Table of Contents
Advertisement
Quick Links
Advertisement
Table of Contents

Related Manuals for AXIOMTEK PICO822


Summary of Contents for AXIOMTEK PICO822
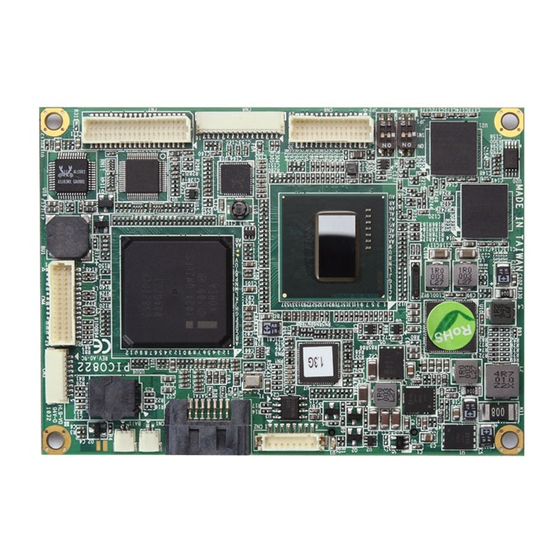
- Page 1 PICO822 ® Intel Atom E620T/E680T All-In-One Pico-ITX Board User’s Manual...
-
Page 2: Disclaimers
Axiomtek does not make any commitment to update the information in this manual. Axiomtek reserves the right to change or revise this document and/or product at any time without notice. No part of this document may be reproduced, stored in a retrieval system, or transmitted, in any form or by any means, electronic, mechanical, photocopying, recording, or otherwise, without the prior written permission of Axiomtek Co., Ltd. -
Page 3: Esd Precautions
Wear a wrist-grounding strap, available from most electronic component stores, when handling boards and components. Trademarks Acknowledgments Axiomtek is a trademark of Axiomtek Co., Ltd. ® Windows is a trademark of Microsoft Corporation. AMI is trademark of American Megatrend Inc. -
Page 4: Table Of Contents
Table of Contents Disclaimers ..................... ii ESD Precautions ................... iii Chapter 1 Introduction ..........1 Features ....................2 Specifications ..................2 Utilities Supported ................3 Chapter 2 Board and Pin Assignments ....5 Board Dimensions and Fixing Holes ..........5 Board Layout .................. - Page 5 Starting ....................27 Navigation Keys ................27 Main Menu ..................29 Advanced Menu ................. 30 Chipset Menu ..................35 Boot Menu ..................40 Save & Exit Menu ................41 Chapter 5 Drivers Installation ........ 43 ® Drivers for Windows XP ..............43 5.1.1 Installing Chipset Driver ................
- Page 6 Sample Program ..................109...
-
Page 7: Chapter 1 Introduction
I/O functions for interactive applications and various embedded computing solutions. The PICO822 is designed with onboard unbuffered 1GB DDR2 800MHz memory, It also features one Gigabit/Fast Ethernet, one serial ATA port with transfer rates up to 3Gb/s, four USB 2.0 high speed compliant and built-in high definition audio codec that can achieve the... -
Page 8: Features
® PICO822 Intel Atom E620T/E680T All-In-One Pico-ITX Board Features ® Ultra low power Intel Atom single core E620T (0.6GHz) and E680T (1.6GHz) ® Intel PCH EG20T 2 COM ports 4 USB 2.0 and 1 client USB 2.0 ... -
Page 9: Utilities Supported
® PICO822 Intel Atom E620T/E680T All-In-One Pico-ITX Board SMBus System Management Bus for advanced monitoring/control. Expansion Connector 2x30-pin high speed connector; containing one serial digital video out, one PCI-Express x1, one USB 2.0, one serial port, one digital I/O and one SMBus. - Page 10 ® PICO822 Intel Atom E620T/E680T All-In-One Pico-ITX Board This page is intentionally left blank. Introduction...
-
Page 11: Board And Pin Assignments
® PICO822 Intel Atom E620T/E680T All-In-One Pico-ITX Board Chapter 2 Board and Pin Assignments Board Dimensions and Fixing Holes Top View Board and Pin Assignments... - Page 12 ® PICO822 Intel Atom E620T/E680T All-In-One Pico-ITX Board Bottom View Board and Pin Assignments...
- Page 13 ® PICO822 Intel Atom E620T/E680T All-In-One Pico-ITX Board Side View Board and Pin Assignments...
-
Page 14: Board Layout
® PICO822 Intel Atom E620T/E680T All-In-One Pico-ITX Board Board Layout Top View Board and Pin Assignments... - Page 15 ® PICO822 Intel Atom E620T/E680T All-In-One Pico-ITX Board Bottom View Board and Pin Assignments...
-
Page 16: Assembly Drawing
® PICO822 Intel Atom E620T/E680T All-In-One Pico-ITX Board Assembly Drawing Heatsink for PICO822 (see image below): First of all, screw heatsink into heatspreader. Board and Pin Assignments... - Page 17 Installing Heatspreader The PICO822 has four assembly holes for installing heatspreader plate. Align both of them and use the four screws to firmly secure the heatspreader plate to the PICO822. Be careful not to over-tighten the screws. Board and Pin Assignments...
- Page 18 Gently insert expansion module into SCN1. Align four assembly holes and use the four screws to firmly secure the heatspreader plate and expansion module to the PICO822. Be careful not to over-tighten the screws. See chapter 3 for details of AX93268 expansion module.
-
Page 19: Switch Settings
E620T/E680T All-In-One Pico-ITX Board Switch Settings Properly configure switches on the PICO822 to meet your application purpose. Below you can find a summary table of onboard default settings. Note: Once the default setting needs to be changed, please do it under power-off condition. -
Page 20: Connectors
® PICO822 Intel Atom E620T/E680T All-In-One Pico-ITX Board Connectors Signals go to other parts of the system through connectors. Loose or improper connection might cause problems, please make sure all connectors are properly and firmly connected. Here is a summary table which shows all connectors on the hardware. -
Page 21: Usb And Front Panel Connector (Cn4)
® PICO822 Intel Atom E620T/E680T All-In-One Pico-ITX Board 2.5.3 USB and Front Panel Connector (CN4) The CN4 is for USB and front panel signal connector. Signal Signal USB_PWR USB_PWR USB_0# USB_1# USB_0 USB_1 USB_GND USB_GND USB_GND USB_GND USB_2 USB_3 USB_2#... -
Page 22: Lvds Connector (Cn6)
® PICO822 Intel Atom E620T/E680T All-In-One Pico-ITX Board 2.5.4 LVDS Connector (CN6) This board has a 30-pin connector for LVDS LCD interface. It is strongly recommended to use the matching JST SHDR-30VS-B 30-pin connector for LVDS interface. Pin 27~30 VCCM can be set to +3.3V or +5V by setting SW1 (see section 2.4.1). -
Page 23: Com And Audio Connector (Cn7)
® PICO822 Intel Atom E620T/E680T All-In-One Pico-ITX Board 2.5.5 COM and Audio Connector (CN7) The CN7 is a 40-pin connector for two COM (RS-232), GPIO (digital I/O) and audio interface. Signal Signal DCD1 DSR1 RXD1 RTS1 TXD1 CTS1 DTR1 COM_GND... -
Page 24: Ethernet Connector (Cn8)
® PICO822 Intel Atom E620T/E680T All-In-One Pico-ITX Board 2.5.6 Ethernet Connector (CN8) The CN8 is a connector for Ethernet interface. Signal 1000_LAN_LED 100_LAN_LED MDI3- MDI3+ MDI1- MDI2- MDI2+ MDI1+ MDI0- MDI0+ VDD3 LINK_ACT 2.5.7 Serial ATA Connector (SATA1) This Serial Advanced Technology Attachment (Serial ATA or SATA) connector is for high-speed SATA interface port. -
Page 25: Expansion Connector (Scn1)
E620T/E680T All-In-One Pico-ITX Board 2.5.9 Expansion Connector (SCN1) The board is equipped with an expansion connector (SCN1) on the bottom side. This SCN1 is for connecting PICO822 to expansion module such as AX93268 (see Appendix A for the details of AX93268). Signal Signal... - Page 26 ® PICO822 Intel Atom E620T/E680T All-In-One Pico-ITX Board This page is intentionally left blank. Board and Pin Assignments...
-
Page 27: Chapter 3 Hardware Description
Atom processor E620T and E680T, which enable your system ® to operate under Windows XP environment. Moreover, the PICO822 with E680T can operate ® under Windows 7 environment. The system performance depends on the microprocessor. Make sure all correct settings are arranged for your installed microprocessor to prevent the CPU from damages. -
Page 28: Bios
SpeedStep function will not perform any CPU speed changing. 4. Clear CMOS function is not supported in PICO822. BIOS The PICO822 uses AMI Plug and Play BIOS with a single 16Mbit SPI Flash. System Memory The PICO822 has 1GB DDR2 SDRAM onboard. -
Page 29: I/O Port Address Map
® PICO822 Intel Atom E620T/E680T All-In-One Pico-ITX Board I/O Port Address Map ® The Intel Atom processor E6xx series communicate via I/O ports. Total 1KB port addresses are available for assigning to other devices via I/O expansion cards. Hardware Description... - Page 30 ® PICO822 Intel Atom E620T/E680T All-In-One Pico-ITX Board Hardware Description...
-
Page 31: Interrupt Controller (Irq) Map
® PICO822 Intel Atom E620T/E680T All-In-One Pico-ITX Board Interrupt Controller (IRQ) Map The interrupt controller (IRQ) mapping list is shown as follows: Hardware Description... -
Page 32: Memory Map
® PICO822 Intel Atom E620T/E680T All-In-One Pico-ITX Board Memory Map The memory mapping list is shown as follows: Hardware Description... -
Page 33: Ami Bios Setup Utility
® PICO822 Intel Atom E620T/E680T All-In-One Pico-ITX Board Chapter 4 AMI BIOS Setup Utility The AMI UEFI BIOS provides users with a built-in setup program to modify basic system configuration. All configured parameters are stored in a flash chip to save the setup information whenever the power is turned off. - Page 34 ® PICO822 Intel Atom E620T/E680T All-In-One Pico-ITX Board Hot Keys Description Left/Right The Left and Right <Arrow> keys allow you to select a setup screen. The Up and Down <Arrow> keys allow you to select a setup screen or ...
-
Page 35: Main Menu
® PICO822 Intel Atom E620T/E680T All-In-One Pico-ITX Board Main Menu When you first enter the setup utility, you will enter the Main setup screen. You can always return to the Main setup screen by selecting the Main tab. System Time/Date can be set up as described below. -
Page 36: Advanced Menu
® PICO822 Intel Atom E620T/E680T All-In-One Pico-ITX Board Advanced Menu Launch PXE OpROM Use this item to enable or disable the boot ROM function of the onboard LAN chip when the system boots up. The Advanced menu also allows users to set configuration of the CPU and other system devices. - Page 37 ® PICO822 Intel Atom E620T/E680T All-In-One Pico-ITX Board CPU Configuration This screen shows the CPU Configuration. Intel Virtualization Technology This item allows a hardware platform to run multiple operating systems separately and simultaneously, enabling one system to virtually function as several systems.
- Page 38 ® PICO822 Intel Atom E620T/E680T All-In-One Pico-ITX Board USB Configuration You can use this screen to select options for the USB Configuration, and change the value of the selected option. A description of the selected item appears on the right side of the screen.
- Page 39 ® PICO822 Intel Atom E620T/E680T All-In-One Pico-ITX Board F81801 Super IO Configuration You can use this screen to select options for the Super IO Configuration, and change the value of the selected option. A description of 0he selected item appears on the right side of the screen.
- Page 40 ® PICO822 Intel Atom E620T/E680T All-In-One Pico-ITX Board F81801 H/W Monitor This screen monitors hardware health status. This screen displays the temperature of CPU and system voltages (VCORE and +3.3V). AMI BIOS Setup Utility...
-
Page 41: Chipset Menu
® PICO822 Intel Atom E620T/E680T All-In-One Pico-ITX Board Chipset Menu The Chipset menu allows users to change the advanced chipset settings. You can select any of the items in the left frame of the screen to go to the sub menus: ►... - Page 42 ® PICO822 Intel Atom E620T/E680T All-In-One Pico-ITX Board North Bridge Chipset Configuration This screen allows users to configure parameters of North Bridge chipset. Memory Information Display the auto-detected memory information. IGD Mode Select Default enabled and 8MB are shared from system memory to IGD (Integrated Graphics Device).
- Page 43 ® PICO822 Intel Atom E620T/E680T All-In-One Pico-ITX Board Boot Display Configuration This screen provides access to boot display parameter settings. AMI BIOS Setup Utility...
- Page 44 ® PICO822 Intel Atom E620T/E680T All-In-One Pico-ITX Board Boot Display Device Select boot display device. Auto is the default. External CRT is worked when AX93268 is installed (see Appendix A). Flat Panel Type Select flat panel resolution. AMI BIOS Setup Utility...
- Page 45 ® PICO822 Intel Atom E620T/E680T All-In-One Pico-ITX Board South Bridge Chipset Configuration This screen allows users to configure parameters of South Bridge chipset. Audio Controller Enable or disable the HD audio controller. SMBus Controller Enable SMBus controller. AMI BIOS Setup Utility...
-
Page 46: Boot Menu
® PICO822 Intel Atom E620T/E680T All-In-One Pico-ITX Board Boot Menu The Boot menu allows users to change boot options of the system. Quiet Boot Select to display either POST output messages or a splash screen during boot-up. Setup Prompt Timeout Number of seconds to wait for setup activation key. -
Page 47: Save & Exit Menu
® PICO822 Intel Atom E620T/E680T All-In-One Pico-ITX Board Save & Exit Menu The Save & Exit menu allows users to load your system configuration with optimal or fail-safe default values. Save Changes and Exit When you have completed the system configuration changes, select this option to leave Setup and return to Main Menu. - Page 48 ® PICO822 Intel Atom E620T/E680T All-In-One Pico-ITX Board Discard Changes Select this option to quit Setup without making any permanent changes to the system configuration. Select Discard Changes from the Save & Exit menu and press <Enter>. Select Yes to discard changes.
-
Page 49: Chapter 5 Drivers Installation
Drivers Installation ® Drivers for Windows The device drivers are located on the product information CD that comes with the PICO822 series package. The auto-run function of drivers will guide you to install the utilities and device ® drivers under Windows XP operating system. - Page 50 ® PICO822 Intel Atom E620T/E680T All-In-One Pico-ITX Board ® An Intel License Agreement screen appears to show you the important information. Click “Yes” to next step. A Readme File Information screen appears to show you the system requirements and installation information. Click “Next” to next step.
- Page 51 ® PICO822 Intel Atom E620T/E680T All-In-One Pico-ITX Board Please wait while setup processes the following operations. Drivers Installation...
- Page 52 ® PICO822 Intel Atom E620T/E680T All-In-One Pico-ITX Board You will be asked to reboot your computer when the installation is completed. Please select “Yes, I want to restart my computer now” if you don’t need to install any other drivers. Then click “Finish” to complete the setup process and reboot.
-
Page 53: Installing Pch Driver
® PICO822 Intel Atom E620T/E680T All-In-One Pico-ITX Board 5.1.2 Installing PCH Driver Run the PCH_EG20T_WinXP_WePOS_All_260.EXE program from the driver directory in product information CD. Click “Next” to next step. ® An Intel License Agreement screen appears to show you the important information. - Page 54 ® PICO822 Intel Atom E620T/E680T All-In-One Pico-ITX Board Click “Complete” and “Next” to next step. To begin installation, click “Install” to next step. Drivers Installation...
- Page 55 ® PICO822 Intel Atom E620T/E680T All-In-One Pico-ITX Board Click “Continue Anyway” to next step. Drivers Installation...
- Page 56 ® PICO822 Intel Atom E620T/E680T All-In-One Pico-ITX Board Click “Continue Anyway” to next step. Click “Continue Anyway” to next step. Drivers Installation...
- Page 57 ® PICO822 Intel Atom E620T/E680T All-In-One Pico-ITX Board Click “Continue Anyway” to next step. Click “Continue Anyway” to next step. Drivers Installation...
- Page 58 ® PICO822 Intel Atom E620T/E680T All-In-One Pico-ITX Board 10. Click “Continue Anyway” to next step. 11. Click “Continue Anyway” to next step. Drivers Installation...
- Page 59 ® PICO822 Intel Atom E620T/E680T All-In-One Pico-ITX Board 12. Click “Continue Anyway” to next step. 13. Click “Continue Anyway” to next step. Drivers Installation...
-
Page 60: Installing Graphics Driver
® PICO822 Intel Atom E620T/E680T All-In-One Pico-ITX Board 14. Click “Finish” to complete the installation. 5.1.3 Installing Graphics Driver Run the WindowsDriverSETUP.cmd program from the driver directory in product information CD. Drivers Installation... - Page 61 ® PICO822 Intel Atom E620T/E680T All-In-One Pico-ITX Board Click “Install driver and application files” to next step. ® An Intel License Agreement screen appears to show you the important information. Select “I agree” and click “Install” to next step. Drivers Installation...
- Page 62 ® PICO822 Intel Atom E620T/E680T All-In-One Pico-ITX Board Click “Continue Anyway” to next step. Click “Continue Anyway” to next step. Drivers Installation...
- Page 63 ® PICO822 Intel Atom E620T/E680T All-In-One Pico-ITX Board Click “Continue Anyway” to next step. You will be asked to restart your computer when the installation is completed. Please click “Yes” if you don’t need to install any other drivers. Otherwise, please click “No”...
-
Page 64: Installing Audio Driver
® PICO822 Intel Atom E620T/E680T All-In-One Pico-ITX Board 5.1.4 Installing Audio Driver Run the WDM_R266.exe for audio from the driver di in product information CD. Click “Next” to continue. Please wait while setup processes the following operations. Drivers Installation... - Page 65 ® PICO822 Intel Atom E620T/E680T All-In-One Pico-ITX Board You will be asked to reboot your computer when the installation is completed. Please select “Yes, I want to restart my computer now” if you don’t need to install any other drivers. Then click “Finish” to complete the setup process and reboot.
-
Page 66: Installing Ethernet Driver
® PICO822 Intel Atom E620T/E680T All-In-One Pico-ITX Board 5.1.5 Installing Ethernet Driver Run the SETUP.EXE for Ethernet from the driver directory in product information CD. Click “Next” to continue. Click “Install” to start the installation. Drivers Installation... - Page 67 ® PICO822 Intel Atom E620T/E680T All-In-One Pico-ITX Board Please wait while setup processes the following operations. Click “Finish” to complete the installation. Drivers Installation...
-
Page 68: Installing Serial (Com) Port Driver
® PICO822 Intel Atom E620T/E680T All-In-One Pico-ITX Board 5.1.6 Installing Serial (COM) Port Driver Run the comport.exe from the driver directory in product information CD. Click “Next” to continue. You will be asked to restart your computer when the installation is completed. -
Page 69: Drivers For Windows 7
E620T/E680T All-In-One Pico-ITX Board ® Drivers for Windows The device drivers are located on the product information CD that comes with the PICO822 series package. The auto-run function of drivers will guide you to install the utilities and device ®... - Page 70 ® PICO822 Intel Atom E620T/E680T All-In-One Pico-ITX Board ® An Intel License Agreement screen appears to show you the important information. Click “Yes” to next step. A Readme File Information screen appears to show you the system requirements and installation information. Click “Next” to next step.
- Page 71 ® PICO822 Intel Atom E620T/E680T All-In-One Pico-ITX Board Click “Install this driver software anyway” to next step. Click “Install this driver software anyway” to next step. Drivers Installation...
- Page 72 ® PICO822 Intel Atom E620T/E680T All-In-One Pico-ITX Board Please wait while setup processes the following operations. Drivers Installation...
- Page 73 ® PICO822 Intel Atom E620T/E680T All-In-One Pico-ITX Board You will be asked to reboot your computer when the installation is completed. Please select “Yes, I want to restart my computer now” if you don’t need to install any other drivers. Then click “Finish” to complete the setup process and reboot.
-
Page 74: Installing Pch Driver
® PICO822 Intel Atom E620T/E680T All-In-One Pico-ITX Board 5.2.2 Installing PCH Driver Run the EG20T_Win7_Setup_140.exe program from the driver directory in product information CD. Click “Next” to next step. ® An Intel License Agreement screen appears to show you the important information. - Page 75 ® PICO822 Intel Atom E620T/E680T All-In-One Pico-ITX Board Select the features you want to install and deselect the features you do not want to install. Then click “Next” to next step. Click “Install” to begin the installation. Drivers Installation...
- Page 76 ® PICO822 Intel Atom E620T/E680T All-In-One Pico-ITX Board Click “Install this driver software anyway” to next step. Click “Install this driver software anyway” to next step. Drivers Installation...
- Page 77 ® PICO822 Intel Atom E620T/E680T All-In-One Pico-ITX Board Click “Install this driver software anyway” to next step. Drivers Installation...
- Page 78 ® PICO822 Intel Atom E620T/E680T All-In-One Pico-ITX Board Click “Install this driver software anyway” to next step. Drivers Installation...
- Page 79 ® PICO822 Intel Atom E620T/E680T All-In-One Pico-ITX Board Click “Install this driver software anyway” to next step. Drivers Installation...
- Page 80 ® PICO822 Intel Atom E620T/E680T All-In-One Pico-ITX Board 10. Click “Install this driver software anyway” to next step. Drivers Installation...
- Page 81 ® PICO822 Intel Atom E620T/E680T All-In-One Pico-ITX Board 11. Click “Install this driver software anyway” to next step. Drivers Installation...
- Page 82 ® PICO822 Intel Atom E620T/E680T All-In-One Pico-ITX Board 12. Click “Install this driver software anyway” to next step. Drivers Installation...
- Page 83 ® PICO822 Intel Atom E620T/E680T All-In-One Pico-ITX Board 13. Click “Install this driver software anyway” to next step. Drivers Installation...
- Page 84 ® PICO822 Intel Atom E620T/E680T All-In-One Pico-ITX Board 14. Click “Install this driver software anyway” to next step. Drivers Installation...
- Page 85 ® PICO822 Intel Atom E620T/E680T All-In-One Pico-ITX Board 15. Click “Install this driver software anyway” to next step. Drivers Installation...
- Page 86 ® PICO822 Intel Atom E620T/E680T All-In-One Pico-ITX Board 16. You will be asked to reboot your computer when the installation is completed. Please select “Yes, I want to restart my computer now” if you don’t need to install any other drivers. Then click “Finish” to complete the setup process and reboot.
-
Page 87: Installing Graphics Driver
® PICO822 Intel Atom E620T/E680T All-In-One Pico-ITX Board 5.2.3 Installing Graphics Driver ® Note: After Windows 7 installation completed, the system is in 16 colors, please install the graphics driver for displaying correct or higher color depth. Run the Setup.exe program for graphics from the driver directory in product information CD. - Page 88 ® PICO822 Intel Atom E620T/E680T All-In-One Pico-ITX Board ® An Intel License Agreement screen appears to show you the important information. Click “Yes” to next step. A Readme File Information screen appears to show you the system requirements and installation information. Click “Next” to next step.
- Page 89 ® PICO822 Intel Atom E620T/E680T All-In-One Pico-ITX Board Please wait while setup processes the following operations. Click “Install this driver software anyway” to next step. Drivers Installation...
- Page 90 ® PICO822 Intel Atom E620T/E680T All-In-One Pico-ITX Board Please wait while setup processes the following operations. Click “Install this driver software anyway” to next step. Drivers Installation...
- Page 91 ® PICO822 Intel Atom E620T/E680T All-In-One Pico-ITX Board Please wait while setup processes the following operations. Click “Next” to continue. Drivers Installation...
- Page 92 ® PICO822 Intel Atom E620T/E680T All-In-One Pico-ITX Board You will be asked to reboot your computer when the installation is completed. Please select “Yes, I want to restart my computer now” if you don’t need to install any other drivers. Then click “Finish” to complete the setup process and reboot.
-
Page 93: Installing Audio Driver
® PICO822 Intel Atom E620T/E680T All-In-One Pico-ITX Board 5.2.4 Installing Audio Driver Run the 32bit_Vista_Win7_R268.exe for audio from the driver directory in product information CD. Click “Next” to continue. Please wait while setup processes the following operations. Drivers Installation... - Page 94 ® PICO822 Intel Atom E620T/E680T All-In-One Pico-ITX Board You will be asked to reboot your computer when the installation is completed. Please select “Yes, I want to restart my computer now” if you don’t need to install any other drivers. Then click “Finish” to complete the setup process and reboot.
-
Page 95: Installing Ethernet Driver
® PICO822 Intel Atom E620T/E680T All-In-One Pico-ITX Board 5.2.5 Installing Ethernet Driver Run the SETUP.EXE for Ethernet from the driver directory in product information CD. Click “Next” to continue. Click “Install” to start the installation. Drivers Installation... - Page 96 ® PICO822 Intel Atom E620T/E680T All-In-One Pico-ITX Board Please wait while setup processes the following operations. Click “Finish” to complete the installation. Drivers Installation...
-
Page 97: Installing Sata Driver
® PICO822 Intel Atom E620T/E680T All-In-One Pico-ITX Board 5.2.6 Installing SATA Driver Run the EG20T_Win7_SATA_setup_120.exe program from the driver directory in product information CD. Click “Next” to continue. ® An Intel License Agreement screen appears to show you the important information. - Page 98 ® PICO822 Intel Atom E620T/E680T All-In-One Pico-ITX Board When the following screen appears, select and deselect features according to you needs. Click “Next” to continue. Click “Install” to start the installation. Drivers Installation...
- Page 99 ® PICO822 Intel Atom E620T/E680T All-In-One Pico-ITX Board Please wait while setup processes the following operations. Click “Install this driver software anyway” to next step. Drivers Installation...
- Page 100 ® PICO822 Intel Atom E620T/E680T All-In-One Pico-ITX Board Please wait while setup processes the following operations. Click “Next” to continue. You will be asked to reboot your computer when the installation is completed. Please select “Yes, I want to restart my computer now” if you don’t need to install any other drivers.
-
Page 101: Installing Serial (Com) Port Driver
® PICO822 Intel Atom E620T/E680T All-In-One Pico-ITX Board 5.2.7 Installing Serial (COM) Port Driver Run the comport.exe from the driver directory in product information CD. Click “Next” to continue. You will be asked to restart your computer when the installation is completed. -
Page 102: Installing Ahci Driver During Os Installation
® PICO822 Intel Atom E620T/E680T All-In-One Pico-ITX Board Installing AHCI Driver during OS Installation PCH EG20T SATA does not support an IDE interface that is compatible with Legacy. ® Windows XP* SP3 does not contain the required SATA AHCI driver natively hence you must follow the instructions below to install the PCH EG20T SATA AHCI driver. - Page 103 ® PICO822 Intel Atom E620T/E680T All-In-One Pico-ITX Board 5. Press <S> to add an additional SCSI device. ® 6. Select the correct driver (PCH EG20T SATA AHCI Controller for Windows XP) and press <Enter> to continue the installation. This will install the PCH EG20T SATA AHCI controller driver.
- Page 104 ® PICO822 Intel Atom E620T/E680T All-In-One Pico-ITX Board ® 7. Finish the Windows XP installation according to your needs. Some USB floppy drivers are not supported when you press <F6> (step 4 above) during installation. See details at http://support.microsoft.com/kb/916196/en-us Note: If a message on the screen saying that one or some file(s) cannot be found, please check the floppy disk or copy the correct AHCI driver again from the driver CD.
-
Page 105: Appendix A Expansion Module (Optional)
® PICO822 Intel Atom E620T/E680T All-In-One Pico-ITX Board Appendix A Expansion Module (Optional) The AX93268 (optional) is an expansion module for PICO822. Its specifications and detailed information are given in this appendix. AX93268 Specifications Size 100mm x 72mm ... -
Page 106: Ax93268 Dimensions And Fixing Holes
® PICO822 Intel Atom E620T/E680T All-In-One Pico-ITX Board AX93268 Dimensions and Fixing Holes Top View Expansion Module (Optional) - Page 107 ® PICO822 Intel Atom E620T/E680T All-In-One Pico-ITX Board Bottom View Expansion Module (Optional)
- Page 108 ® PICO822 Intel Atom E620T/E680T All-In-One Pico-ITX Board Side View Expansion Module (Optional)
-
Page 109: Ax93268 Layout
® PICO822 Intel Atom E620T/E680T All-In-One Pico-ITX Board AX93268 Layout Top View Expansion Module (Optional) -
Page 110: Connectors
® PICO822 Intel Atom E620T/E680T All-In-One Pico-ITX Board Connectors Signals go to other parts of the system through connectors. Loose or improper connection might cause problems, please make sure all connectors are properly and firmly connected. Here is a summary table which shows all connectors on the hardware. -
Page 111: Pci-Express Mini Card Connector (Cn2)
® PICO822 Intel Atom E620T/E680T All-In-One Pico-ITX Board PCI-Express Mini Card Connector (CN2) This is a PCI-Express Mini Card connector which supports PCI-Express x1 link and USB 2.0 link. A PCI-Express Mini Card can be applied to either PCI-Express or USB 2.0. It complies with PCI-Express Mini Card Spec. -
Page 112: Expansion Connector (Cn3)
® PICO822 Intel Atom E620T/E680T All-In-One Pico-ITX Board Expansion Connector (CN3) The CN3 is for connecting this expansion module to PICO822. Please gently insert CN3 into SCN1 of PICO822. Signal Signal +12V +12V +12V +12V +12V +12V No use No use... -
Page 113: Appendix B Watchdog Timer
® PICO822 Intel Atom E620T/E680T All-In-One Pico-ITX Board Appendix B Watchdog Timer About Watchdog Timer After the system stops working for a while, it can be auto-reset by the watchdog timer. The integrated watchdog timer can be set up in the system reset mode by program. - Page 114 ® PICO822 Intel Atom E620T/E680T All-In-One Pico-ITX Board This page is intentionally left blank. Watchdog Timer...
-
Page 115: Appendix C Digital I/O
® PICO822 Intel Atom E620T/E680T All-In-One Pico-ITX Board Appendix C Digital I/O About Digital I/O The onboard GPIO (digital I/O) has 8 bits. Each bit can be set to function as input or output by software programming. In default, GPIO0~GPIO6 are pulled high with +5V level (according to standby power) and GPIO8 is pulled high with +3.3V level (according to main power). - Page 116 ® PICO822 Intel Atom E620T/E680T All-In-One Pico-ITX Board else printf("\n"); printf("Usage: %s port [output]\n", argv[0]); printf(" port Specify the port number (port=0-11 decimal).\n"); printf(" output Specify the port value (output=0 | 1).\n"); printf(" When this is not specified, the port direction is set input mode.\n");...
- Page 117 ® PICO822 Intel Atom E620T/E680T All-In-One Pico-ITX Board predictedLength = requiredLength; deviceInterfaceDetailData = malloc (predictedLength); if(deviceInterfaceDetailData) deviceInterfaceDetailData->cbSize = sizeof(SP_DEVICE_INTERFACE_DETAIL_DATA); } else printf("Couldn't allocate %d bytes for device interface details.\n", (INT)predictedLength); SetupDiDestroyDeviceInfoList (hardwareDeviceInfo); break; if (! SetupDiGetDeviceInterfaceDetail ( hardwareDeviceInfo, &deviceInterfaceData, deviceInterfaceDetailData, predictedLength, &requiredLength,...
- Page 118 ® PICO822 Intel Atom E620T/E680T All-In-One Pico-ITX Board printf("\n=========================\n"); printf("GPIO Device Driver Check(%s) \n", DriverName); printf("=========================\n"); if (argc>0) portnum = (UCHAR)atoi(argv[0]); printf("Specified port number : %d\n", (INT)portnum); printf("\n*** CreateFile(%s) \n", DriverName); hDevice = CreateFile(DriverName, GENERIC_READ | GENERIC_WRITE, FILE_SHARE_WRITE, NULL, OPEN_EXISTING, FILE_FLAG_OVERLAPPED,NULL);...
- Page 119 ® PICO822 Intel Atom E620T/E680T All-In-One Pico-ITX Board else if (argc == 2) portval = (UCHAR)atoi(argv[1]); printf("Specified port value : %s\n", (portval ? "HIGH" : "LOW")); printf("\n*** DeviceIoControl(code:IOCTL_GPIO_DIRECTION <0, GPIO%d, OUTPUT, 0>)\n", (INT)portnum); objGpioReqtOut.port=0; objGpioReqtOut.pins=(1<<portnum); objGpioReqtOut.mode=OUTPUT_SEL; objGpioReqtOut.enable=0; lpOutBuffer = (LPVOID)&objGpioReqtOut;...
- Page 120 ® PICO822 Intel Atom E620T/E680T All-In-One Pico-ITX Board if(CloseHandle(hDevice)) printf("\n*** CloseHandle(hDevice:%08X)\n", (UINT)hDevice); if(CloseHandle(hDevice)) printf(" Sucess CloseHandle\n"); bRc = TRUE; else printf("Failue CreateFile %s (LastError:%d)\n", DriverName, (INT)GetLastError()); return bRc; Digital I/O...
Need help?
Do you have a question about the PICO822 and is the answer not in the manual?
Questions and answers