Table of Contents
Advertisement
Advertisement
Table of Contents
Troubleshooting

Related Manuals for Xantrex PROwatt 3000


Summary of Contents for Xantrex PROwatt 3000
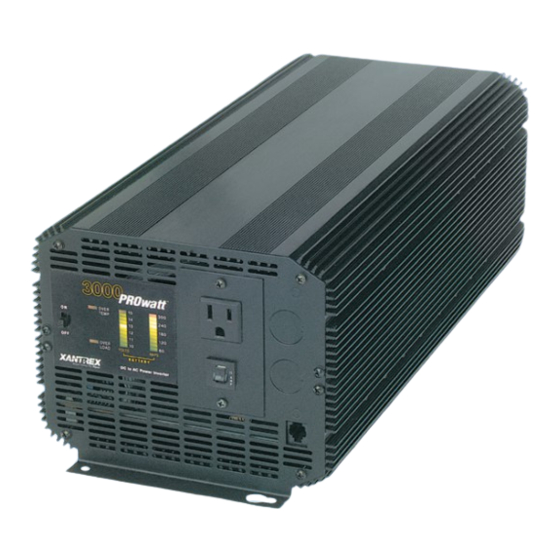
- Page 1 PROwatt 3000 Inverter Owner’s Guide...
-
Page 2: Contact Information
About Xantrex Xantrex Technology Inc. is a world-leading supplier of advanced power electronics and controls with products from 50 watt mobile units to 1 MW utility-scale systems for wind, solar, batteries, fuel cells, microturbines, and backup power applications in both grid-connected and standalone systems. -
Page 3: About This Guide
This guide is organized into five chapters, five appendixes, and an index. Chapter 1, “Introduction”, outlines the main performance and safety features of the PROwatt 3000. Reading this chapter will give you a clear understanding of the inverter’s capabilities. Chapter 2, “PROwatt 3000 Features”, outlines the main physical features of the inverter and the components that are shipped with it. - Page 4 “Product and System Information”, contains the product’s warranty, explains how to return a product for service, and describes how to prepare for a call to Xantrex Customer Service. The Index provides a valuable means of looking up specific information topics and tasks.
-
Page 5: Conventions Used
PROwatt 3000 or other equipment. : Notes describe additional information which may add to your Note understanding of how to use the inverter. Related Information You can find more information about Xantrex Technology Inc. as well as its products and services at www.xantrex.com... -
Page 7: Table Of Contents
Comprehensive Protection - - - - - - - - - - - - - - - - - - - - - - - - - - - - - - - - - - - - - 1–3 2 PROwatt 3000 Features Materials List - - - - - - - - - - - - - - - - - - - - - - - - - - - - - - - - - - - - - - - - - - - - - 2–2... - Page 8 Contents AC Wiring Precautions - - - - - - - - - - - - - - - - - - - - - - - - - - - - - - - - - - - - - 3–6 AC Wiring Procedure- - - - - - - - - - - - - - - - - - - - - - - - - - - - - - - - - - - - - - - 3–7 Installing Transfer Switches in AC Circuits - - - - - - - - - - - - - - - - - - - - - - - - 3–9 Installing the Remote On/Off Switch- - - - - - - - - - - - - - - - - - - - - - - - - - - - - 3–10...
- Page 9 Contents Specifications Electrical Performance (Inverter) - - - - - - - - - - - - - - - - - - - - - - - - - - - - - - - - A–2 Physical (Inverter) - - - - - - - - - - - - - - - - - - - - - - - - - - - - - - - - - - - - - - - - - - A–2 Dimensions (Remote On/Off Switch) - - - - - - - - - - - - - - - - - - - - - - - - - - - - - A–2 Alternators and Charging Systems Charging System Requirements - - - - - - - - - - - - - - - - - - - - - - - - - - - - - - - - - B–2...
-
Page 11: Important Safety Information
Important Safety Information WARNING ™ Before installing and using your PROwatt 3000 Inverter, be sure to read and save these safety instructions. General Precautions 1. Before installing and using the inverter, read all appropriate sections of this guide as well as all instructions and cautionary markings on the inverter and the batteries. -
Page 12: Precautions When Working With Batteries
AC or DC output (less than 30 volts), the PROwatt 3000 can power this charger or adapter safely. Some chargers for small nickel-cadmium batteries can be damaged if connected to the PROwatt 3000. Do not use the following with the PROwatt 3000: •... -
Page 13: Introduction
Introduction Congratulations on your purchase of the PROwatt 3000 Inverter! As part of the PROwatt Inverter family, the PROwatt 3000 has been designed to give you quality power, ease of use, and outstanding reliability. Please take a few moments to read this chapter to familiarize yourself with the PROwatt 3000’s... -
Page 14: Quality Power
• The PROwatt 3000 provides up to 2500 watts of continuous power or 3000 watts for five minutes, making it ideal for large single loads, intermittent loads, or multiple smaller loads. -
Page 15: Comprehensive Protection
Comprehensive Protection Comprehensive Protection The PROwatt 3000 is equipped with numerous protection features to guarantee safe and trouble-free operation: Low battery alarm Alerts you if the battery has become discharged to 10.7 V or lower. Low voltage shutdown Automatically shuts the inverter down if the battery voltage drops below 10 V. - Page 16 1–4...
-
Page 17: Prowatt 3000 Features
PROwatt 3000 Features describes the main features of the Chapter 2 PROwatt 3000. Xantrex recommends that you familiarize yourself with them before installing and operating the inverter. -
Page 18: Materials List
PROwatt 3000 Features Materials List Your PROwatt 3000 package includes: 3000 • 1 PROwatt Inverter • 2 plastic terminal connector covers (red for positive; black for negative) with screws • 1 cover plate to cover the wiring compartment on the AC end of the inverter •... -
Page 19: Front Panel (Ac End)
Front Panel (AC End) Front Panel (AC End) The front panel of the PROwatt 3000 can be configured in two ways: • PROwatt 3000 is equipped with one 15 A circuit breaker-protected receptacle on the front panel as shown in Figure 2-1. -
Page 20: Front Panel With Ac Receptacle
PROwatt 3000 Features Front Panel With AC Receptacle Figure 2-1 Front Panel With AC Receptacle Feature Description This switch turns the inverter’s control circuit on and On/Off Switch off. It is not a power disconnect switch. You must disconnect AC and DC power before working on any circuits connected to the inverter. - Page 21 Front Panel (AC End) Feature Description AC Receptacle Delivers 15 amps (approximately 1700 watts) of continuous AC power. This is a grounded outlet with a 15 amp circuit breaker. For full output power, you need to make a permanent hardwire connection. Circuit Breaker for AC receptacle Knockouts for AC wiring Remote Control Jack The jack allows you to connect the remote...
-
Page 22: Front Panel Showing Ac Wiring Compartment
PROwatt 3000 Features Front Panel Showing AC Wiring Compartment Figure 2-2 Front Panel With AC Wiring Revealed Feature Description AC Wiring Compartment Outgoing AC Cable 10 AWG copper 2-conductor-plus-ground to AC distribution Wire Nuts or Crimp-on Connectors (depending on the code that governs your installation) 2–6... -
Page 23: Back Panel (Dc End)
Back Panel (DC End) Back Panel (DC End) Figure 2-3 Back Panel: DC End Feature Description Ventilation Openings For safety and proper operation of the inverter, these openings (and the openings on the front of the inverter) must not be obstructed. When the inverter is mounted, these ventilation openings must not point up or down. -
Page 24: Remote On/Off Switch
PROwatt 3000 Features Remote On/Off Switch REMOTE SWITCH INVERTER ON Figure 2-4 Remote On/Off Switch Feature Description Switch Panel The 2 1/2 inch wide x 4 1/4 inch high (6.35 cm x 10.80 cm) panel mounts flush and requires 0.7 inches (18 mm) of depth. -
Page 25: Installation
Installation explains how to install the Chapter 3 PROwatt 3000. Xantrex recommends that you read the entire chapter so you can plan an installation that is suited to your power needs and then complete the installation procedures. -
Page 26: Safety Instructions
Installation Safety Instructions Before you start to install the PROwatt 3000: • Review the “Important Safety Information” page • Do not attempt your own AC wiring unless you have the knowledge and experience to do a safe job. Your RV dealer, boat dealer, or a licensed electrician can install the inverter if you do not wish to do your own wiring. -
Page 27: Overview Of Installation Steps
Overview of Installation Steps Lugs and terminals for the DC cables that connect to the battery and fuse holder(s) DC fuse(s) and fuse holder(s) AC cable (2-conductor-plus-ground cable), sized appropriately for load and application (if you are connecting to an existing AC circuit) 1/2 inch cable clamp (if connecting to an AC circuit) AC transfer switch (if connecting to an AC circuit that also uses power from another AC source) -
Page 28: Designing Your Installation
Designing Your Installation Before doing anything else, determine how you are going to use your PROwatt 3000, and on the basis of that, design a power system that will give you maximum performance. The more thorough your planning, the better your power needs will be met. In particular, you need to: •... -
Page 29: Choosing A Location
Do not install the PROwatt 3000 in a zero-clearance compartment. Overheating may result. The PROwatt 3000 must only be installed in a location that is: Do not allow water or other liquids to drop or splash on it. -
Page 30: Connecting To An Existing Ac Circuit
• green = ground Do not connect the PROwatt 3000 and another AC source (such as a generator or utility power) to the AC wiring at the same time. The PROwatt 3000 will not operate if its output is connected to AC voltage from another source, and potentially hazardous or damaging conditions may occur. -
Page 31: Ac Wiring Procedure
Connecting to an Existing AC Circuit If you install the PROwatt 3000 into an electrical system that also uses power from a generator or a utility line, you must include a switch that prevents the inverter and the other power source from being connected to the AC distribution system at the same time. - Page 32 CAUTION: Reverse Polarity Improper connections (connecting a line conductor to a neutral conductor, for example) will cause the PROwatt 3000 to malfunction and may permanently damage the inverter. Damage caused by a reverse polarity connection is not covered by your warranty.
-
Page 33: Installing Transfer Switches In Ac Circuits
Installing Transfer Switches in AC Circuits If you are using another AC source on the same circuit as the PROwatt 3000, install a transfer switch to ensure that the sources never power the circuit at the same time. The switching mechanism can be as simple as a plug that you insert in the desired AC power source. -
Page 34: Installing The Remote On/Off Switch
Installing the Remote On/Off Switch The remote switch lets you turn the PROwatt 3000 on and off from a convenient location—up to 20 feet (6 m) away from the inverter—while the inverter is mounted out of sight and close to the batteries. -
Page 35: Mounting The Inverter
WARNING: Electrical Shock Hazard Never operate the PROwatt 3000 without connecting it to the ground. Electrical shock could result. The PROwatt 3000 has a ground lug on the outside of the rear panel as shown in Figure 3-4. Follow the guidelines in “Grounding Locations”... -
Page 36: Grounding Locations
Installation Chassis Ground Figure 3-4 Rear Panel Connections The neutral (common) conductor of the inverter AC output circuit is connected to the chassis ground. Therefore, when the chassis is connected to ground, the neutral conductor is also grounded. This conforms to National Electrical Code requirements stating that separately derived AC sources (such as inverters and generators) must have their neutral conductors tied to the ground in the same way that the neutral conductor... -
Page 37: Connecting Dc Cables
PV array. Connecting DC Cables To operate safely and effectively, the PROwatt 3000 needs proper cables, wiring, and fuses. Because the PROwatt 3000 has low-voltage, high- current input, low-resistance wiring between the battery and the inverter is essential to deliver the maximum amount of usable energy to the loads. -
Page 38: Dc Fuses
Installation DC Fuses Xantrex recommends a 400 amp Class T or Class RK5 fuse such as a Bussman JJN or FRN. Cabling Procedure Follow the installation procedure given below and consult Figure 3-5 Figure 3-6 for additional details that are specific to your installation. - Page 39 Figure 3-6 Configuration for Heavy Loads To connect the DC cables: 1. Ensure that the On/Off switch on the PROwatt 3000 is off. If you are using a battery selector switch, switch it off as well. 2. Cut the cables to the correct length.
- Page 40 CAUTION: Reverse Polarity Power connections to the PROwatt 3000 must be positive to positive and negative to negative. A reverse polarity connection (positive to negative) will blow a fuse in the inverter and may permanently damage the unit.
- Page 41 Connecting DC Cables 12. Turn on the inverter’s On/Off switch. 13. Check the front panel of the inverter. The indicator should read VOLTS 12–13 volts, depending on the voltage of the battery. If it does not, check your battery and the connection to the inverter. The other indicators should be off.
- Page 42 3–18...
-
Page 43: Operation
Operation explains how to operate the Chapter 4 PROwatt 3000 most efficiently. Specifically, this chapter: • Gives procedures for operating the inverter from the front panel and from the remote On/Off switch • Discusses operating limits • Provides information about routine maintenance •... -
Page 44: Turning The Inverter On And Off
Operation Turning the Inverter On and Off The On/Off switch on the inverter’s front panel turns the control circuit in the PROwatt 3000 on and off. To turn the inverter on and off from its front panel: • Turn the inverter’s On/Off switch on or off. -
Page 45: Operating Several Loads At Once
VOLTS the PROwatt 3000. At low input currents, this voltage is very close to the battery voltage. At high input currents, this voltage is lower than the battery voltage because of the voltage drop across the cable and connection. -
Page 46: Over Temp Indicator (And Alarm)
Operating Limits Power Output The PROwatt 3000 can deliver 3000 watts (26 amps) for 5 minutes or 2500 watts (22 amps) continuously at 77º F (25º C) when the input voltage is between 12 and 14 volts. The wattage rating applies to resistive loads such as incandescent lights while the current rating applies to reactive loads such as motors. -
Page 47: Input Voltage
VOLTS red area. Note: Although the PROwatt 3000 incorporates over-voltage protection, it can still be damaged if input voltage exceeds 16 V. Unit restarts after low The inverter will not restart unless the... -
Page 48: Inverter Loads
VOLTS start the motor. If the indicator drops below 11 V while the PROwatt 3000 is trying to start the motor, this may be why the motor won’t start. Make sure that the battery connections are good and that the battery is fully charged. -
Page 49: Battery Charging Frequency
For information about battery chargers, see our web site at www.xantrex.com Routine Maintenance Minimal maintenance is required to keep your PROwatt 3000 operating properly. Periodically you should: • Clean the exterior of the unit with a damp cloth to prevent the accumulation of dust and dirt •... - Page 50 4–8...
-
Page 51: Troubleshooting
Xantrex Customer Service. If you are unable to solve a problem and need to contact Xantrex, record the information that is asked for in “Information About Your System” on . This will help our Customer Service page D–4... -
Page 52: Common Problems
3. Keep the cables between the battery and the PROwatt 3000 as short as possible and twist them together with two to three twists per foot. -
Page 53: Troubleshooting Reference
Troubleshooting Reference Troubleshooting Reference WARNING: Electrical Shock and Burn Hazard Do not dismantle the PROwatt 3000. It does not contain any user-serviceable parts. Attempting to service the unit yourself could result in an electrical shock or burn. Table 5-1 Troubleshooting Reference... - Page 54 No output voltage; the Thermal shutdown. Improve ventilation; make sure the OVER indicator is on; the PROwatt 3000’s ventilation openings TEMP load is less than 3000 W / are not obstructed; reduce the ambient 26 A output current. temperature.
-
Page 55: Specifications
Specifications contains electrical and physical Appendix A specifications for the PROwatt 3000 and its remote On/Off switch. -
Page 56: Electrical Performance (Inverter
Specifications Electrical Performance (Inverter) Output power at 77º F (25º C) ambient and 12 Vdc input: • 5 minutes 3000 W • Continuous power 2500 W Output voltage 115 Vac RMS ±5% Output waveform Modified sine wave (quasi- square) Output frequency 60 Hz ±0.01% Input voltage 10–15 Vdc... -
Page 57: Alternators And Charging Systems
Alternators and Charging Systems A good charging system is important for the health of your batteries. Poor recharging methods can quickly damage them. provides guidelines for recharging Appendix B batteries from an alternator, from AC power, and from alternate energy sources. -
Page 58: Charging System Requirements
14.4 V and then drop back to a “float” voltage of 13.5–14 V (or shut off). CAUTION Never operate the PROwatt 3000 directly from an alternator. To work properly, the inverter must be connected to a battery or a well-regulated, high-current DC power supply. -
Page 59: Using An Alternator Controller
CAUTION Never operate the PROwatt 3000 directly from an energy source such as a solar panel. The inverter must be connected to a battery or a well-regulated, high-current DC power supply to work properly. - Page 60 B–4...
-
Page 61: Battery Types And Sizes
Battery Types and Sizes The batteries you use strongly affect the performance of the PROwatt 3000. It is important to connect the inverter to the correct size and type of battery. The information in will help you Appendix C select, connect, and maintain batteries that are... -
Page 62: Battery Types
RV batteries, marine batteries, or golf cart batteries. For most applications of the PROwatt 3000, Xantrex recommends that you use one or more deep-cycle batteries that are separated from the vehicle’s starting battery by a battery isolator. -
Page 63: Battery Size
Battery Size CAUTION The PROwatt 3000 must only be connected to batteries with a nominal output voltage of 12 volts. The PROwatt 3000 will not operate from a 6 volt battery and will be damaged if connected to a 24 volt battery. -
Page 64: Estimating Battery Requirements
To determine how much battery capacity you need: 1. Determine how many watts are consumed by each appliance that you will operate from the PROwatt 3000. You can normally find this on a label on the product. If only the current draw is given, multiply it by 115 to get the power consumption in watts. -
Page 65: Battery Sizing Worksheet
Estimating Battery Requirements This example illustrates how quickly your battery needs can escalate. To reduce the required battery size, you can conserve energy by eliminating or reducing the use of some loads or by re-charging more frequently. When sizing your battery, resist the temptation to skip the last step of this calculation (multiplying by 2). -
Page 66: Using Multiple Batteries
FUSE OR DEEP-CYCLE VEHICLE TO DC CIRCUIT LOADS BREAKER AUXILIARY STARTING BATTERY BATTERY GROUND TO FUSE OR VEHICLE CIRCUIT CHASSIS BREAKER TO VEHICLE PROwatt 3000 GROUND TO GROUND TO VEHICLE VEHICLE CHASSIS CHASSIS Figure C-1 Configuration for Normal Loads C–6... -
Page 67: Two Separate Battery Banks
Using Multiple Batteries Two Separate Battery Banks If you need more than two batteries (or are using different makes or models of batteries), Xantrex recommends that you install two separate battery banks and a battery selector switch. Figure C-2 shows two separate battery banks and a battery selector switch. -
Page 68: Battery Tips
Battery Types and Sizes Battery Tips WARNING Review “Precautions When Working With Batteries” page xii before you work with the batteries in your system. Explosive/Corrosive Gases Lead-acid batteries may emit hydrogen, oxygen, and sulfuric acid fumes when recharging. To reduce the risk of explosion: •... - Page 69 Battery Tips Battery Connections Connections to battery posts must be made with permanent connectors that provide a reliable, low-resistance connection. Do not use alligator clips. Clean the connections regularly and prevent corrosion by using a protective spray coating or vaseline. Battery State of Charge You can measure battery state of charge with a hydrometer or, more easily, with a voltmeter.
- Page 70 C–10...
-
Page 71: Product And System Information
Product and System Information contains the warranty for your Appendix D PROwatt 3000 as well as instructions for returning the product for servicing. also has a place where you can record Appendix D information about your system in case you need... -
Page 72: Warranty
What will Xantrex do? Xantrex will, at its option, repair or replace the defective product free of charge. Xantrex will, at its own option, use new and/or reconditioned parts made by various manufacturers in performing warranty repair and building replacement products. -
Page 73: Return Material Authorization Policy
If you are returning a product from the USA or Canada, follow this procedure: 1. Contact Xantrex to obtain an RMA number and a shipping address. 2. Package the unit safely, preferably using the original box and packing materials. Include the following: •... -
Page 74: Information About Your System
Product and System Information Information About Your System As soon as you open your PROwatt 3000 package, record the following information and be sure to keep your proof of purchase. Serial Number (on DC ______________________________ end) Purchased From ______________________________ Purchase Date... -
Page 75: Remote On/Off Switch Mounting Template
Remote On/Off Switch Mounting Template Remote On/Off Switch Mounting Template 2 1/2 (6.35 cm) 1 3/4 (1.9 cm) Figure D-1 Remote On/Off Switch Mounting Template D–5... - Page 76 D–6...
- Page 77 Index AC receptacle 2–3 2–5 3–7 batteries AC wiring amp-hour (Ah) capacity C–3 color coding 3–6 automotive starting C–2 C–3 connecting to an AC circuit 3–6 3–7 charging frequency 4–7 knockout for 2–5 3–7 connecting 2 in parallel C–6 procedure 3–7 deep-cycle lead-acid C–2 Ah.
- Page 78 Index estimating worksheet C–5 recommended diameter and length 3–13 estimating your needs 3–4 C–3 C–4 DC cabling terminals 2–7 depth of discharge (DOD) C–5 cable clamp 2–2 3–3 3–7 cables. See DC cables. electrolyte level C–8 charging explosive gases xi 3–16 C–8 from AC power B–3...
- Page 79 5–3 chassis ground lug 2–7 3–12 connecting to existing AC circuit 3–6 3–7 date of purchase D–3 materials list for PROwatt 3000 2–2 electrical specifications A–2 motors front panel features described 2–4 2–6 difficulty starting 4–6 front panel illustrated 2–4 2–6...
- Page 80 Index polarity, correct 3–6 3–8 3–16 5–3 television reception 5–2 power output 4–4 televisions 1–2 power tools 1–2 temperature power tools, battery-operated xii ideal ambient temperature 3–5 precautions reducing ambient temperature 5–4 explosive gas xi template (remote switch) when using rechargeable appliances xii illustrated D–5 when working with batteries xii installing 3–10...
-
Page 81: Index
Index Xantrex email 2–2 D–2 fax number 2–2 D–2 phone number 2–2 D–2 web site 2–v 4–7 B–3 Index–5... - Page 82 Index––6...
Need help?
Do you have a question about the PROwatt 3000 and is the answer not in the manual?
Questions and answers