
Related Manuals for Oracle Audio Delphi Mk VI


Summary of Contents for Oracle Audio Delphi Mk VI
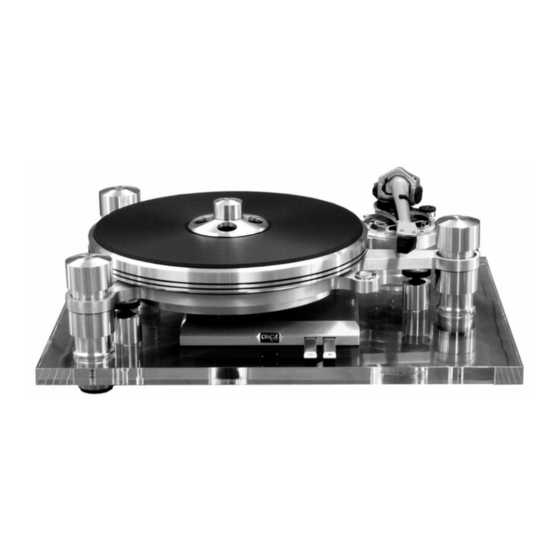
- Page 1 The Fine Art of Playing Music Oracle Audio Technologies Delphi Mk VI Owner’s Manual...
- Page 2 Your Delphi Mk VI is a precision instrument and its performance is directly linked to the quality and accuracy of the different adjustments you will perform. It is important to set up your new turntable with...
-
Page 3: Table Of Contents
TABLE OF CONTENTS Unpack your Delphi MK VI ..............4 Assemble the sub-chassis ..............6 Install the tone arm and phono cartridge..........6 Precisely align the phono cartridge ............8 Assemble and level the plinth .............. 9 Install the MVSS plungers..............10 Prepare and install the suspension modules........ -
Page 4: Unpack Your Delphi Mk Vi
UNPACK YOUR DELPHI MK VI Before you begin the set up process, it is important that you find a clean and rigid surface where you will be able to safely place the turntable for the assembly. Make sure there is adequate lighting. - Page 5 Strain relief device • Spindle holder assembly • One extra suspension spring, Blue • Three suspension caps • Three reservoirs for the Micro Vibration Stabilizer System ( MVSS ) • Three plungers and wheel lock nut for the MVSS Oracle Audio Technologies...
-
Page 6: Assemble The Sub-Chassis
Install the tone arm following the manufacturer’s recommendations. Notes : At this time the MVSS plungers and wheel lock nuts will not be fitted to the sub-chassis. Oracle Audio Technologies... - Page 7 Place the tone arm mounting board loosely in the sub-chassis mounting ring and determine the correct distance and direction to mount the arm to the arm board. • First mount the tone arm to the pre-cut aluminum board. • Properly secure the tone arm mounting hardware. Oracle Audio Technologies...
-
Page 8: Precisely Align The Phono Cartridge
• Check the azimuth ( lateral view of the cantilever ) by lowering the stylus over the black portion on the calibrator disc. The mirror reflection will help determine if the cartridge is off its vertical axis. Oracle Audio Technologies... -
Page 9: Assemble And Level The Plinth
• Install the stylus guard to complete the assembly of your Delphi Mk VI. Do not install the phono lead at this time. If there is no stylus guard for your phono cartridge use a tie wrap to secure the tone arm tube in the arm rest support. -
Page 10: Install The Mvss Plungers
• Install each threaded plunger at the position indicated on the plastic bag and thread both the wheel lock nut and the plunger all the way up loosely against the sub-chassis. Oracle Audio Technologies... -
Page 11: Prepare And Install The Suspension Modules
Running the Sorbothane on a paper towel will make fibers adhere to its surface making it easier to slide in the suspension housing. Oracle Audio Technologies... -
Page 12: Calibrate The Suspension
Make a final round of calibration of the suspension system so all three suspension housings are set at about .5 mm (0,020 inch) above the "B" step. • Over a period of a few days the springs suspension system will set to the desired optimal setting. Oracle Audio Technologies... -
Page 13: Filling The Mvss Reservoirs With The Silicone Fluid
Note : At this time in the set up process of your Oracle Delphi MK VI the drive belt is not installed, there is no oil yet in the spindle holder and the phono lead is not yet attached to the base of the tone arm. The suspension system has been precisely calibrated …... -
Page 14: Install The Drive Belt
• Bring the platter over the spindle holder, align the drive belt installation tool so the motor pulley falls between the two legs of the tool. • Carefully lower the platter straight down in the spindle holder. Oracle Audio Technologies... - Page 15 … the oil syringe we supply contains 4cc of oil. The special mix of Synthetic / PTFE lubricating oil supplied with your Delphi Mk VI is designed to protect and preserve the mating parts for many years. Unless contaminated with dirt or alcohol, this lubricating oil will last for many years.
-
Page 16: Calibrating The Micro Vibration Stabiliser System
! If the plungers are calibrated too far down ( 4 turns down for exemple ) in the Silicone reservoirs some mechanical energy will start bypassing the suspension system. The system has been purposely designed like this to make sure the optimal calibration of the MVSS could be achieved under all conditions. Oracle Audio Technologies... -
Page 17: Attach The Phono Lead
Keep the power supply away from signal carrying leads. The power supply can remain connected to the wall outlet unless you don’t intend to use the turntable for a long period of time. ADJUST THE 33 AND 45 SPEED Oracle Audio Technologies... -
Page 18: Attach The Ground Lead
Mount the hinges to the plinth and do not tighten the screws completely. Make sure the dust cover slots line up correctly with each other before securing the screws. • Install the dust cover by sliding it in the hinge slot. Oracle Audio Technologies... -
Page 19: The Record Clamp And Tapered Washer
Position the tapered washer over the spindle on the acrylic mat • Place a record over the acylic mat. • Retrieve the record clamp from the foam packaging • Tighten the clamp so the record is pushed flat against the mat. Oracle Audio Technologies... -
Page 20: Level Your Delphi Mk Vi
Whenever you have to either carry your turntable or remove the platter, always remove the suspension caps to prevent any metal to metal contact between the sub-chassis and the caps which would damage to the clear protective coating on the aluminum parts of your Delphi MK VI. Oracle Audio Technologies... -
Page 21: Maintenance
Use the depth gauge to make sure the right quantity of oil has been used. • As a precaution to preserve the furniture your Delphi Mk VI sits on, it is advisable to use a folded paper towel under the spindle holder for a few weeks in the case of an oil spillage. -
Page 22: Warranty Registration Card
You can also scan this whole page and send it by e-mail to info@oracle-audio.com WARRANTY REGISTRATION CARD Your new Oracle Delphi MK VI carries a non-transferable, 3 year parts and labor limited warranty against manufacturing defects. Oracle Audio Technologies will repair the defective item within this warranty period.
Need help?
Do you have a question about the Delphi Mk VI and is the answer not in the manual?
Questions and answers