Bayer HealthCare Breeze 2 User Manual
Hide thumbs
Also See for Breeze 2:
- User manual (54 pages) ,
- User manual (55 pages) ,
- Quick reference manual (2 pages)
Table of Contents
Advertisement
Quick Links
Advertisement
Table of Contents

Related Manuals for Bayer HealthCare Breeze 2


Summary of Contents for Bayer HealthCare Breeze 2
- Page 1 ® BLOOD GLUCOSE MONITORING SYSTEM ® USER GUIDE...
- Page 2 Smaller Blood Drop, Faster Test Results, and Increased Memory Capacity 1-2-3... ASY AS Open meter, insert 10-test disc, close meter. Pull (a) and push (b) handle to expose test strip. Apply sample. Bayer Customer Service: 800-348-8100...
-
Page 3: Table Of Contents
ABLE OF ONTENTS NTRODUCTION NTRODUCTION OOK AT ETER XPLANATION OF ISPLAY YMBOLS ESTING ATERIALS VERYDAY 10-T NSERTING A UNNING A LOOD LUCOSE MARKING A DELETED BLOOD TEST UNDERSTANDING YOUR TEST RESULTS ALTERNATIVE SITE TESTING UNNING A ONTROL MARKING A CONTROL TEST EYOND VERYDAY ECALLING... - Page 4 ABLE OF ONTENTS ECHNICAL NFORMATION PECIFICATIONS ERFORMANCE VALUATIONS OLVING ROBLEMS OLVING ROBLEMS ROUBLESHOOTING AND RROR ODES USTOMER ERVICE EPLACEMENT TEMS ARRANTY NFORMATION The B blood glucose monitoring system (meter, test strips and ® REEZE controls) is intended for self-testing by persons with diabetes and by healthcare professionals, to monitor the level of glucose in whole blood.
-
Page 5: Introduction Introduction
NTRODUCTION NTRODUCTION ® Thank you for choosing the B blood glucose REEZE monitoring system! We are proud to be your partner in helping you manage your diabetes. We understand that people who regularly check their blood glucose levels want a meter that is simple, straightforward and easy to use. As you use your B system, you will appreciate the: REEZE... -
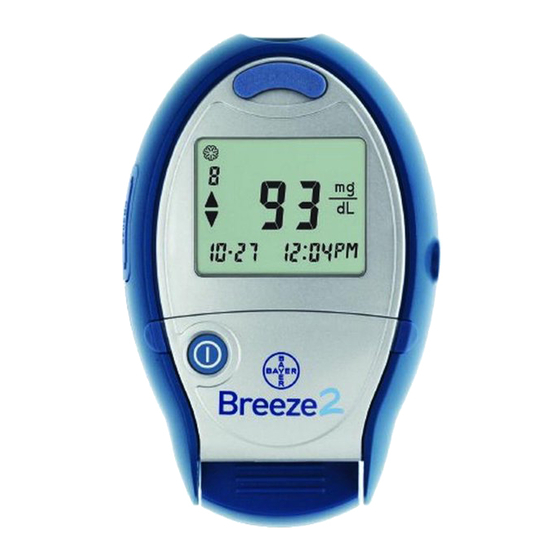
Page 6: Ook At Your Meter
OOK AT REEZE ETER : Release Button Press to release and discard the used test strip. Screen This is where Data Port your test results (side of meter) will be displayed. Insert cable here to allow communication Battery Holder between the (side of meter) meter and Holds one... - Page 7 Button Door Open On/Off Button Used to manually turn the meter Down on or off, check Buttons the number of Used to display strips, and check additional the date/time. results or options. Memory Button Accept Used to view your Button blood glucose Used to accept results stored in...
-
Page 8: Explanation Of Display Symbols
XPLANATION OF ISPLAY YMBOLS : A full display, as shown here, indicates that all elements in the display are working properly. To view the full display, press and hold the On/Off button ( ) or pull the meter handle all the way out. Compare your meter to the display shown here before you run each test. - Page 9 Here is what each display element means: Apply blood to Temperature is the test strip too high or too low Battery is Insert a new low or dead test disc The result is not to be included in the averages The volume of The result is a the buzzer...
-
Page 10: Testing Materials
ESTING ATERIALS ® 10-test disc REEZE (Disc contains ten test strips) (Included with some kits) ® normal control REEZE (Included with some kits) ® 2 lancing device ICROLET and lancets (Included with some kits) ® ® Ascensia adjust- ICROLET able lancing device and lancets (Included with some kits) Please refer to the Ascensia device package... -
Page 11: Everyday Use
VERYDAY 10-T NSERTING A WARNING: Never open the meter with the meter handle pulled out. Open Meter 1. Turn the meter over so the display screen is facing down. Open the meter by pressing in on the back edge of the open latch and then pulling up on the base. - Page 12 Insert Disc 3. Insert a new 10-test disc (with the bumpy side up), aligning the 5 notches in the disc with the tabs on the meter. Close Meter 4. Close the meter and snap it shut. Keep the meter fl at when closing it.
- Page 13 Counting the Number of Strips Left Your B meter will REEZE automatically count down the number of test strips you have left. The number is shown with your test result. To see the count when the meter is off, press the button.
-
Page 14: Running A Blood Glucose Test
UNNING A LOOD LUCOSE 1. Wash your hands well with soap and warm water. Rinse and dry thoroughly. NOTE: For testing sites other than fi ngertips, see page 20. Prepare Lancing Device Refer to the package insert for your lancing device for com- plete instructions. - Page 15 Twist off the lancet cap. Be sure to save it for disposing of the used lancet. 4. Replace the gray endcap prior to getting your blood drop. Push Out Test Strip 5. Your B meter uses REEZE a special, easy-to-use “Pull and Push”...
- Page 16 NOTE: After the meter handle is pushed in, the release button is UP, a test strip is pushed out, and a series of “apply blood” prompts appears. The meter is now ready to run a blood glucose test. CAUTION: • Your meter is designed to push out one test strip at a time.
- Page 17 7. Stroke your hand and fi nger towards the puncture site to form a drop of blood. Do not squeeze around the puncture site. 8. Test immediately after a good blood drop has formed. Test 9. Your test strip is like a straw—it sips in a sample of blood.
- Page 18 For best results: • Blood is pulled IN the test strip, not dropped ON. • Do not allow blood to run down into the meter. • Do not add more blood to the test strip after the meter beeps. 10. After the beep, the display counts down from “5”...
- Page 19 Your test result then appears on the screen. Helpful Hint: The number displayed in the upper left cor- ner is the number of test strips remaining in your 10-test disc. IMPORTANT: If you want to mark this result as a deleted blood test, you must do that now, while the result is still be- ing displayed.
- Page 20 Remove the used lancet 1. In one hand, hold the lanc- ing device with your thumb on the grip indent, with your other hand, hold the gray endcap dial as shown, and gently snap off the endcap. 2. Place the round protective lancet cap on a fl...
- Page 21 PRECAUTIONS: • Test your blood again if your glucose result is below 50 mg/dL, above 250 mg/dL or if the meter shows “LO” or “HI.” If your glucose level is still below 50 mg/dL, above 250 mg/dL, or if the meter again shows “LO”...
-
Page 22: Marking A Deleted Blood Test
Marking a Deleted Blood Test NOTE: Marking a test result as a deleted blood test excludes it from all of the averages that are calculated by your meter. You must mark the result immediately after the test is performed — while the result is still displayed on the screen. -
Page 23: Understanding Your Test Results
Understanding Your Test Results Expected Blood Glucose Values Blood glucose values will vary from time to time depending on food intake, medication dosages, health, stress or exercise. Consult your physician or healthcare professional for the target glucose values appropriate for you. Standard medical practice goals for a typical non-pregnant individual with diabetes are: •... -
Page 24: Alternative Site Testing
Unusual Test Results If your blood glucose result doesn’t match the way you feel, follow these steps: 1. run a control test (see page 22); 2. retest your blood glucose (see page 10); 3. call your doctor immediately if your result still does not agree with the way you feel. - Page 25 Select a puncture site from a fl eshy area on the palm. Avoid veins, moles, bones, and tendons. For palm testing, it is not neces s - sary to rub the skin or pump the sary to rub the skin or pump the device.
-
Page 26: Running A Control Test
UNNING A ONTROL There are times when you will want to do a quality control test so you know that your system is working properly. You may also want to do a control test to check the way you do your test. Simply follow these steps: Push Out Test Strip 1. - Page 27 Test 3. Move the entire front edge of the test strip until it touches the edge of the drop of the control solution. The control solution is automatically pulled into the test strip. IMPORTANT: Hold the test strip in place until the meter beeps, then move the meter away.
-
Page 28: Marking A Control Test
Compare this control test result with the control range NORMAL NORMAL HIGH HIGH CONTROL RANGES CONTROL RANGES printed on the bottom fl ap of 49-91 49-91 110-157 262-341 110-157 262-341 mg/dL mg/dL the carton of B test REEZE 1A2164AA 1A2164AA LOT: LOT: 2007-03... - Page 29 6. To release the used test strip, hold the meter with the test strip pointing down over a waste container. Press the release button. Be sure the heel of your hand is not against the meter handle. NOTE: If you block the meter handle with your hand, the test strip may not release properly.
-
Page 30: Beyond Everyday Use
EYOND VERYDAY ECALLING ESULTS Your B meter can store up to 420 test results in its REEZE memory. This makes it easy to see your previous blood glucose test results. To view those results: 1. Open the button door. 2. Press the button. -
Page 31: Viewing Your Averages
Viewing Your Averages Your B meter calculates several different averages REEZE of your blood glucose results. You can view averages for 1 day (the previous 24 hours), 7 days, 14 days, and 30 days. To see the averages, simply follow these steps. 1. -
Page 32: Clearing Stored Test Results
Clearing Stored Test Results To clear the stored results from your meter, follow these simple steps: 1. Open the button door. 2. Press the button. 3. Press the button again and hold it. 4. While holding the button, press and hold the button. -
Page 33: Setup Function
ETUP UNCTION Helpful Hint: You can press the button at any time during Setup to turn the meter off. Just remember to press the button fi rst to store your changes! Setting the Time 1. Open the button door (see page 3). 2. -
Page 34: Setting The Date
5. Press to select AM or PM. Press to accept and move on. Setting the Date NOTE: If you have just set the time, skip ahead to step 4. 1. Open the button door. 2. Press 3. Press until you see the “day”... - Page 35 5. Press to change the month. Press to accept and move on. 6. Press to change the year. Press to accept and move on. www.bayerdiabetes.com/us...
-
Page 36: Setting The Buzzer Level
Setting the Buzzer Level Your B meter has an easy-to-use volume control REEZE for the buzzer. There are three different buzzer levels: high NOTE: If you have just set the date, skip ahead to step 4. 1. Open the button door. 2. -
Page 37: Setting The Time Format
Setting the Time Format (12- or 24-hour Clock) Your meter can display the time format as either 12-hour ) or 24-hour ( ).You can change the time format as follows: NOTE: If you have just set the buzzer level, skip ahead to step 4. -
Page 38: Setting The Date Format
Setting the Date Format Your meter can display the date format as either “month-day” ( ) or as “day-month” ( ).You can change the date format as follows: NOTE: If you have just set the time format, skip ahead to step 4. -
Page 39: Transferring Results To A Computer
RANSFERRING ESULTS TO A OMPUTER You can transfer test results from the B meter REEZE to a computer, where they can be summarized in a report with graphs and tables. To make use of this feature, you need Bayer’s diabetes management software and data cable. -
Page 40: Cleaning Your Meter
LEANING ETER Your B meter can be cleaned using a moist (not REEZE wet) lint-free tissue with a mild detergent or disinfecting solution (1 part bleach mixed with 9 parts water). Do not use alcohol. Wipe the outside of the meter, taking care to keep detergent or disinfecting solution from running down into the test strip slot. -
Page 41: Replacing The Battery
EPLACING THE ATTERY Your B meter uses one 3-volt lithium battery REEZE (CR2032). A battery will already be installed in the meter when you buy it. A fl ashing battery on the screen means that it is time to put a new battery in the meter. - Page 42 To replace the battery, follow these steps: NOTE: A replacement battery (CR2032) can be found at most stores or can be ordered from Bayer Customer Service (free of charge for meter owners in the U.S.A.). 1. Hold the meter with the display screen down.
- Page 43 4. Snap 1 new battery (CR2032) fi rmly in the holder with the + side up. 5. Gently slide the battery holder back into the battery compartment. Make sure the battery holder is pushed all the way in. 6. Close the meter. 7.
-
Page 44: S Pecifications
ECHNICAL NFORMATION PECIFICATIONS Test: Capillary blood glucose referenced to plasma/serum glucose values Calibration: Meter is automatically coded each time a new 10-test disc is inserted Sample Size: Approximately 1 µL Units of Measure: mg/dL Test Range: 20–600 mg/dL Results: 5-second countdown Memory Feature: Meter stores 420 test results Normal Operating... -
Page 45: T Roubleshooting And E Rror C Odes
OLVING ROBLEMS OLVING ROBLEMS You can solve many of the problems you might have by working through this section. 1. Do you have a 10-test disc in the meter? Yes____ No_____ If No, see page 7. 2. Does it contain new test strips? Yes____ No_____ If No, see page 7. - Page 46 ROUBLESHOOTING AND RROR ODES When you have a problem or a question concerning what you see on your screen, the following may be helpful. What You See What It Means What You Should Do Test result is below Repeat the test and make sure 10 mg/dL.
- Page 47 What You See What It Means What You Should Do Low Battery symbol Replace the battery (CR2032) fl ashes if battery power within 20 readings or one week. is low. Battery life has ended. Replace the battery (CR2032). Temperature is outside Allow the meter to reach room the operating range of temperature.
- Page 48 What You See What It Means What You Should Do 1. You may have 1. Repeat the test and wait until applied blood too you see the “apply blood” early to the test strip. prompts before you touch the strip to the blood drop. 2.
- Page 49 What You See What It Means What You Should Do Meter has detected an Turn the meter off, then on error; accurate result is using , then retest. If the not possible. error remains, contact Bayer Customer Service. or higher 1.
- Page 50 What You See What It Means What You Should Do Control Test • Control solution is Run another control test. If the past its expiration result is still out of range, retest result is out of date or is past the with a new 10-test disc and range (too high 6-month open...
- Page 51 USTOMER ERVICE If a problem arises, work through the Solving Problems section (see page 41). You will probably fi nd your solution there. If you are still having trouble, please call our Customer Service Department. We have friendly, knowledgeable people who are there to help 24 hours a day.
-
Page 52: Replacement Products
REEZE You can obtain these parts in the United States by calling: 800-348-8100 or by writing: Bayer HealthCare LLC Customer Service Department P.O. Box 2004 Mishawaka, Indiana 46546 If you call or write for supplies, please include the number with the name of the replacement part or product. - Page 53 Customer Service at 800-348-8100. Manufacturer’s Warranty: Bayer HealthCare LLC (“Bayer”) warrants to the original purchaser that this instrument will be free from defects in materials and workmanship for 5 years from the date of original purchase (except as noted below). During...
- Page 54 For Warranty Service: Purchaser must contact the Customer Service Department of Bayer HealthCare LLC, by calling toll free 800-348-8100, for assistance and/or instructions for obtain- ing service of this instrument. Bayer Customer Service: 800-348-8100...
- Page 55 Bayer HealthCare LLC Mishawaka, IN 46544 USA www.bayerdiabetes.com/us Bayer, the Bayer Cross, B , Ascensia, M , No Coding and the REEZE UTODISC ICROLET No Coding logo are trademarks of Bayer. 99C14409 ©2008 Bayer Rev. 2/08...
Need help?
Do you have a question about the Breeze 2 and is the answer not in the manual?
Questions and answers