Table of Contents
Advertisement
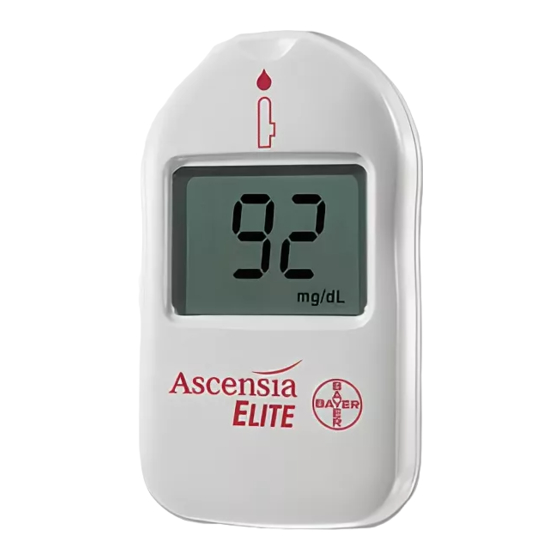
THE NEW FACE of Glucometer
®
Diabetes Care System
U
G
SER
UIDE
For Use With Ascensia E
™
LITE
Blood Glucose Meter
Need Help With Reimbursement? Call Our Bayer Care Help Line: 1-877-787-1912.
If You Have Any Questions, Comments or Need Help With Reimbursement For
Your Testing Supplies, Please Call 1-800-348-8100.
Advertisement
Table of Contents

Related Manuals for Bayer HealthCare Ascensia Elite Blood Glucose Meter MODEL Ascensia Elite


Summary of Contents for Bayer HealthCare Ascensia Elite Blood Glucose Meter MODEL Ascensia Elite
-
Page 1: Blood Glucose Meter
UIDE For Use With Ascensia E ™ LITE Blood Glucose Meter Need Help With Reimbursement? Call Our Bayer Care Help Line: 1-877-787-1912. If You Have Any Questions, Comments or Need Help With Reimbursement For Your Testing Supplies, Please Call 1-800-348-8100. - Page 2 Introduction What it is: The Ascensia E ™ Diabetes Care System is a blood glucose monitoring LITE system. The system is made up of the Ascensia E ™ Meter, Test Strip, LITE and Code Strip. For quality control of the system, the Ascensia E ™...
-
Page 3: Testing Materials
TESTING MATERIALS... - Page 4 Test Slot – provides an opening for inserting strip into the Meter. Icon – shows proper orientation and direction for inserting the Test Strip, Code Strip or Check Strip into the Meter. Display – displays test results, current Code (Function) Number (F– #), or low battery indicator.
- Page 5 Introduction What you do: 1. Insert the Test Strip into the Test Slot located at the top, center of the Meter. 2. Touch the test end (tip) of the Test Strip to a drop of blood. A “beep” sounds after the Test Strip reaction chamber is filled with blood.
-
Page 6: Special Feature
Special Feature 1. WHAT IS DIFFERENT? The part of the Test Strip that touches the sample. 2. HOW IS IT DIFFERENT? The blood sample is drawn into the Test Strip and is not put on the Test Strip. 3. WHEN DOES THIS HAPPEN? The test end (tip) of the Test Strip draws (pulls) the blood sample into the Test Strip when the tip touches the blood sample. - Page 7 RIGHT 4. IN OTHER WORDS: Think of the Test Strip as a straw used for drink- ing. You put the straw into the liquid. The liquid WRONG is drawn into the straw at one end...SO the blood sample is drawn into the Test Strip at one end when you put the tip of the Test Strip into...
-
Page 8: Table Of Contents
Contents SECTION 1 – The Ascensia E • Learn About the System ........1 •... - Page 9 Contents (continued) SECTION 4 – Learn About the Memory Feature • Introduction to Memory ........21 •...
-
Page 10: Lite
Learn About the System SECTION 1 This booklet is designed to guide you through the operation of the Ascensia E ™ Diabetes LITE Care System with detailed directions and illustrations. A Quick Reference Guide is provided, and can be carried in your Meter Carrying Case. -
Page 11: Install/Replace Batteries
Install / Replace Batteries THE BATTERIES: The Meter uses two (3-volt lithium) batteries. These are furnished with the Meter. WHEN TO REPLACE: When the battery voltage becomes weak (after approximately 1000 readings), the Meter will show a battery display ( time to replace the batteries (see page 40 for battery types). -
Page 12: Check The Meter Performance
Check the Meter Performance WHEN: When your Meter is new and anytime you want to check that your Meter is functioning properly. WHAT TO EXPECT: A Check Strip test result that falls within the Check Strip Range tells you that the Meter electronics are working properly. Note the Check Strip Range printed on the check strip package insert. -
Page 13: The Check Strip Test
The Check Strip Test MATERIALS REQUIRED: Ascensia E ™ Meter • LITE Ascensia E ™ • LITE Check Strip CHECK THE METER: *A full display, as shown here, indicates that all characters in the display are working properly. If ever all the display segments do not appear, see Section 6, page 32. -
Page 14: Things To Remember
The Check Strip Test X X X X X X X X X X X X X X X X X X X X X X X X X X X X X X If the Check Strip test result is within the range listed on the package insert found inside the Check Strip package, the Meter is... -
Page 15: Code (Calibrate) The Meter
Code (Calibrate) the Meter WHY CODE THE METER? To match the Meter to the reactivity of the Test Strip, you must first code (calibrate) the Meter using the Code Strip provided in the carton of Ascensia E Each lot of Test Strips is tested extensively and assigned a Function Number (0 through 12) identified on the Code Strip. -
Page 16: Code The Meter
Code the Meter MATERIALS REQUIRED: Ascensia E ™ Meter • LITE Ascensia E ™ Code • LITE Strip CODE THE METER: (continued) Open your new carton of Test Strips and find the clear plastic packet contain- ing the Code Strip. SECTION 2 Carefully tear open the packet, and remove the... - Page 17 Code the Meter Insert the Code Strip into the Test Slot (as shown). A beep sounds and a full display appears briefly. Another beep sounds and the Function Number (for exam- ple, F-4) appears in the Display. (continued) Things to remember: •...
-
Page 18: The Control Test
The Control Test To make sure your Ascensia E Test is performed using the Ascensia E WHY? A Control Test confirms that the system is functioning properly and you are using proper technique. When running a Control Test, the system is defined as: the Meter and the Test Strips. -
Page 19: The Control Test
The Control Test MATERIALS REQUIRED: Ascensia E ™ Meter • LITE Ascensia E ™ Normal • LITE Control Solution Ascensia E ™ Test • LITE Strip and Code Strip CLINILOG ® Diary • PREPARE FOR TEST: If not already done, code your Meter using the Code Strip (see page 7). - Page 20 The Control Test Remove the Test Strip from packet. Holding the round end, insert the strip fully into the Meter. NOTE: Save the empty foil packet for use in Step 6. (continued) A beep sounds and a full display appears, followed by the Function Number (F#) and the previous test result.
- Page 21 The Control Test Gently squeeze a small drop of Control solution onto the inside of the foil you saved in Step 3. (continued) Touch and hold the TEST END of the Test Strip in the drop until after the Meter beeps. A small amount of Control solution is auto- matically drawn into the Test Strip.
- Page 22 The Control Test FOLLOW UP: Record and date all Control Test results in your CLINILOG Diary. CAUTION: If the Control Test result does not fall within the stated range, the system may not be operating prop- erly. See Section 6 of this User Guide and the Ascensia ™...
-
Page 23: Get Ready For The Blood Glucose Test
Get Ready for the Blood Glucose Test MATERIALS REQUIRED: Ascensia E ™ Meter • LITE Ascensia E ™ Test • LITE Strip and Code Strip MICROLET ® Adjustable • Lancing Device/Lancet - Tissue or cotton ball for wiping finger after testing CLINILOG ®... - Page 24 Get Ready for the Blood Glucose Test Wash your hands. Use warm soapy water. Rinse and dry thoroughly. Remove foil packets from carton and tear off single packet. (continued) SECTION 3 To open the Test Strip packet, carefully peel the foil until the Test Strip is completely exposed (as shown).
- Page 25 Get Ready for the Blood Glucose Test Remove Test Strip from packet. Holding the round end, insert the strip fully into the Meter. NOTE: Be sure to save the foil to use when disposing of the Test Strip. A beep sounds and a full display appears, followed by the Function Number (F#) and the previous test result.
-
Page 26: Perform The Blood Glucose Test
Perform the Blood Glucose Test Stick your finger with the MICROLET Adjustable Lancing Device and form a small drop of blood. Note: Multiple Site Testing Consult with your healthcare professional prior to testing from a site other than your fingertips. Blood glucose testing results from sites other than your fingertip could be significantly different. - Page 27 Perform the Blood Glucose Test Touch and hold the test end (tip) of the Test Strip to the drop of blood until after the Meter beeps. See page iv for the right method. Blood is auto- matically drawn into the Test Strip. The timer begins count- ing down...
- Page 28 Perform the Blood Glucose Test If you do not want to store the test result in the memory, pull out the Test Strip and quickly insert it back into the Meter (within 2 seconds). dEL appears in the Display, and the test result will not be stored in the memory.
- Page 29 Perform the Blood Glucose Test Things to remember: • Never use a Test Strip beyond the printed expiration date (on the foil packet). • Use the Test Strip immediately after removing from the foil packet. • It is important to insert the Test Strip until it comes to a full stop. When inserted fully, the tab on the top portion of the strip should be completely hidden within the Meter.
-
Page 30: Introduction To Memory
Introduction to Memory SECTION 4 This section will instruct you on the use of the Ascensia E ™ Meter’s memory LITE feature. The following questions and answers should help you learn about this feature. How many test results does the memory store? The memory stores up to 20 test results, and also provides the “average”... - Page 31 Introduction to Memory (continued) SECTION 4 Can I delete test results? Yes, you can delete either all of the test results stored in the memory, or a single test result before it goes into the memory. How will I know the difference between a stored Blood Glucose Test and a Control Test? A Control Test result in memory is preceded by a C- display.
-
Page 32: Recall Test Results From The Memory
Recall Test Results from the Memory Insert the Check Strip fully into the Meter as shown. appears briefly. Another beep sounds NOTE: If your Check and the Check Strip Strip is not available, result is displayed. you can use a new Test Strip for this procedure. -
Page 33: Delete All Test Results From The Memory
Delete ALL Test Results from the Memory Insert the Check Strip fully into the Meter. Wait 10 seconds for the memory sequence to begin. NOTE: You may also use a Test Strip to delete all test results from memory. However, you must wait 3 minutes for the memory sequence to begin. -
Page 34: Delete A Single Test Result From The Memory
Delete a SINGLE Test Result from the Memory A test result may be deleted at the end of a test during the 3 minutes it is displayed. Use a tissue to pull out the Test Strip and quickly insert it back into the Meter (within 2 seconds). -
Page 35: Mark A Control Test Result
Mark a Control Test Result To prevent the Control results from being included in the average, you should mark each Control Test with a “C.” This must be done before performing the Control Test. First, insert the Test Strip fully into the Meter. -
Page 36: Things To Remember
Things to Remember About the Memory Recall Test Results from the Memory (see page 23) • Low (below 20 mg/dL [1.1 mmol/L]) and high (above 600 mg/dL [33.3 mmol/L]) test results are displayed and stored in memory as Lo and Hı. In calculating the aver- age, Lo is entered as 20 mg/dL (1.1 mmol/L), and Hı... - Page 37 Things to Remember About the Memory Mark a Control Test Result (see page 26) 1. You should “mark” your Control Test results with a “C” before storing them in the memory. This prevents the Meter from averaging your Control Test results in with your blood glucose results.
-
Page 38: Section 5 - Care Of The Meter And Strips
Care of the Meter and Strips 1. To help keep the Meter and Test Strips free of oils and other contaminants, wash hands and dry thoroughly before using. 2. Handle the Meter carefully. Dropping may damage the electronics or cause other malfunctions. 3. - Page 39 Care of the Meter and Strips (continued) SECTION 5 WARNING: Potential Biohazard: Healthcare professionals or persons using this system on multiple patients should be aware of the following and should follow the infection control procedure approved by their facility. All products or objects which come in contact with human blood, even after clean- ing, should be handled as if capable of transmitting viral diseases.
-
Page 40: Meter And Test Strip Problems
Meter and Test Strip Problems PROBLEM CAUSE Meter electronics failure. display Display goes blank 1. Batteries are not installed after Test, Code or Check Strip is inserted 2. Strip is not fully inserted into the Meter. 3. Batteries are dead. 4. - Page 41 Meter and Test Strip Problems PROBLEM CAUSE Meter fails to start 1. Blood applied wrong; countdown. 2. Test Strip inserted 3. Sample is applied while Some display seg- Meter electronics or ments do not appear. battery failure. 1. Battery voltage low. Battery display.
-
Page 42: Test Result Problems
Test Result Problems PROBLEM CAUSE “Lo” display. 1. The blood glucose value 2. Test Strip not filled 3. Test Strip is defective or CAUTION: Glucose levels below 50 mg/dL (2.8 mmol/L) may indi- 4. Wrong Function Number cate a potentially serious medical condition. - Page 43 Test Result Problems PROBLEM CAUSE Blood glucose or con- 1. Not enough blood or trol test results are inconsistent, or control test results are not within the specified 2. Test Strips or control range. 3. Deteriorated Test Strip 4. Meter, Control Solution and/ IMPORTANT: To have accurate test results, sufficient sample to...
-
Page 44: Service
Service If attempts to correct a problem fail, please call our Customer Service Department. We have trained specialists to assist you. IMPORTANT: • Speak to a Customer Service Representative before returning your Meter for any reason. He/she will give you the information needed to get your problem handled correctly and efficiently. -
Page 45: Check List
Check List 1. The Meter serial number is: 2. The date and time the problem occurred was: 3. I tested with both the Check Strip and with the Ascensia E ™ Normal control: LITE • The Check Strip result was: •... -
Page 46: Limitations Of The Procedure
>200 mmHg had a small bias ™ in comparison to the laboratory method LITE is 80 to 110 mmHg (11.04 to ™ Blood Glucose Meter is not qualified for testing LITE Blood Glucose Test results. LITE Test Strip results are not... -
Page 47: Specifications
Specifications Test Sample: Whole blood Reaction Chamber Sample Volume: 2 L Measuring Range: 20–600 mg/dL (1.1–33.3 mmol/L) Measuring Time: 30 Seconds Calibration Curve: Selected by use of the Code Strip Memory Feature: Stores last 20 test results Temperature Compensation: Automatic compensation with Battery Type: 3-volt lithium batteries (DL or CR2032) –... -
Page 48: Turning Off The Alarm
Specifications TURNING OFF THE ALARM: We strongly advise you to leave the alarm on, as it helps tell you when the Test Strip is adequately filled with blood or con- trol solution. However, you can operate your Meter discreetly by turn- ing off the alarm. -
Page 49: Supplies
Supplies When calling or writing for supplies be sure to include the number with the name of the replacement part or accessory item. REPLACEMENT PARTS Item Part Number* 40030030 3-volt Lithium Battery (DL or CR2032) – 2 (Available at most Camera Stores) 99M39019 Ascensia E... -
Page 50: Limited Warranty
4. Important: Bayer has no knowledge of the performance of the Ascensia E Blood Glucose Meter when used with any Test Strips other than Ascensia E Test Strips, and therefore makes no war- ranty of the performance of the Ascensia... -
Page 51: Warranty
Warranty (continued) BAYER MAKES NO OTHER EXPRESS WAR- RANTY FOR THIS PRODUCT. THE OPTION OF REPLACEMENT, DESCRIBED ABOVE, IS BAYER’S ONLY OBLIGATION UNDER THIS WARRANTY. IN NO EVENT SHALL BAYER BE LIABLE FOR INDIRECT, SPECIAL OR CONSEQUEN- TIAL DAMAGES, EVEN IF BAYER HAS BEEN ADVISED OF THE POSSIBILITY OF SUCH DAMAGES.
Need help?
Do you have a question about the Ascensia Elite Blood Glucose Meter MODEL Ascensia Elite and is the answer not in the manual?
Questions and answers