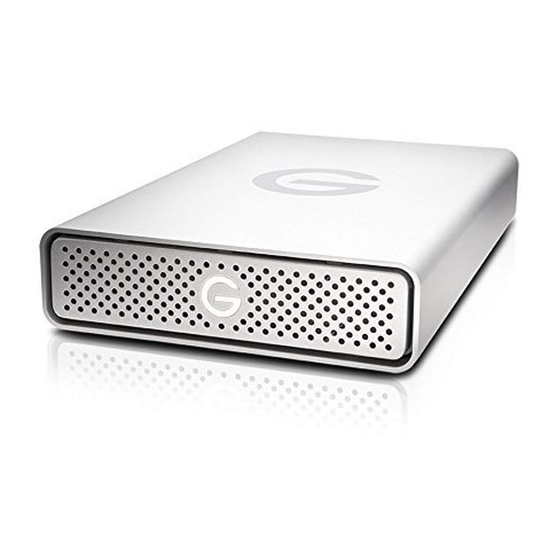
G-Technology G-DRIVE Manual
Hide thumbs
Also See for G-DRIVE:
- User manual ,
- Product manual (35 pages) ,
- Installation manual (13 pages)
Summary of Contents for G-Technology G-DRIVE
-
Page 1: Table Of Contents
Table of Contents Introduction Safety Precautions System Requirements What’s in the Box G-DRIVE Overview Installing G-DRIVE Initializing G-DRIVE Disconnecting G-DRIVE Optimizing Performance Technical Support Limited Warranty... - Page 2 IMPORTANT SAFEGUARDS The lightning ash with arrowhead symbol within an equilateral triangle is intended to CAUTION alert the user to the presence of uninsulated dangerous voltage within the product enclosure and may be of signi cant risk of electrical shock to persons. The exclamation point within an equilateral triangle is intended to alert the user to the RISK OF ELECTRIC SHOCK presence of important operating maintenance (servicing) instructions literature...
-
Page 3: Introduction
G-DRIVE for both Windows and Mac, click here. Safety Precautions The disk drive contained in your G-DRIVE is a delicate electronic instrument and is susceptible to damage due to excessive physical shock. Place the unit in a vented area away from moisture or liquids. -
Page 4: What's In The Box
449-4599. For more details on this, click here. G-DRIVE Overview Note the various features of the G-DRIVE. There is a Power and Activity LED behind the grill on the front of the unit, while a heat sink is beneath it. On the rear of the unit is an eSATA port, 2 FireWire 800 ports, a USB 2.0 port, an On/Off... -
Page 5: Installing G-Drive
Installing G-DRIVE Attention Mac OS X Users G-DRIVE attaches to your computer via an eSATA, USB 2.0 or G-DRIVE is set up at the factory for use with FireWire 800 port. FireWire 400 connectivity is handled by a 9 Mac OS X systems. If you are running Mac OS X, to 6 pin cable (included). -
Page 6: Initializing G-Drive
Utility in order to initialize the disk for Mac OS X. Apple Disk Utility is in 1. Select G-DRIVE by clicking on the drive icon in the left- the Utilities Folder located in the hand column, as shown. Information about G-DRIVE will Applications Folder on the be displayed at the bottom of the window. - Page 7 Format is set to Mac OS Extended (Journaled), as indicated in the Format category. 3. Choose the Format: • Set the format to Mac OS Extended (Journaled) if you intend to use G-DRIVE for Time Machine or to create a...
- Page 8 4. Click the Erase Button in the lower corner of the window. 5. Click on the Erase button to continue. A progress bar in the lower right corner of the window will show you the progress of the disk’s reformatting. You may get a dialog box asking you if you want to use the drive with Time Machine.
- Page 9 If you wish to use the drive for Time Machine, you can click on the Use as Backup Disk button. For more info about setting up 4. Select the G-DRIVE FireWire icon on the Desktop and press the G-DRIVE with Time Machine, go here.
- Page 10 Using G-DRIVE with Time Machine G-DRIVE is a perfect candidate to use with Apple Time Machine. Time Machine provides automatic backup for your crucial les. The following steps will guide you in setting up the G-DRIVE with Time Machine. Format the drive as Mac OS Extended (Journaled) as described in “Reformatting for Mac OS X”...
- Page 11 Reformatting with Multiple Partitions Volume Scheme menu. Here, there are 2 partitions selected. You can reformat the G-DRIVE to have multiple partitions. The following steps will guide you through this process. Open Apple Disk Utility. Disk Utility is in the Utilities Folder located in the Applications Folder on the Macintosh HD (or press Shift + Command + U to open the Utilities folder).
- Page 12 • Choose a Format from the Format Menu (for more info on formats go here). • Type in a Size for the partition • Click the Apply button 6. Click on the Partition button to continue. A progress bar in the lower right corner of the window will show you the progress of the disk’s reformatting.
- Page 13 Windows and Macintosh systems, use Apple Disk Utility and format Select the G-DRIVE from the left-hand column G-DRIVE to MS-DOS (FAT), also known as “FAT32”. Click on the “Erase button at the top of the window as shown.
- Page 14 Select MS-DOS File System from the Format drop down menu. NOTE: You may need to re-name the drive because FAT32 does not support more than 11 letters in the drive name. A new dialog box appears. WARNING: THIS NEXT STEP WILL ERASE ALL DATA ON YOUR DRIVE.
-
Page 15: Disconnecting G-Drive
Optimizing Data Transfer Rates Windows XP/ Vista/ Windows 7 and MAC OS X machines. G-DRIVE can be connected to any Mac or PC equipped with NOTE: You could format your drive on a an eSATA, FireWire 400, FireWire 800 or USB 2.0 port. -
Page 16: Limited Warranty
If you do not have a valid proof of purchase, the limited warranty period will be measured from • Your G-DRIVE serial number (on bottom of unit) the date of sale from Hitachi GST to the authorized •... - Page 17 Inc. Hitachi Global Storage Technologies and Hitachi Inspire the DAMAGES (OTHER THAN BODILY INJURY INCLUDING DEATH Next are trademarks of Hitachi Ltd. G-Technology is a trademark of AND TANGIBLE PERSONAL PROPERTY; 2) LOSS OF, OR Hitachi Global Storage Technologies. All other trademarks are the...
- Page 18 For G-Technology by Hitachi products less than 1TB: “One gigabyte (GB) is equal to one billion bytes when referring to hard drive capacity.


Need help?
Do you have a question about the G-DRIVE and is the answer not in the manual?
Questions and answers