Table of Contents
Advertisement
Quick Links
Download this manual
See also:
Instruction Manual
Advertisement
Table of Contents

Related Manuals for Ikegami IPD-BX110


Summary of Contents for Ikegami IPD-BX110
-
Page 1: Instruction Manual
INSTRUCTION MANUAL Mega-Pixel Network Camera MODEL IPD-BX110 Rev. A OUTDOOR USE WARNING WARNING — TO PREVENT FIRE OR ELECTRIC SHOCK, DO NOT EXPOSE THIS APPLIANCE TO RAIN OR MOISTURE. Ikegami Tsushinki Co., Ltd. - Page 2 Thank you much for choosing this Ikegami high quality TV Camera. Please read this Instruction Manual carefully to keep your Ikegami camera at peak performance for longer service duration. All Ikegami cameras are designed and manufactured with utmost care and craftsmanship to provide long life and high quality performance, if it is properly used and maintained as outlined in this manual.
-
Page 3: Table Of Contents
Contents of IPD-BX110 Instruction Manual Page 1. Introduction ................. 1-1. Handling precautions ............1-2. Disclaimer ................1-3. Protection of personal information ........1-4. Cautions Concerning Network Connections ......1-5. Limitations on Equipment Use ..........1-6. License for third party software .......... - Page 4 The exclamation point within an equilateral triangle is intended to alert the user to the presence of important operating and maintenance (servicing) instructions in the literature accompanying the appliance. NOTE: This equipment has been tested and found to comply with the limits for a Class B digital device, pursuant to Part 15 of the FCC Rules.
-
Page 5: Introduction
1. Introduction 1-1. Handling precautions • Do not install the camera in a water-splashed or highly humid environment. • Do not use the camera where the ambient temperature drops below -10°C or rises above +50°C. The images and component parts may be adversely affected or the camera may not function correctly. -
Page 6: Disclaimer
Accidents or breakdowns due to mistaken usage or negligence. Disassembly or repair of equipment that is not recognized by Ikegami. Improper use by a third party of the surveillance images produced by this equipment, or damages resulting from such use. -
Page 7: Cautions Concerning Network Connections
1-4. Cautions Concerning Network Connections This equipment is connected to a network for use. To protect the system from damage unique to network connections, the customer should act on personal responsibility to carry out security measures. Damage unique to networks includes leaking/outflow of information obtained with this device, damages due to illegal access and system stoppage. -
Page 8: License For Third Party Software
1-6. License for third party software We are licensed to use the software made by third parties for this product. The license for each software shall be applicable to the software in question respectively and not to the whole software of this product. Certain software used in this product and made by third parties are used based on the following licenses: * GNU General Public License Version 2 (GPL) -
Page 9: General
2. General This equipment is a surveillance-use mega-pixel network camera featuring Web server functions for connection to a network. The image compression makes use of the H.264 method to supply high-quality images. Because it is used with PoE, it is possible to connect it to an Ethernet to easily create a surveillance camera network system. - Page 10 (10) Motion Detection Function A motion detection function with Ikegami’s original algorithms and resistant to reaction has been adopted for use outdoors, etc. for reduction in error detection caused by shaking leaves on trees, etc.
-
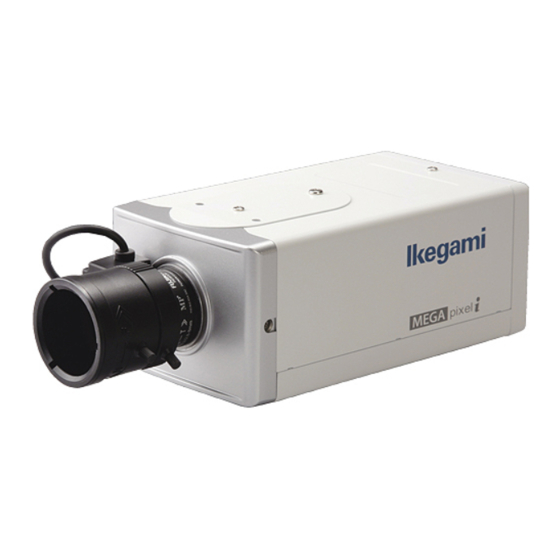
Page 11: Names Of Parts And Their Functions
4. Names of parts and their functions [Front] [Side] Camera mounting screw holes [Rear] [Bottom] (1/4"-20UNC) FOCUS EZ SET UP 10 11... - Page 12 Lens mount (CS mount) This is used to mount the lens on the camera. Many types of CS mount lens can be used. C-mount adapter (optional) allows use of C-mount lens. Camera mount These holes (1/4”-20UNC) are used to install and fix the camera on the camera mounting or bracket.
- Page 13 Ethernet connector (RJ45) To be used with Ethernet 10Base-T/100Base-TX. For connection to other devices, use a cable of category 5 or higher. Used with PoE (IEEE 802.3af) CLASS 0. LINK/ACT LEDs LINK: Green light is lit when connection with other equipment has been established.
-
Page 14: Terminal Block
4-1. Terminal Block These terminals are used as input or output terminals. Only connect after first confirming that no power is being supplied to the equipment. 4-1-1. Terminals REMOTE Name Function Alarm input/output terminal Normally open no-voltage contact input or open collector output. - Page 15 4-1-2. When using as input terminal. (IO1/IO2/REMOTE) ■ Connection example No-voltage connection ■ Operation Operates with function set with input/output setting screen. 4-1-3. When using as output terminal. (IO1/IO2) ■ Connection example Open collector Contact point input with external device. ■...
-
Page 16: Handling Of Lenses
5. Handling of lenses 5-1. Cautions when choosing lenses Operates with CS mount lens. When using a C-mount lens, purchase the separately-sold C-mount adapter. To obtain maximum use of the functions of this equipment, use lenses designed especially for mega-pixel cameras. Choose a lens for which the protrusion of the lens on the camera mount inner side is 6 mm or less. -
Page 17: Setup
6. Setup 6-1. Setup Switches and functions Setup involves making camera settings from the menu display on the screen. Setup is controlled with the push switch on the back of the camera. See Section 6-2 and the following sections regarding menus. FOCUS EZ SET UP Item selection... -
Page 18: Setup 1
6-2. Setup 1 6-2-1. Main Menu 1/3 (Condition on shipment from factory) PAGE Menu page number. Changes in order: 1/3, 2/3, 3/3. DAY/NIGHT AUTO Automatic switching to high quality color images during the day and high-sensitivity black-white images at night. Press the [E] button to display the DAY/NIGHT submenu. - Page 19 SENS UP For settings other than OFF or MANUAL, the Gain automatically goes to AGC. It is also possible to switch to HYP-AGC. There is no function for increasing the electronic sensitivity. The S/N priority mode. Used to take pictures of objects for which the brightness changes and there is little movement.
- Page 20 WHITE BAL. Automatic adjustment (Continued.) Focus on the white object that is the target and press the [E] button. Before adjustment: AWC PUSH is displayed. During adjustment: AWC - - - - is displayed. When adjustment is finished: AWC SET is displayed.
- Page 21 6-2-2. Submenu [DAY/NIGHT] (AUTO) SW LEVEL Possible to set the day/night switching brightness level. The switching level becomes brighter in the order of DARK, MID, BRIGHT. If MANUAL is chosen, it is possible to set the switching brightness. Possible to set the brightness for changing from color to black/ white.
- Page 22 6-2-3. Submenu [DAY/NIGHT] (CONTROL SIGNAL) CONTROL SIGNAL MAKE If the remote terminal is shorted, system goes to black/white image. (Color image with terminal open). BREAK If the remote terminal is open, goes to black/white image (color image with terminal shorting). Select the item with the [L], [R] buttons and then press the [E] button.
- Page 23 6-2-4. Submenu [LIGHT CONTROL] BACKLIGHT CMP. If set to ON or SPOT, the backlight compensation function is operating. The SPOT setting is used to optimize the brightness of the image for the indicated range. See Section 6-2-5 for setting methods. If backlight compensation is functioning, the item BLC (BACKLIGHT CMP.) LEVEL appears in the screen.
- Page 24 Used to adjust the effect of backlight compensation. The effect becomes large in direction H. Adjust according to the purpose. Select the item with the [L], [R] buttons and then press the [E] button. RET Returns to Main Menu (page 1/3). EXIT Save the setting and return to the normal screen.
- Page 25 6-2-5. Submenu [SPOT SET] [Setting order] Use the [U], [D], [L] and [R] buttons to select the setting direction (blinking display). After determining the direction, press the [E] button (inverted blinking display). Use the [U], [D] buttons for adjusting the setting range in an up-down direction and the [L], [R] buttons for adjustment to the left and right.
- Page 26 6-2-6. Submenu [WHITE BALANCE] Carries out adjustment only of red. Carries out adjustment only of blue. Select the item with the [L], [R] buttons and then press the [E] button. RET Returns to Main Menu (page 1/3). EXIT Save the setting and return to the normal screen.
-
Page 27: Setup 2
6-3. Setup 2 6-3-1. Main Menu 2/3 (Condition on shipment from factory) Menu page number. Changes in order: 1/3, 2/3, 3/3. Possible to adjust contrasting density of image color. Color becomes denser in direction H. Possible to adjust amount of image edge enhancement. Image becomes sharper in direction H. -
Page 28: Setup 3
6-4. Setup 3 6-4-1. Main Menu 3/3 (Condition on shipment from factory) Menu page number. Changes in order: 1/3, 2/3, 3/3. Press the [E] button to display the IP ADDRESS submenu. For details, See Section 6-4-2. If set to ON, the camera ID (character display on screen) becomes activated. - Page 29 6-4-2. Submenu [IP ADDRESS] (Condition on shipment from factory) Press the [U]/[D] buttons to select the address. 192. 168. 001. 100 button Moving to ID ADDRESS and SUBNET MASK is also done with the [U]/[D] buttons. The [L]/[R/ buttons are used to change the address value. Press [R] to increase the value.
- Page 30 6-4-3. Submenu [ID EDIT] Characters that can be used. Move with [U][D] buttons. Operation Determine the ID display start position. Use the [L], [R] buttons to move 1 character to the left or right. (Character selection). Use the [U], [D], [L], [R] buttons to select characters and then press the [E] button.
- Page 31 6-4-4. Submenu [PRIVACY MASK] Set mask valid/invalid. Use the [U], [D] buttons to select the mask number for setting and then use the [L], [R] buttons to switch between [ON] (valid) and [OFF] (invalid). [Setting order] Use the [L], [R] buttons to [ON] and press the [E] button to set the mask domain.
- Page 32 Select the item with the [L], [R] buttons and then press the [E] button. RET Returns to Main Menu (page 3/3). EXIT Save the setting and return to the normal screen.
-
Page 33: Focus Ez Function
7. FOCUS EZ function 7-1. Screen Displays FOCUS EZ is a function to support focus adjustment. A focus indicator displayed on the screen can be used to confirm the focus conditions. In case of auto-iris, it is possible to open the lens aperture forcibly for a set time period to carry out focus adjustment without worrying about field of depth even in a bright environment during the day. -
Page 34: Flange Focus
Note There are delays in image distribution with Ethernet. When adjusting the focus, we recommend monitoring with the VIDEO OUT analog image. In the following cases, the focus indicator does not obtain sufficient accuracy. • Movement • Unstable illumination • Even surface such as solid color wall. •... - Page 35 • In the case of a moving object, it is not possible to adjust the flange focus to the desired location. - Try aiming at a still object. - Or try adjusting the flange focus manually. • Operations when it is not possible to adjust the flange focus automatically.
-
Page 36: Troubleshooting
8. Troubleshooting In case of possible malfunction, carry out the following checks according to the symptoms. If the symptoms do not disappear or in case of other symptoms, consult with your dealer. Problem Check Point The image doesn’t Please check the lighting status of the power indicator. show up. -
Page 37: Warranty And After-Sale Service
The Guarantee for this product is attached to this manual. Read the contents carefully and fill in the required items. Keep the Guarantee in a safe place. ● Please consult Ikegami Electronics (U.S.A.) Inc. or Ikegami Electronics (Europe) GmbH or your dealer for full warranty information. Your dealer will repair or replace free of charge within the warranty period according to the warranty coverage. -
Page 38: Specifications
10. Specifications (1) Image Sensor 1/3 type, CMOS sensor Effective pixel count 1329(H) x 1049(V), Approx. 1,400,000 pixels Color filter: RGB method (2) Scanning system Progressive scan (3) Sync system Internal synchronization: Crystal-lock (4) MONITOR OUT VBS 1.0Vp-p/75Ω (Field angle adjustment: NTSC compliant) (5) Minimum object illumination 0.7Lx/F1.4... - Page 39 (17) Lens Flange Back Adjustment With remote adjustment function (18) Privacy masking function Provided (Possible to set in max. 8 locations) (19) Motion detection function Provided (Mask setting possible) (20) Camera ID function Provided (1 line, max. 24 characters) (21) Camera setup Possible Switch operation with menu screen or remote control from client PC.
- Page 40 (36) Input/output connectors • LAN : RJ-45(Auto-MDI/MDIX) • DC12V/AC24V input : 2P push-in terminal • Alarm input/output : 6P push-in terminal • MONITOR OUT : BNC (Field angle adjustment) • LENS : 4P (Applicable connector E4-191J-150 or equivalent) • SD memory card slot : Full size (37) Accessories Installation Procedure, Instruction Manual...
-
Page 41: External Appearance
11. External Appearance FOCUS EZ SET UP... - Page 42 ■ Ikegami Electronics (U.S.A.), Inc. 37 Brook Avenue, Maywood, N.J. 07607, U.S.A. Phone: (201) 368-9171, FAX (201) 569-1626 www.Ikegami.com ■ Ikegami Electronics (U.S.A.), Inc, West Coast Office 2631 Manhattan Beach Blvd., Redondo Beach, C.A. 90278 Phone: (310) 297-1900, FAX (310) 536-9550 www.Ikegami.com ■...
Need help?
Do you have a question about the IPD-BX110 and is the answer not in the manual?
Questions and answers