
Related Manuals for Ikegami IEN-T01


Summary of Contents for Ikegami IEN-T01
- Page 1 INSTRUCTION MANUAL NETWORK CAMERA (APPLICATION INSTRUCTIONS) IPD-Q01 NETWORK ENCODER IEN-T01 Carefully read this manual before use in order to keep these products at full capacity.
-
Page 2: Table Of Contents
Contents INTRODUCTION ........................... 1 Features..........................1 Recommended operating environment ................. 1 Terms ............................. 2 HOOKING UP A PC TO THE NETWORK CAMERA/ENCODER ..........3 ............... 3 ONNECTING A TO THE NETWORK CAMERA ENCODER Setting up a PC........................3 Direct connection using a cross cable ................... 3 Connection using a hub ...................... - Page 3 ..................27 ISTENING TO AND SENDING THE AUDIO ....................28 ONTROLLING STREAMED IMAGES (ZPC)......... 29 PERATING THE CAMERA CONNECTED WITH THE NETWORK ENCODER ZPC CONTROL ........................29 (PCS) ........ 31 PERATING THE CAMERA CONNECTED WITH THE NETWORK ENCODER PCS CONTROL ........................31 PCS FUNCTION ........................
- Page 4 ................74 ISPLAYING THE MODEL RELATED INFORMATION TROUBLESHOOTING........................ 75 GLOSSARY ..........................77 INDEX............................82 SPECIFICATIONS........................84 IPD-Q01 ..................... 84 ETWORK AMERA IEN-T01 ....................86 ETWORK NCODER APPEARANCE VIEW ......................... 88 IPD-Q01 ..................... 88 ETWORK AMERA IEN-T01 ....................89 ETWORK NCODER...
-
Page 5: Introduction
Introduction Features Thank you very much for your wise choice of Ikegami’s IPD-Q01 Network Camera and IEN-T01 Network Encoder. These products have the following features. JPEG2000 format adopted The JPEG2000 image compression format provides for high compression ratio yet quality images. -
Page 6: Terms
Terms In this manual, “left-click” or “click” is used to mean “click the left mouse button”, and “right-click” to mean “click the right mouse button”. Also in this book, “left-drag” or “drag” is employed to mean “hold down the left mouse button and move the mouse”, and “right-drag”... -
Page 7: Hooking Up A Pc To The Network Camera/Encoder
Category 5 or higher. Network camera/encoder Initial settings IP address :192.168.1.100 Subnet mask :255.255.255.0 Ikegami LAN cable Cross cable, Category 5 or higher PC (Windows XP) IP address :192.168.1.*** Subnet mask... -
Page 8: Connection Using A Hub
The network camera/encoder and the PC may also be interconnected through a hub. In such connection, be sure to use a straight LAN cable of Category 5 or higher. Network camera/encoder Initial settings IP address :192.168.1.100 Ikegami Subnet mask :255.255.255.0 PC (Windows XP) IP address :192.168.1.*** Subnet mask :255.255.255.0... -
Page 9: Connecting Via Internet Explorer
Connecting via Internet Explorer Enter the of the network camera/encoder in the Internet Explorer address bar. The initial setting is “http://192.168.1.100/”. A pop-up window opens and you are asked for the user name and password. Enter the administrator’s operator’s user name and password, and click on . The initial settings are “admin”... -
Page 10: Installing The Imaging Activex
Installing the Imaging ActiveX When connecting the network camera/encoder for the first time, no images appear onscreen because the Imaging ActiveX is not installed in the PC. The screen below refers to Windows XP Service Pack 2. A different screen appears with Windows XP Service Pack 1 or earlier. -
Page 11: Basic Settings
Basic settings Before setting up the network camera/encoder, make basic settings. To modify the network camera/encoder settings, it is necessary to start the system with the administrator’s user name and password. The initial settings are “admin” for the administrator’s user name and “1” for the password. For modifying these settings, first select “SETTING”... - Page 12 ① Setting menu Used to select a setting item. Setting the network (page 12) Changing the administrator’s registered information (page 14) Registerning operators (page 15) Registerning a recorder (page 53) Changing the mail settings (page 43) Registerning destinations (page 44) Changing the alarm settings (page 36) Setting the motion detection function...
-
Page 13: Setting Flow
Setting flow Click an item to modify on the setting menu. The setting page shows up at the right side of the screen. Modify the setting as required and click on . To go back to the page opening status, click on The confirmation dialog box appears. - Page 14 The setting result appears. When the “Setting succeeded." message appears, the new setting has been successfully saved for the network camera/encoder. “Motion detection setting” (page38) and “Privacy mask setting” (page 55) will be reflected without clicking on . When the network camera/encoder is rebooted, however, their settings will be back to previous ones.
-
Page 15: Displaying The Tips
Displaying the tips With the help function, entry-range values and their tips can be displayed onscreen. To enable the help function, check the HELP “ON” radio button at the top-right corner of the page. Move the mouse cursor onto an entry box or above an item of the setting area, and the entry’s tip is displayed. -
Page 16: Setting The Network
Setting the network To connect the network camera/encoder to an LAN and Internet, the network settings must be made. Make these settings on the IPv4 setting page. Click on on the setting menu. ① Use DHCP Manual: Used to allocate the IP address specified in ③. Auto: Used for the DHCP server to automatically allocate the IP address. -
Page 17: Setting The Clock
⑥ MTU (Maximum Transmission Unit) Enter the setting. The entry should be between 576 and 1500. Its initial setting is “1454”. ⑦ DNS Server Enter the server IP address. There is no need to specify an alternate DNS server. The initial priority DNS server setting is “192.168.1.1”. But no alternate DNS server is preset. -
Page 18: Hanging The Administrators Registered Information
Changing the administrator’s registered information When the network camera/encoder gets started with the administrator’s user name and password, the settings can be modified. The initial settings are “admin” for the administrator’s user name and “1” for the password. With the network camera/encoder in place, it is advisable to modify these entries and to prevent any unauthorized persons from changing the system settings. -
Page 19: Registering Operators
Registering operators Authorized operators can monitor images and operate the camera. They are not authorized, however, to modify the settings and maintain the system. For modifications and maintenance, the system must get started with the administrator’s user name and password. For usual monitoring, preferably boot the system with the operator’s user name and password. -
Page 20: Changing The Camera Settings
Changing the camera settings The camera setting items are different between the camera and the encoder. For the network camera ① Streaming Setting Enter the title to display in monitoring images with the web browser. Up to 16 one-byte or up to 8 two-byte characters can be entered, but [ “ ] cannot be used. ②... -
Page 21: For The Network Encoder
② Camera Type Setting Set the type of camera that is connected with the encoder. When the fixed camera is connected. When Ikegami’s ZPC series zoom/pan/tilt controller is connected. When Ikegami’s PCS series combination camera is connected. ③ ID Set the camera’s ID code. Enter the ID code of the camera being connected. -
Page 22: Placing The Network Camera/Encoder
Here is an example to connect the network camera/encoder and the PC in the same network. Make the IP address and subnet mask settings as specified. Network camera/encoder IP address :172.16.0.111 Subnet mask :255.255.0.0 Ikegami IP address :172.16.0.5 Subnet mask :255.255.0.0... -
Page 23: Locating In Different Networks
Make the IP address, subnet mask and gateway settings as specified. Network camera/encoder IP address :172.16.0.111 Subnet mask :255.255.0.0 Gateway :172.16.0.1 Ikegami LAN 1 Router/L3 switch IP address 1 :172.16.0.1 Subnet mask 1 :255.255.0.0 LAN 2 IP address 2 :172.30.0.1... -
Page 24: Connecting Via Internet
Connecting via Internet Here are examples to locate the network camera/encoder in a remote place via Internet. If a proxy is added, images cannot be displayed. Set up a router so that the network camera/encoder is accessed without proxy. Also make the Internet Explorer settings without proxy in between. - Page 25 IP address :172.16.0.111 Subnet mask :255.255.0.0 Gateway :172.16.0.1 HTTP port :80 HTTPS port :443 Ikegami LAN side WAN side IP address :172.16.0.1 Router Port forwarding settings port 80 →Port 80 of 172.16.0.111 port 443 →Port 443 of 172.16.0.111 Fixed IP address IP address :...
-
Page 26: Allocating A Global Ip Address To The Network Camera/Encoder
Reconfigure the firewall so that the PC can be directly connected to the network camera/encoder. Network camera/encoder IP address :192.0.2.100 Subnet mask :255.255.0.0 Gateway :192.0.2.61 Ikegami HTTP port :80 Router Permit HTTP/HTTPS connection to Router 192.0.2.100 from outside. LAN side IP address :192.0.2.61... -
Page 27: Monitoring
Monitoring When the PC is hooked up with the network camera/encoder, the monitor screen shows up first. Screen display ① ② ④ ③ ① Mode selection With the system started with the administrator’s user name and password, the “MONITOR”, “SETTING” or “MAINTENANCE” mode can be selected on the drop-down list. - Page 28 ② Menu selection Select the menu ③. The menu is different depending on the type of camera being connected. With the network camera, network encoder and fixed camera in place, the system is fixed at “DELIVERY CONTROL”. With the network encoder and ZPC in place, the “DELIVERY CONTROL”...
-
Page 29: Viewing Images
Viewing images Screen Streaming title displayed Clock appearing during recording Status message displayed There are the following 5 status messages. ① Pre-Alarm Appears while the pre-alarm recording is in progress.. ② Alarm Data Exists Appears when an alarm image is recorded in the network camera/encoder’s built-in memory. -
Page 30: Right-Click Menu
Right-click menu Right-click within the image, and the menu shows up. ① Zoom Used to enlarge the image. The magnification can be chosen from x1, x2, x4. The image is just enlarged at the same resolution, which may make the image look rough. It may take some time to get the enlarged image displayed, depending on the PC performance. -
Page 31: Listening To And Sending The Audio
(“Recording streamed images on the PC” (page 46)). ⑦ Home Position When Ikegami’s PCS series combination camera is hooked up with the encoder, the shift takes place to a registered home position. Listening to and sending the audio In delivering/sending the audio, use the icons located below the image. To listen to the... -
Page 32: Controlling Streamed Images
Controlling streamed images Using the DELIVERY CONTROL menu at the bottom left of the screen, streamed images can be controlled. This menu is partially different between the administrator startup and the operator startup. DELIVERY CONTROL menu (administrator) DELIVERY CONTROL menu (operator) ①... -
Page 33: Operating The Camera Connected With The Network Encoder (Zpc)
Current images are stored onto the PC as still ones. The images are saved in the format. Operating the camera connected with the network encoder (ZPC) When Ikegami’s ZPC series zoom/pan/tilt controller is hooked up with the encoder, “camera menu” shows up in the menu select area on the monitor screen. - Page 34 ② AUTOPAN Click on “ON”, and the camera starts panning. Click on “OFF” to stop it. ③ WIPER Used to move the wiper of the camera housing. ④ ZOOM Used to put the lens in the telephoto and wide-angle mode. The action continues while the button is held down.
-
Page 35: Operating The Camera Connected With The Network Encoder (Pcs)
Operating the camera connected with the network encoder (PCS) When Ikegami’s PCS series combination camera is hooked up with the encoder, “camera menu” shows up in the menu select area on the monitor screen. “PCS CONTROL”, “PCS FUNCTION” and “PRESET” are added in the drop-down list. -
Page 36: Pcs Function
④ ZOOM Used to put the lens in the telephoto and wide-angle mode. The action continues while the button is held down. ⑤ FOCUS Used to adjust the lens focus. The action continues while the “FAR” or “NEAR” button is held down. - Page 37 ② WHITE BALANCE Used to select a white balance adjustment method. AUTO/AUTO 1 The white balance is automatically adjusted by following a subject’s color temperature fluctuations. Select this for usual light sources. AUTO/AUTO 2 The white balance is automatically adjusted by following a subject’s color temperature fluctuations.
-
Page 38: Preset
PRESET With the PCS series camera, the preset positions can be put in memory. Up to 16 positions may be saved through the encoder. ① Entry/Delete Used to register or delete a selected, numbered preset position when clicked on. ② NO. Used to select a preset position number from 1 thru 16. -
Page 39: Operating The Camera Connected With The Network Encoder (Zpc, Pcs)
Operating the camera connected with the network encoder (ZPC, PCS) When the ZPC series controller or PCS series camera is hooked up with the encoder, the mouse can be clicked in the image area to operate the camera. Move the mouse cursor in the image area, and the cursor changes to . -
Page 40: Using The Alarm Function
Using the alarm function This network camera/encoder system can put in its built-in memory images that have been shot for several seconds each before and after the alarm. An alarm can also be e-mailed to the PC or cellphone. Two alarm settings are available: external alarm coming in via the alarm terminal and motion alarm by Motion detection function... -
Page 41: Recording Alarm Images In Network Camera / Encoder
⑤ Picture Protection Used to enable or disable the overwrite by new alarm images over previous ones if the network camera/encoder’s built-in alarm image storage space gets full. When the alarm image overwrite is disabled and the built-in memory is full, no more alarm images can be recorded. -
Page 42: Setting The Motion Detection Function
The number of alarm records depends on the “pre-alarm time” and “post-alarm time” settings. This is calculated in the following equation. Number of alarm records = Recording time ÷ (Pre-alarm time + Post-alarm time) Let’s suppose that the frame rate of an NTSC system video signal is 5 fps and that the pre-alarm time and post-alarm time are 1 and 2 seconds, respectively. - Page 43 ① Video Left-drag the mouse in the image, and the masking range and minimum detection size can be set. ② Use Motion Detection Used to turn on and off the motion detection function. To use the motion detection function, turn on the alarm function (page 36) too.
-
Page 44: Mask Setting
Mask setting Select "Mask” in the display, left-click and left-drag within the image, and the covered area is displayed in blue. Any motions in such area will not be detected. Left-drag. Masking area No reaction to motions within this area. To cancel the masking, right-click and right-drag over the masked area. -
Page 45: Minimum Size Setting
Minimum size setting Select “Minimum Size” in the display, left-click and left-drag within the image, and a minimum motion detection size will be set. Set this size so that a human subject, for example, in the monitoring area looks two-thirds smaller than usual vertically and horizontally. -
Page 46: Checking The Motion Detection Alarm
Checking the motion detection alarm When both the alarm and motion detection functions are enabled, motion detection alarms can be checked on the monitor screen. Motion detection frame (Alarm) “Alarm Data Exists” displayed when an alarm image has been recorded Motion detection frame When a motion is detected, a frame is displayed around the moving subject. -
Page 47: E-Mailing Alarms
E-mailing alarms An alarm can be notified via e-mail. Internet Ikegami Alarm Changing the mail settings Make basic e-mail settings. Click on “Mail” in the setting menu. ① Use Mail Used to enable or disable the e-mailing if an alarm occurs. -
Page 48: Registering Destinations
③ SMTP Server : Enter the IP address or host name of SMTP server. Port number : Enter the server’s SMTP service port number. ④ Use Authentication Select an authentication format to send e-mails. : No authentication POP before SMTP : POP before SMTP authentication SMTP-Auth... -
Page 49: Recording/Replaying
Recording/replaying Alarm images that are recorded in the network camera/encoder’s built-in memory, as well as streamed images, can be recorded on the PC. There are the following two ways to record images. Downloading alarm images, which are recorded in the network camera/encoder’s built-in memory, on the PC. -
Page 50: Recording Streamed Images On The Pc
Recording streamed images on the PC In addition to the downloading of alarm images recorded in the network camera/encoder’s built-in memory, browser-streamed images can also be recorded on the PC. In this case, the resolution, picture quality and frame rate of recorded images are the same as those of images streamed to the PC. -
Page 51: If An Alarm Occurs, Streamed Images Are Automatically Recorded On The Pc
Without limit, a new “Date¥Time” folder is created every 10 minutes under “Desktop¥Monitoring¥Streamingtitle¥Record¥” Images are recorded in such folders. If there is no streaming title, a new “Date¥Time” folder is created under: “Desktop¥Monitoring¥Record¥” Images are recorded in this folder. If an alarm occurs, streamed images are automatically recorded on the PC. If an alarm occurs during streaming, the alarm images (refer to “Recording alarm Images in network camera/encoder’s built-in... -
Page 52: Snapping Photos
Snapping photos Click on at the bottom of the DELIVERY CONTROL menu, and the image at the very moment will be stored in the format. Browser-streamed images are stored as they are. The image is stored in “Desktop¥Monitoring¥Streamingtitle” If there is no streaming title, the image is stored in “Desktop¥Monitoring”... -
Page 53: Replaying
Replaying Alarm images downloaded from the network camera/encoder and streamed images recorded on the PC can be replayed. Resolution/picture quality/frame rate in replay The resolution, picture quality and frame rate of replayed images are as follows. Alarm images downloaded from the network camera/encoder Resolution : 1/1 Picture quality... -
Page 54: Replaying Procedure
Replaying procedure In the “Date” folder, there are JPEG2000 files (“~.jp2” files) and HTML files (“~.html” files). Be careful not to delete these files because otherwise their images would not be replayed. The “Date” folder can be relocated. To replay a recorded image, open the HTML file on Internet Explorer. A yellow bar may be displayed with the following message at the top of Internet Explorer screen. - Page 55 If the security warning dialog box appears, click on The replay screen shows up. Click on to get replaying started.
-
Page 56: Manipulating The Replay Screen
Manipulating the replay screen ② ① ① Control buttons There are the following buttons from left. : Pause : Rew (The speed changes 2, 5, 10 and back to 2 times at each click.) : Reverse : Stop : Play : FF (The speed changes 2, 5, 10 and back to 2 times at each click.) ②... -
Page 57: Other Settings
Other settings Registering a recorder To record the images from the network camera/encoder onto the network recorder, enter the login name and password of the recorder. ① Login Name Enter the recorder’s login name. Up to 16 one-byte alphanumeric characters can be entered, but [ “... -
Page 58: Adjusting A Time Lag Automatically
Adjusting a time lag automatically Using the function, a time lag can be automatically adjusted. Click on “NTP” in the setting menu. ① Use NTP Select the ON radio button. The time is automatically adjusted with NTP. ② Adjustment Time Enter the time to apply to the NTP server. -
Page 59: Masking Part Of An Image
Masking part of an image The privacy mask function serves to cover part of streamed images mosaic-like. This function works with the alarm images (page 36) and images recorded on the PC (page 46). With the function in use, therefore, these images are replayed (page 49) with their specified part masked. - Page 60 Black Masking area daubed in black Gray Masking area daubed in gray White Masking area daubed in white If the screen top or bottom is masked in white, the streaming title or time may be covered invisibly.
-
Page 61: Setting A Masking Area
Setting a masking area Left-click and left-drag within the image, and the covered area is displayed in green. To cancel the masking, right-click and right-drag over the masked area. The area displayed in green will be back to the original state. Left-drag... -
Page 62: Changing The Video Scanning System
Changing the video scanning system The video scanning system can be modified on the system setting page. Click on “System” in the setting menu. Frame Interlace-system frame images (1 frame image = 2 field images) are compressed in the JPEG2000 format. This upgrades the vertical resolution higher than by selecting “field”. -
Page 63: Changing The Serial Communication Settings (Network Encoder Only)
Changing the serial communication settings (network encoder only) RS-232C RS-485 serial communication settings can be modified. Click on “Communication” in the setting menu. The communication settings may be modified with the network encoder only. ① Baud Rate Select the communication speed (bits per second) for the encoder. ②... -
Page 64: Maintenance
Maintenance To maintain the network camera/encoder, it is start the system with the administrator’s user name and password. The initial settings are “admin” for the administrator’s user name and “1” for the password. To do the maintenance, first select “MAINTENANCE” in the mode box. The maintenance menu and the title page show up. -
Page 65: Displaying And Storing The Logs
Displaying and storing the logs The network camera/encoder’s logs can be displayed over browser or stored on a PC file. The logs are used for maintenance at your dealer or the manufacturer’s workshop. Click on “Log” in the maintenance menu. Displaying the logs over browser Select the type of a log from the drop-down list at the top of the page. -
Page 66: Storing The Logs To The Pc
Storing the logs to the PC A selected log can be stored on a PC file. Select the type of a log from the drop-down list at the top of the page. Click on The confirmation dialog box shows up. Click on If the “File Download”... -
Page 67: Displaying The Logs Stored Pc
When the file is stored, the “Download complete” dialog box appears. Displaying the logs stored PC The log is written on the file in the format. When the Windows machine has a CSV-formatted file handling application software (Microsoft Excel, OepnOffice.org, etc.) installed, the stored file can be opened by double-clicking. -
Page 68: Storing The Settings To The Pc
Storing the settings to the PC The information of network camera/encoder settings can be stored to the PC. This is helpful when the same or similar settings are made for the other network cameras/encoders or when the settings must be backed up. Before upgrading the firmware, for example, preferably back up those settings. -
Page 69: Restoring The Settings From The Backup
When the file is stored, the “Download complete” dialog box appears. Click on to end the procedure. The saved file is dedicated for the network camera/encoder. The file does not open on the PC even if is clicked on. Restoring the settings from the backup The settings data stored in the PC can be sent to the network camera/encoder for the settings to get restored. - Page 70 Select the settings data file to be sent and click on . The file name appears in the entry box. Click on at the bottom of the page, and the confirmation dialog box appears. Click on . The screen changes and the message “Setting data sending. Please wait for a moment.”...
-
Page 71: Initializing The Data
Initializing the data The settings and other data can be returned to their factory ones, and the log data can be deleted. First select the data to initialize from the drop-down list. There are the following 3 types of initialization. Initialize all data (Factory default): Settings initialized and logs deleted. -
Page 72: Upgrading The Firmware
(page 64). If the system still fails to run, contact your local dealer. Downloading the latest firmware First visit Ikegami’s website and download the latest firmware. With the web browser, type <http://www.ikegami.co.jp/en/products/security/index.html> Download the latest firmware of your model number. -
Page 73: Upgrading Flow
Upgrading flow When the latest firmware has been downloaded, click on “Update” in the maintenance menu to make the upgrading screen appear. Click on , and the file select dialog box appears. Select the downloaded firmware and click on The firmware location appears in the entry box. Click on The conformation dialog box appears. - Page 74 The screen changes and the upgrading progress is displayed. The upgrading process goes on automatically. It takes some time. Do not handle the web browser, but just wait. If the web browser is handled or closed, the upgrading may fail. When the firmware has been sent out, it will be written into the network camera/encoder memory.
-
Page 75: If The System Gets In Trouble
With the network camera/encoder restarted with the new firmware, the message “Update succeeded” appears. On the Information screen, make sure the new firmware functions. If the system gets in trouble If the upgrading fails and your system does not work, you are kindly requested to take the following procedure. -
Page 76: Rebooting
Rebooting The network camera/encoder can get rebooted. Click on , and the confirmation dialog box appears. Click on The screen changes and the “Now rebooting. Please close the browser, and reconnect.” message appears. It takes several to 10-odd seconds to get rebooted. Close the browser once and open it again. -
Page 77: Displaying The Current Status
Displaying the current status The current status of the network camera/encoder can be displayed. Click on “Status” in the maintenance menu. ① Operating Time The current status of the network camera/encoder can be displayed. Click on “status” in the maintenance menu. ②... -
Page 78: Displaying The Model-Related Information
Displaying the model-related information The network camera/encoder model number, firmware version, address, etc. can be displayed. Click on “Information” in the maintenance menu. ① Model Name Shows the model number. ② IPSec This stands for Security Architecture for Internet Protocol, implying the equipment’s internal information. -
Page 79: Troubleshooting
Troubleshooting Failure to connect over browser Possible cause Correction No power supplied Turn on the power. Connect the network cable to the PoE-compatible hub in the case of PoE power supply. Network cable Reconnect the network cable. disconnected Network camera/encoder’s Make correct network settings, referring to “Setting the network settings incorrect... - Page 80 “PCS control” or “ZPC control” not selectable (no indication) Possible cause Correction Network camera in use “PCS control” or “ZPC control” works only when Ikegami’s ZPC series zoom/pan/tilt controller or Ikegami’s PCS series combination camera is connected with the network encoder Fixed camera connected and when the connected camera is set for “ZPC”...
-
Page 81: Glossary
Glossary ActiveX Microsoft Corporation’s technology to reconfigure software into components and to get them embedded in other programs. In this manual, ActiveX means the software component that serves to display images from the network camera/encoder. AES (Automatic Electronic Shutter) The electronic shutter function of solid-state image pickup device automatically controls the device output level according to the incident light amount. - Page 82 DHCP (Dynamic Host Configuration Protocol) A technology to dynamically allocate IP addresses and other setting information to computers. DirectX Microsoft Windows’ multimedia processing software component. To reproduce the audio of the network camera/encoder, this software component must be installed. DNS (Domain Name System) A system to correspond an IP address to a computer’s host name.
- Page 83 HTTPS (Hyper Text Transfer Protocol Security) A protocol for HTTP communications through encryption. Interlace A system to display an image by scanning for every second line. IP address An identifier allocated to identify a device on a TCP/IP network. JPEG2000 An image compression format.
- Page 84 A serial transmission interface. RS-485 A serial transmission interface. This network encoder is equipped with an RS-485 interface for communications with Ikegami’s I-LAN equipment. Server A software that provides services on a network. A computer with a server software in action is also called a server.
- Page 85 SMTP-Auth (SMTP Authentication) A user certification mechanism in which a sender is certified in sending an e-mail via SMTP. Unlike POP before SMTP, direct certification is made between an e-mailer and e-mail server (SMTP server). SSL (Secure Sockets Layer) A cryptographic protocol for communications via TCP and UDP. SSL 2.0, SSL 3.0 and its successor TLS (Transport Layer Security) 1.0 are currently available.
-
Page 86: Index
Index A F ACTIVE TIME (PCS) Field ACTIVE TIME (ZPC) Firmware ActiveX Firmware Version Flicker Less (Network camera) ActiveX Version Administrator Registration FLICKERLESS (PCS) FOCUS (PCS) FOCUS (ZPC) ALARM DATA DELIVERY FPGA Version FRAME RATE Alarm image Alarm Setting G Audio Delivery Gateway Auto Alarm Record... - Page 87 Manual Record Time Recording time Mask setting Registering operators Minimum size setting Replaying Model Name RESOLUTION MONITOR RS-232C Monitoring RS-485 Motion detection frame S Send Mail Setting Motion Detection Setting Serial Number Setting a masking area N Notice Signal Type NTP Server SMTP NTP Setting...
-
Page 88: Specifications
Specifications Network Camera IPD-Q01 (1) Pickup device: 1/3-inch IT-CCD Effective pixels NTSC : 768(H) x 494(V), approx. 380,000 pixels PAL : 752(H) x 582(V), approx. 440,000 pixels Color filter Color difference line sequential system (2) Scanning system: 2:1 interlaced NTSC system / PAL system (3) Vertical frequency: NTSC: 59.94 Hz / PAL: 50 Hz (4) Horizontal frequency:... - Page 89 (20) Image compression format: JPEG2000 (21) Image quality: 5 levels (22) Frame rate: NTSC: Max. 30 fps / PAL: Max. 25 fps Frame rate control: 7 levels (23) Audio: ADPCM interactive Microphone input : -60 dBV, 1kΩ unbalanced (plug-in power type) Line output : -10 dBV, 600Ω...
-
Page 90: Network Encoder Ien-T01
Network Encoder IEN-T01 (1) Video input: Composite 1.0 Vp-p/75Ω unbalanced With automatic terminating loop through NSTC: RS-170A-compliant (color) or RS-170-compliant B/W) PAL: PAL-B-compliant (color) or CCIR-compliant B/W) (2) Pixel size: NTSC: 720x480, 720x240 360x240(120), 180x120(60) with scalable delivery function PAL: 720x576, 720x288... - Page 91 (19) Outer dimensions: 88(W) x 44(H) x 159(D) mm (projections and accessories not included) (20) Weight: Approx. 570 g (21) Input/output connectors: * Ethernet: RJ-45 * VIDEO IN : BNC (automatic termination) * VIDEO OUT : BNC (loop through) * AUDIO IN : Pin jack * AUDIO OUT : Pin jack * AC24V/DC12V : 2P push-in terminal (common for AC/DC) * DC12V : AC adaptor jack...
-
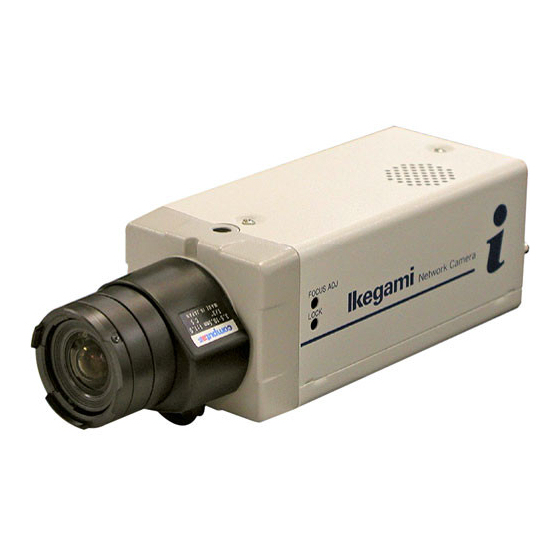
Page 92: Appearance View
Appearance view Network Camera IPD-Q01... -
Page 93: Network Encoder Ien-T01
Network Encoder IEN-T01... - Page 94 37 Brook Avenue, Maywood, New Jersey 07607, U.S.A. Phone: (201) 368-9171, FAX 201-569-1626 Ikegami Electronics (Europe) GmbH Ikegami Strasse 1, 41460 Neuss 1, F.R. Germany TEL. 02131-123-0/FAX 02131-102820 Ikegami Electronics (Europe) GmbH U.K. Branch Unit E1 Cologne Court Brooklands Close, Windmill Road Sunbury-on-Thames Middlesex TW16 7EB, UK TEL.
Need help?
Do you have a question about the IEN-T01 and is the answer not in the manual?
Questions and answers