Oce ColorWave 300 User Manual
Wide format all-in-one
Hide thumbs
Also See for ColorWave 300:
- User manual (376 pages) ,
- User manual (24 pages) ,
- User manual (356 pages)
Table of Contents
Advertisement
Advertisement
Table of Contents

Subscribe to Our Youtube Channel
Related Manuals for Oce ColorWave 300


Summary of Contents for Oce ColorWave 300
- Page 1 Océ ® ColorWave Jump to One User manual Operating information...
- Page 2 Océ-Technologies B.V. © 2011 Océ. All rights reserved. No part of this work may be reproduced, copied, adapted, or transmitted in any form or by any means without written permission from Océ. Océ makes no representation or warranties with respect to the contents hereof and specifi- cally disclaims any implied warranties of merchantability or fitness for any particular purpose.
- Page 3 Trademarks Trademarks ® Océ, Océ ColorWave 300 and the Océ Express WebTools are registered trademarks of Océ-Technologies B.V. ® ® ® Adobe and PostScript 3™ are registered trademarks of Adobe Systems Incorporated. ® ® Macintosh is a registered trademark of Apple Computer, Inc.
-
Page 4: Table Of Contents
How to use this manual................18 The Océ ColorWave 300 key concepts...........21 User interaction..................23 Chapter 2 Get to know the Océ ColorWave 300 multifunction printer......25 The main components................26 The Océ ColorWave 300 system.............27 Working area [Footprint].................28 The Océ ColorWave 300 hardware and consumables......30... - Page 5 Contents Scan a color CAD drawing to PDF format........71 Scan a CAD drawing to b/w TIFF format..........73 Scan to a USB mass storage device..........75 Switch off the printing system............77 Chapter 4 Define your workflow with the Océ Express WebTools.......79 Introduction....................80 The Océ...
- Page 6 Use Smart Inboxes in a repro environment........149 Open or create a Smart Inbox............150 Delete a Smart Inbox................151 Chapter 5 Use the Océ ColorWave 300 multifunction printer........153 Pause, resume or delete an active job ..........154 The job states..................157 Clear the system..................159 Basic scan jobs..................160...
- Page 7 Contents Make a copy and add a strip............202 Make a copy and erase a margin............204 Make a copy of a specific area of an original.........206 Make a copy and erase a specific area of an original....208 Send print jobs..................210 What you need to know before you send your print jobs....210 Use Océ...
- Page 8 Contents Use the 'Print quality' wizard............272 Chapter 7 Maintain the Océ ColorWave 300 multifunction printer......275 Replace the media..................276 Replace / Install the media...............276 Ink......................281 Replace the ink tanks................281 Replace a defective printhead............284 Replace the maintenance cassette..........290 Refill the ink tube................293 Remote consumables reading ............297...
- Page 9 Check or adapt the network settings............340 Check or adapt the security settings.............342 Appendix A Specifications of the Océ ColorWave 300.............345 Specifications Océ ColorWave 300 printer ..........346 Specifications Océ Scanner Express............349 Specifications Océ PowerM controller..........351 Specifications drivers and job submission software......353 Preferred Océ...
- Page 10 Contents...
-
Page 11: Chapter 1 Introduction
Chapter 1 Introduction... -
Page 12: Notes For The Reader
Notes for the reader Notes for the reader Introduction This manual helps you to use the Océ ColorWave 300. The manual contains a description of the product and guidelines to use and operate the Océ ColorWave 300. Definition Attention Getters Parts of this manual require your special attention. - Page 13 Notes for the reader Word Icon Indicates Caution Moving parts Caution Laser beam The use of heat-resistant gloves is mandatory when you carry out the actions concerned. Safety information The safety information for this product is included in a separate manual with the title Safety information.
-
Page 14: Online Support For Your Product
A Knowledge Base (OKB) with answers to your questions or problems is continuously being updated. To find an answer to your question or problem, please visit: http://global.oce.com/support and select your product. In the Support section, use the search field to enter your question. You will get a list of possible answers. - Page 15 Online support for your product Addresses of local Océ organizations For the addresses of local Océ organizations, visit: http://global.oce.com/contact/countries Comments Send your comments by e-mail to: itc-userdoc@oce.com Chapter 1 - Introduction...
-
Page 16: Available Documentation
Wide-Format Printing Systems - • On www.oce.com Connectivity Manual Available as a PDF file in English only. Note: Visit Océ on the internet at www.oce.com for the latest information. Available documentation Océ Express WebTools Documentation Availability User manual - Operating information •... - Page 17 Available as a PDF file in multiple lan- guages. On-line Help • Embedded in the application Available in multiple languages. Note: Visit Océ on the internet at www.oce.com for the latest information. ® Available documentation Océ PostScript 3 Driver Documentation Availability Installation manual •...
-
Page 18: How To Use This Manual
Topics Introduction • Overview of available documentation. • Explanation regarding the manual and how to use it. • The Océ ColorWave 300 key con- cepts. • User interaction. • Get to know the Océ Color- The main components. • Wave 300 Footprint. - Page 19 Check and adapt network settings. tings • Check and adapt security settings. Appendix Specifications of the Océ • System specifications. ColorWave 300 • Specifications drivers and job submis- sion software. • Preferred Océ media types and sizes. Appendix General information Reader's comment sheet.
- Page 20 How to use this manual Chapter Section Topics Appendix General information Addresses of local Océ organizations. Chapter 1 - Introduction...
-
Page 21: The Océ Colorwave 300 Key Concepts
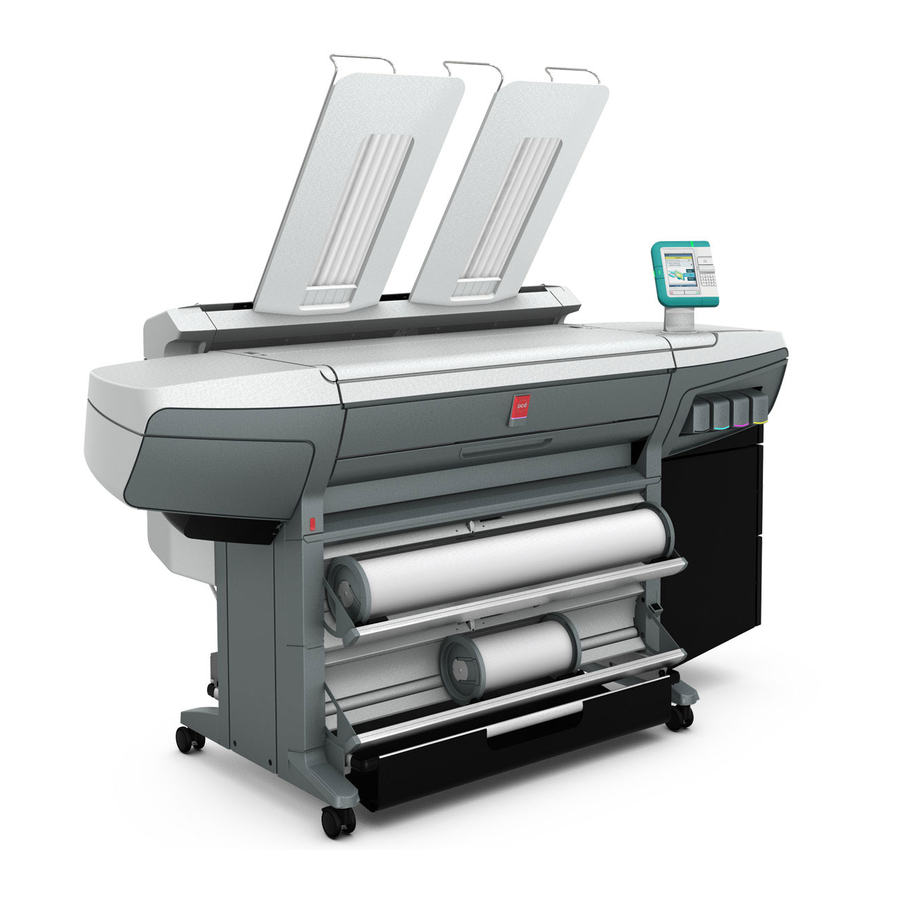
Océ ColorWave 300 system configuration The Océ ColorWave 300 system is available in a number of configurations. The Océ ColorWave 300 multifunction printer is a printer combined with an Océ scanner Express, top delivery tray and a lower receiving tray. - Page 22 4 scan templates, stamps, system preferences and network connectivity settings. Print jobs A print job is a job sent to the Océ ColorWave 300 printer from a user application (print job). A print job can consist of several sets, which in turn may consist of several pages.
-
Page 23: User Interaction
The user can communicate with the Océ ColorWave 300 from local locations and remote locations. User panel The Océ ColorWave 300 offers a user panel that allows you to do the following. • Maintain the system. Examples: monitor the queue, monitor the system status, print a demo print, cancel a job. - Page 24 User interaction Chapter 1 - Introduction...
-
Page 25: Get To Know The Océ Colorwave 300 Multifunction Printer
Chapter 2 Get to know the Océ Col- orWave 300 multifunction printer... -
Page 26: The Main Components
The purposes of the Océ Express WebTools are the following. • Settings and configuration management • Queue management • License management • System monitoring • Scan retrieval • Print job submission Chapter 2 - Get to know the Océ ColorWave 300 multifunction printer... -
Page 27: The Océ Colorwave 300 System
Introduction The Océ ColorWave 300 is a multifunction printer. The Océ ColorWave 300 offers a wide range of print functionalities. The Océ ColorWave 300 uses the CMYK color model. The printer contains printheads for cyan, magenta, yellow, and black (CMYK) and is based on thermal inkjet technology. -
Page 28: Working Area [Footprint]
Working area [Footprint] Working area [Footprint] 'Océ ColorWave 300 multifunction Express' without top delivery tray The 'Océ ColorWave 300 multifunction Express' requires a floor space of 2242 mm x 986 mm ( 88.2 inch x 38.8 inch). 1978mm / 77.8”... - Page 29 Working area [Footprint] 1978mm / 77.8” 264mm / 10.4” 2242mm / 88.2” [12] Footprint Océ ColorWave 300 multifunction Express with top delivery tray Chapter 2 - Get to know the Océ ColorWave 300 multifunction printer...
-
Page 30: The Océ Colorwave 300 Hardware And Consumables
(1) Provide the media for your printed output. lower front door Door to access the media path. upper front cover Cover. front top cover Cover. Chapter 2 - Get to know the Océ ColorWave 300 multifunction printer... - Page 31 Receive the output. foot cover Cover of the foot. wheel Swivel wheel with brakes. Chapter 2 - Get to know the Océ ColorWave 300 multifunction printer...
-
Page 32: The Components Of The Printer (Right Hand Side)
The main components of the printer (right hand side) Number Component Function maintenance door Door to get access to the mainte- nance cassette. maintenance cassette Device used for the maintenance of the printhead(s). Chapter 2 - Get to know the Océ ColorWave 300 multifunction printer... -
Page 33: The Components Of The Printer (Back)
/ folder. power switch Switch of the mains supply. wheel Swivel wheel with brakes. connector for the TDT Electrical connector for the top delivery tray. Chapter 2 - Get to know the Océ ColorWave 300 multifunction printer... -
Page 34: The Components Of The Scanner
Sensors to detect the original. transparent contact plates Cover of the image sensors. original feeding table Use this table if you feed the original into the scanner. Chapter 2 - Get to know the Océ ColorWave 300 multifunction printer... - Page 35 The components of the scanner Component Description / Function original guide Guides the original over the scanner to the front. Chapter 2 - Get to know the Océ ColorWave 300 multifunction printer...
-
Page 36: The Components Of The Top Delivery Tray (Optional)
Component Description top delivery tray Stack the prints and copies door top delivery tray Door to access the media feed to the TDT. output section top delivery tray Chapter 2 - Get to know the Océ ColorWave 300 multifunction printer... -
Page 37: The User Panel
The button on the user panel that allows the oper- ator to start a scan job, a print job or a copy job. When active, it blinks. Chapter 2 - Get to know the Océ ColorWave 300 multifunction printer... - Page 38 Close and confirm the selected value of a set- ting. scroll wheel Wheel on the right side of the user panel, that al- lows the operator to do the following: • Scroll through settings and values. Chapter 2 - Get to know the Océ ColorWave 300 multifunction printer...
- Page 39 Key that allows the operator to select the option displayed in lower right corner of the screen of the user panel. Chapter 2 - Get to know the Océ ColorWave 300 multifunction printer...
-
Page 40: The Top Delivery Tray
The top delivery tray The top delivery tray Introduction The 'Top Delivery Tray' [1] is an optional for the Océ ColorWave 300 system. The 'Top Delivery Tray' can collect a maximum of 50 sheets. Illustration Capacity The capacity of the 'Top Delivery Tray' depends on various factors like the media type, width, length and climate conditions. - Page 41 11 / 'High qual. coated pa- IJM149: Océ Smart Matt Paper 120 g/m2 per 120-170g' IJM150: Océ Smart Matt Paper 170 g/m2 IJM151: Océ Smart Matt Paper 150 g/m2 Chapter 2 - Get to know the Océ ColorWave 300 multifunction printer...
- Page 42 IJM240: Océ Top Photo Plus Satin 195 g/m2 SIPPLS7: Océ Satin Photo Paper 7.6 mil 'Custom photo paper' The system will deliver all other (than above mentioned) media to the 'Lower receiving tray'. Chapter 2 - Get to know the Océ ColorWave 300 multifunction printer...
- Page 43 If you use a different media type, the printed output is always delivered to the 'Lower receiving tray'. • If you select 'Lower receiving tray' your printed output is by default delivered to the 'Lower receiving tray' of the printer. Chapter 2 - Get to know the Océ ColorWave 300 multifunction printer...
-
Page 44: The Printing System Consumables
Container that contains a bag with ink. maintenance cassette Container used for the maintenance of a print head. ink colors cyan (C) magenta (M) yellow (Y) black (K) Chapter 2 - Get to know the Océ ColorWave 300 multifunction printer... -
Page 45: Chapter 3 Quick Start
Chapter 3 Quick start... -
Page 46: Connect The Mains Supply Cable
Connect the mains supply cable Connect the mains supply cable Caution: Make sure the power switch is in 'off' position. Plug in the mains supply cable at the power connection at the back of the printer. Plug the other side of the mains supply cable into the wall socket. Chapter 3 - Quick start... -
Page 47: Switch On The Printing System
Switch on the printing system Switch on the printing system Switch on the power switch at the rear side of the printing system. Use the on / off button at the front side of the printer to switch on the printing system. Chapter 3 - Quick start... -
Page 48: Replace / Install The Media
Replace / Install the media Introduction The Océ ColorWave 300 contains two rolls of media. Appendix A (of the User Manual) contains a list of the supported media types and media sizes. This section describes how to remove and load a roll of media. - Page 49 Replace / Install the media Use both hands to remove the roll. [24] Remove the roll Both far ends of the roll contain roll holders with handles. Lift the handles to release the roll holders. [25] Release the roll holders Chapter 3 - Quick start...
- Page 50 Replace / Install the media Remove the roll holders. [26] Remove the roll holders How to load a new media roll Insert the roll holder in both ends of the new media roll. Press the handles down to fasten the roll holders. Chapter 3 - Quick start...
- Page 51 Replace / Install the media Put the green saddles into position at the ends of the track. [27] Green saddles Use both hands to place both roll holders in the green saddles on the printer. Use both hands to slide the media under the paper guide. Place the media on the printer as shown in the figure below.
- Page 52 Replace / Install the media The printer automatically draws the media into the correct position. Follow the steps in the wizard on the user panel: • Select the correct media type for the new media roll. • Select the clean-cut length. Options: - No strip - Long strip (preferred if the new media on the core is dirty).
-
Page 53: The Océ Express Webtools
Note: If the Océ Express WebTools do not appear, contact the network administrator to check the network parameters. Check if the Océ ColorWave 300 network settings have been registered in the network infrastructure. Chapter 3 - Quick start... -
Page 54: The Smart Inbox
The Smart Inbox The Smart Inbox Definition Smart Inboxes are used for customized job management. You can get an overview of the Smart Inboxes when you open the 'Jobs' tab in the Océ Express WebTools. Illustration Jobs in a Smart Inbox You can use the Smart Inbox to manage your jobs. - Page 55 The Smart Inbox • Copy jobs If you want your copy jobs to appear in a Smart Inbox, you must enable the 'Prefer- ences' - 'System settings' - 'Smart Inbox management' - 'Display a Smart Inbox with all jobs' setting. Your copy job is then displayed in the 'View all' Smart Inbox. The 'Preferences' - 'System settings' - 'Smart Inbox management' - 'Save printed jobs in a Smart Inbox' - setting determines if copy jobs that have been printed will be kept in the Smart Inbox for reprint or not.
-
Page 56: Easy Printing, Copying And Scanning
Print a file from a USB mass storage device or flash drive Easy printing, copying and scanning Print a file from a USB mass storage device or flash drive Insert USB mass storage device in the USB stick interface on the user panel. The system automatically selects the print tab. -
Page 57: Use Océ Publisher Express To Send A Print Job
Mozilla Firefox™ 2.0 (or higher) Enter the URL http://'printer 'Printer name' is the name of your Océ name' or IP address in your ColorWave 300 printer. workstation browser to connect to the Océ Express WebTools. Chapter 3 - Quick start... - Page 58 Use Océ Publisher Express to send a print job Step Action Remarks Open the 'Jobs' tab, This tab displays the following. • The Océ Publisher Express section. • An overview of all jobs that are current- ly available in the 'Jobs - Queue'. •...
- Page 59 Use Océ Publisher Express to send a print job Step Action Remarks In the 'Workflow' section enter You can easily create a new Smart Inbox the name of the Smart Inbox you if you enter a new Smart Inbox name. want to print to and click 'Ok' to send the print job to the Smart Inbox.
-
Page 60: Print A Job From The Smart Inbox
Print a job from the Smart Inbox Print a job from the Smart Inbox How to print a job from the Smart Inbox using the Océ Express WebTools Select the 'Jobs' tab in the Océ Express WebTools. Select the correct Smart inbox. Select the job and click 'Print'. -
Page 61: Use The Océ Windows
Océ Windows Printer Driver User manual Note: The Océ ColorWave 300 is delivered with a driver pack CD-ROM. You can also download the latest Océ drivers, free of charge, from our Web site www.oce.com. Chapter 3 - Quick start... - Page 62 2000 or any other Windows print in the source application. application From the 'File' menu of the ap- plication, click 'Print'. Select the Océ ColorWave 300 in the 'Printer' area of the 'Print' dialog box. Click 'Properties'. Check all tabs in the driver and change the settings for this job if necessary.
-
Page 63: Use The Océ Postscript
Océ ColorWave 300. Note: ® You need a license to be able to print PostScript files on the Océ ColorWave 300. Note: More information about how to install, configure and use the driver is available in the ® documentation provided with the Océ PostScript 3 Driver. - Page 64 Step Action Remarks From the 'File' menu of the ap- plication, click 'Print'. Select the Océ ColorWave 300 in the 'Printer' area of the 'Print' dialog box. Click 'Properties'. You can define the default print job set- tings in the Océ Express WebTools.
-
Page 65: Make A Fast Copy Of A Cad Drawing
Make a fast copy of a CAD drawing Make a fast copy of a CAD drawing Feed the original face up and centered on the original feeding table. Note: You do not need to center the original precisely. The exact position of the original is au- tomatically detected by the scanner. - Page 66 Make a fast copy of a CAD drawing Note: The description of the second default copy template is displayed ('Fast CAD color copy'). With a copy template you can pre-define the settings you need for a copy job. You only need to set the job settings once and you can store the settings in a job template that is presented on the user panel.
-
Page 67: Make A Normal Color Copy
Make a normal color copy Make a normal color copy Feed the original face up and centered on the original feeding table. Note: You do not need to center the original precisely. The exact position of the original is au- tomatically detected by the scanner. - Page 68 Make a normal color copy Note: With a copy template you can pre-define the settings you need for a copy job. You only need to set the job settings once and you can store the settings in a job template that is presented on the user panel.
-
Page 69: Make A Fast B/W Copy Of A Cad Drawing
Make a fast b/w copy of a CAD drawing Make a fast b/w copy of a CAD drawing Feed the original face up and centered on the original feeding table. Note: You do not need to center the original precisely. The exact position of the original is au- tomatically detected by the scanner. - Page 70 Make a fast b/w copy of a CAD drawing Note: With a copy template you can pre-define the settings you need for a copy job. You only need to set the job settings once and you can store the settings in a job template that is presented on the user panel.
-
Page 71: Scan A Color Cad Drawing To Pdf Format
Scan a color CAD drawing to PDF format Scan a color CAD drawing to PDF format Feed the original face up and centered on the original feeding table. Note: You do not need to center the original precisely. The exact position of the original is au- tomatically detected by the scanner. - Page 72 Scan a color CAD drawing to PDF format Note: The description of the first default scan template is displayed ('CAD to color PDF'). With a scan template you can predefine the settings you need for a scan job. You only need to set the job settings once and you can store the settings in a job template that is presented on the user panel.
-
Page 73: Scan A Cad Drawing To B/W Tiff Format
Scan a CAD drawing to b/w TIFF format Scan a CAD drawing to b/w TIFF format Feed the original face up and centered on the original feeding table. Note: You do not need to center the original precisely. The exact position of the original is au- tomatically detected by the scanner. - Page 74 Scan a CAD drawing to b/w TIFF format Note: With a scan template you can pre-define the settings you need for a scan job. You only need to set the job settings once and you can store the settings in a job template that is presented on the user panel.
-
Page 75: Scan To A Usb Mass Storage Device
Scan to a USB mass storage device Scan to a USB mass storage device Feed the original face up and centered on the original feeding table. Note: You do not need to center the original precisely. The exact position of the original is au- tomatically detected by the scanner. - Page 76 Scan to a USB mass storage device Note: With a scan template you can pre-define the settings you need for a scan job. You only need to set the job settings once and you can store the settings in a job template that is presented on the user panel.
-
Page 77: Switch Off The Printing System
Switch off the printing system Switch off the printing system Use the on / off button at the front side of the printer to switch off the printing system. Note: Wait until the user panel is black. Note: You can also use the 'Shut down' button in the Océ Express WebTools. Chapter 3 - Quick start... - Page 78 Switch off the printing system Chapter 3 - Quick start...
-
Page 79: Define Your Workflow With The Océ Express Webtools
Chapter 4 Define your workflow with the Océ Express WebTools... -
Page 80: Introduction
Note: If the Océ Express WebTools do not appear, contact the network administrator to check the network parameters. Check if the Océ ColorWave 300 network settings have been registered in the network infrastructure. Chapter 4 - Define your workflow with the Océ Express WebTools... -
Page 81: The System Requirements
The system requirements The system requirements Introduction You can use an Internet browser to open the home page of the Océ Express WebTools. Depending on the Internet browser you use, you must set the required minimum browser security settings as indicated below. Note: The minimum system requirements are a 3 GHz Pentium 4 with 1 Gbyte RAM and Windows XP. - Page 82 The system requirements Set the minimum browser security settings for Firefox 2 / 3 Step Action Value Select Tools / Options Main Show the downloads window when downloading a file Recom- mended Content: Load images automatically Enable Enable Javascript Enable Privacy Accept cookies from sites Enable...
-
Page 83: The 'Jobs' Tab
The 'Jobs' tab The 'Jobs' tab Illustration The 'Jobs' tab Note: Editable for any user. For some specific actions you must log on as a Key operator. (see ‘User roles and authorizations’ on page 102) Your remote control of the system's workflow. Tasks: Create a new job from a printable file in the Océ... - Page 84 The 'Jobs' tab Control your jobs in the 'Smart Inbox' section (group jobs, make settings, start jobs/sets). This section enables you to do the following. • When you click 'Open Smart Inbox' and enter a name, the new Smart Inbox imme- diately appears in the Smart Inbox overview (see ‘Open or create a Smart Inbox’...
-
Page 85: The 'Preferences' Tab
The 'Preferences' tab The 'Preferences' tab Illustration The 'Preferences' tab Note: Before you can edit a setting or a settings group, you must log on as a Key operator or a Power user. (see ‘User roles and authorizations’ on page 102) Fine tune the system to fit your company's workflow and processes. -
Page 86: The 'Configuration' Tab
The 'Configuration' tab The 'Configuration' tab Illustration The 'Configuration' tab Note: Before you can edit a setting or a settings group, you must log on as a System adminis- trator or a Power user. (see ‘User roles and authorizations’ on page 102) Install the system in your infrastructure, according your standards. -
Page 87: The 'Support' Tab
102) Tasks that require contact with Océ. Tasks: • 'About' Information about the Océ ColorWave 300 system software version. Information about the included licenses. These are the licenses used to build the software. • 'Media' ‘What is a media profile?’ on page 248 ‘Manage media’... - Page 88 The 'Support' tab • 'Input Profiles' ‘What is an input profile? ’ on page 253 ‘Manage input profiles’ on page 254 • 'Licenses' ‘Check your licenses’ on page 326 ‘Save the currently active licenses’ on page 328 ‘Install a new license’ on page 329 Chapter 4 - Define your workflow with the Océ...
-
Page 89: The 'System' Tab
The 'System' tab The 'System' tab Illustration The 'System' tab Your remote view on the system. This tab can be accessed by any user. The 'System' tab is visible on all pages at the bottom of the page. When you click on the 'System' tab in the lower left corner of the screen, the system monitor pops-up. -
Page 90: Set Another Language For The Océ Express Webtools
Set another language for the Océ Express WebTools Set another language for the Océ Express WebTools Introduction The language setting of the Internet browser you use defines the language in which the user interface of the Océ Express WebTools is displayed. Note: This language setting does not influence the language on the user panel. - Page 91 Set another language for the Océ Express WebTools How to change the language setting in Mozilla Firefox™ Open Mozilla Firefox™. Select the Extra menu - Options. The Options window appears. Click the Advanced button and make sure you have selected the General tab. In the Languages section click the Choose...
-
Page 92: How To Edit A Setting
How to edit a setting How to edit a setting Browse to the settings group you want to edit, for example 'Preferences' - 'System settings' - 'Print queue management'. You can find detailed information about the settings in the tooltip. The illustration below shows, for example, the tooltip information of the 'Print queue' setting. - Page 93 How to edit a setting For example, if you click on the value of the 'Print queue' setting a seperate window opens, where the same information is displayed as in the tooltip and where you can edit the setting. You can click 'Edit' in the settings group bar to access a window for all settings in the group if you want to edit more settings in the settings group.
- Page 94 How to edit a setting you can edit all these settings. This overview window does not show detailed information per setting. Modify the setting or settings. Click 'Ok' to confirm your entries or 'Cancel' to reject your entries. Chapter 4 - Define your workflow with the Océ Express WebTools...
-
Page 95: View And Check The Settings
View and check the settings View and check the settings Purpose View and check the settings and the values that are stored when you save the settings file. When to do • Before you save the setting and the values in the Océ Express WebTools. •... -
Page 96: Save The Settings In A File
Save the settings in a file Save the settings in a file Purpose Save the settings and the values that you configured in the Océ Express WebTools in a file. When to do • Duplicate the settings very easily to another printer of the same type. Note: Not all settings are stored in the settings file. -
Page 97: Load The Settings From A File
Load the settings from a file Load the settings from a file Purpose Load the settings and the values for the Océ Express WebTools from a file. When to do • Duplicate the settings to another printer of the same type. Caution: When you are logged in as a Key operator you can only load the Key operator settings. -
Page 98: Restore The Factory Defaults
Restore the factory defaults Restore the factory defaults When to do • When you want to restore the factory default settings and values of your Océ Express WebTools. Caution: When you are logged in as a Key operator you can only restore the Key operator settings. When you are logged in as a System administrator you can only restore the System ad- ministrator settings. -
Page 99: The System Monitor
The system monitor The system monitor Introduction You can open the system monitor to get an overview of the current status of the printing system. When you click on the 'System' tab in the lower left corner of the screen, the system monitor pops-up. - Page 100 The system monitor Overview of the scanner states State Icon Description 'User intervention re- General error message. quired' 'Scanner is busy' 'Scanner is ready' Chapter 4 - Define your workflow with the Océ Express WebTools...
-
Page 101: Shut Down Or Restart The System
Shut down or restart the system Shut down or restart the system To remotely shut down the printing system you can click 'Shut down' in the 'Support' tab. You can also use this button to restart the system. Chapter 4 - Define your workflow with the Océ Express WebTools... -
Page 102: Security
The settings in the Océ Express WebTools can be configured and managed to enable the optimal performance of the Océ ColorWave 300. You can view all the settings in the Océ Express WebTools but when you want to edit a setting, a message appears. -
Page 103: Log In As An Authorized User
Log in as an authorized user Log in as an authorized user Purpose In order to have write access for certain groups of settings, you must log in as an authorized user. There are 3 user roles, System administrator, Key operator and Power user who have authorization to edit specific groups of settings. -
Page 104: Log Out After Your Session
Log out after your session Log out after your session Purpose When you have finished the modification of a setting, it is advised to log out again. How to log out after you have finished your session Click the log out hyperlink in the top right-hand corner of the screen. Close the screen of your Internet browser. -
Page 105: Change The Password For Authorized Users
Change the password for authorized users Change the password for authorized users When to do For security reasons it is advised to periodically change the password for the 3 access modes (Key operator, System administrator, Power user) to the Océ Express WebTools. How to change the password for authorized users Click 'Configuration' - 'Connectivity' - 'Passwords'. -
Page 106: Secure Protocols
Enable IPSec Secure protocols Enable IPSec Introduction IPsec is a security protocol that you can use: • to limit the access to your network to a maximum of 5 hosts. • to encrypt the data between these hosts and the system. You can enable IPSec in the Océ... -
Page 107: Enable Ipv6
Enable IPv6 Enable IPv6 Introduction IPv6 is a internet protocol that you can use. You can enable IPv6 in the Océ Express WebTools. For more information on IPv6, consult the Connectivity manual. Enable IPSec Go to 'Configuration' - 'Connectivity' 'TCP/IP: IPv6'. Click . -
Page 108: Ipv6 Settings
IPv6 settings IPv6 settings Introduction In case IPv6 is enabled, the user can change some of the IPv6 settings. IPv6 settings The following settings for IPv6 are available: • 'IPv6 Link Local address'. This address is determined automatically. The user cannot change this address. -
Page 109: E-Shredding
Enable or disable the E-shredding function E-shredding Enable or disable the E-shredding function Introduction The E-shredding function allows you to securely erase jobs from the system. This prevents unauthorized people from recovering the deleted jobs. When the E-shredding function is enabled, you can select an E-shredding algorithm. You can enable the E-shredding function in the Océ... -
Page 110: Select The E-Shredding Algorithm
Select the E-shredding algorithm Select the E-shredding algorithm Introduction The E-shredding function allows you to securely erase jobs from the system. This prevents unauthorized people from accessing the deleted jobs. You can select one of the following algorithms. • 'Gutmann'. All jobs on the system are erased in 35 overwrite passes. -
Page 111: Specify The Number Of Overwrite Passes
Specify the number of overwrite passes Specify the number of overwrite passes Introduction The E-shredding function allows you to erase jobs from the system. This prevents unau- thorized people from accessing the jobs. You can manually enter the required number of overwrite passes. -
Page 112: Configure Your Printing System
Change the regional settings Configure your printing system Change the regional settings Note: Before you can edit a setting or a settings group, you must log on as System administrator or Power user. The regional settings are configured during the installation of your system. If you want to change the initial configuration, you can do so in the 'Preferences' - 'System settings' - 'Regional settings'. -
Page 113: Configure The Sleep Mode Timer
Configure the sleep mode timer Configure the sleep mode timer Introduction If the printer is idle for a defined period it goes into sleep mode. In sleep mode the printer uses minimal energy, because the power supply of the printer is turned off. The power supply of the embedded controller remains on. -
Page 114: Configure The Network Settings In The Océ Express Webtools
Configure the network settings in the Océ Express WebTools Configure the network settings in the Océ Express WebTools Introduction Some of the network settings are configured during the installation of your system. If you want to change the initial configuration or if you want to define more network settings, you can do so in the 'Configuration' - tab. -
Page 115: Configure And Manage Scan Destinations
Configure scan destinations Configure and manage scan destinations Configure scan destinations Introduction When you select the 'Scan' tab on the user panel a list of scan destinations is displayed. A scan destination is a place where you send your scanned file to for storage. You can define a maximum number of 10 scan destinations in the 'Configuration' - 'Scan destinations' tab. - Page 116 Configure scan destinations Type Description • Local 'Local to the Smart Inbox' When you select this scan destination your scanned file is sent to the 'Scans' Inbox. This is the fixed scan destination for scan destination 1. • 'Local to USB storage device' When you select this scan destination your scanned file is sent to the USB Mass storage device connected to the USB stick interface on the user panel.
-
Page 117: Configure A Local Scan Destination
Configure a local scan destination Configure a local scan destination Note: Before you can edit a setting or a settings group, you must log on as System administrator or Power user. Click 'Configuration' - 'Scan destinations'. Click 'Edit' in a 'Scan destinations' bar. Enter a name for the destination. -
Page 118: Configure A Remote Scan Destination
Configure a remote scan destination Configure a remote scan destination Note: Before you can edit a setting or a settings group, you must log on as System administrator or Power user. Create a web destination with FTP Create a home directory and a subdirectory on a workstation. For example c:\Ftp\Scan Enable FTP on the workstation Click 'Configuration' - 'Scan destinations'. - Page 119 Configure a remote scan destination Create a network destination with SMB Create a shared folder on a workstation. For example c:\Scan Click 'Configuration' - 'Scan destinations'. Click 'Edit' in a 'Scan destinations' bar. Enter a name for the scan destination. This name will appear on the user panel.
- Page 120 Configure a remote scan destination Test button To test the validity of the remote scan destination (FTP or SMB), use the “Test” button. The test automatically executes the following 5 steps: • Check the remote folder syntax. • Check the validity of the hostname. •...
- Page 121 Configure a remote scan destination Error code Possible Causes • Check whether the hostname or IP address is correctly typed. • Check that the remote host is up and running and connected to the network. 5, 6, 7 • Check that SMB or FTP protocol is enabled on the remote host •...
-
Page 122: Configure The Pen Settings
Configure the pen settings Configure the pen settings Introduction Normally the pen settings are defined in the application that is used to create a drawing. If the pen settings are not defined in the application, the default pen settings configured in the Océ... -
Page 123: Define Your Printing System Preferences
What you need to know about default settings Definition Before you send print jobs to the Océ ColorWave 300, remember the following. The values defined in the Océ Express WebTools are default values for the general system behavior. You can define a number of job settings in the Océ printer drivers or the Océ... -
Page 124: Define The System Preferences
Define the system preferences Define the system preferences Introduction Before you start to use your printing system you can define the general system preferences to fine tune it to optimally fit your company's workflow and processes. Note: Before you can edit a setting or a settings group, you must log on as a Key operator. Illustration How to define the system preferences Click 'Preferences' - 'System settings'. - Page 125 Define the system preferences Settings group Description 'Regional settings' The regional settings are configured during the installation of your system. Here you can change the initial configuration. Note: You can toggle between the 'First lan- guage' and the 'Second language' on the user panel.
-
Page 126: Define The Print Job Preferences
Define the print job preferences Define the print job preferences Introduction Here you can define the default values for print jobs. If you send a print job using an Océ printer driver or an Océ job submission tool, the job settings defined in the printer driver or the job submission tool always overrule the default settings defined in the Océ... - Page 127 Define the print job preferences Settings group Contains settings that define 'Image' the default processing of image data. 'Color manage- the look and feel of the printed colors ment' 'Layout' the default positioning of the image on the printed output. 'Sheet' the default media usage.
-
Page 128: Optimize The Default Output Quality For Print Jobs
Optimize the default output quality for print jobs Optimize the default output quality for print jobs Introduction The Océ Express WebTools offers the following settings to optimize the default output quality for print jobs. You can find these settings in the 'Preferences' - 'Print job defaults' tab. Note: Before you can edit a setting or a settings group, you must log on as a Key operator. - Page 129 Optimize the default output quality for print jobs Values Description 'Océ en- 'Enhanced colors' gives photo-realistic colors. Suggested use: photos or hanced col- graphic art presentations. You will get the most realistic result if you ors' set the RGB input data to the international standard your original was made in.
- Page 130 Optimize the default output quality for print jobs Values Description 'Océ En- 'Enhanced colors' gives photo-realistic colors. Suggested use: photos or hanced col- graphic art presentations. You will get the most realistic result if you ors' set the RGB input data to the international standard your original was made in.
- Page 131 Optimize the default output quality for print jobs Values Description 'Océ En- 'Enhanced colors' gives photo-realistic colors. Suggested use: photos or hanced col- graphic art presentations. You will get the most realistic result if you ors' set the RGB input data or CMYK input data to the international stan- dard your original was made in.
- Page 132 Optimize the default output quality for print jobs Values Description 'Océ En- 'Enhanced colors' gives photo-realistic colors. Suggested use: photos or hanced col- graphic art presentations. You will get the most realistic result if you ors' set the RGB input data to the international standard your original was made in.
-
Page 133: Define The Copy Job Preferences And Copy Templates
Define the copy job preferences and copy templates Define the copy job preferences and copy templates Introduction Here you can define the general copy job settings and four copy templates. What you need to know about copy templates Copy templates enable you to easily perform copy jobs that you do very often. The job templates appear on the user panel when you select 'COPY'. - Page 134 Define the copy job preferences and copy templates Illustration How to define the copy job preferences Click 'Preferences' - 'Copy job defaults'. The system settings are grouped in functional settings groups. You can find detailed in- formation about the settings in the tooltip. Settings group Description 'General copy job settings'...
- Page 135 Define the copy job preferences and copy templates Settings group Description 'Copy template 1: Sheet' Settings that determine the default media usage. Note: You can define the same settings for copy template 2, 3 and 4. Click 'Edit' in the settings group bar or click the value of a single setting. (see ‘How to edit a setting’...
-
Page 136: Optimize The Default Output Quality For Copy Jobs
Optimize the default output quality for copy jobs Optimize the default output quality for copy jobs Introduction The Océ Express WebTools offers the following settings to optimize the default output quality for copy jobs. You can define a default output quality for each copy job template. You can find these settings in the 'Preferences' - 'Copy job defaults' tab. - Page 137 Optimize the default output quality for copy jobs Values Description 'Colored original' 'Colored original' is the advised value for colored originals like maps, 3D-CAD drawings, consumer graphics or rasterized photos. The output is optimized for the reproduction of the color infor- mation.
- Page 138 Optimize the default output quality for copy jobs Values Description 'Release' The print speed is high. The output quality is very good. This setting offers a good combination of output quality and productivity. 'Release' is the default value. 'Check' The print speed is very high. The output quality is good.
-
Page 139: Define The Scan Job Preferences And Scan Templates
Define the scan job preferences and scan templates Define the scan job preferences and scan templates Introduction Here you can define the general scan job settings and four scan templates. What you need to know about scan templates Scan templates enable you to easily perform scan jobs that you do very often. The job templates appear on the user panel when you select 'SCAN'. - Page 140 Define the scan job preferences and scan templates Illustration How to define the scan job preferences Click 'Preferences' - 'Scan job defaults'. The system settings are grouped in functional settings groups. You can find detailed in- formation about the settings in the tooltip. Settings group Description 'General scan job settings'...
- Page 141 Define the scan job preferences and scan templates Settings group Description 'Scan template 1: File' Settings that refer to the destination and the file type of the scanned file. You can select on of the scan destination that you enabled in the 'Configuration' - 'Scan destinations' tab.
-
Page 142: Optimize The Default Output Quality For Scan Jobs
Optimize the default output quality for scan jobs Optimize the default output quality for scan jobs Introduction The Océ Express WebTools offers the following settings to optimize the default output quality for scan jobs. You can define a default output quality for each scan job template. You can find these settings in the 'Preferences' - 'Scan job defaults' tab. - Page 143 Optimize the default output quality for scan jobs Values Description 'Colored original' 'Colored original' is the advised value for colored originals like maps, 3D-CAD drawings, consumer graphics or rasterized photos. The output is optimized for the reproduction of the color infor- mation.
- Page 144 Optimize the default output quality for scan jobs 'Lighter/darker' Values Description Numeric value be- Increase this value if you want your printed output to be darker. tween -5 and +5 Decrease this value if you want your printed output to be lighter. 0 is the default value.
-
Page 145: Manage Jobs On Your Printing System
The Smart Inbox and Jobs Queue concept Manage jobs on your printing system The Smart Inbox and Jobs Queue concept Definition Smart Inboxes are used for customized job management. Concept The Jobs Queue The Smart Inbox Metaphor Production belt Personal mailboxes User intention •... - Page 146 The Smart Inbox and Jobs Queue concept Scan jobs, if the selected scan destination is set to 'Local to the Smart Inbox'. If you select a remote scan destination ('Configuration' - 'Scan destinations') it is possible that the scanned file cannot be delivered to this destination. In that case the scanned file will also be placed in the 'Scans' Smart Inbox.
- Page 147 The Smart Inbox and Jobs Queue concept 'Delete all' (only for 'View all' Smart Inbox) To delete all the jobs from all Smart Inboxes click the 'Delete all' button. Note: The icon in front of the job name provides status information about the job. Detailed information about the status is displayed in the tooltip.
-
Page 148: Use Smart Inboxes In A Multiple-User Environment
Use Smart Inboxes in a multiple-user environment Use Smart Inboxes in a multiple-user environment Introduction A multiple-user environment is a working environment where users directly send jobs to the printer, collect their own prints and make their own copies and scans. In this environ- ment it is important for a user to have easy access to his personal jobs. -
Page 149: Use Smart Inboxes In A Repro Environment
Use Smart Inboxes in a repro environment Use Smart Inboxes in a repro environment Introduction A repro environment is a working environment where a repro operator handles all the jobs. In this environment the repro operator can use the 'Smart Inbox' to organize his daily work. -
Page 150: Open Or Create A Smart Inbox
Open or create a Smart Inbox Open or create a Smart Inbox Open or create a Smart Inbox in the 'Smart Inbox' section Select the 'Jobs' tab. In the 'Smart Inbox' section click 'Open Smart Inbox'. Click on the blank field to open a drop-down list with all Smart Inboxes available on your system that contain one or more jobs. -
Page 151: Delete A Smart Inbox
Delete a Smart Inbox Delete a Smart Inbox Caution: When you delete a 'Smart Inbox', you only delete the view on the 'Smart Inbox', but not the content. To permanently delete the jobs from a 'Smart Inbox' you must select the jobs in the 'Smart Inbox' and click 'Delete'. - Page 152 Delete a Smart Inbox Chapter 4 - Define your workflow with the Océ Express WebTools...
-
Page 153: Use The Océ Colorwave 300 Multifunction Printer
Chapter 5 Use the Océ ColorWave 300 multifunction printer... -
Page 154: Pause, Resume Or Delete An Active Job
How to delete an active print job If you use the Then Result User panel Press the stop button A dialog box appears on the user panel. Chapter 5 - Use the Océ ColorWave 300 multifunction printer... - Page 155 How to delete an active copy job (printer active - scanner active) Step Action Result Press the stop button. The machine stops scanning. A dialog box appears: 'Copy job has been stopped' and 'Release original?' Chapter 5 - Use the Océ ColorWave 300 multifunction printer...
- Page 156 The system aborts and deletes tick the box in front of the the job immediately. The deleted job you want to delete and job is in the Smart inbox. click 'Delete'. Chapter 5 - Use the Océ ColorWave 300 multifunction printer...
-
Page 157: The Job States
Ready to print Indicates that the job is ready for printing. Scheduled Indicates that the job is waiting to be printed. Printing Indicates that the job is currently being printed. Chapter 5 - Use the Océ ColorWave 300 multifunction printer... - Page 158 The job states State Icon Description Attention needed General error message. Chapter 5 - Use the Océ ColorWave 300 multifunction printer...
-
Page 159: Clear The System
Use the scroll wheel to select 'Clear system'('Remove all jobs') wizard and confirm with the confirmation button (above the scroll wheel). Follow the steps in the wizard. Select 'Home' to return to the 'HOME' screen. Chapter 5 - Use the Océ ColorWave 300 multifunction printer... -
Page 160: Basic Scan Jobs
The scan templates provide access to the different settings per scan template. You can use the scroll wheel to see all the predefined settings. When the scan job is fin- ished, the scanned file is placed in the Smart Inbox 'Scans'. Chapter 5 - Use the Océ ColorWave 300 multifunction printer... -
Page 161: Feed The Original
Feed the original face up and centered on the original feeding table. Note: You do not need to center the original precisely. The exact position of the original is au- tomatically detected by the scanner. The scanner takes the original. Chapter 5 - Use the Océ ColorWave 300 multifunction printer... -
Page 162: Auto-Feed The Original
You can change the settings of your copy or scan job before you feed the originals. How to autofeed the original Feed the first original face up and centered on the original feeding table. Chapter 5 - Use the Océ ColorWave 300 multifunction printer... - Page 163 Note: You can de-activate the auto-feed functionality by pressing the green button once more. Wait for the operator panel to display 'Auto-feed next original' before feeding the next original. Chapter 5 - Use the Océ ColorWave 300 multifunction printer...
-
Page 164: Do A Basic Scan Job
Select 'Scan' on the user panel. Press the start button. Result You do a basic scan job in 3 steps. The basic scan job uses the settings of the first scan template. Chapter 5 - Use the Océ ColorWave 300 multifunction printer... -
Page 165: Extended Scan Jobs
The scan templates provide access to the different settings per scan template. You can use the scroll wheel to see all the predefined settings. When the scan job is fin- ished, the scanned file is placed in the Smart Inbox 'Scans'. Chapter 5 - Use the Océ ColorWave 300 multifunction printer... -
Page 166: Do An Extended Scan Job
You do not need to center the original precisely. The exact position of the original is au- tomatically detected by the scanner. Select 'Scan' on the user panel. Open the 'Scan' tab with the confirmation button above the scroll wheel. Select your scan template. Chapter 5 - Use the Océ ColorWave 300 multifunction printer... - Page 167 Select 'OK' to return to the overview of the predefined settings groups. Repeat steps 5 and 6 until you have set all the correct values for your scan job. Press the start button. Chapter 5 - Use the Océ ColorWave 300 multifunction printer...
-
Page 168: Available Settings For Scan Jobs
Available settings for scan jobs Introduction The Océ ColorWave 300 provides a lot of settings to manage all your different scan jobs. These settings are used for extended scan jobs. The following table gives an overview and a very short description of the available settings. You can find a detailed description of each setting in the Océ... - Page 169 'Group 3' 'JPEG quality' 'Maximum' 'The image quality when scanning to 'High' PDF with JPEG compression. With a 'Medium' lower quality, the compression increases 'Low' giving a smaller file size.' Chapter 5 - Use the Océ ColorWave 300 multifunction printer...
- Page 170 If scan to grayscale or black and white: 'Line/text' 'Colored original' 'Photo' 'Blueprint' 'Dark original' 'Folded line/text' 'Backgnd 'On' Reduce the background noise of the im- comp' 'Off' age. 'Auto' Chapter 5 - Use the Océ ColorWave 300 multifunction printer...
- Page 171 The width of the original is a standard size. Note: Depend on the media series you defined in the Océ Express WebTools 'Custom' 210 to 914 mm The width of the original is a custom size. Chapter 5 - Use the Océ ColorWave 300 multifunction printer...
- Page 172 'Left' 0 to 400 mm 'Erase a strip from the left side of the original.' 'Right' 0 to 400 mm 'Erase a strip from the right side of the original.' Chapter 5 - Use the Océ ColorWave 300 multifunction printer...
- Page 173 'Mirror' 'On' 'When 'on', the image is mirrored along 'Off' the vertical axis (the media transport di- rection).' This setting is useful for dark transparent originals. Chapter 5 - Use the Océ ColorWave 300 multifunction printer...
-
Page 174: File Type
'TIFF multi- 'Striped' 'Packbits' page' 'Tiled' 'None' 'PDF/A' Not applicable 'Flate' Not applicable 'PDF multi- 'None' page' 'JPEG' 'Maximum' 'High' 'Medium' 'Low' 'JPEG' Not applicable Not applicable 'Maximum' 'High' 'Medium' 'Low' Chapter 5 - Use the Océ ColorWave 300 multifunction printer... - Page 175 Not applicable 'TIFF multi- 'Striped' 'Group 3' page' 'Tiled' 'Packbits' 'None' 'PDF/A' Not applicable 'Group 4' Not applicable 'PDF multi- 'Flate' page' 'None' 'CALS' Not applicable Not applicable Not applicable Chapter 5 - Use the Océ ColorWave 300 multifunction printer...
-
Page 176: Make A Scan And Erase A Margin
Open the 'Scan' tab with the confirmation button above the scroll wheel. Define the job settings. The 'Top' margin The 'Bottom' strip The 'Left' margin The 'Right' margin strip • Open a template with the confirmation button. Chapter 5 - Use the Océ ColorWave 300 multifunction printer... - Page 177 Scroll to 'Top', 'Bottom', 'Left' or 'Right', define the value with the scroll wheel or numeric keys and confirm. Press the start button. Result The Océ ColorWave 300 scans the original without a strip. Chapter 5 - Use the Océ ColorWave 300 multifunction printer...
-
Page 178: Basic Copy Jobs
133). When you select 'Copy', the user panel shows four copy templates. The copy templates provide access to the different settings per copy template. You can use the scroll wheel to see all the predefined settings. Chapter 5 - Use the Océ ColorWave 300 multifunction printer... -
Page 179: Feed The Original
Feed the original face up and centered on the original feeding table. Note: You do not need to center the original precisely. The exact position of the original is au- tomatically detected by the scanner. The scanner takes the original. Chapter 5 - Use the Océ ColorWave 300 multifunction printer... -
Page 180: Auto-Feed The Original
You can change the settings of your copy or scan job before you feed the originals. How to autofeed the original Feed the first original face up and centered on the original feeding table. Chapter 5 - Use the Océ ColorWave 300 multifunction printer... - Page 181 Note: You can de-activate the auto-feed functionality by pressing the green button once more. Wait for the operator panel to display 'Auto-feed next original' before feeding the next original. Chapter 5 - Use the Océ ColorWave 300 multifunction printer...
-
Page 182: Do A Basic Copy Job
The 'Copy' tab is automatically activated on the user panel. Note: The description of the first copy template is displayed. A basic copy job uses the settings defined in the first copy template. Press the start button. Chapter 5 - Use the Océ ColorWave 300 multifunction printer... - Page 183 Do a basic copy job Result You do a basic copy job in 2 steps. The basic copy job uses the settings of the first copy template. Chapter 5 - Use the Océ ColorWave 300 multifunction printer...
-
Page 184: Extended Copy Jobs
133). When you select 'Copy', the user panel shows four copy templates. The copy templates provide access to the different settings per copy template. You can use the scroll wheel to see all the predefined settings. Chapter 5 - Use the Océ ColorWave 300 multifunction printer... -
Page 185: Do An Extended Copy Job
The 'Copy' tab is automatically activated on the user panel. Open the 'Copy' tab with the confirmation button above the scroll wheel. Select your copy template. Chapter 5 - Use the Océ ColorWave 300 multifunction printer... - Page 186 Select 'OK' to return to the overview of the predefined settings groups. Repeat step 4 and 5 until you have set all the correct values for your copy job. Press the start button. Chapter 5 - Use the Océ ColorWave 300 multifunction printer...
-
Page 187: Available Settings For Copy Jobs
Available settings for copy jobs Introduction The Océ ColorWave 300 provides a lot of settings to manage all your different copy jobs. These settings are used for extended copy jobs. The following table gives an overview and a very short description of the available settings. You can find a detailed description of each setting in the Océ... - Page 188 'E+ (36")' 'B1 (707 mm)' 'B2 (19.69 in)' Scales the image to fit the selected media size. Note: Depend on the media series you defined in the Océ Express WebTools Chapter 5 - Use the Océ ColorWave 300 multifunction printer...
- Page 189 Scales the image to fit the selected media 'A1' size. 'A2' 'A3' 'A4' 'E+ (36")' 'B1 (707 mm)' 'B2 (19.69 in)' Note: Depend on the media series you defined in the Océ Express WebTools Chapter 5 - Use the Océ ColorWave 300 multifunction printer...
- Page 190 'Synchro' 'Determines the cut size of the print. 'Standard' 'Standard': the print is cut to a standard media size (DIN, ANSI, ...). 'Synchro': the print length depends on the image.' Chapter 5 - Use the Océ ColorWave 300 multifunction printer...
- Page 191 'Bottom right' 'Shift horizon- - 914 mm to + 914 mm 'Shifts the image in the horizontal direc- tal' tion (after alignment to one of the posi- tions given in 'Alignment').' Chapter 5 - Use the Océ ColorWave 300 multifunction printer...
- Page 192 'Bottom' 0 to 400 mm 'Erase a strip from the bottom of the original.' 'Left' 0 to 400 mm 'Erase a strip from the left side of the original.' Chapter 5 - Use the Océ ColorWave 300 multifunction printer...
- Page 193 'The vertical offset where the erase area starts.' 'Width' 0 to 914 mm 'The width of the area to erase.' 'Length' 0 to 6000 mm 'The length of the area to erase.' Chapter 5 - Use the Océ ColorWave 300 multifunction printer...
- Page 194 'The position of the stamp inside the leg- 'Middle' end.' 'Bottom' 'Size' 'Small' 'The size of the stamp.' 'Large' 'Color' 'Light gray' 'The color of the stamp.' 'Gray' 'Dark gray' 'Black' Chapter 5 - Use the Océ ColorWave 300 multifunction printer...
- Page 195 -5 to +5 Increase the value for lighter prints; de- crease for darker prints. 'Mirror' 'On' 'When 'on', the image is mirrored along 'Off' the vertical axis (the media transport di- rection).' Chapter 5 - Use the Océ ColorWave 300 multifunction printer...
- Page 196 Available settings for copy jobs Settings group: 'Sort' Setting Settings values Function 'Sort' 'By page' If you want to copy multiple sheets, you 'By set' can indicate how the copied sheets must be sorted. Chapter 5 - Use the Océ ColorWave 300 multifunction printer...
-
Page 197: Make Multiple Sets Of Copies
Change the settings for your first original if necessary. • Define the number of copies and press the start button. You can not change the number of copies after you press the start button for the first time. Chapter 5 - Use the Océ ColorWave 300 multifunction printer... - Page 198 Repeat this step until all originals are fed. Select 'Close set' with the lower left soft key. Result The Océ ColorWave 300 copies a set of originals sorted by set or by page. Chapter 5 - Use the Océ ColorWave 300 multifunction printer...
-
Page 199: Make A Copy With A Stamp
Scroll to 'Color', select the correct color with the scroll wheel and confirm. Define the number of copies and press the start button. Result The copy contains the selected stamp. Chapter 5 - Use the Océ ColorWave 300 multifunction printer... -
Page 200: Scale To Another Media Size
Scroll to 'Scale' and open this setting with the confirmation button. • Scroll to 'To fit', select a standard media format from the media series you use and confirm. Define the number of copies and press the start button. Chapter 5 - Use the Océ ColorWave 300 multifunction printer... - Page 201 Scale to another media size Result The Océ ColorWave 300 copies to another media size. Chapter 5 - Use the Océ ColorWave 300 multifunction printer...
-
Page 202: Make A Copy And Add A Strip
Scroll to 'Sheet size' and open this setting with the confirmation button. • Scroll to 'Top' or 'Bottom', define the value with the scroll wheel or numeric keys and confirm. Define the number of copies and press the start button. Chapter 5 - Use the Océ ColorWave 300 multifunction printer... - Page 203 Make a copy and add a strip Result The Océ ColorWave 300 adds a trailing or leading strip to the copy. Chapter 5 - Use the Océ ColorWave 300 multifunction printer...
-
Page 204: Make A Copy And Erase A Margin
The 'Copy' tab is automatically activated on the user panel. Open the 'Copy' tab with the confirmation button above the scroll wheel. Define the job settings. Chapter 5 - Use the Océ ColorWave 300 multifunction printer... - Page 205 Define the number of copies and press the start button. Result The Océ ColorWave 300 copies the original without a strip. You can also use this setting to copy a specific area of the original. (see ‘Make a copy of a specific area of an original’ on page 206).
-
Page 206: Make A Copy Of A Specific Area Of An Original
The 'Copy' tab is automatically activated on the user panel. Open the 'Copy' tab with the confirmation button above the scroll wheel. Define the job settings. Chapter 5 - Use the Océ ColorWave 300 multifunction printer... - Page 207 You can use the 'Alignment' 'Shift horizontal' and 'Shift vertical' to adjust the defined position of the specified area. Result The Océ ColorWave 300 copies a specific area of the original to the specified position on the copy. Chapter 5 - Use the Océ ColorWave 300 multifunction printer...
-
Page 208: Make A Copy And Erase A Specific Area Of An Original
The 'Copy' tab is automatically activated on the user panel. Open the 'Copy' tab with the confirmation button above the scroll wheel. Define the job settings. Chapter 5 - Use the Océ ColorWave 300 multifunction printer... - Page 209 Scroll to 'Length', define the value with the scroll wheel or numeric keys and confirm. • Press 'OK' Define the number of copies and press the start button. Result The Océ ColorWave 300 copies an original without the specified area. Chapter 5 - Use the Océ ColorWave 300 multifunction printer...
-
Page 210: Send Print Jobs
What you need to know before you send your print jobs Definition Before you send print jobs to the Océ ColorWave 300, remember the following. • The values defined in the Océ Express WebTools are default values for the general system behavior. -
Page 211: Use Océ Publisher Express To Send A Print Job
Enter the URL http://'printer 'Printer name' is the name of your Océ name' or IP address in your ColorWave 300 printer. workstation browser to connect to the Océ Express WebTools. Chapter 5 - Use the Océ ColorWave 300 multifunction printer... - Page 212 Change the 'Settings' and the Job settings that you change in Océ Pub- 'Preset' if necessary. lisher Express always overrule the default settings defined in the Océ Express WebTools. Chapter 5 - Use the Océ ColorWave 300 multifunction printer...
- Page 213 Smart Inbox you if you enter a new Smart Inbox name. want to print to and click 'Ok' to send the print job to the Smart Inbox. Chapter 5 - Use the Océ ColorWave 300 multifunction printer...
-
Page 214: Use The Océ Windows
Printer Driver User manual Note: The Océ ColorWave 300 is delivered with a driver pack CD-ROM. You can also download the latest Océ drivers, free of charge, from our Web site www.oce.com. Chapter 5 - Use the Océ ColorWave 300 multifunction printer... - Page 215 Click 'Properties'. Check all tabs in the driver and change the settings for this job if necessary. Click 'OK' to send the print job to the print queue. Chapter 5 - Use the Océ ColorWave 300 multifunction printer...
-
Page 216: Use The Océ Postscript
Illustration ® How to use the Océ PostScript 3 Driver to send a print job Step Action Remarks Open the file that you want to print in the source application. Chapter 5 - Use the Océ ColorWave 300 multifunction printer... - Page 217 Activate the Océ Job Ticket to overrule the default values for the job settings. Check and change the Printer Features settings if necessary. Click 'OK' to send the print job to the print queue. Chapter 5 - Use the Océ ColorWave 300 multifunction printer...
-
Page 218: Use Ftp To Send A Print Job To The Océ Colorwave 300
• From a Web browser The Océ ColorWave 300 has a dedicated FTP Jobs folder. You cannot delete or change this folder. It is created at installation and protected. The most convenient way to print files through FTP is to drag and drop the files or to copy and paste the files, into this 'Jobs' folder on the FTP site of your Océ... -
Page 219: Use Lpr To Send A Print Job To The Océ Colorwave 300
Use LPR to send a print job to the Océ ColorWave 300 Use LPR to send a print job to the Océ ColorWave 300 Introduction The Océ ColorWave 300 supports printing through LPR. If you send your print job through LPR the default Océ Express WebTools settings are leading. -
Page 220: Print A Job From The Smart Inbox
How to print a job from the Smart Inbox using the Océ Express WebTools Select the 'Jobs' tab in the Océ Express WebTools. Select the correct Smart inbox. Select the job and click 'Print'. The job is copied to the Jobs Queue. Chapter 5 - Use the Océ ColorWave 300 multifunction printer... -
Page 221: Print A File From A Usb Mass Storage Device Or Flash Drive
If necessary, you can edit the settings of your job with the lower right softkey. Note: In case multiple files are selected the setting is the same for all files. Use the start button to start printing. Chapter 5 - Use the Océ ColorWave 300 multifunction printer... - Page 222 Print a file from a USB mass storage device or flash drive Chapter 5 - Use the Océ ColorWave 300 multifunction printer...
-
Page 223: Ensure The Best Output Quality
Chapter 6 Ensure the best output quality... -
Page 224: Introduction To How To Ensure The Best Output Quality
Introduction to how to ensure the best output quality Introduction to how to ensure the best output quality Introduction This chapter describes how to make sure you have the best quality for your scan and print jobs. It is important to know that the quality of your output depends on both the scan quality of the scanner and the print quality of the printer. - Page 225 Introduction to how to ensure the best output quality Make sure you defined the correct output mode for your job. ‘Output type, output quality and print speed’ on page 229. When you have defined the correct media and the correct print mode, and you are still not satisfied with the output quality, use the wizards to achieve optimal output quality.
-
Page 226: Optimize The Output Quality Of The Scanner
Calibrate the scanner Optimize the output quality of the scan- Calibrate the scanner Introduction You can calibrate the scanner when you are not satisfied with the copy or scan quality. Use the calibration wizard on the printer user panel to calibrate the scanner. Before you begin Clean the scanner before you start the calibration procedure. - Page 227 Calibrate the scanner Use the scroll wheel to go to the 'Scanner calibration' ('Calibrate the scanner') wizard. Open this section with the confirmation button. Insert the scanner calibration sheet¹ as instructed in the wizard. Press the start button to start the scanner calibration. The message 'Calibrating, please wait...
-
Page 228: Define The Output Quality Of The Printer
The quality modes Introduction The Océ ColorWave 300 enables you to select the correct quality mode for your output requirements. You can define the required quality mode in the printer driver. You can define the default quality mode in the Océ Express WebTools. -
Page 229: Output Type, Output Quality And Print Speed
Output type, output quality and print speed Output type, output quality and print speed Introduction The type of your printed output depends on the following parameter. • The color mode ('Grayscale' / 'Color') The quality of your printed output depends on the following parameters. •... -
Page 230: Recommended Media Types And Quality Modes
Recommended media types and quality modes Recommended media types and quality modes Introduction The selection of the media and the quality modes depends on the application of the output. The tables give you an idea of which media type and quality modes to use in a work process. - Page 231 Recommended media types and quality modes 2D CAD color drawing 3N1183 3500+peil 4040+peil 3N1170 4080+peil 4300+peil cvr125 4040+peil 3N1011 4275+peil 3N1002 cvr100 cvr125 3N1011C vvr200 3950+peil cvr100 3N1011B 4040+peil 3400+peil 3600+peil 1430 m 4275+peil 4275+peil 3N1046 3750+peil 3950+peil 3990+peil 4275+peil 3850+peil 1430 m 4275+peil...
- Page 232 Recommended media types and quality modes 3D CAD and rendering - Color When to use Recommended media type Recommended quality mode To check or release a 'Coated paper 90-130g' 'Color' drawing 'High qual. coated paper 120- 170g' 'Release' 'High qual. coated paper Japan' 'Presentation' 'Coated paper 24 lb' 'Photo matte'...
- Page 233 Recommended media types and quality modes Logo and business color drawing [194] Example of logo and business color Logo and Business - Color When to use Recommended media type Recommended quality mode To release or present 'Paper 90g' 'Color' a document 'Paper 24 lb' 'Coated paper 90-130g' 'Release'...
- Page 234 Recommended media types and quality modes Map - Color When to use Recommended media type Recommended quality mode To release or present 'Paper 90g' 'Color' a document 'Paper 24 lb' 'Coated paper 90-130g' 'Release' 'High qual. coated paper 120- 'Presentation' 170g' 'High qual.
- Page 235 Recommended media types and quality modes Consumer graphics drawing [197] Example of Consumer graphics Consumer graphics - Color When to use Recommended media type Recommended quality mode To present a docu- 'Coated paper 90-130g' 'Color' ment 'High qual. coated paper 120- 170g' 'Presentation' 'High qual.
- Page 236 Recommended media types and quality modes Photo realistic impression - Color When to use Recommended media type Recommended quality mode To release or present 'Coated paper 90-130g' 'Color' a drawing 'High qual. coated paper 120- 170g' 'Release' 'High qual. coated paper Japan' 'Presentation' 'Coated paper 24 lb' 'Photo matte'...
- Page 237 Recommended media types and quality modes Mixed content drawing [200] Example drawing with Mixed content Mixed content - Color When to use Recommended media type Recommended quality mode To release or present 'Paper 90g' 'Color' a document 'Paper 24 lb' 'Coated paper 90-130g' 'Release' 'High qual.
-
Page 238: Color Management
'Color Management' Path: 'Preferences' 'Print job defaults' 'Color management' Depending on the type of file you want to print, the Océ ColorWave 300 offers different color-information conversions. You can select the 'Color Management' settings in the Océ Express WebTools, that give the best results for the color-information conversion. - Page 239 'Color Management' Values Description 'Océ CAD 'CAD colors' gives bright saturated colors. Suggested use: line and colors' vector drawings. 'Océ en- 'Enhanced colors' gives photo-realistic colors. Suggested use: photos or hanced col- graphic art presentations. You will get the most realistic result if you ors' set the RGB input data to the international standard your original was made in.
- Page 240 'Color Management' Values Description 'Océ En- 'Enhanced colors' gives photo-realistic colors. Suggested use: photos or hanced col- graphic art presentations. You will get the most realistic result if you ors' set the RGB input data to the international standard your original was made in.
- Page 241 'Color Management' Values Description 'Océ En- 'Enhanced colors' gives photo-realistic colors. Suggested use: photos or hanced col- graphic art presentations. You will get the most realistic result if you ors' set the RGB input data or CMYK input data to the international stan- dard your original was made in.
- Page 242 'Color Management' Values Description 'Océ En- 'Enhanced colors' gives photo-realistic colors. Suggested use: photos or hanced col- graphic art presentations. You will get the most realistic result if you ors' set the RGB input data to the international standard your original was made in.
-
Page 243: Color Feel
'Color feel' 'Color feel' One of the options you have to finetune your output quality is to adjust the 'Color Management' settings. With the 'Color Management' setting 'Color feel' you can finetune the look and feel of the printed colors. Overview of the 'Color feel' settings. -
Page 244: Océ 'Enhanced Colors: Rgb Input Data
Océ 'Enhanced colors: RGB input data' Océ 'Enhanced colors: RGB input data' One of the options you have to finetune your output quality is to adjust the 'Color Management' settings. If the 'Color Management' setting 'Color feel' is set to 'Océ enhanced colors' you can define the Océ... -
Page 245: Océ 'Enhanced Colors: Cmyk Input Data
Océ 'Enhanced colors: CMYK input data' Océ 'Enhanced colors: CMYK input data' One of the options you have to finetune your output quality is to adjust the 'Color Management' settings. If the 'Color Management' setting 'Color feel' is set to 'Océ enhanced colors' you can define the Océ... -
Page 246: Océ 'Enhanced Colors: Rendering Intent
Océ 'Enhanced colors: Rendering intent' Océ 'Enhanced colors: Rendering intent' One of the options you have to finetune your output quality is to adjust the 'Color Management' settings. If the 'Color Management' setting 'Color feel' is set to 'Océ enhanced colors' you can define the Océ... - Page 247 Océ 'Enhanced colors: Rendering intent' 'Enhanced colors: Rendering Description intent' 'Relative colorimetric' This setting provides a high accuracy in rendering RGB colors into CMYK colors, but maps the source's white to the media's white point, so that any monitor background color cast is eliminated. Though the printed output will be colorful, this setting may lead to a loss of contrast in the dark areas.
-
Page 248: Media
What is a media profile? Media What is a media profile? Definition A media profile is also called an Océ Media Profile (OMP file). The media profile contains a number of preset values that give the best print result per media type for your system. By default the system already has a number of media profiles available after installation, but due to changes in the production methods for media, the profiles can also change over time. -
Page 249: Manage Media
You can view the following settings: • 'Category' Four categories of media: 'Paper', 'Coated paper', 'Photopaper' and 'Films and trans- parencies' are defined for the Océ ColorWave 300. • 'Media type' 'Media type' is the media name on the user interface. - Page 250 Manage media Step Action Click the name of the 'Media type' to access a secondary window with the following detailed information: • 'Category' • 'Media type' • 'Media label' • 'File name' • 'Version' • 'Install date' • 'Drying time correction' •...
-
Page 251: Download And Install A Media Profile
Visit http://mediaguide.oce.com. Click 'Continue' in the Wide format printer section. Select Océ ColorWave 300 in the Printer name section and click 'Continue'. Select one, more or all media types and click 'Continue'. Click on the icon in the 'Profiles' column (rightmost) of the IJM222 Top Photo Plus Gloss media. - Page 252 Download and install a media profile The new media dependent data (omp file) is activated after the next restart. Restart the system. Result After the restart of the system the new media profile is activated. Chapter 6 - Ensure the best output quality...
-
Page 253: Input Profiles
What is an input profile? Input profiles What is an input profile? Definition An input profile is also called an Océ Input Profile (OIP file). The input profile changes the output of the printer to match the output of a simulated printer (For example: 'Simulated Océ... -
Page 254: Manage Input Profiles
Manage input profiles Manage input profiles About manage the media The 'Support' - 'Input Profiles' tab in the Océ Express WebTools allows you to manage the input profiles that are active on your system. You can use the 'Support' - 'Input Profiles' tab to perform the following tasks. •... - Page 255 Manage input profiles Install a new input profile Install a new input profile Step Action Click 'Support' - 'Input Profiles' to view the current installed 'Input Profiles'. Click the 'Install' button. Browse to the location of the new input profile. Select the input profile.
-
Page 256: Check The Output Quality Of The Printer
Check the output quality of the printer 'Demo print' Introduction You can make a demo print to get an impression of the print capabilities of the Océ ColorWave 300. The Océ ColorWave 300 has 4 demo prints: • '2D CAD monochrome' • '2D CAD color' •... - Page 257 'Demo print' • 'Mixed content' • 'Consumer graphics' 6. Press the start button. Chapter 6 - Ensure the best output quality...
-
Page 258: Quality Check' Print
'Quality check' print 'Quality check' print Introduction The 'Quality check' print option is a quick method to help you find the cause of an un- satisfactory output quality. The 'Quality check' print option is especially useful to check the quality of printed lines. Use the 'Test prints'('Print a demo or test image') wizard on the printer user panel to trace output quality problems. -
Page 259: Tone Scale Area Check' Print
'Tone scale area check' print 'Tone scale area check' print Introduction The 'Tone scale area check' print option can be used, upon request of a helpdesk, to in- dicate areas with unsatisfactory output quality. Illustration [203] Tone scale area check print How to make a 'Tone scale area check' print The system prints the 'Tone scale area check' print in the 'Presentation' quality mode. - Page 260 'Tone scale area check' print Use the 'Tone scale area check' print to test the scanner On request of the helpdesk the 'Tone scale area check' print can be used to indicate scanner problems. Use the 'Scan to USB' option. 1.
-
Page 261: Color Reference Chart' Print
'Color reference chart' print 'Color reference chart' print Introduction The 'Color reference chart' print gives an overview of the print job settings, copy job settings and advised media settings for a specific input type. Use the 'Test prints'('Print a demo or test image') wizard on the printer user panel to print the 'Color Reference Chart'. - Page 262 'Color reference chart' print How to make a 'Color reference chart' print Note: The 'First language:' setting (in the Océ Express WebTools) is used for the language of the "Color reference chart' . 1. From the'HOME' screen select the 'System' tab. 2.
-
Page 263: Output Quality Problems
Output quality problems Output quality problems Introduction The Océ ColorWave 300 offers three possibilities to check the quality of your printed output. • Make a quality check print • Make a tone scale area print • Make a demo print. - Page 264 Output quality problems Overview of output quality problems - Stripes and Banding Stripes and Banding problems Graphical representation of the prob- Description Small stripes over the entire width of the print (color independent) Perform an 'Optimize print quality' test. Note: This problem can occur in all print modes.
- Page 265 Output quality problems Graphical representation of the prob- Description Stripes perpendicular to the paper feed direction In check mode the width of these lines is 12 mm. In release mode the lines are smaller (3-6 mm) and less visible. Perform an 'Optimize print quality' test. Note: After the 'Optimize print quality' test is completed, the printer may...
- Page 266 Output quality problems Overview of output quality problems - Waves / Cockle Waves / Cockle problems Graphical representation of the prob- Description Waves and or light stripes in the paper feed direction Bands can consist of waves and / or slight color differences of approximately 1cm.
- Page 267 Output quality problems Graphical representation of the prob- Description Colors appear too dark and dark areas are clipped Select 'Océ enhanced colors' setting from the 'Color Management' menu in the Océ Express WebTools or Océ Windows Printer Driver. Set the subset 'Rendering intent' to 'Per- ceptual (photo)'.
-
Page 268: Optimize The Output Quality Of The Printer
Optimize the output quality on the printer Optimize the output quality of the printer Optimize the output quality on the printer Introduction This section describes different methods that you can use to optimize the output quality on the printer. Problem analysis and solutions Problem analysis and solutions Problem Method of analy-... - Page 269 Optimize the output quality on the printer Problem Method of analy- Solutions White stripes in 'Quality check' • Use the 'Presentation' quality filled areas print mode‘Output type, output quality and print speed’ on page 229 • Use the 'Optimize print quality' wiz- ard to correct the problem ‘Use the 'Print quality' wizard’...
- Page 270 Optimize the output quality on the printer Problem Method of analy- Solutions Missing sections in 'Quality check' • Use the 'Presentation' quality mode lines or stepped print • Use the 'Optimize print quality' wiz- lines ard to correct the problem. •...
- Page 271 Optimize the output quality on the printer Problem Method of analy- Solutions The print contains 'Demo print' • The media type defined on the printer regular horizontal must be the same as media roll avail- light or dark bands able on the printer. When the media type defined on the printer is not the same as the media available on the printer, use the 'Change media type'...
-
Page 272: Use The 'Print Quality' Wizard
• Nozzle check: detect weak or failing nozzles. The Océ ColorWave 300 automatically compensates the detected nozzles in future prints to make sure that print quality is optimal. • Align the print heads and optimize the paper transport. - Page 273 Use the 'Print quality' wizard Only start the wizard when you are sure that you used the correct media type and the correct print mode, and the output quality is still not satisfactory. How to use the 'Print quality' wizard From the'HOME' screen select the 'System' tab.
- Page 274 Use the 'Print quality' wizard possible with one of the rolls, the system automatically uses the correct roll of media. When calibration is possible with both rolls, continue with step 5. Use the scroll wheel to select the required roll and press the confirmation button to select a media roll for the calibration.
-
Page 275: Maintain The Océ Colorwave 300 Multifunction Printer
Chapter 7 Maintain the Océ Color- Wave 300 multifunction printer... -
Page 276: Replace The Media
Replace / Install the media Introduction The Océ ColorWave 300 contains two rolls of media. Appendix A (of the User Manual) contains a list of the supported media types and media sizes. This section describes how to remove and load a roll of media. - Page 277 Use both hands to remove the roll. [220] Remove the roll Both far ends of the roll contain roll holders with handles. Lift the handles to release the roll holders. [221] Release the roll holders Chapter 7 - Maintain the Océ ColorWave 300 multifunction printer...
- Page 278 [222] Remove the roll holders How to load a new media roll Insert the roll holder in both ends of the new media roll. Press the handles down to fasten the roll holders. Chapter 7 - Maintain the Océ ColorWave 300 multifunction printer...
- Page 279 Use both hands to slide the media under the paper guide. Place the media on the printer as shown in the figure below. The media loads into the printer from the top of the media roll. Make sure the media makes contact with the transport rollers. Chapter 7 - Maintain the Océ ColorWave 300 multifunction printer...
- Page 280 Options: - No strip - Long strip (preferred if the new media on the core is dirty). - Short strip. Note: The printer automatically detects the width of the media. Chapter 7 - Maintain the Océ ColorWave 300 multifunction printer...
-
Page 281: Ink
Replace the ink tanks Replace the ink tanks Introduction The Océ ColorWave 300 contains the following four ink tanks. • One tank for the cyan ink. • One tank for the magenta ink. • One tank for the yellow ink. - Page 282 The indication for the removed tank on the printer user panel changes into a dashed line. How to place an ink tank Caution: Make sure that you only use Océ ColorWave 300 ink tanks. Using other ink tanks will damage your printer! Caution: Make sure that you replace an ink tank with a tank that contains ink of the same color.
- Page 283 When the printer detects the full ink tank, the ink level indicator on the printer user panel displays 100%. Note: The printer first refills the intermediate ink storage tank. Therefore the ink level indicator on the printer user panel can decrease to about 95%. Chapter 7 - Maintain the Océ ColorWave 300 multifunction printer...
-
Page 284: Replace A Defective Printhead
Replace a defective printhead Replace a defective printhead Introduction The Océ ColorWave 300 contains the following nine print heads. Overview print heads Quantity Color Print head position (indicated on the print head carriage) Black (K) 1, 2, 3 Cyan (C) - Page 285 When calibration is possible with both rolls, use the scroll wheel to select the media roll and press the confirmation button to select the roll. Press the key for 'Next >'. Chapter 7 - Maintain the Océ ColorWave 300 multifunction printer...
- Page 286 The screen displays the message 'Replace printheads' and the print head(s) that you must replace. Find the correct print head number on the print head carriage. Press the front of the print head cover to unlock the cover. Chapter 7 - Maintain the Océ ColorWave 300 multifunction printer...
- Page 287 Replace a defective printhead Open the print head cover. Pull out the print head and remove it. How to place a print head Remove the protective tape from the new print head. Chapter 7 - Maintain the Océ ColorWave 300 multifunction printer...
- Page 288 Replace a defective printhead Hold the print head at the top. Note: Do not touch the contact and nozzle areas of the print head after you remove the protective tape. Chapter 7 - Maintain the Océ ColorWave 300 multifunction printer...
- Page 289 290. Check if all wipers are present and clean. Excessive ink remains on the wipers can damage the print heads. Wipe the wiper blades with a moist cloth to increase the lifetime of the print heads. Chapter 7 - Maintain the Océ ColorWave 300 multifunction printer...
-
Page 290: Replace The Maintenance Cassette
Use the scroll wheel to go to the 'Maintenance tray' ('Replace maintenance tray') section. Open this section with the confirmation button. An introduction screen displays the message 'Use this wizard to replace the maintenance tray.' Press the 'Next >' key. Chapter 7 - Maintain the Océ ColorWave 300 multifunction printer... - Page 291 Pull out the maintenance cassette. Note: Always store the old maintenance cassette in a horizontal position to prevent the spilling of ink. Be careful with the ink on the maintenance cassette. Chapter 7 - Maintain the Océ ColorWave 300 multifunction printer...
- Page 292 Select 'New' if you inserted a cassette that was not used before. The end-of-life counter is reset to zero. The screen displays the message 'Carriage moving to home position...'. The maintenance cassette is replaced. Chapter 7 - Maintain the Océ ColorWave 300 multifunction printer...
-
Page 293: Refill The Ink Tube
Refill the ink tube Refill the ink tube Introduction The Océ ColorWave 300 has ink tubes between the intermediate reservoirs and the print heads. The ink tubes must be filled with ink to keep the print heads functioning. When to do Check whether the ink tubes are filled with ink on a regular basis. - Page 294 Take the ink filling tool. [243] Ink filling tool Place the metal tube in the hole of the pump. [244] Metal tube of ink filling tool [245] Metal tube placed on pump Chapter 7 - Maintain the Océ ColorWave 300 multifunction printer...
- Page 295 Follow the instruction of the wizard to get the system up and running. Note: If needed: Repeat this procedure for another ink tube with air. Note: Clean the ink filling tool with water. Chapter 7 - Maintain the Océ ColorWave 300 multifunction printer...
- Page 296 Contact the Océ service organization to activate this option. Note: The Océ ColorWave 300 engine needs to be switched on (Example: standby or sleep mode) to enable the print head maintenance option. Chapter 7 - Maintain the Océ ColorWave 300 multifunction printer...
-
Page 297: Remote Consumables Reading
Start a Web browser (e.g. Internet Explorer) on your workstation. Fill in the URL: http://<hostname>/servlet/ALGetResourceCounters?identification=1 Fill in the correct hostname or IP address of your system. You will get an overview of the consumables information. Chapter 7 - Maintain the Océ ColorWave 300 multifunction printer... -
Page 298: Maintain The Scanner
Sensors to detect the original. transparent contact plates Cover of the image sensors. original feeding table Use this table if you feed the original into the scanner. Chapter 7 - Maintain the Océ ColorWave 300 multifunction printer... - Page 299 In that case you must clean the scanner to ensure top quality output. How to clean the scanner Use both hands to push up the left and right scanner open levers (4) to fully open the scanner top cover (3). Chapter 7 - Maintain the Océ ColorWave 300 multifunction printer...
- Page 300 To clean the scanner, use the soft lint-free towels from the scanner cleaning kit. Use a towel that has been moistened with water and firmly wrung out to clean the follow- ing parts of the scanner. Chapter 7 - Maintain the Océ ColorWave 300 multifunction printer...
- Page 301 Take care not to get your fingers caught in the scanner top cover. Press the scanner top cover down gently with both hands to close it. Note: Check that the left and right scanner open levers are locked into position. Chapter 7 - Maintain the Océ ColorWave 300 multifunction printer...
-
Page 302: Calibrate The Scanner
From the 'HOME' screen select the 'System' tab. Select the 'Setup' tab. Use the scroll wheel to go to the 'Scanner calibration' ('Calibrate the scanner') wizard. Open this section with the confirmation button. Chapter 7 - Maintain the Océ ColorWave 300 multifunction printer... - Page 303 The message 'Calibrating, please wait... do not open the scanner.' appears. Note: 'Calibrating the scanner takes between 5 to 10 minutes.' Note: ¹ The scanner calibration sheet code number is 1060077525. Chapter 7 - Maintain the Océ ColorWave 300 multifunction printer...
-
Page 304: Update
Click 'Ok' to confirm your entries or 'Cancel' to reject your entries. The update starts. At the end of the process, the controller reboots. Click 'Ok' to open the Océ Express WebTools. Chapter 7 - Maintain the Océ ColorWave 300 multifunction printer... - Page 305 When the status is 'Failure': Click on 'Open the log of the last patch applied on the controller' and read the information to determine the cause of the problem. If the log file provides no solution, contact your Océ representative. Chapter 7 - Maintain the Océ ColorWave 300 multifunction printer...
- Page 306 Update the system software Chapter 7 - Maintain the Océ ColorWave 300 multifunction printer...
-
Page 307: System Messages And Solutions
Chapter 8 System messages and so- lutions... -
Page 308: The Printer
Overview The printer Overview Definition This table gives an overview of the possible error messages and system messages of the printer and refers to the possible solution. Error message / System mes- Description / solution sage 'Required media not available' The media required for the job is not available on the printer. - Page 309 Overview Error Description Customer action code 4501 - Excessive leakage current detect- Replace the printhead by using the 4509 ed for head [1…9] wizard. Printhead failing Replace printed [1…9] Note: Never re-insert a printhead that has caused this problem. 4551 - Head defective during printing Printhead is probably not placed 4559...
-
Page 310: Cover Or Door Opened
Cover or door opened Cover or door opened Cover or door opened When you open a cover accessing the wizard, the system produces a double warning signal. When you open a door or cover during printing, the printer stops. A message on the printer user panel tells you to close the cover. - Page 311 Cover or door opened Chapter 8 - System messages and solutions...
- Page 312 Cover or door opened Note: When the cover or door is opened while the printer prints a job, the print is cut after you close the cover. Then the whole print job is restarted. Chapter 8 - System messages and solutions...
-
Page 313: Remove Jammed Media
Use the following procedure to remove the jammed media. Job recovery The Océ ColorWave 300 is equipped with a job recovery function that safeguards users against data loss in case of a printer failure. After a restart, the data submitted to the printer before the crash will be automatically processed and printed. - Page 314 Remove jammed media Examples: Use a pair of scissors to cut loose the media. Remove the jammed media from the output side of the printer. Press the softkey for 'Next >' to confirm that you removed the jammed media. Close the cover or door that the printer user panel indicates. Insert the roll of media in the printer.
-
Page 315: Temperature Or Humidity Out Of Range
Temperature or humidity out of range Temperature or humidity out of range Temperature or humidity out of range The system produces a short interrupted audio signal. When this error persists, contact your local Océ service organization. Chapter 8 - System messages and solutions... -
Page 316: Carriage Away From Home Position Too Long
Carriage away from home position too long Carriage away from home position too long Caution: When the carriage stays away from its home position too long, the printheads become dry. When the printheads are dry, you must replace the printheads. Carriage away from home position too long Always replace the printheads or the maintenance cassette in one continuous action to prevent the drying of the printhead nozzles. -
Page 317: The Scanner
Clear an original jam on the scanner The scanner Clear an original jam on the scanner Introduction When an original jam occurs on the scanner, the message 'Scanner original jam' appears on the user panel. You must remove the original from the scanner. If an original jam occurs often: •... - Page 318 Clear an original jam on the scanner Note: Check that the left and right scanner open levers are locked into position. Make the original smooth and feed the original. Chapter 8 - System messages and solutions...
-
Page 319: License Management
Chapter 9 License management... -
Page 320: Introduction To Managing Licenses
Introduction to managing licenses Introduction to managing licenses Introduction The Océ applications and options are protected against unauthorized use. You need to activate the license to enable an application or option for use. The 'Support' - 'Licenses' tab in the printer enables you to manage the licenses very easily. This section describes the following. -
Page 321: The 'Licenses' Tab In The Océ Express Webtools
The 'Licenses' tab in the Océ Express WebTools The 'Licenses' tab in the Océ Express WebTools Introduction The 'Support' - 'Licenses' tab has the following possibilities. Possibilities • View the current active licenses • Get the host id of the Océ system •... -
Page 322: The Basic Workflow Of 'Support' - 'Licenses' Activation
The basic workflow of 'Support' - 'Licenses' activation The basic workflow of 'Support' - 'Licenses' activation Introduction Before you can work with licenses, you must access to the Océ Express WebTools. The following workflow describes per step when to use which possibility. The workflow View the current active licenses. -
Page 323: Océ License Logic
Océ License Logic Océ License Logic Introduction When you navigate to the 'Support' - 'Licenses' tab in the Océ Express WebTools, you get access to the Océ License Logic application. Overview Océ License Logic functionality Function Description View the current active licenses. You can make a list of new options you need and make a list of license numbers. -
Page 324: The Structure Of License Files And Licenses
The structure of license files and licenses The structure of license files and licenses Introduction A license file contains a license per option of your Océ system. You can view the current active licenses with Océ 'Support' - 'Licenses' tab in the Océ Express WebTools. You can preview the new active licenses during the license activation job. - Page 325 The structure of license files and licenses Situation What do you see Preview the resale licenses during You see the following. the license activation job if you • All current active resale licenses use the license file that contains • All new active resale licenses.
-
Page 326: Check Your Licenses
The 'Support' - 'Licenses' tab in the Océ Express WebTools allows you to manage the licenses that are active on your system. A license is needed to activate certain functions on your Océ ColorWave 300. You can use the 'Support' - 'Licenses' tab to perform the following tasks. - Page 327 Check your licenses Information Description 'Option' This field displays the name of the option. For Océ ColorWave 300 the following licenses are available. • 'Océ ColorWave 300 license' • 'Security' • 'Queue management' • 'Accounting' • 'Copy with Océ Scanner Express' •...
-
Page 328: Save The Currently Active Licenses
Save the currently active licenses Save the currently active licenses Introduction You can save all current active licenses of different licenses types into one single file. Purpose Save the current active licenses for the following purposes. • Collect and save all active licenses of different types into one single file •... -
Page 329: Install A New License
Purpose • Upload a new license file. • Extend the existing license on your Océ ColorWave 300. Note: After the license is uploaded you must restart your system to activate the license file. How to get a new license file Click 'Support' - 'Licenses' to display the license information page. - Page 330 Install a new license Click 'Activate' to open a browser window to search for the license file on the network. Chapter 9 - License management...
- Page 331 Install a new license Browse the network and select the license file. Chapter 9 - License management...
- Page 332 Install a new license Click 'Next >' to check the license information. Click 'Next >'to read the End user license information. Read this information carefully. Check the "I accept" tick box. Click 'Finish' to start the activation of the license file. Restart the system to activate the changes.
- Page 333 Install a new license Result • If you have updated an expired license, the new license file overwrites the previous li- cense file. • If you have uploaded a new license, the license state in the overview is changed from 'Not authorized' to 'Authorized'.
- Page 334 Install a new license Chapter 9 - License management...
-
Page 335: Chapter 10 Software Options
Chapter 10 Software options... -
Page 336: Océ Repro Desk Studio
Océ Repro Desk Studio Océ Repro Desk Studio Océ Repro Desk Studio Introduction Océ Repro Desk Studio provides end-users (designers, information consumers, document distribution specialists) a simple uniform way of viewing and printing technical documents, with integrated accounting capabilities. Note: For this application a separate user manual is available. -
Page 337: Account Management
An overview of Océ Account Center Account management An overview of Océ Account Center Introduction Use Océ Account Center to manage the account information of print jobs, copy jobs and scan jobs for your Océ devices. Note: For this application a separate user manual is available. Definition Océ... - Page 338 An overview of Océ Account Center Illustration User roles and tasks in Océ Account Center Users Tasks 1) Administrator • Create, manage and delete the account dialog. • Publish the account dialog to the Océ Express WebTools and the user panel. 2) Users •...
-
Page 339: Network And Security
Chapter 11 Network and Security set- tings... -
Page 340: Check Or Adapt The Network
Check or adapt the network settings Check or adapt the network settings Introduction The 'Network settings' wizard on the printer user panel gives the option to check or adapt the network of the system. Caution: Detailed network knowledge is needed to change the network settings. How to check or adapt From the'HOME' screen select the 'System' tab. - Page 341 Check or adapt the network settings • 'Netw. speed' Two options are possible: • Press the 'Cancel' key in case you only want to read and check the network settings. • Press the 'Begin' key in case you want to adapt the network settings. Follow the wizard to fill in the network settings.
-
Page 342: Check Or Adapt The Security
Check or adapt the security settings Check or adapt the security settings Introduction The 'Security' wizard on the printer user panel gives the option to check or adapt the se- curity settings of the system. Caution: Detailed network knowledge is needed to change the security settings. How to check or adapt From the'HOME' screen select the 'System' tab. - Page 343 Check or adapt the security settings Overview of the security levels and the network access options: 'Security level:' Network access options: 'Normal' 'LPR printing, FTP scan-to-file (passive mode), DHCP' 'HTTP (and Océ Express WebTools), FTP printing, FTP data retrieval (active mode)' 'SNMP, DNS, SMB, FTP scan-to-file (active mode)' 'Medium' 'LPR printing, FTP scan-to-file (passive mode), DHCP'...
- Page 344 Check or adapt the security settings Chapter 11 - Network and Security settings...
-
Page 345: Specifications Of The Océ Colorwave
Appendix A Specifications of the Océ ColorWave 300... -
Page 346: Specifications Océ Colorwave 300 Printer
2 front loadable rolls Media core diameter 2" (50 millimeters) Optional: 3" (76.2 millimeters) Maximum roll length 120 meters 393.7 ft Output delivery Front-accessible 'Lower receiving tray' (standard) Top delivery tray (optional) Folder (optional) Appendix A - Specifications of the Océ ColorWave 300... - Page 347 Engine (printer + scanner): 201 W, Controller: 39W • Ready mode (Standby) Engine (printer + scanner): 146 W, Controller: 39W • Sleep mode ® Engine (printer + scanner): 3 W EPA Energy Star Appendix A - Specifications of the Océ ColorWave 300...
- Page 348 Weight print engine 180 kg 397 lbs Weight top delivery tray 37 kg (optional) 81.6 lbs Safety approvals ® Energy Star , TüV, GS, CETECOM, CE, UL, (c)UL, CB, FCC, RoHS, FEMP Appendix A - Specifications of the Océ ColorWave 300...
-
Page 349: Specifications Océ Scanner
Grayscale: Lines&Text, Grays&Lines, Dark Original, Blueprint, Photo, Transparent, 'Folded line/text' • Color: Photo, Lines/text, Map, Artwork, 'Folded line/text'. Number of copies 1 - 999 (scan once print many) Color space sRGB Appendix A - Specifications of the Océ ColorWave 300... - Page 350 Concurrent scanning and printing • Scan to file Black&White / Grayscale / Color • Scan to 'TIFF', 'TIFF multipage', 'PDF/A', 'PDF multipage', 'JPEG', 'CALS'. Weight scanner • 24.5 kg 53.9 lbs Appendix A - Specifications of the Océ ColorWave 300...
-
Page 351: Specifications Océ Powerm
The Océ PowerM controller software consists of a basic module and a print module. Basic module Basic functions File spooling on the controller. Concurrent receiving, processing, copying (or scanning) and printing of digital jobs. Appendix A - Specifications of the Océ ColorWave 300... - Page 352 Raster: JPEG, HP-RTL, TIFF 6.0, NIFF, CALS-I, NIRS, C4, ASCII Cut length • Standard cut • Synchro cut • Custom cut Optional ® Adobe PostScript 3™ PDF printing Adobe Asian Fonts for PS/PDF printing Appendix A - Specifications of the Océ ColorWave 300...
-
Page 353: Specifications Drivers And Job Submission
Citrix Presentation Server 4.x • Citrix Metaframe The driver is compatible with the Novell iPrint and NDPS environments (installation, propagation and printing). Note: Visit Océ on the Internet at www.oce.com for the latest information. Appendix A - Specifications of the Océ ColorWave 300... - Page 354 • Citrix Metaframe • Macintosh Mac OS 9.x • Macintosh Mac OS 10.x Note: Visit Océ on the internet at www.oce.com for the latest information. Optional application software Function Application software Job submission • Océ Repro Desk Studio Appendix A - Specifications of the Océ ColorWave 300...
-
Page 355: Preferred Océ Media
Preferred Océ media names Preferred Océ media names Introduction The following preferred media names are supported by the Océ ColorWave 300. Four categories of media names are defined: • Paper • Coated paper • Photopaper • Transparencies & Films Supplies A media guide with the latest information is available on the website: http://www.mediaguide.oce.com/... - Page 356 Paper FSC 90 g/m² IJM119: Océ Premium Paper FSC 100 g/m² IJM123: Océ Premium Paper FSC 130 g/m² IJM131: Océ Premium Plus Paper 90 g/m² IJM132: Océ Premium Plus Paper 120 g/m² Appendix A - Specifications of the Océ ColorWave 300...
- Page 357 Océ Inkjet Color Bond 24 lb 'Coated paper Japan' IPC-U: Océ Coated Paper 80 g/m² 'High qual. coated pa- IPP-J: Océ Premium per Japan' Coated Paper 81 g/m² 'Custom coated paper' Appendix A - Specifications of the Océ ColorWave 300...
- Page 358 170 g/m² 'Photo satin' IJM240: Océ Top Pho- IJM259: Océ Top Pho- to Plus Satin to Satin FSC 195 g/m² 170 g/m² SIPPLS7: Océ Satin Photo Paper 7.6 mil 'Custom photo paper' Appendix A - Specifications of the Océ ColorWave 300...
- Page 359 'Transparent paper 16- Ink Jet Bond: Océ 18 lb' 860018 Translucent Bond 18 lb Ink Jet Bond: Océ 860016 Translucent Bond 16 lb 'Transparent paper IPT: Tracing Paper Japan' 75 g/m² Appendix A - Specifications of the Océ ColorWave 300...
- Page 360 4 mil 'Clear film (side stripe)' IJM332: Océ Clear Film Extra 110 µm Ink Jet Film: 868340 Océ Clear Film w/ Side Stripe 4 mil IJM545: Océ Polyprop Outdoor Banner 200 µm Appendix A - Specifications of the Océ ColorWave 300...
- Page 361 914 millimeters 297 millimeters 36 inch 11 inch Roll diameter 130 millimeters This is the outer diame- 5.1 inch ter of a media roll Core 50 millimeters Not applicable 2 inch Appendix A - Specifications of the Océ ColorWave 300...
-
Page 362: Typical Drying
Tray' Tray' 'Paper 70-80g' IJM005: Océ Draft Pa- 0" 0" 75 g/m2 IJM012: Océ Draft Plus Paper 80 g/m2 'Recycled paper 70-80g' IJM042: Océ Recycled 0" 0" Paper 80 g/m2 Appendix A - Specifications of the Océ ColorWave 300... - Page 363 'Recycled paper 20 lb' Ink Jet Bond: 86500R 0" 0" Océ Recycled Bond 20 lb 'Paper 24 lb' Ink Jet Bond: 86800 0" 0" Océ Deluxe Bond 24 lb 'Custom paper' 0" 0" Appendix A - Specifications of the Océ ColorWave 300...
- Page 364 IJM151: Océ Smart Matt Paper 150 g/m2 'Coated paper 24 lb' Ink Jet Bond: 862024 0" 0" Océ Premium Color Bond 24 lb Ink Jet Bond: 861024 Océ Inkjet Color Bond 24 lb Appendix A - Specifications of the Océ ColorWave 300...
- Page 365 Photo paper 7.6 mil IPG-ZA: Océ Top Photo Plus Gloss 195 g/m2 'Photo gloss (instant IJM251: Océ Photo 0" 0" dry)' Gloss Paper 170 g/m2 IPG: Océ Photo Gloss Paper 170 g/m2 Appendix A - Specifications of the Océ ColorWave 300...
- Page 366 Matt Photo Paper 170 g/m2 'Photo satin' IJM240: Océ Top 4' 10" 9' 40" Photo Plus Satin 195 g/m2 SIPPLS7: Océ Satin Photo Paper 7.6 mil 'Custom photo paper' 4' 10" 10' 0" Appendix A - Specifications of the Océ ColorWave 300...
- Page 367 Not allowed per 16-18 lb' 860018 Translucent Bond 18 lb Ink Jet Bond: Océ 860016 Translucent Bond 16 lb 'Transparent pa- IPT: Tracing Paper 0' 55" Not allowed per Japan' 75 g/m2 Appendix A - Specifications of the Océ ColorWave 300...
- Page 368 'Clear film (side IJM332: Océ Clear Film 3' 20" Not allowed stripe)' Extra 110 um Ink Jet Film: 868340 Océ Clear Film w/ Side Stripe 4 mil 'Custom film' 2' 35" Not allowed Appendix A - Specifications of the Océ ColorWave 300...
-
Page 369: Factor
Standard scale factor Standard scale factor Introduction The Océ ColorWave 300 can scale (reduce and enlarge) the image to a defined format. The overview below shows the scale factor if you need to copy on media of different sizes. Caution: If you select the wrong scale factor you can lose information. - Page 370 Standard scale factor Originals Standard scale fixed steps for the ISO media series [%] Appendix A - Specifications of the Océ ColorWave 300...
-
Page 371: Sheet
Appendix B Reader's comment sheet... -
Page 372: Sheet
Reader's comment sheet Reader's comment sheet Questions Have you found this manual to be accurate? O Yes O No Were you able to operate the product, after reading this manual? O Yes O No Does this manual provide sufficient background information? O Yes O No Is the format of this manual convenient in size, readability and arrangement (page layout,... - Page 373 Please return this sheet to: Océ-Technologies B.V. For the attention of ITC User Documentation. P.O. Box 101, 5900 MA Venlo The Netherlands Send your comments by E-mail to: itc-userdoc@oce.com For the addresses of local Océ organisations see: http://www.oce.com Appendix B - Reader's comment sheet...
- Page 374 ...........131, 241 description description ...........162, 180 Color feel for HP-GL, HP-GL/2 and HP-RTL Available documentation description ...........128, 238 Océ ColorWave 300 ........16 Color feel for PostScript and PDF Océ Express WebTools ........16 description ...........130, 240 Océ PostScript® 3 Driver ......17 Color feel for TIFF and JPEG Océ...
- Page 375 Index green button principle ........21 description ............133 Océ Express WebTools controller application Create ................22 a network destination with SMB ....119 print jobs ............22 a web destination with FTP ......118 printer configuration ........21 Smart Inbox ..........150 Current date and time scan functionality ..........21 description ............112...
- Page 376 Index Extended DIN media series ..........369 Download copy job ............185 media profile ..........251 scan job ............166 media profile from the Océ web site .....251 Drawing method description ............195 Driver Factory defaults Océ PostScript® 3™ Driver ......354 restore .............98 Océ Windows® Printer Driver ....353 Feed the original Drying time: typical drying times per media type...
- Page 377 ..............154 Job states Queue ............157 Smart Inbox ..........157 Job submission Main components description ............210 Océ ColorWave 300 ........26 ..............218 Mains supply cable ..............219 connect ............46 Maintenance cassette: Place Océ Windows ® Printer Driver .....61, 214 Jobs Queue Maintenance cassette: Place ......292...
- Page 378 ......111 OIP file ..........253–254 ...............14 OMP file Océ Account Center OMP file ..........248–249 Overview ............337 Omp.file Océ ColorWave 300 Omp.file ............251 footprint ............28 Open main components ...........26 the system monitor .........99 Océ Enhanced colors: CMYK input data Optimize Output quality Océ...
- Page 379 Index description ............317 configure ............122 Original type color copy Photo description ............136 Color ............236 Original type grayscale copy Photo realistic impression description ............136 Photo realistic impression ......235 Original type when scanning to color Place: Maintenance cassette description ............142 Place: Maintenance cassette ......292 Original type when scanning to grayscale or black- Place: Print heads...
- Page 380 Index Error codes ...........308 Replace printheads ........284 Printheads: Replace Replace: ink tank Printheads: Replace ........284 Replace: ink tank ..........281 Printing of gray colors Resolution ...........143, 170 description ............132 description Printing system Restart footprint ............28 description ............101 Restore factory defaults switch off ............77 Restore factory defaults ........98...
- Page 381 Index Scan-to-file Sort color mode: black and white ......175 description ............196 Specific area color mode: color .........174 description ............206 color mode: grayscale ........175 Specifications Scanner ...........226, 302 Controller software ........351 calibration clean .............299 Océ PostScript® 3™ Driver ......354 Océ PowerM controller ........351 Specifications ..........349...
- Page 382 Index System messages Printer ............308 System monitor description ............99 Waves / Cockle System requirements Output quality problems ......266 System requirements ........81 Wizard: Change the media type System software Wizard: Change the media type .....48, 276 System software ..........304 Wizard: Ink tube System states Wizard: Ink tube ..........293...
- Page 384 © 2011Océ. Illustrations and specifications do not necessarily apply to products and services offered in each local market. Technical specifications are subject to change without prior notice. Trademarks mentioned in this document are the property of their respective owners. For more information visit us at: www.oce.com 2011-10...
Need help?
Do you have a question about the ColorWave 300 and is the answer not in the manual?
Questions and answers