Table of Contents
Advertisement
Quick Links
Advertisement
Chapters
Table of Contents

Related Manuals for DOPOD D810


Summary of Contents for DOPOD D810
- Page 1 U ser M a n u a l catalog.indd 2006/11/4 上午 09:27:...
- Page 2 Thank you for purchasing the all new Windows Mobile™ PDA Phone! Microsoft, MS-DOS, Windows, Windows NT, Windows Server, Windows Mobile, ActiveSync, Excel, Internet Explorer, MSN, Outlook, PowerPoint, and Word are trademarks, or registered trademarks of Microsoft Corpo- ration in the United States of America and/or other countries. QuickMark and its icons are registered trademarks of SimpleAct, Inc.
- Page 3 Important Safety Precautions Please adhere to the following safety precautions when using this prod- uct to avoid risk of legal and monetary responsibilities. Electrical Safety This product is only operable when using battery supplied power.Using other power sources may cause harmful conditions and will void all guar- antees for this product.
- Page 4 Dopod Defective Pixel Warranty Policy As the LCD display on the handheld product is made up of high precision components, possible lit or dark pixels (Note) appearing on the display screen is a common occurrence from the product manufacturing pro- cess.If your purchased product meets the following conditions, you may...
-
Page 5: Table Of Contents
Table of Contents G e t ti n g t o K no w Yo u r P8 0 0 W 1.1 Introduce to Handset ........1.2 About the USIM/SIM Card & Battery ....1.3 Learn about the Today Screen ......1.4 Programs ............ - Page 6 View M e s sa g e s 4.1 Using the Messaging Center ......4.2 SMS ..............4.3 MMS (MultiMedia Message) ......4.4 Outlook E-mail ..........4.5 POP3 / IMAP Account ........M an a gi n g Pe r s o na l I nf o r m at i o n 5.1 Contacts ............
- Page 7 E xp er i e n ce M ob i le Off i c e L i v e 8.1 Word Mobile ........... 8.2 Excel Mobile ........... 8.3 PowerPoint Mobile .......... 8.4 Adboe Reader LE ........... Wi r e le s s Co n n e c ti o ns 9.1 Comm Manager ..........
- Page 8 11.14 Clock & Alarm ..........11.15 Screen ............11.16 Device Information ........11.17 About ............11.18 Microphone AGC ......... 11.19 Beam ............11.20 Task Manager ..........U s in g M o r e Pr o g r a m s 12.1 Java MIDIet Manager ........
-
Page 9: How To Use This Manual
How to Use This Manual After purchasing this product, carefully read through the user manual before operatingFor your reading convenience, this manual is de- signed with many tips and services in order to help you find information quickly. Page Format Generally, each page is separated into up- per and lower areas, regardless of the left or right half of the page. - Page 10 About Action Icons Every topic’s content page includes icons that will as- sist the reader in operating the product and learning quickly.At the beginning of each action icon, the pur- pose of this action will be outlined in red background color.Each procedure will indicate the step sequence numbers, the action you will need to execute, the screen that appears for this procedure, and the de-...
- Page 11 Topic Getting to Know Your D810 In this topic, you will learn ... Introduction to Handset SIM Card and Battery Learn about the Today Screen Start Menu Standby Mode and System On/Off Soft Reset and Hard Reset CH01.indd 2006/11/4 上午 09:33:...
- Page 12 Index Action Introduction to Handset ..........3 Learn about the Today Screen ........8 Status Indicator and Program Icons ......9 Start Menu ..............10 Power Off ..............14 Reset Your Device ............. 15 Using the Restore to Default ........16 Using Hard Reset Restore to Default......
-
Page 13: Introduction To Handset
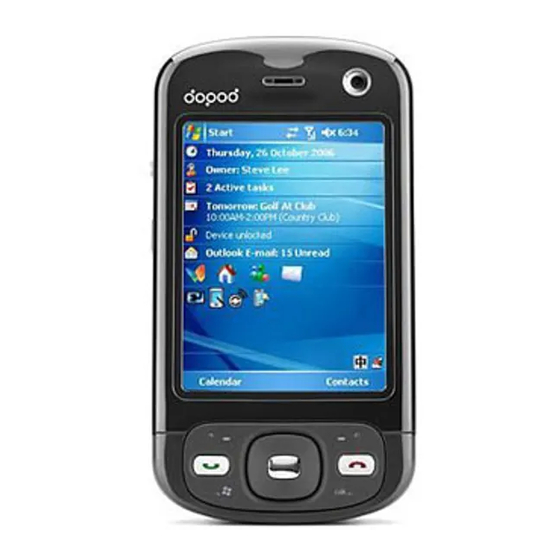
1.1 Introduction to Handset Getting to know your handset buttons and LED indicators. Introduction to Handset The left LED indicates the WiFi and Bluetooth. A blinking Blue light stands for Bluetooth system notifica- Left LED tion of "activated" and "ready to transmit radio frequency" Indicator signal. - Page 14 START Button Press to open the Start menu. NAVIGATION Press this multi-directional control up, down, left, or right Control/ EN- to move through menus and program instructions; carry out the selection by pressing the center button. Press to confirm your data entries, or to exit the pro- OK Button gram in use.OK button and the "OK"...
- Page 15 Press to confirm your data entries, or to exit the OK Button program in use. Use the main camera to take still photos and record Main Camera video clips. Connect your device to the car antenna while in a car Car Antenna Connector to have better reception quality.
-
Page 16: About The Usim/Sim Card & Battery
1.2 About the USIM/SIM Card and Battery Always turn off your device before installing/replacing the battery and SIM card.Follow the instructions in the Quick Start Guide to install a SIM (Subscriber Identity Module) card provided by your local network service provider and to install the battery. -
Page 17: Charge The Battery
Charge the Battery New batteries are shipped partially charged. Before you start using your device, it is recommended that you install and charge the battery. Some bat- teries perform best after several full charge/discharge cycles. Charge the battery in two ways: •... -
Page 18: Learn About The Today Screen
1.3 Learn about the Today screen The Today screen displays important information, such as upcoming ap- pointments and status indicators; You can tap a section on the screen to open the associated program. To access the Today screen, please select >... -
Page 19: Status Indicator And Program Icons
Status indicator and program icons Status indicator: New E-mail or text message : EDGE is active SMS notification of voice mail New multimedia (MMS) mes- Roaming sage New MSN message Connection is active There are more notifications. Connection is not active Tap the icon to view all. -
Page 20: Start Menu
3G UMTS in process 3G UMTS is active Stereo Bluetooth headset de- Sprite Backup notification tected USB connection active When your device is connected to your computer and you enable a USB connection between them, the USB to PC icon ( ) will ap- pears on the Today Screen. -
Page 21: Programs
1.4 Programs Using the Programs: Synchronize information between your ActiveSync device and a PC or the Exchange Server. Searches for other Bluetooth devices that Bluetooth Explorer have file sharing enabled and allows you to access their Bluetooth shared folder. Lets you perform basic arithmetic and Calculator calculations, such as addition, subtraction, multiplication, and division. - Page 22 Allows you to connect your notebook com- Internet Sharing puter to the Internet through your device's data connection. Allows you to browse Web and WAP sites Internet Explorer as well as download new programs and files from the Internet. Allows you to send and receive e-mail, Messaging MMS, and text messages.
- Page 23 Streaming Media video. Scan and recognize QRCode 2D bar code; can also used to save contact information. QuickMark (Please download this program from Dopod Website.) Lets you create, view, and edit Word docu- Word Mobile ments. Enables you to save memory and free up storage space on your device by compress- ing files in the conventional ZIP format.
-
Page 24: Standby Mode And System On/Off
1.5 Standby Mode and System On/Off Press to turn off the display temporarily. This switches your device to Sleep mode. You can still receive calls and messages when your device is in Sleep mode. Press and hold (for about 5 seconds) to turn off the power completely. All functions including the phone will be unavailable for use. -
Page 25: Soft Reset And Hard Reset
1.6 Soft Reset and Hard Reset Soft Reset restart the device and the operating system. When programs are not responding correctly, or new programs are installed, soft reset is required. Unsaved data will be lost after performing Soft Reset, but saved information will remain unchanged. -
Page 26: Using The Restore To Default
Perform Hard Reset when the system problems cannot be solve by Soft Reset.Use Hard Reset to reset the device to factory default.All personal information such as contacts, tasks, calendar appointments, as well as additional installed programs and configurations will be lost. You can sync the data to a personal computer prior to performingHard Resetto avoid data loss.When the phone malfunctions due to an error, you can try restoring the factory default values. -
Page 27: Using Hard Reset Restore To Default
Action: Using hard reset restore to default Press and hold the Use the stylus to Remove the stylus left and right short- press the reset but- (Note1) cut button Left Shortcut button Right Shortcut button Reset button Press You can also press END button cancel the Hard Reset. - Page 28 CH01.indd 2006/11/4 上午 09:33:...
-
Page 29: Learning The Input Modes
Topic Learning the Input Modes In this topic, you will learn … Using the Input Method Using Block Recognizer Using Letter Recognizer Using Transcriber Using Phone Pad CH02.indd 2006/11/4 上午 09:57:... - Page 30 Index Action Show and Turnoff Virtual Keyboard ......21 Enter Upper Case or Symbols ........22 Continuously Enter Upper Case English Characters ... 23 Switch to Numeric Keypad ......... 23 Switch to Latin Keyboard ........... 24 Switch to Symbol Pad ..........24 Block Recognizer Input Screen ........
-
Page 31: Using The Input Method
2.1 Using the Input Method Your handset comes with on-screen Keyboard, Letter Recognizer, Transcriber, Block Recognizer, Symbol Pad and Phone Pad input methods. 2.1.1 Getting to Know the Virtual Keyboard You can enter text from the touch screen virtual keyboard; the input method status is displayed in the center of the task bar at bottom of the screen. - Page 32 2.1.2 Using On-screen Keyboard When using the on-screen Keyboard to input text, you must use the stylus to select the letter, digit or symbol shown on the screen. You can use the virtual keyboard to quickly switch between lower and upper case as well as the number-symbol and Latin alphabet keyboard.
- Page 33 Action: Continuously Enter Upper Case English Characters Select twice Select Select (virtual keyboard) (virtual keyboard) (virtual keyboard) The virtual keyboard Before selecting shows upper case the input method will letters remain upper case Action: Switch to Number-Symbol Keyboard Select Select (top left of the (top left of the virtual keyboard)
- Page 34 Action: Switch to Latin Keyboard Select Select (lower left of virtual (lower left of virtual keyboard) keyboard) Selected , you can You can now select and return to the English input the Latin alphabet. keyboard. Action: Switch to Symbol Pad Select Select Symbol Pad...
-
Page 35: Using Block Recognizer
2.2 Using Block Recognizer Using the Block Recognizer input method, the handset will recognize the character, symbol or digit that you write on the screen. Block Recognizer Input Screen Block Recognizer input method: Select a Candidate Words candidate word Character Input Field Write character Number, Symbol Write digit or... -
Page 36: Using Letter Recogniz
2.3 Using Letter Recognizer Using the Letter Recognizer input method, the handset will recognize the character, symbol or digit that you write on the screen. Letter Recognizer Input Screen Block Recognizer input screen: Select a Candidate Words candidate word Write upper case Upper case Input Field Write lower case Lower case Input Field... -
Page 37: Using Transcriber
2.4 Using Transcriber Transcriber is a handwriting recognition program that allows you to write in cursive, print,or a combination of both. Transcriber works transparently in the background of programs,recognizing words with its integrated dictionary. When Transcriber is turned on, it interprets stylus movement anywhere on the screen as handwriting input Transcriber Input Screen Transcriber Shortcut Icon Functions:... - Page 38 Action: Using Transcriber Select Transcriber Select (right side of input method display) After virtual keyboard is Transcriber input screen activated, the icon will be shown Action: Handwriting Recognition Written <text> Please write some Input text successfully character on the screen, recognized for example: Smile CH02.indd...
-
Page 39: Using Phone Pad
2.5 Using Phone Pad Phone Pad is a Soft Input Panel (SIP) application that provides a flexible alternate input method. You can input every letter, number, and symbol offered by the standard QWERTY keyboard SIP, but with greater convenience. With Phone Pad, you can easily switch among three input modes (T9, Multi-Tap, and Numeric) plus a Symbols menu, allowing you to use the same simple buttons on the screen for different input behaviors, depending on the current input mode. - Page 40 Picked words shown in the input screen. Action: Use Phone Pad to Enter Numbers Select Select button Select <numbers to T9 button be input> Switched to , Select the correct which mean numbers number to be inputed input. on the screen. CH02.indd 2006/11/4 上午...
- Page 41 Picked numbers shown in the input screen. Action: Use Phone Pad with Multi-tap to Enter Text Select Select Button Select <Words to be selected> Button For example, tap "7" for Select the correct words Switched to , means MultiTap input mode. four times for S, and "2"...
- Page 42 The selected words on screen. Action: Enter Punctuation Marks by Phone Pad Select Select Symbol Symbol button Use physical keyboard Entering the symbol; Punctuation mark entered to enter characters Use the direction key to browse the symbol list. CH02.indd 2006/11/4 上午...
- Page 43 Action: Configure Phone Pad Settings Select Options Select arrow, then select Options Modify the settings here. (Note1): Turn on one-touch If this option is checked, you can select only one symbol entry symbol at a time. That is, after you tap a symbol in the Symbols screen, the screen will close and the chosen symbol will be input (no need to tap OK in the Symbols screen).
- Page 44 CH02.indd 2006/11/4 上午 09:57:...
-
Page 45: Using The Communication
Topic Using the Communication In this topic, you will learn ... Using the Phone Making Voice Calls Receiving Voice Calls Making a Video Call Call Options Additional Information on Dialing Smart Dailing Managing Call History Configure Speed Dial CH03.indd 2006/11/4 上午... - Page 46 Index Action Turn Off/On the Phone Function ......... 38 Adjust Phone Volume ..........40 Using the Phone Dialing Application ......41 Dialing from the Contacts List ........42 Dialing When Browsing Contact Information ....42 Using Call History for Dialing ........43 Use SIM Card Manager Dialing ........
- Page 47 Continue with Original Call ......... 54 Keep Original Call, Dial Second Number ....55 Create Multi-way Conference ........56 Switch to Private Call ..........56 Turn the Handsfree Off/ On ........57 Turn On/ off Mute Function ......... 57 Use Speed Dial List to Dial Voice Mail ......58 Dialing Emergency Calls ..........
-
Page 48: Using The Phone
3.1 Using the Phone You can use the Comm Manager to activate/ deactivate the phone and wireless functions. Also, v\olume is adjustable at any time during a call or when using the phone. 3.1.1 Phone Screen At the phone screen, you can directly enter the number to dial, use contacts dialing, Speed Dialing, browse call records, create notes and configure the phone. -
Page 49: Turn Off/On The Phone Function
3.1.3 Activate/Deactivate Phone Functions You can use the Comm Manager to activate/ deactivate the phone, Wi-Fi wireless network, and Bluetooth wireless functions. In certain circumstances, such as when on an airplane, you may be required to turn off the phone and other wireless communication functions. -
Page 50: Adjust Phone Volume
3.1.4 Adjust Call and Device Volume You can use the volume adjust button or se- lect the speaker icon from the top of the Today screen, to adjust the “phone " and "device " volume respectively.Adjusting the “phone” volume will adjust the ring tone volume;adjusting the “device”... -
Page 51: Making Voice Calls
3.2 Making Voice Calls You can use the phone application programs, contacts, call records, SIM manager, speed dialing function, and voice commands to make calls. During a call, you will still be able to access other application programs, or return to the Today screen. When using speed dialing, you only need to select the number button on the phone screen to dial the most recently used numbers. -
Page 52: Dialing From The Contacts List
Action: Dialing from Contacts List Press NAVIGATION Press Call button up/down to select to dial Call Item (Note 1) Press NAVIGATION left or right to choose the location of the contact (Mobile, Home, Work) to dial Choose the desired Dialing the Contact contact to call (Note 1) Action: Dialing When Browsing Contact Information Select... -
Page 53: Using Call History For Dialing
Action: Using Call History for Dialing Select Call history Select <Contacts> Select Call or press Call button At the phone Home Choose the contact to Dial contact in call his- screen, access the call call in call history tory history Action: Using SIM Card Manager Dialing Select >... -
Page 54: Use Speed Dialing From Phone Screen
Action: Use Speed Dialing from Phone Screen Select and hold <number button> (Note 1) If the specified contact number is 12, you can select “1” and then select and hold “2” to dial the contact numbered “12.” Select the correspond- Dial the speed dialing ing speed dialing num- specified contact... -
Page 55: Use Voice Command Dialing
Action: Use Voice Command Dialing Select Voice Call <Contact> Select > Commander a t < H o m e / Wo r k / Programs Mobile> You can also press the Activate Voice Com- For example, say Voice Commander but- mander call to David mobile to activate directly. -
Page 56: Receiving Voice Calls
3.3 Receiving Voice Calls When you receive incoming calls, the phone screen display will show the incoming mes- sage, you can choose to accept or reject the incoming call.When you are on a call, you can still select the start menu and access other application programs at any time, or return to the Today screen. -
Page 57: Reject Incoming Calls
Action: Reject Incoming Calls S e l e c t I g n o r e press button Incoming call prompt Top of the screen will show to remind you the missed calls. Action: View Missed or Rejected Incoming Calls Select Notification Select... -
Page 58: Dialing Missed Calls
Action: Dialing Missed Calls Select <Missed Calls>, then select Call or press Call list screen Dialing missed call Action: End Call Select or press Hang up button In call End call CH03.indd 2006/11/4 上午 10:20:... -
Page 59: Making A Video Call
3.4 Making a Video Call You can use the phone application to make video calls to contacts. Before dialing or answering video calls, please make sure you are using a 3G mobile network supported USIM card and account. When the task bar at the top of the screen shows the appropriate icon it means that you are already using a... - Page 60 Select or press Hang up button Video call in progress End video call End call Adjust Video Call settings In a Video Call, you can adjust the video content by pressing below items: : Tap to adjust the camera’s brightness. : Tap to toggle between turning on/off the camera.
-
Page 61: Answering A Video Call
Action: Answering a video call Press Call but- or tap Answer Video call incoming Answering video calls notification If you unsuccessfully dialed a video call, you can choose: • Try again • Make voice Call • Send SMS • Send MMS ▲Unsuccessful video call dialed CH03.indd... -
Page 62: Configure A Video Call
Action: Configure Video Calls Select Menu > Video Call Options Video call options Incoming video call screen notification Video Call Options Video call configuration options: Options Description Show still image Choose the picture you wish to display when the video camera is disabled during a call. You can choose a custom picture to replace the default picture. -
Page 63: Call Options
3.5 Call Option You can choose to hold a call, switch between calls, set up multi-way calls during a call, as well as use the hands-free speakerphone or acti- vate the microphone muting function during a call. If you receive incoming calls while on a call, the phone will show a noti- fication. -
Page 64: End New Incoming Call, Return To Original Call
Action: End New Incoming Call, Return to Original Call Select End new incoming call, Continue with original return to original call call Action: Continue with Original Call Select Swap Switch call to other side CH03.indd 2006/11/4 上午 10:20:... -
Page 65: Keep Original Call, Dial Second Number
Action: Keep Original Call, Dial Second Number Select Hold Select Keypad Select or press Left <Number buttons> shortcut button Hold original call Orginal call holding Enter the second phone number Select Talk Create new call Dial the second phone number CH03.indd 2006/11/4 上午... -
Page 66: Create Multi-Way Conference
Action: Create Multi-way Conference S e l e c t M e n u > Conference Not all service providers support multi-way conferencing, please contact your service provider for more information. You can use “Confer- Connect screen will ence” to create a multi- show “conferencing”... -
Page 67: Turn The Handsfree Off/ On
Action: Turn the Hands-free On/ Off Select Speaker On Select Speaker Off (Note1) You can select Menu > Speaker On. Press & hold Call button to actiivate speaker phone function. You can also select menu > Speaker to turn off speakerphone. -
Page 68: Additional Information On Dialing
3.6 Additional Information on Dialing You can use additional dialing functions, including dialing to voice mail, emergency and international calling, using SIM card service (STK), and creating call notes. To listen to voicemail messages, you can dial the voicemail number (pro- vided by the service provider) from the phone application. -
Page 69: Dialing Emergency Calls
Action: Dialing Emergency Calls Select <emergency phone number> then select Talk SIM card may store other emergency help numbers, please ask your service provider for more information. Enter emergency phone Dialing emergency calls number Action: Dialing International Calls Select and hold Select <Numbers>... -
Page 70: Using Sim Card Service (Stk)
Action: Using SIM Card Services (STK) Select Select > (STK Icon ) Programs The STK icon displayed name is your service provider name Action: Use Phone Application to Ceate Call Notes Select Menu Select Create Note Edit <Note Content> Phone Screen For phone screen edit- ing notes please refer to 5.4 Notes Application... -
Page 71: Smartdailing
3.7 SmartDailing Smart Dialing is integrated in the phone ap- plications, providing you with even more con- venient phone dialing. When you select the number or the English characters representing the number (for example: the number “8” is represented by t, u, v), Smart Dialing will au- tomatically search stored contacts, SIM card contacts and received call items, then lets you choose the number or contact to dial. -
Page 72: Managing Call History
3.8 Managing Call History The phone application call history lets you browse, delete, and manage call details. You can use the filter function to search for the desired history. The filter function can display call records as follows: all calls, missed calls, incoming calls, video calls, and by contact name, for your convenience. -
Page 73: Filter Call History
Action: Filter call history Select Select Menu > Filter <Filter Criteria> Call history screen Select the call type to List all outgoing calls browse.For example, Outgoing Action: Delete Single Call History Select and hold Select <Contacts> Then select delete (Note1) To delete entire call history, please select. -
Page 74: Configure Speed Dial
3.9 Configure Speed Dial The phone speed dial application allows you to use the number buttons to quickly dial con- tacts. Before using the speed dialing function, you must first create speed dial entries using the speed dial application. You will also be able to delete and edit the speed dial entries. -
Page 75: Removing A Speed Dial Entry
Select <Number> Select Select Choose <Location> S e l e c t t h e n u m b e r Select the correspond- Finish creating a speed to correspond to the ing number button.For dial entry speed dial entry example, 2 Action: Removing a Speed Dial Entry Select... - Page 76 CH03.indd 2006/11/4 上午 10:21:...
-
Page 77: View M E S Sa G E S
Topic View Message In this topic, you will learn ... Use the Messaging Center Outlook E-mail POP3 / IMAP4 Account CH04.indd 2006/11/4 上午 10:39:... - Page 78 Index Action Switch Accounts ............69 Switch Folders ............70 Adding a New Message ..........71 Open Messages ............72 Reply Messages ............73 Deleting Messages............. 73 Copy Message to SIM card ........74 Copy Message to Inbox ..........74 New Multimedia (MMS) Message .......
-
Page 79: Using The Messaging Center
4.1 Using the Messaging Center The messaging center is used to manage your SMS, MMS, and e-mail messages. You can use the messaging center to send and receive SMS, MMS, Outlook® e-mails, and other mes- sages from custom e-mail accounts. By switching accounts, you can browse SMS, MMS, Outlook®... - Page 80 Action: Switch folders Select Inbox Select <Folder to open> Open the folder to view Folder switched (Note 1), for example: Drafts (Note1) Default folder description: Folder Description Inbox Stores all received messages. Deleted Items Deleted messages are saved in Deleted Items. Drafts Stores message drafts.
-
Page 81: Sms
4.2 SMS Through SMS you can quickly send / receive text messages to other people.The fee for each message transaction will depend on the telecom service provider. A single message can have up to 160 English characters. When your text count exceeds the character limit, the phone will automatically split the text into two or more messages before sending.Browse received messages. - Page 82 Select the lower Select Send empty field, then Enter <Text> Message sent Action: Open messages Select < M e s s a g e t o browse> Message opened, you can browse the mes- sage contents CH04.indd 2006/11/4 上午 10:39:...
- Page 83 Action: Reply messages Select and hold Select Reply <Message to reply> Message editing screen. Action: Deleting messages Select and hold Select Delete <Message to de- lete> Deleted messages are moved to the “Deleted Items” folder CH04.indd 2006/11/4 上午 10:39:...
- Page 84 Action: Copy message to SIM card Select Menu > copy to SIM card Message copied to SIM card Action: Copy message to Inbox Select Menu > Copy to Inbox Message has been cop- ied to Inbox CH04.indd 2006/11/4 上午 10:39:...
-
Page 85: Mms (Multimedia Message)
4.3 MMS (MultiMedia Message) You can easily create or share MMS messages with friends and family. MMS enables you to send or browse pictures, movies, audio, and text in an MMS message. Browse received MMS messages, read and unread messages are indi- cated by the following icons: : Unread MMS messages : Read MMS messages... - Page 86 Continue: New multimedia (MMS) message Select and enter Select Select <Picutres Subject Videos>Then Select Select Insert pictures or videos Choose a picture or video to send(Note1) Select Enter text Select Choose here then Enter Insert audio clipe <audio clip> <Text to send> here You can also select Recordings...
- Page 87 Select Send ( N o t e 1 ) I f y o u are having large pictures size, it is likely resulted in MMS sent fail. It is recommended to use the "Pictures & Videos" to select the files to be sent, via "Pictures &...
-
Page 88: Outlook E-Mail
® sync connection.E-mails will be sent/received simultaneously when synchronizing between the phone and a computer or Exchange Server®. When your D810 is configured to sync via the “e-mail” option with an Ex- change Server®, you can specify a sync setting of “when item arrives” in the ActiveSync®... - Page 89 Enter the text body. For Append file body in the empty edit- example: FYI ing field Select Select Send <Files to send> For example, dopod During next execution smartphone guide of ActiveSync, mail will be automatically sent CH04.indd 2006/11/4 上午 10:39:...
- Page 90 Action: Recieving e-mail Select Send / Recieve You must perform Received E-mail ActiveSync sync before receiving mail Action: Browse e-mail Select <E-mail to Select browse> You can also select and Icon for read e-mail be- view the appended files comes CH04.indd 2006/11/4 上午...
- Page 91 Action: Download complete e-mail contents Select Obtain remaining parts of this message E-mail contents will be completely downloaded during next sync Action: Download attached files Select <File to download> File will be downloaded during next sync CH04.indd 2006/11/4 上午 10:39:...
- Page 92 Action: Save the attached file to storage card S e l e c t M e n u > Select Storage Select Store attach- Tools> Option ments on storage card Action: Reply to e-mails S e l e c t a n d h o l d Select Reply Select...
- Page 93 Select Send During next execution of ActiveSync, mail will be automatically sent CH04.indd 2006/11/4 上午 10:39:...
-
Page 94: Pop3 / Imap Account
Action: Adds a new POP3/IMAP mail account Select Menu > Select <Other Enter Options > (POP3/IMAP) > <E-mail Address> New Accounts... then Next Messaging Home Please enter your e-mail Screen address, for example: dopod@dopod.com.tw CH04.indd 2006/11/4 上午 10:39:... - Page 95 Select Next Enter <Your name Enter <Account / User name / Pass- type /Name> word> Please ask your mail Note: After setup, no server administrator for modification is permit- the server information Enter <Incoming Choose and Select mail / Outgoing mail Yes/No / Domain>...
- Page 96 4.5.2 Download E-mail You can use the Messaging Center to download and send e-mails.When sending/receiving you may be charged fees by the ISP for connecting to the Internet. Action: Send and receive e-mail Select Menu > Send/Receive E-mail downloaded CH04.indd 2006/11/4 上午...
-
Page 97: Contacts
Topic Managing Personal Information In this topic, you will learn ... 1. Contacts 2. Calendar 3. Tasks 4. Notes CH05.indd 2006/11/4 上午 10:25:... - Page 98 Index Action Open Contacts Application ......... 90 Adding New Contacts to the Phone ......91 Add New Contacts through Call History ...... 94 Viewing and Editing Contact........94 Deleting Contacts............95 Search Contact ............95 Grouping Contact ............96 View Grouping Contacts ..........96 Send contacts through MMS ........
- Page 99 Open the Notes Application ........108 Add New Notes ............109 Adding a New Voice Note ........... 111 View Notes..............111 Play Voice Notes ............112 Rename/Moving Notes ..........112 Delete Notes .............. 113 Change the Notes Default Storage Location ....114 CH05.indd 2006/11/4 上午...
-
Page 100: Open Contacts Application
5.1 Contacts Use the Contacts application to manage your contact information, to quickly connect with or send messages to your contacts.Using the Micro- soft Office Outlook® data sync function, you can easily sync your con- tacts to the contacts list on the phone to manage them.In the Contacts application, you can add, view, edit, copy, and delete contacts, or man- age contacts in categories.You can also use Bluetooth, IR, and MMS to send contacts to other people. -
Page 101: Adding New Contacts To The Phone
Action: Adding New Contacts to the Phone Select Menu > Select Name Select then Enter Contact Then enter <Con- <mobile number> tact name> You can also press The mobile number is For example: Bruce Left Shortcut Button the default calling num- ber (Note 1) (Note 2) Select Select... - Page 102 Continue: Adding New Contacts to the Phone Enter <Address> Select <Ring tone> Select then Enter <E-mail> Select contacts incom- E n t e r t h e c o n t a c t s ing ring tone, for ex- e-mail address (Note 1) ample: Dopod01.
- Page 103 These are the built-in contact information fields you can enter: Name Picture Job Title Department Company Work Tel Work Fax Work Address Instant Mess- E-mail Number Mobile Num- Ring tone Web page Office location Home tel Home ad- Categories Other ad- Pager dress dresses...
-
Page 104: Add New Contacts Through Call History
Action: Add New Contacts through Call History Select and hold S e l e c t S a v e t o Input <Call history item> Contacts <Various informa- tion for the contact> Select call item, for ex- Edit various information ample: (091) 100-0000. -
Page 105: Deleting Contacts
Action: Deleting Contacts Select <Contacts> Select Menu > Deleting Contacts Choose the Contact to Delete a single contact Contact deleted delete. For example, information entry Bruce Action: Search Contact Select then Enter Select <Search Cri- E n t e r N a m e o r teria>... -
Page 106: Grouping Contact
Action: Grouping Contact Select Menu > Edit Select Categories Check <contact cat- egory> then Select Contacts information You can also select browsing screen. to add a new cat- egory Action: View Grouping Contacts S e l e c t M e n u >... -
Page 107: Send Contacts Through Mms
Send contacts through MMS Follow theses procedures to send contacts to other people as a vCard (Note 1) through MMS: • At the contacts main screen, select < contact > For example: David • Select Menu > Send as vCard •... -
Page 108: Open The Calendar Application
5.2 Calendar You can use the calendar application to schedule, search, and create reminders of appointments. Using the Microsoft Office Outlook® data sync function, you can easily manage calendar appointments. In the calendar program, you can add new appointments, view, edit, copy, and delete sent appointment information. -
Page 109: Change Calendar View Method
Action: Change Calendar View Method Select Select Week Select Month “ A g e n d a ” v i e w. A ft e r “Day” view.After selec- “ W e e k ” v i e w. A f t e r selection, changes to tion, changes to “Week”... -
Page 110: Adding New Appointments
Action: Adding New Appointments Select Menu > Select and Enter Select and Enter Adding New Ap- <Subject> <location> pointments Enter the appointment Enter the appointment subject, for example: location, for example: meeting Conference Room Select Starts, then Select End, then Select Day, Enter... - Page 111 Select Occurs, then Select Reminder, Select then Enter Choose <Appoint- then <Whether re- <Reminder time> ment periodicity> minder is required> C o n f i g u r e h o w l o n g Select the periodicity of Select whether to re- before the appoint to appointments (Note 1)
- Page 112 Select <Contacts> Select Status, then Select Sensitiv- Select again Choose <Status> ity, then choose <Sensitivity> Select the appointment Select the appointment Select the appointment status (Note 2), for ex- confidentiality (Note 3), attendees, for example: ample: Busy for example: Normal Bruce Select Select...
- Page 113 These are the built-in appointment formation fields you can enter: Subject Location Starts Ends All Day Occurs Reminder Categories Attendees Status Sensitivity Newly added appoint- ments will be shown on the Today screen (Note1) Appointment periodicity description: Once Appointment occurs only once Same day every week Appointment occurs on same day of every week Same day every month...
-
Page 114: Close Reminder
Action: Close Reminder Action: Delay Reminder Select Dismiss Select Menu > <Delay time> At the appointment reminder time Remind you again after the delay the phone will show the reminder time, for example: “Snooze 5 min- screen and sound the ring tone utes”... -
Page 115: Tasks
5.3 Tasks You can use the Task application to track ongoing events; tasks can be a single operation or a repeating operation.You can set up reminders for tasks, or manage them by setting up different categories.All of your en- tered tasks are displayed in the application main screen Tasks List. In the tasks application, you can add new tasks, view, edit, search, de- lete, and send task information.When adding new task entry information, you can set the task start and end date, as well as reminder time, etc. -
Page 116: Quick Add New Tasks
Action: Quick Add New Tasks Select Tap here to Select the Ordering Press add a new task Priority Enter virtual button Then EnterSubject Enter the task subject, You can select High Use the virtual keyboard for example: Buy ticket to input; press the track Priority, Low Priority,... -
Page 117: Setting Tasks As Completed
Select Due, then Select Starts, then Select Notes, then Select Expiration Select <Start Date> Enter <Note Con- date> tent>. Select Select the task start Select the task expira- Enter task notes in the d a t e , f o r e x a m p l e : tion date, for example: empty space.Select 2006/10/17... -
Page 118: Notes
5.4 Notes The Notes application can assist you to quickly note down your thoughts, questions, reminders, things to do list, and meeting records, etc. You can use the virtual or hardware keyboard, handwriting recognition, and audio recording to edit note contents. In the notes program, you can add new, view, edit, rename/move, and delete notes, as well as record audio notes.You can rename the note to another file name, as well as move the note to internal phone memory... -
Page 119: Add New Notes
Action: Add New Notes Select Input <Drawing or hand- written characters> Draw mode. You can use the stylus N o t e s a p p l i c a t i o n to draw or write charac- screen ters on the screen Select Menu... - Page 120 Select Menu, then Select Select check View Record- ing Toolbar Start recording toolbar, Start recording Stop recording to record audio notes Select Return to main screen. Audio note contents You have added a new are shown as in note documents. note entry CH05.indd 2006/11/4...
-
Page 121: Adding A New Voice Note
Action: Adding a New Voice Note Select Menu > Select Select V i e w R e c o r d i n g Toolbar O p e n t h e r e c o r d i n g Begin Recording After stop recording, tool bar to record audio... -
Page 122: Play Voice Notes
Action: Play Voice Notes Select <Audio to play> Select the audio note to Begin audio playback, Audio note play com- playback. For example: plete you can selectSelect recording 1 to stop play Action: Rename/Moving Notes S e l e c t a n d h o l d Select Select Name, then <Note to rename>... -
Page 123: Delete Notes
Continue: Rename / Move Notes Select <Folder> S e l e c t L o c a t i o n Select Then Select <Fold- then Select <Save er name> location> For example: Storage After Notes move to You can use different Storage card, icon be- Card folders to categorize... -
Page 124: Change The Notes Default Storage Location
Action: Change the Notes Default Storage Location S e l e c t S a v e t o Select Menu > Select then Select <Save Options location> Notes application main You can choose to save Notes default storage screen notes to Main memory location changed... -
Page 125: Synchronizing Your Phone
Topic Synchronizing Your Phone In this topic, you will learn ... Introducing ActiveSync Installing ActiveSync Installing Microsoft Office Outlook First Connection Using ActiveSync Synchronizing with Multiple Computers Synchronizing through Bluetooth Synchronizing with an Exchange Server Using ActiveSync to Transfer and Manage Files 10. - Page 126 Index Action Install ActiveSync to the Computer ......118 Install Microsoft Office Outlook ........120 Connect to the Phone for the First Time ..... 123 Activate ActiveSync on the Phone ......126 Set the Phone to Sync with Multiple Computers ..127 Set Bluetooth Sync Connection ........
-
Page 127: Introducing Activesync
Install desktop theme and ring tone to the device. You can obtain the ActiveSync installation program from the included user CD. In addition, you can also download the latest version of the ActiveSync® installation program from Dopod or the Microsoft® website Download Center (http://www.microsoft.com/windowsmobile). CH06.indd 2006/11/3 上午... -
Page 128: Installing Activesync
6.2 Installing ActiveSync To use ActiveSync® sync, you must first install Microsoft ActiveSync® 4.2 version or above on the personal computer. The phone should also have ActiveSync® installed on it as well; follow the instructions on the User CD to install it. If your ActiveSync installation program is downloaded from the Internet, please execute the installation program from the folder it was downloaded to. - Page 129 Enter your name and group informa- Select the installation destination tion, for example: for the user name, folder. Select “Next” if no change is enter User; for the organization, enter necessary Dopod Select Install Select Finish Begin installation ActiveSync installed successfully CH06.indd...
-
Page 130: Installing Microsoft Office Outlook
6.3 Installing Microsoft Office Outlook Microsoft ActiveSync® can be used to sync and manage personal in- formation for the Microsoft Office Outlook® application program on the phone and computer; however, it cannot exchange information with Mi- crosoft Outlook Express®. You can obtain the Microsoft Office Outlook 2002 installation program and Product Key from the included User CD. - Page 131 Enter < Product Key > Select Install Then select Next Then select Next Select the installation type.You can also modify the installation directory and type Select Install Confirm Install Microsoft Office Out- Installing Microsoft Office Outlook®® look® CH06.indd 2006/11/3 上午 11:53:...
- Page 132 Select Successfully installed Microsoft Office Outlook® CH06.indd 2006/11/3 上午 11:53:...
-
Page 133: First Connection
6.4 First Connection When you use the phone and computer to connect via USB cable, Infra- red or Bluetooth for the first time, the ActiveSync® application program on the personal computer will automatically detect if your device is al- ready connected to the computer. It will then execute the sync configura- tion wizard to create the ActiveSync connection between the phone and computer. - Page 134 Select Next Select <Data type> Then select Settings You can set the sync options for the Complete sync options settings data types (for example, calendar) Select Finish Searching modified items on the phone/ computer CH06.indd 2006/11/3 上午 11:53:...
- Page 135 Select <Combine the items on my device with the item on this computer>, then select Decide whether to keep the informa- Begin executing sync operation, sta- tion on the phone tus displays as “Synchronizing” Sync is now completed. Computer (such as Windows PC) status dis- plays as “Synchronized”...
-
Page 136: Using Activesync
6.5 Using ActiveSync After connecting the phone to the computer with a USB cable or by Blue- tooth, the computer and phone will automatically activate an ActiveSync ® sync. You can also manually control ActiveSync® syncing operation on the phone or personal computer. After the phone and computer are disconnected, ActiveSync will automatically stop the sync operation. -
Page 137: Synchronizing With Multiple Computers
6.6 Synchronizing with Multiple Computers If your phone has already established an ActiveSync® sync connection with any single computer, when the phone establishes an initial con- nection (please refer to section 6.4) with another ActiveSync® installed computer, the ActiveSync® sync configuration wizard will ask you to en- ter the other computer’s name in order to differentiate it from the original computer. -
Page 138: Bluetooth
6.7 Sync Connection through Infrared/ Bluetooth You can create a connection between the phone and a computer using Infrared/ Bluetooth and then use ActiveSync® to sync information. When using Bluetooth synchronization, please first activate the Bluetooth function on the computer. ActiveSync will automatically activate the Bluetooth function on the phone. - Page 139 Select <Device to Enter <Passkey> connect to>, then Then select Next select Next Scanning nearby Blue- Please select the con- Enter custom Bluetooth tooth devices necting device, for ex- headset passkey, for ample, Laptop example, 0000 Enter <Bluetooth Passkey>, Select ActiveSync then select Then select...
-
Page 140: Use Bluetooth To Connect To The Computer
Action: Use IR Connection to Computer Select Menu > Connect via IR Using IR connection Connection is successful Action: Use Bluetooth to Connect to the Computer Select Menu > Connect via Blue- tooth Connect via Bluetooth Connection is successful CH06.indd 2006/11/3 上午... -
Page 141: Syncing With An Exchange Server
6.8 Syncing with an Exchange Server If your company provides Microsoft Exchange Server® sync information functions, you can use the phone to sync information with the remote server.To use this func- tion, you must first obtain the server information such as user name, password, and network name from the server administrator. - Page 142 Enter <Server ad- Enter <User name/ Select and check dress>, then select Password/Domain> Save Password Next then select Next Enter Outlook Check with your system If you wish to perform au- Web Access address administrator before enter- tosync in the future, please ing user name, password.
-
Page 143: Set The Phone's Scheduled Synchronization
Action: Set the Phone’s Scheduled Synchronization Select Menu > Configure <Peak Select Use above set- Schedule time> <Off-peak tings when roaming time> S e l e c t w h e t h e r t o u s e Opens the Schedule set- Configure each synchroni- peak/off peak time when... -
Page 144: Using Activesync To Transfer And Manage Files
6.9 Using ActiveSync to Transfer and Manage Files When using an ActiveSync® sync connection, you can use the Windows ® file manager to easily transfer files to the phone as well as moving, copying, renaming, or deleting files. To use this function, you must first establish an ActiveSync connection between the phone and computer, and then activate the ActiveSync application program on the computer. -
Page 145: Use File Explorer To Sync And Transfer Files
Select and open My Windows Mobile device Open and browse the top folder on Top folder of the phone.Select “Stor- the phone age Card” to open the memory card folder Action: Use File Explorer to Sync and Transfer Files Select <Files on computer>... - Page 146 Right click the mouse Select Then select Paste Paste the files to the “Mobile device” (phone) directory The files on the computer are now sent to the My Documents folder on the phone CH06.indd 2006/11/3 上午 11:53:...
-
Page 147: Advanced Pc Sync Settings
6.10 Advanced PC Sync Settings You can set the connection, sync conflict processing policy, sync data, and options scheduling of the phone using the ActiveSync® program on the personal computer. When configuring ActiveSync®, please do not connect the phone to the computer. 6.10.1 Connecting Setting the ActiveSync®... -
Page 148: Set The Connection Serial Port On Computer
Action: Set Sync Connection Serial Port on Computer Check Allow connections to one Select <Serial port location> of the following Uses the serial port connection Select the serial port to connect to the phone, for example: COM4 Options settings descriptions: •... -
Page 149: Set Sync Data Type On The Computer
6.10.2 Sync Information and Options When you first establish the connection, the sync configuration wizard will ask you for the sync data options, for example: contacts, calendar etc. You can establish the connection on the phone, and then modify the sync option types. -
Page 150: Set Calendar Sync Options On The Computer
Action: Set Calendar Sync Options on the Computer Select Calendar Select <Sync only the past...> Then select Settings option, then select Opens the option “Calendar Synchro- The phone will only sync the past, for nization Settings” window example: appointments and past 2 weeks CH06.indd 2006/11/3... -
Page 151: Syncing Music, Video, And Pictures
6.11 Syncing Music, Video, and Pictures If you wish to go mobile with your personal music or other multimedia files, you can sync the music, video, and picture files on the computer and the phone through Active Sync ® and Windows Media Player®. You must first set the sync data type on the computer’s ActiveSync program and configure the sync connection for the computer’s Microsoft Windows Media Player. -
Page 152: Sync Multimedia Files To The Phone
Action: Sync Multimedia Files to the Phone Select Sync Select <Sync list> Windows Media Player Screen Select the playlist you wish to sync to the phone, for example: All Music Check <Multimedia files to sync> Select <Device to sync to> Selects the multimedia files you wish Select the sync device. - Page 153 Select Select Start Sync <Sync to memory card folder> Sets the file sync device to the mem- Begin executing sync operation. ory card folder. For example, Music CH06.indd 2006/11/3 上午 11:53:...
-
Page 154: Installing Software
6.12 Installing Software To install software to the phone, you must first obtain the Windows Mobile™ (Pocket PC) version automatic installer program provided by the software developer. Please refer to the software installation manual and execute the installer in Windows®. The software will be copied to the phone automatically during the next ActiveSync®... -
Page 155: Activesync Connection Troubleshooting
6.13 ActiveSync Connection Troubleshooting The ActiveSync® program on the computer may be affected by the Microsoft Windows XP Service Pack 2 built-in firewall or some anti-virus software, causing problems when establishing the sync connection between the phone and the com- puter. - Page 156 CH06.indd 2006/11/3 上午 11:53:...
-
Page 157: Experiencing Multimedia Entertainment
Topic Experiencing Multimedia Entertainment In this topic, you will learn ... 1. Camera and Video Camera 2. Viewing Pictures and Movies 3. Windows Media Player 4. Today Screen & Themes 5. Streaming Media CH07.indd 2006/11/3 上午 11:57:... - Page 158 Index Action Activate Camera Function .......... 151 Change the Save Location to Storage Card....151 Capture ..............152 Filming ............... 153 Turn off Camera ............153 Open the Camera Setting ........... 154 Open Pictures & Videos ..........155 Open Pictures/Movies on the Storage Card ....156 Open Pictures ............
- Page 159 Add/renew Files to Windows Media Library ....165 Use Windows Media Library to Play Media File ..165 Save Play List ............166 Windows Media Playback buttons ......166 Shuffle ............... 167 Open Windows Media Settings Option ....... 167 Windows Media Playback Options ......168 Windows Media Video Options ........
-
Page 160: Camera And Video Camera
7.1. Camera and Video Camera The camera on the phone is with both digital camera and video cam- era functions. After capturing, you can send the photo to other people through e-mail or MMS, or set the captured picture as the displayed pic- ture for incoming calls. -
Page 161: Activate Camera Function
Action: Activate Camera Function Select Select Camera > Programs You can also use the camera button the phone. Action: Change the Save Location to Storage Card Select Storage card Then Select Photo file sizes are larger. To conserve p h o n e m e m o r y space, it is recom- mended to store the pictures in the... -
Page 162: Capture
Action: Capture Press Camera button After complete cap- ture, please select one of the 4 action hints (Note 1) from the screen (Note 1) After capturing, you can continue with the following controls: Continue Capturing Delete photo Use e-mail/MMS/website up- Use picture and video to load to send out open picture... -
Page 163: Filming
Action: Filming Select Go to Press Video Camera button (Note 1) After film- ing, you can con- tinue with the four following actions: Resume filming Use e-mail/ MMS to send out Delete video P l a y b a c k w i t h Windows Media Player Switch as movie mode... -
Page 164: Open The Camera Setting
7.1.2 Configure Camera Self timer setup: configure the timer as off, 2 second seconds. Ambience setup:configure the white balance mode and effect. White balance setup: Automatic Camera automatically adjust for white balance according to the onsite light source Daylight Activate sunlight white balance under sunlight Night Use night white balance when insufficient lighting Incandescent... -
Page 165: Viewing Pictures And Movies
7.2 Viewing Pictures and Movies To browse pictures and movies, all pictures and movies will be displayed in thumbnails on the screen for fast browsing, opening, and sending.Use the file explorer to open pictures or movies, the program associated with pictures and movies will be activated. -
Page 166: Open Pictures/Movies On The Storage Card
Action: Open Pictures/Movies on the Storage Card Select Select Storage card Switch to the folders w h i c h l i s t e d o n t h e Storage card Action: Open Pictures Select <Picture to browse> Picture opened CH07.indd 2006/11/3... -
Page 167: Open Movies
Action: Open Movies Select <Movie to browse> Movie opened Action: Full Screen Picture Playback Select <Picture for Select Menu > Select full screen display> Play Slide Show Select the Picture for The picture display au- full screen display tomatically switching to next during playback CH07.indd 2006/11/3... -
Page 168: Delete Pictures/Movies
Action: Delete Pictures/Movies Select <Picture or Select Menu > Select movie you wish to Delete delete> Select the picture or Confirm delete Pictures/ movie you wish to de- Movies lete Action: Use Infrared/Bluetooth to Share Picture or Movies Select and hold Select Beam... -
Page 169: Send Through Mms, E-Mail
Wait for the data Wait for the data Select transmission to fin- transmission You may require other Send completed. devices to accept your sent file Action: Send through MMS, E-mail Select and hold Select Send Select <Picture/move to <Send Method> send>... -
Page 170: Open Pictures & Movies Settings Option
Action: Open Pictures & Movies Settings Option Select Menu > Options ... Configure the pictures and movies various set- tings (Note 1) (Note 1) Options settings descriptions: Option Help Adjust size when sending by Adjust file size to speed up sending time e-mail through mail Rotate picture to the left or right based on... -
Page 171: Windows Media Player
7.3 Windows Media Player Through Microsoft Windows Media Player® 10 Mobile multimedia play- back function, you can use the phone to browse audio and vide multi- media files on the phone or on the network.Before browsing files on the network, you must first use GPRS, WiFi or create ActiveSync ® on com- puter etc. -
Page 172: Open Media Files On The Phone
Action: Open Media Files on the Phone Select Menu > Select <Folder> Select <Media File> Open Files... and press Play Media Library screen. Windows Media® supports the following me- dia formats: Supported file File extension Video: Windows Media Video .WMV Audio: Windows Media Audio .WMA... -
Page 173: Open Media Files On The Network
Action: Open Media Files on the Network Select Menu > Enter <File Ad- Open URL dress> Then select Media Library screen. Enter the address, ex: Locating the URL file http://192.168.1.1/ding. and play the media files Action: Use File Explorer to Open Media Files Select <Media File>... -
Page 174: Open Media Library
Action: Open Media Library Select Menu > Library Open Media Library Media Library screen. Action: Select Windows Media Library File Location Select Menu > Select Library <File Location> Media Library screen. Select the media files located on phone or memory card. CH07.indd 2006/11/3 上午... - Page 175 Action: Add/renew Files to Windows Media Library Select Menu > Select Done Update Media Li- brary Media Library screen. Automatically search Add/renew complete media files located in media library Action: Use Windows Media Library to Playback Media File Select <File Type> Select Select <Artist>, <Music Category>...
- Page 176 Action: Save Play List Select Select Menu > Enter <Playlist <Now Playing> Save Playlist... Name> then select Save now playing to the Now Playlist saved list Windows Media Playback buttons At the Windows Media® playback screen, you can use the playback con- trol options for media files.You can also set to random or repeat playback of song tracks in the play list.
- Page 177 Action: Shuffle Select Menu > Select Shuffle Shuffle/Repeat Windows Media play- Activate shuffle play- back screen back option Action: Open Windows Media Settings Option Select Menu > Options ... C o n f i g u r e W i n d o w s Configuration screen Media playback screen settings...
- Page 178 Windows Media Playback Options You can configure “Playback” tab: Option Discription You can select the dis- played time progressed Show time as or remaining time on screen Checkmark this option Pause playback while to automatically pause using another program playback when exiting Windows Media Checkmark this option Resume playback after a...
-
Page 179: Today Screen & Themes
7.4 Today Screen & Themes You can customize the Today screen shown information, themes, and desktop. Configure the theme to replace the displayed picture, warning icon, and overall colors. Other than the default desktop background of the themes, you can also set your customized pictures as the desktop background. You can download other legal shared themes to the phone from the web. - Page 180 Select (Note 1) Windows Mobile™ built-in themes:Windows d e f a u l t , G u a v a Bubbles Theme changed Action: Change Desktop Background Select Today Select >Settings Check Use this picture as the back- ground Use customized desk- top background CH07.indd 2006/11/3...
- Page 181 Select Browse Select Select <Desktop File> Select picture file to be desktop Action: Use Pictures & Movie to Change the Desktop Select Select Menu > Select <Set as desktop Set as Today Back- <Transparency> picture> ground Then select Select a picture as the Yo u c a n a d j u s t t h e desktop desktop background...
- Page 182 Action: Configure Today Screen Item Setup Select Select Today Select Items > Settings Switched to “Items” tab Check <<Item and location to display> then select (Note 1) You can select move down adjust the item displayed location in the To- day screen Select the display items (Note 1) shown at the...
-
Page 183: Streaming Media
7.5 Streaming Media You can use streaming media playback on the Internet that supports RTSP (Real Time Streaming Protocol). This function does not support all telecom service provider provided streaming media service, please contact the service provider if issues occur. Action: Open Streaming Media Please following the setps below to open Streaming Media:... - Page 184 CH07.indd 2006/11/3 上午 11:58:...
- Page 185 Topic Experience Mobile Office Living In this topic, you will learn ... Word Mobile Excel Mobile PowerPoint Mobile Adobe Reader LE CH08.indd 2006/11/4 上午 10:32:...
- Page 186 Index Action Open Word Mobile ............. 178 Open Word Document ..........178 Rename/Moving Word Documents ......179 Delete Word Documents ..........179 Hide Word Mobile Toolbar .......... 179 Add New Word File and Enter Text ......180 Start Excel Mobile ............182 Open Excel Workbook ..........
-
Page 187: Word Mobile
8.1 Word Mobile The phone’s built-in Microsoft Word Mobile® application gives you the ability to browse and edit Microsoft Office Word® documents on the PC. You can also create and edit documents and templates in Word Mobile ® and save them as doc, rtf, txt, and dot format files.You can also modify the Word Mobile®... -
Page 188: Open Word Mobile
Action: Open Word Mobile Select Word Mobile Select > Programs Open Word Mobile You can choose to open or add a new file Action: Open Word Document Select Select <File located <File to open> Folder> For example: All Fold- For example: About Do- Original document is pod International Corp. -
Page 189: Rename/Moving Word Documents
Rename/Moving Word Documents You can rename or move Word documents : • Press up/down the NAVIGATOR button to select the document to rename/move • Select Menu > Rename / Move • To rename documents, select and enter <Name> • To move documents to the memory card or folder on the phone, select and choose Loca- tion... -
Page 190: Add New Word File And Enter Text
Action: Add New Word File and Enter Text Select Select or press left shortcut key Please select the empty File was edited and field and use the virtual saved. Default file name keyboard to enter text is first line you entered. CH08.indd 2006/11/4 上午... -
Page 191: Excel Mobile
8.2 Excel Mobile Using the phone’s built-in Microsoft Excel Mobile® application, you can open, edit, and browse Microsoft Office Excel® spreadsheets on the computer.You can also modify the Excel Mobile® files default save loca- tion, add new file default templates, and listing file types while browsing files. -
Page 192: Start Excel Mobile
Action: Start Excel Mobile Select Excel Mobile Select > Programs Start Excel Mobile you can choose to open or add a new file on the screen Action: Open Excel Workbook Select Select <File located fold- <File to open> er> For example: For example: Book1 Open new file, the origi- nal one will be automat-... -
Page 193: Add New Excel Workbook
Action: Add New Excel Workbook Select Select then enter Select or press <Storage block> left shortcut button Select the storage block Close and save the on the screen, and file. Default file name is enter data “Book (number)” Action: Use Excel Built-in Functions Select Menu >... -
Page 194: Create Excel Charts
Continue: Use Excel Built-in Functions S e l e c t < S t o r a g e Select block>, then enter <Function value> Select the storage block Finished. The com- The function has ; enter the column index plete function format is: summed up all values in in function input area... - Page 195 Confirm Select Select <Column <Data range> <Data Layout> location for labels> Then select Next Then select Next Then select Next For example: Data in For example: Labels in columns the first column Select <Insert chart as> Then select Finish Select the location to in- Chart create finished sert chart, for example: A new sheet...
-
Page 196: Powerpoint Mobile
8.3 PowerPoint Mobile You can use Microsoft PowerPoint Mobile® to browse Microsoft Office PowerPoint® 97 version and above slideshow files, including ppt and pps formats. Many built-in presentation elements for slideshows, for example slideshow changing and animation, can be played back on the phone. -
Page 197: Open Slides
Action: Open Slides Select Select <File to open> <Any location on the screen> Tap anywhere on the screen to For example: Windows switch to next page Mobile 5 Slide switched to next page CH08.indd 2006/11/4 上午 10:33:... -
Page 198: Browse A Specific Slide Page
Action: Browse a Specific Slide Page Select > Go to Slide > <Specific page> You can also browse a specific page, Jumped to specific page for example: 7 Action: Change Slideshow Zoom Select > Zoomed In / Out You can view the zoomed in/out Slideshow contents slideshow zoomed in... -
Page 199: Start Adobe Reader Le
8.4 Adobe Reader LE Adobe Reader LE is the application used to display portable document files(PDF) files on small display device. This application is specially cus- tomized for portable device, with several support to PC version Acrobat Reader feature. The Way to Display the PDF Documents: Rigth Shortcut including regular document function, such as Button... -
Page 200: Open Pdf Files
Action: Open PDF file Select Select > Adobe Reader LE Programs Viewing the PDF file Click “Browse“ to open a different PDF file Action: View the PDF file Select tools > > <the page you want to move to> You can up/ down NAVIGATOR button to change page. - Page 201 Topic Wireless Connections In this topic, you will learn about… 1. Comm Manager 2. WiFi Wireless Networking 3. Bluetooth 4. Bluetooth Explorer 4. Configure Network Service Provider Settings 5. Internet Sharing CH09.indd 2006/11/3 下午 05:30:...
- Page 202 Index Action Open the Comm Manager .......... 194 Use Microsoft Direct Push .......... 195 Stop GPRS Data Transfer Service......195 Switch to Vibrate Mode ..........196 Activate ActiveSync ............ 196 Activate/Deactivate WiFi Wireless Networking .... 198 Connect to WiFi Network ..........198 Searching and Connecting for Nearby Wi-Fi AP ..
- Page 203 Using USB for Internet Sharing ........213 Using Bluetooth Internet Sharing ........ 214 Add Computer to PAN over the Phone ....... 215 CH09.indd 2006/11/3 下午 05:30:...
-
Page 204: Comm Manager
9.1 Comm Manager The Comm Manager lets you start up and turn off the phone, WiFi wireless networking, and Bluetooth wireless networking; it also lets you activate ActiveSync®, stop data transfers, and use Microsoft Direct Push. To use Comm Manager to turn on and off phone functions, please refer to section 3.1.3;... -
Page 205: Use Microsoft Direct Push
Action: Use Microsoft Direct Push Select Select Microsoft Direct Microsoft Direct Push Push Perform Microsoft Di- Perform data instant Stop Microsoft Direct rect Push data sync sync Push data sync Action: Stop GPRS Data Transfer Service Select Stop data service (Note 1) You must first con- nect to a GPRS... -
Page 206: Switch To Vibrate Mode
Action: Switch to Vibrate Mode Select Select Vibrate Vibrate Switch to Vibrate Mode Phone volume is set Return to ring tone to mute, and vibration mode function is activated. Action: Activate ActiveSync Select ActiveSync Activate ActiveSync ActiveSync syncing ap- plication CH09.indd 2006/11/3 下午... -
Page 207: Wifi Wireless Networking
9.2 WiFi Wireless Networking This phone supports IEEE 802.11b/g wireless networking, which you can use to connect to a public wireless network, private wireless network ac- cess point, or other supported WiFi compliant computer or device. WiFi is the default network connection setting. If the phone has not been acti- vated with WiFi, or has not successfully connected to a wireless access point, then GPRS will be used as the default connection method. -
Page 208: Activate/Deactivate Wifi Wireless Networking
Action: Activate/Deactivate WiFi Wireless Networking Select Select WiFi network WiFi network At the Comm Manager, WiFi wireless network- Turn off WiFi wireless activate WiFi wireless ing activated networking networking Action: Connect to WiFi Network Select Select Select and enter <Network connec- <Network connec- <Key>, then select... - Page 209 (Note 1) For the connection key, please check the wireless network administrator. If the network does not use security features, this screen will not appear (Note 2) WiFi connection icon (shown on the taskbar at the top of screen): Not detected WiFi wireless network Phone connecting to WiFi wireless network Connected to WiFi wireless network Connection successful,...
-
Page 210: Searching And Connecting For Nearby Wi-Fi Ap
Action: Searching and connecting for nearby WiFi AP Start > Settings, then Select <Wireless Settings <Connection select Connections > network name> then location>, Then select Wi-Fi select Connect Next Comm Manager Screen Activate wireless net- work settings page Enter <Key> Select Done Then select... -
Page 211: View Wifi Connectivity Information
Action: View WiFi Connectivity Information Select (Note 1) Connec- tivity information icon descriptions: Wireless access point name Signal strength This icon will be shown when Bluetooth is acti- Please tap the icon WiFi connection infor- vated after WiFi wireless con- mation page (Note1) nection Action: View WiFi Connection Information... -
Page 212: Configure Wifi Power Saving Mode
Action: Configure WiFi Power Saving Mode Select Power mode Select and move Power save mode slider Wireless network set- Adjust the wireless ting webpage network power saving mode CH09.indd 2006/11/3 下午 05:30:... -
Page 213: Bluetooth
9.3 Bluetooth This phone supports Bluetooth wireless communication technology. Bluetooth provides short range (around 10 meters), low power wireless connectivity. You can use Bluetooth to perform the following tasks: • Transfer data such as files, appointments, tasks, and contacts with other Bluetooth equipped devices and phones •... -
Page 214: Activate/Deactivate Bluetooth
Action: Activate/Deactivate Bluetooth Select Select Bluetooth Bluetooth has been ac- Bluetooth activated Turn off the Bluetooth tivated Action: Add a new Bluetooth device Select Settings> Select <device> Select Add new Bluetooth settings device... The Comm Manager Switched to “Playback” Screen CH09.indd 2006/11/3 下午... - Page 215 Select <Device to Select and enter connect to>, then <Passkey> select Next Then select Next Scanning nearby Blue- Please select the con- Enter your custom Blue- tooth devices necting device, for ex- tooth headset passkey, ample, Laptop for example, 0000 Enter <Bluetooth Passkey>...
-
Page 216: Using The Bluetooth Headset
Select Complete adding a new Bluetooth device Action: Using the Bluetooth Headset Select Settings> Select <device> Click Bluetooth Bluetooth settings headset talk button Turn on the Bluetooth The Comm Manager Switched to “Device” headset & press the Screen talk button to activate CH09.indd 2006/11/3 下午... - Page 217 Then select Next Select the Bluetooth Refer to the Bluetooth headset to connect, for headset manual for example: Dopod H1 passkey Confirm that Hands Select Free Using a new Bluetooth Complete adding a new The calling screen...
-
Page 218: Bluetooth Wireless Stereo Headset
Bluetooth Wireless Stereo Headset If your Bluetooth headset support Stereo Au- dio (A2DP) profile, please check "Wireless Stereo" when choosing the service to be used. After finishing pairing, select and hold the Bluetooth device, then check "Set as Wireless Stereo". ▲... -
Page 219: Bluetooth Explorer
9.4 Bluetooth Explorer Bluetooth Explorer searches for other Bluetooth devices that have file sharing enabled and lets you access their Bluetooth shared folder. You can copy files from and to their shared folder, and create subfolders in it. When you enable Bluetooth file sharing on your device, other Bluetooth- enabled devices will also be able to access your Bluetooth shared folder. -
Page 220: Setting Up File Sharing Folder
Copy, paste files to bluetooth device here Action: Setting up File Sharing Folder Select Connections Select Select tab, then select Start > Setting Bluetooth Configure Bluetooth FTP settings. Eg. folder location CH09.indd 2006/11/3 下午 05:30:... -
Page 221: Configure Gprs/3G
9.5 Configure GPRS/3G Your system provider’s GPRS/3G and MMS transfer settings will be detected and configured automatically after you insert the SIM card. Therefore, you do not need to manually set up a mobile network. Nevertheless, you can still use the Network Wizard to manually configure the GPRS/3G and MMS connections. - Page 222 Continue: Using Network Wizard Select and choose Select and choose Select <Country> <Network> Select your current Select the local telecom Finish Setting location, for example: service provider Hong Kong network Select Restart device to apply settings CH09.indd 2006/11/3 下午 05:30:...
-
Page 223: Internet Sharing
9.6 Internet Sharing Link your device to other computer or devices (eg. PDA) through USB or Bluetooth connecitons. Other device can share the GPRS or 3G connection while connected. To use USB for Internet sharing, please confirm your computer with ActiveSync 4.2 or above started, and then check "Enable Advanced Internet Funtionality"... - Page 224 Select Connection Select Disconnect Start Internet Sharing Disconnect Internet Sharing Action: Using Bluetooth Internet Sharing Select Bluetooth Select then connect Using Bluetooth Internet Set your device as discoverable for other Sharing device. CH09.indd 2006/11/3 下午 05:30:...
- Page 225 Action: Add Computer to PAN over the Phone S e l e c t S t a r t > Select Network Connections Control Panel Select Network Select Bluetooth Network Connections Connection CH09.indd 2006/11/3 下午 05:30:...
- Page 226 Double click Bluetooth Select Network Connections Select Dopod D810 Click Next then select Connect CH09.indd 2006/11/3 下午 05:30:...
- Page 227 Select Dopod D810 then Select Let me choose select Next passkey then enter Passkey Then select Next Select Enter Passkey Enter (Computer then select Next Name) then select Save Enter the same pass key as computer CH09.indd 2006/11/3 下午 05:30:...
- Page 228 Sharing Internet over Bluetooth CH09.indd 2006/11/3 下午 05:30:...
-
Page 229: Experiencing Internet Entertainment
Topic Experiencing Internet Entertainment In this topic, you will learn ... Internet Explorer Pocket MSN CH10.indd 2006/11/3 下午 05:42:... - Page 230 Index Action Start Internet Explorer ..........221 Enter the Web Address to Open a Website ....222 Use My Favorites to Open Website ......222 Add Websites to My Favorites ........223 Use Full Screen Browsing .......... 223 Change View Type ............. 224 Opens the Settings Options ........
-
Page 231: Internet Explorer
10.1 Internet Explorer You can use Internet Explorer® to browse most websites. Internet Ex- plorer® supports browsing of limited JavaScript and HTML web pages, however some web pages may not be properly rendered or completely functional.Before browsing web pages, you must first use GPRS, WiFi or create an ActiveSync®... -
Page 232: Enter The Web Address To Open A Website
Action: Enter the Web Address to Open a Website Select Address Bar Select & enter <web address> Select again Connection page opened Action: Use My Favorites to Open Website Select Menu > Select My Favorites... <My Favorites> website list Select My Favorite My Favorite website website to open, eg. -
Page 233: Add Websites To My Favorites
Action: Add Websites to My Favorites Select Menu > Select and enter Select Add to Favorites... <Name>, then select You can customize the Finish adding My Fa- My Favorites name and vorites entry saved directory Action: Use Full Screen Browsing Select Select Full screen... -
Page 234: Change View Type
Action: Change View Type Select Select Menu > View <View type to use> Select the appropri- View type changed ate web page display method, desktop PC Not all website designs are tailored to the phone; appropriate configura- tion of the web page display method will enable you to easily browse all types of websites. -
Page 235: Opens The Settings Options
Action: Change Web Page Zoom Select Select Menu > Zoom <Zoom to use> Select your Zoom pref- Text font will in/de- erence, for example: crease according to Medium zoom preference Action: Delete Temporary Files Select Memory Select Delete Files All temporary files generated by website browsing will be deleted CH10.indd... -
Page 236: Pocket Msn
10.2. Pocket MSN You can use Pocket MSN® to instantly obtain the latest MSN Hotmail® e-mail, send Hotmail® e-mail, work with the MSN Messenger® contacts list, and send instant messages to MSN Messenger® contacts. 10.2.1 MSN Messenger The MSN Messenger® application of Pocket MSN® supports basic MSN ®... -
Page 237: Logging Out Of Msn Messenger
Select Enter <E-mail Tap here to sign in address> & <Pass- word> to sign in Logging in requires You have successfully some time, please wait logged into MSN Mes- senger Action: Logging Out of MSN Messenger Select Menu > Sign Out You have logged out of MSN Messenger CH10.indd... -
Page 238: Sending Messages
Action: Sending messages Select Select and enter <MSN contacts> <Message> Then select Send Select the contact you Enter message in bot- Message sent to recipi- wish to chat with tom entry block Action: Return to Contacts List when Chatting with Contacts Select Menu >... -
Page 239: View Hotmail E-Mail
10.2.2 Hotmail By using Pocket MSN®, you can view and download the latest Hotmail® e-mail, as well as send, reply, move, or delete Hotmail® e-mail. ▲Browse Hotmail E-mail Action: View Hotmail E-mail Select > Pro- Select Pocket MSN Select MSN Hot- mail grams Open Pocket MSN... -
Page 240: Read Hotmail E-Mail
Action: Read Hotmail E-mail Select <E-mail to read> For example: Windows Mail opened Mobile News for Octo- ber 2006 Action: Compose Hotmail E-mail Select Enter <Mail Body> Compose Hotmail Then select Send Mail sent CH10.indd 2006/11/3 下午 05:42:... -
Page 241: Setting The Phone Information
Topic Setting the Phone Information In this topic, you will learn ... My Information 18. Microphone AGC Phone 19. Exchange Data Incoming Ring Tone (Beam) Function Button 20. Task Manager Start Menu Enter Password Protection Audio & Notifications Remove Programs 10. - Page 242 Index Action Setup My Information ..........234 Opens Phone Settings ..........235 Configure Sounds on the Phone at the Phone Tab ..236 Change PIN Code ............236 Set up Network Service at "Services" Tab ....237 Manually Select the Mobile Network ......238 Configure Incoming Auto Answer ........
- Page 243 Activate Backlight Settings ......... 255 Configure Screen Brightness ........255 Backlight Settings When Using Battery Power .... 255 Backlight Settings When Using External Power ..255 Open the Clock and Alarm Settings ......256 Configure the Time ............. 256 Setting the Alarm ............257 Open Screen Settings ..........
-
Page 244: My Information
11.1 My Information Setup the user name and personal informa- tion for this phone.When the phone is lost, the finder can return your phone according to the information you input. When you register the application software by other publishers, the name from My Infor- mation will be used for the registration.At the same time, your name will be the device name for the Bluetooth. -
Page 245: Phone
11.2 Phone You can setup the phone ring tone, ring tone method, SIM card pass- word (PIN code), call options, auto answering, and mobile network. Setting up or changing the PIN code can protect your SIM card for unau- thorized access.You can set to enter the PIN code at each startup SIM card to be able to use the calling function. -
Page 246: Configure Sounds On The Phone At The Phone Tab
Configure Sounds on the Phone at the Phone Tab You can configure sounds on the phone at the Phone tab screen: Settings Options Description Items Ring tone Normal ring tone Increasing ring Ring volume increase gradually Ring once Only ring once Vibrate Do not ring, the phone will vibrate instead Ring type... -
Page 247: Set Up Network Service At "Services" Tab
Select <Number Select OK keys> then select Enter At the "Phone" tab check Require PIN when phone is used used, to activate/deactivate PIN code protec- tion Enter the new PIN code PIN code changed again for confirmation Set Up Network Service at "Services" tab You can configure phone services at the service tab screen:... -
Page 248: Manually Select The Mobile Network
Settings Options Description Items Voice Mail Configure the SMS service center and Text and voicemail number Messages Fixed Dial- Set up fixed dialing and fixed dial- ing mode No matter who called to your Forward all incoming phone number, it will be forwarded to the calls number you set When your phone has no recep-... -
Page 249: Configure Incoming Auto Answer
Set Up Network Type and Band at "Band" tab You can set up the network type and band on "Band" screen: Item Option Description Auto WCDMA Network Type Select GSM WCDMA Select WCDMA Auto S e l e c t a u t o m a t i c a l l y w i t h GSM/ UMTS GSM (900+1800) Select GSM 900, 1800 and... -
Page 250: Configure Incoming Ring Tone
11.3 Configure Incoming Ring Tone You can store the ring tone files to the \ Application Data \ Sounds folder through ActiveSync® syncing or from the file explorer, the system will automatically add the ring tone to the usable ring tone list. This phone supports WMA, MP3, and MIDI format ring tone files. -
Page 251: Function Button
11.4 Function Button Configure the corresponding application to buttons on unit of phone, the button repeat speed, and hardware keyboard automatic light sensing function. Please refer to "button icon" in the screen, and the button icon on the device for more under- standing of button assignment. -
Page 252: Configure The Up/Down Control Function Button Repeat Speed
Continue: Configure the Function Button Select and choose Press Button 1 <Assigned pro- (Voice Command- gram> Button assignment can Button1 has been Press Function button1 be separated as action changed to “Streaming to activate the assigned <> or program Media” application application Configure the up/down control function button repeat speed You can follow the following procedures to... -
Page 253: Start Menu
11.5 Start Menu You can customize the applications in the start menu. Meanwhile, you can at most check 7 applications to be placed in the start menu. Uncheck items will be placed in the Programs. ▲ Start Menu Action: Configure Start Menu Select >... -
Page 254: Input
11.6 Input Configure the input methods, as well as voice notes entry selection and recording quality. You can select the input method options, for example, transcriber: Input Mode Options Description Character sound Emit an audio hint when character recognizes Stylus off pending time Configure the pending time when you lift the stylus off Convert half width characters... -
Page 255: Configure The Input
Action: Configure the Input Select Input Select and choose Select > Settings <Input Mode> Select the input mode to configure the settings Select Options Select / check <Input mode set- tings> Switch to “Options” tab Select and configure each input mode option CH11.indd 2006/11/4 上午... -
Page 256: Password Protection
11.7 Password Protection You can assign a password for the phone to keep your privacy. Also, this could prevent other people from using your phone without permission. If you activate the security principles of Ex- change server, the device is likely to : 1. - Page 257 Select and choose Select and choose Enter <Idle time> <Password Type> <Password> Automatic lock after idle Select the password Use simple 4 digit num- time. For example: 5 type, for example: ber as the password. Minutes Simple PIN For example: 1234 Enter <Password/ Select...
-
Page 258: Sounds And Notifications
11.8 Sounds and Notifications Configure the notification and event reminder audio for the phone. Activate Audio and Notification • Select > Settings , to enter the configuration • At the “Personal” tab, select Sounds & Notifica- tions Configure event and notification sounds Select the Volume tab and configure event volume:... -
Page 259: Removing Programs
11.9 Removing Programs You can remove unnecessary applications to conserve storage space on the phone. ▲ Remove application screen Action: Removing Programs Select > Settings Select System Select <Program to then select Remove remove> then Programs select Remove Select the application to remove from the list CH11.indd 2006/11/4... - Page 260 Continue: Removing programs Select Confirm removal of ap- Program has been plication removed CH11.indd 2006/11/4 上午 12:18:...
-
Page 261: Local Area Setting
11.10 Local Area Setting Configure the area, language, and the local number, currency, time and date format for your current location. Open Local Area Settings • Select > Settings, to enter the configura- tion screen • Select System tab. • At the “System” tab, select Regional Settings ▲... -
Page 262: Memory
11.11 Memory Browse phone and memory card memory us- age. You can also close running applications to conserve memory space and improve ex- ecution efficiency. ▲ Memory usage Action: Browse Memory Usage Select > Settings Select System Then select Memory The phone main memory usage (Note 1) CH11.indd... -
Page 263: Close Running Programs
Select Storage Card (Note 1) Phone main memory is divided as: Stores Storage file and programs Program program execution You can browse to to- tal, used, and remain- ing space of these two memory space ( N o t e 2 ) Yo u c a n Browse Memory Card Memory card usage browse the total, used... -
Page 264: Power
11.12 Power You can check the remaining battery level. As well as configure the phone to automatically enter standby to conserve power. Open Power Information • Select > Settings, to enter the configura- tion screen • Select System • At the “System” tab, select Power ▲View power informa- tion... -
Page 265: Backlight
11.13 Backlight Configure the phone to use battery power or external power backlight options, you can conserve the phone battery when using battery power or external power. Activate Backlight Settings • Select > Settings , to enter the configura- tion screen •... -
Page 266: Clock & Alarm
11.14 Clock & Alarm You can configure the date and time at the clock and alarm settings, as well as setup the alarm ring time. Open the Clock and Alarm Settings • Select > Settings , to enter the configuration screen •... -
Page 267: Setting The Alarm
Action: Setting the Alarm Select Alarm Select then enter Select <Configure the <Description> alarm week and time> then select You can use the alarm “Time” tab. Configure the alarm settings description, for week and time example: work Check <Alarm option settings> then select Configure alarm set- The alarm will automati-... -
Page 268: Screen
11.15 Screen Change the screen browsing orientation and text size, for the screen to be more suitable to your actual requirements. Open Screen Settings • Select > Settings , to enter the configura- tion screen • Select System • At the “System” tab, select Screen Configure Screen Display Orientation •... -
Page 269: Device Information
11.16 Device Information Browse phone hardware version, hardware specification, identification and call duration. After the phone firmware is updated, you can use “Version” tab to view the phone firmware for the latest version. Browse Device Information • Select > Settings to enter the configuration screen •... -
Page 270: About
11.17 About You can browse the phone operating system version, processor model, memory, and copy- right statements. You can also configure the phone device name, the device name will be shown in the ActiveSync® sync program on the computer as the data exchange device name. -
Page 271: Microphone Agc
11.18 Microphone AGC Use the microphone automatic volume control to normalize the recording quality and volume. When recording, increase the volume if the sound is too low, and vise versa Open the Microphone Auto Volume Control Settings Screen • Select >... -
Page 272: Task Manager
11.20 Task Manager You could configure the way to close the programs in Task Manager in order for better use of system resources and maintain good operation speed. (Note1) If you leave the box unchecked, tap "X" will not release the programs from the memory but continue as background running;... -
Page 273: Using More Programs
Topic Using More Programs In this topic, you will learn ... Java MIDlet Manager File Explorer Voice Command Search Calculator Games Backup Your Device CH12.indd 2006/11/4 上午 09:06:... - Page 274 Index Action Install Java Program from File Explorer ...... 265 Opens the File Explorer ..........266 Browse Folders ............267 Return to Top Folder ..........267 Open Files ..............268 Move File/Folder ............268 Delete File/Folder ............269 Memory Card Folder ..........270 Use Infrared/ Bluetooth to Send Files ......
-
Page 275: Java Midiet Manager
12.1 Java MIDlet Manager Java MIDlet Manager enables you to execute Java applications on your phone. Java application extension is .jad and .jar, all Java programs must be executed under MIDlet Manager and cannot be directly execut- ed on the Windows Mobile™ platform. You can use File Explorer to access your Java program and use Java MIDlet Manager to execute.To send Java files to the phone, please refer to section 6.9 Sync Transmission and Manage Files. -
Page 276: File Explorer
Through e-mail, you can send files to different locations, but you need to connect to the Internet first. If you wish to use D810 to receive files, you must go to Start >... -
Page 277: Browse Folders
Action: Browse Folders Select <Folder to browse> For example: My Docu- You are currently at “My ments Documents” folder Action: Return to Top Folder Select Select <Top folder to return to> Text in upper left corner For example: My De- Return to Top Folder will differ with your cur- vice... -
Page 278: Open Files
Action: Open Files... Select <File to open> For example, Flower Associated program will be automatically selected to open files. Action: Move File/Folder Select and hold Select Switch to <Destina- tion folder> <File/folder to move> For example move to: Bluetooth Share CH12.indd 2006/11/4 上午... -
Page 279: Delete File/Folder
Select & hold <Blank space>, then select Paste File/folder moved to destination Action: Delete File/Folder Select and hold Select Delete <Files to delete> File/folder will be permanently deleted CH12.indd 2006/11/4 上午 09:06:... -
Page 280: Memory Card Folder
Memory Card Folder You can select the icon in upper left and select Storage Card to enter the memory card folder. ▲ Switch to memory card folder Action: Use Infrared/ Bluetooth to Send Files Select and hold Select < Select <Files to send>... -
Page 281: Voice Commander
12.3 Voice Commander Voice commands can enable you to perform simple command controls by your voice, this can save the selection and search time of contacts and phone application. This program provides the following voice recog- nition functions: * Dial to contacts * Find contacts * Open applications * Control Windows Media®... -
Page 282: Speak Out The Voice Command
Action: Speak out the voice command Please refer to the voice command main screen format to speak out the command you wish to execute: Voice command format For example, speak out Description Call to Dialing to the Contact Roger Smith Call to <Contact >... -
Page 283: Search
12.4 Search You can use the search application to search for file on the phone or memory card. Also, you can search for text in notes, appointments, con- tacts, and tasks. By searching and deleting excessively large data on the phone, you can effectively release internal memory space on the phone. -
Page 284: Calculator
12.5 Calculator Runs simple math calculations such as addition, subtraction, multiplica- tion, and division using the calculator. The calculator does not support engineering calculations or obey the multiplication priority rules. Action: Open Calculator Select > Select Calculator Programs Calculator screen CH12.indd 2006/11/4 上午... -
Page 285: Game
12.6 Game There are two built-in games on the phone: Solitaire, Bubble Breaker. In additional to the built-in games, you can also install more games onto the phone. Accessing The Built-in Games on the Phone • You can access the four built-in games on the phone from the games folder:Select >... -
Page 286: Bubble Breaker
Bubble Breaker Game method of“Bubble Breaker”is to connect two or more bubbles to clear them, you can stack up the score and clear the bubbles on screen. The following are hints and rules on the game: • Select once on the bubble to show the un- derlying score for the area •... -
Page 287: Backup Your Device
12.7 Backup Your Device (Please install the Sprite Backup from the application CD) You can use Sprite Backup to make copies of your device information. Sprite Backup can make copies of your information, including docu- ments, e-mails, personal information (calendar, contacts and jobs) and system data (including the programs installed and settings). - Page 288 Enter same pass- Select word twice, then select Enter the same pass- System will restart now Backup in process. word twice and start backup pro- After finishing backup, cess the device will reboot CH12.indd 2006/11/4 上午 09:06:...
-
Page 289: Proceed With Basic Restore
Action: Proceed with Basic Restore Select Select Select > Programs Sprite Backup Restore Now Start Sprite Backup Going to proceed with program complete system re- store. Enter Select Backup password , then select Please enter the same The system will reboot Restore processing. - Page 290 Action: Configure Regular Backup Scheduling Select Option > Select Option Select Change Advanced Mode >Scheduled Scheduling Backup Enter frequency, Enter the same time and file loca- password twice, tion, then select then select Configure the schedul- The length of the pass- ing for backup frequen- word should between cy, time, and location.
-
Page 291: Q&A
Topic Q&A CH13.indd 2006/11/4 上午 09:09:... -
Page 292: Registering Your Phone
Register your phone to receive more information and services. Registering Your Phone 1. Open the Internet browser and connect to the Dopod website. Click on members from the home page. 2.Select the Sign up as member link on the left side of the screen. Then... - Page 293 3. Enter Hardware S/N (please refer to the S/N on the back of the device), Name Date of Birth. Then press the Send button. How do I sync the phone with the computer? How do I backup information on the phone? 1.
- Page 294 Contact your anti-virus software provider for a solution. For detailed information, please refer to section 6.13. Where can I download the User’s Manual, program updates, or other Dopod provided applications for the phone? You can visit the Dopod website: http://www.dopodasia.com to download the latest versions of the Quick User’s Guide, User’s Manual, program...
- Page 295 Topic Appendix A.1 Regulatory Notices A.2 PC Requirement to Run ActiveSync 4.x A.3 Important Note for Using GPS A.4 Product Specification A.5 Customer Service Information Appendix.indd 2006/11/4 上午 09:20:...
-
Page 296: Regulatory Agency Identifications
A.1 Regulatory Notices Regulatory Agency Identifications For regulatory identification purposes, your product is assigned a model number of TRIN100/ D810. To ensure continued reliable and safe operation of your device, use only the accessories listed below with your TRIN100/ D810. The Battery Pack has been assigned a model number of TRIN160. This product is intended for use with a certified Class 2 Limited Power Source, rated 5 Volts DC, maximum 1 Amp power supply unit. - Page 297 for radio equipment and services; Part 1: Common technical require- ments. • ETSI EN 301 489-7: Electromagnetic compatibility and Radio spec- trum Matters (ERM); ElectroMagnetic Compatibility (EMC) standard for radio equipment and services; Part 7: Specific conditions for mobile and portable radio and ancillary equipment of digital cellular radio telecommunications systems (GSM and DCS). • ETSI EN 301 489-17: Electromagnetic compatibility and Radio spec- trum Matters (ERM); ElectroMagnetic Compatibility (EMC) standard for radio equipment and services; Part 17: Specific conditions for 2.4 GHz wideband transmission systems and 5 GHz high performance RLAN equipment.
- Page 298 Safety Precautions for RF Exposure Use only original manufacturer-approved accessories, or accessories that do not contain any metal. Use of non-original manufacturer-approved accessories may violate your local RF exposure guidelines and should be avoided. Exposure to Radio Frequency (RF) Signals The wireless phone is a radio transmitter and receiver. It is designed and manufactured not to exceed the emission limits for exposure to radio frequency (RF) energy. The exposure standard for wireless mobile phones employs a unit of measurement known as the Specific Absorption Rate, or SAR. The standard incorporates a substantial margin of safety to give addi- tional protection for the public and to account for any variations in usage. Normal conditions only ensure the radiative performance and safety of the interference. As with other mobile radio transmitting equipment, users are advised that for satisfactory operation of the equipment and for the safety of personnel, it is recommended that no part of the human body be allowed to come too close to the antenna during operation of the...
- Page 299 • Should ALWAYS keep the phone more than six inches from their pacemaker when the phone is turned ON. • Should not carry the phone in a breast pocket. • Should use the ear opposite the pacemaker to minimize the potential for interference.If you have any reason to suspect that interference is taking place, turn the phone OFF immediately. Hearing Aids Some digital wireless phones may interfere with some hearing aids.In the event of such interference, you may want to consult your service pro- vider, or call the customer service line to discuss alternatives.
- Page 300 safety of human health and environment.For more information about electronic and electrical waste equipment disposal, recov- ery, and collection points, please contact your local city center, household waste disposal service, shop from where you pur- chased the equipment, or manufacturer of the equipment. RoHS Compliance This product is in compliance with Directive 2002/95/EC of the European Parliament and of the Council of 27 January 2003, on the restriction...
- Page 301 A.2 PC Requirement to Run ActiveSync 4.x To connect your device to the PC, you must have Microsoft® ActiveSync ® program installed on your PC. ActiveSync 4.x is included in the Getting Started CD, which is compatible with the following operating systems and applications: • Microsoft® Windows® 2000 Service Pack 4 •...
- Page 302 A.4 Product Specification System Information Samsung® SC32442A 400 MHz •ROM: 128 MB Memory •ROM: 64 MB SDRAM Operating Microsoft Windows Mobile Version 5.0 System Display 2.8” Semi-reflection TFT-LCD, Backlight equipped LED, LCD Type Touch screen Resolution 240 x 320, 65535 colors Supported Horizontal/Vertical orientation GSM/GPRS/EDGE/UMTS Module Function 850, 900,1800, 1900 and 2100 Mode Quad Band Built-in An-...
-
Page 303: Controls And Lights
Form Factor L.W.H. 108 mm (L) x 58.2 mm (W) x 18.4 mm (T) Weight 150 g with battery pack Controls and Lights • 5-way Navigation Control • Two program buttons : VOICE COMMAND, CAMERA • Two phone functions : TALK and END • START MENU button Navigation • Two OK buttons Buttons • Two soft keys •... - Page 304 Power Supply Battery 1500 mAh removable, rechargeable, Li batter Charging time Up to 3.5 hours Up to 200 ~ 250 hours for GSM Standby Time Up to 180 ~ 250 hours for UMTS When the screen is off Talk Time Up to 5 hours for GSM Up to 4 hours for UMTS Media Play- WMV: Up to 8 hours ; WMA: Up to 12 hours back Time •...
- Page 305 A.5 Customer Service Information Thank your for using D810.This product will bring you an all new enjoy- ment, if you need further usage information, we welcome you to contact with our customer service center. We welcome you to immediately logon to the member website, and to e-mail us for any suggestions. Taiwan Customer 0800-088-858 02-8761-5959 Service Website http://www.dopod.com.tw e-mail service@dopod.com.tw Hong Kong: Customer +852-3520-1234...
- Page 306 Singapore: Customer Service 1800-238-7788 Website http://www.dopodasia.com e-mail SEAservice@dopodasia.com Malaysia: Customer Service +603-5569-8878 Website http://www.dopodasia.com e-mail SEAservice@dopodasia.com Thailand: Customer Service +66-2640-3000 Website http://www.dopodasia.com e-mail SEAservice@dopodasia.com Indonesia: Customer Service +62-21-380-7668 350-5668 Website http://www.dopodasia.com e-mail SEAservice@dopodasia.com Thank you and please enjoy our product. Appendix.indd 2006/11/4 上午 09:20:...
Need help?
Do you have a question about the D810 and is the answer not in the manual?
Questions and answers