Wacom cintiq companion User Manual
Professional creative
Hide thumbs
Also See for cintiq companion:
- User manual (93 pages) ,
- User manual (71 pages) ,
- Quick start manual (41 pages)
Table of Contents
Advertisement
Quick Links
Advertisement
Table of Contents

Related Manuals for Wacom cintiq companion


Summary of Contents for Wacom cintiq companion
- Page 1 Contents Index Professional Creative Tablet User’s Manual About the Cintiq Companion Getting Started Customizing your Cintiq Pen features The multi-touch experience The Wacom Desktop Center Troubleshooting Care and maintenance Support options Contents Index...
-
Page 2: Contents Index
Wacom reserves the right to revise this publication without obligation to provide notification of such changes. Wacom does its best to provide current and accurate information in this manual. However, Wacom reserves the right to change any specifications and product configurations at its discretion, without prior notice and without obligation to include such changes in this manual. -
Page 3: Table Of Contents
Index TABLE OF CONTENTS ABOUT THE MANUAL Using Screen Keys or Screen Touch Strips Changing the appearance of on-screen controls 37 ABOUT THE CINTIQ COMPANION Managing On-Screen Controls Features Button functions Parts and Accessories Using and customizing the Radial Menu... -
Page 4: About The Manual
Information about your operating system or application software is not included in this manual. Wacom’s philosophy is to continually improve all of its products. As a result, engineering changes and improvements are made from time to time. Therefore, some changes, modifications, and improvements may not be covered in this manual. -
Page 5: About The Cintiq Companion
Index ABOUT THE CINTIQ COMPANION The Cintiq Companion is a high-performance mobile computer that supports both pen and touch input. Your Cintiq is designed to accommodate your work preferences. It can be used in landscape or portrait orientation, lying flat on your desk or in your lap. In landscape orientation, it can also be placed in one of three different inclined positions using the stand provided. -
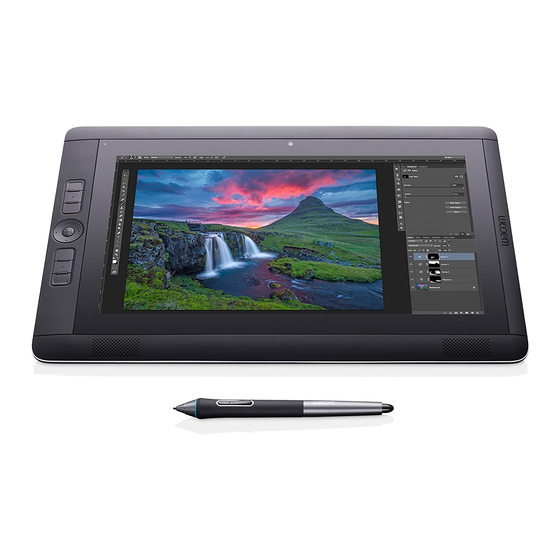
Page 6: Parts And Accessories
Contents Index PARTS AND ACCESSORIES The Cintiq Companion and supplied accessories are shown below. UNPACKING • Unpack the Cintiq and place it on your desktop, or another work area that is level and stable. Make sure the surface is flat, clean, and dry. Inventory the items and ensure the box contents are complete. -
Page 7: Front View
Contents Index FRONT VIEW The features of your Cintiq are illustrated below. It can be configured for either right-handed or left-handed use, and positioned in landscape or portrait orientations. ExpressKeys (4) Rocker Ring Front Camera Windows Button Contents Index... -
Page 8: Rear And Side Views
Contents Index REAR AND SIDE VIEWS Grip pad Power button Microphone Headphone jack USB port Stand slots Mini DisplayPort USB port Power cable jack Rear camera MicroSD card slot Microphone Battery status Speaker Cooling vents Speaker Auto-rotate switch Volume control button Contents Index... -
Page 9: Adjusting The Stand
Contents Index ADJUSTING THE STAND In landscape orientation, the Cintiq stand can be used in one of three inclined positions. You can adjust the display incline as follows. Refer to the rear and side views below. 1. Place the Cintiq on a flat, stable surface, in the orientation you prefer (ExpressKeys to the right or left). 2. -
Page 10: Operating System
Contents Index OPERATING SYSTEM The Cintiq Companion uses the Windows 8 operating system, and supports both the standard desktop and the new Windows 8 Start screen. For help and information on using Windows 8, explore the Microsoft support website: http://support.microsoft.com/find-solutions/windows/windows-8. -
Page 11: Getting Started
12. Wacom recommends that you click the Wacom Software Update, which is the first item in the Wacom Desktop Center, to download the most recent version of the Cintiq driver. You can access the Wacom Control Panel from the task bar on the standard desktop, or from a tile on the Windows 8 Start screen. -
Page 12: Setting Up Your Work Area
A short tutorial to help you learn about and understand your Cintiq is available when you first start it up. You can view the tutorial at that time, or access it later from the Help & Support section of the Wacom Desktop Center. - Page 13 Contents Index Contents Index...
- Page 14 Cintiq, and learn more about how to work with it. You will need a wifi connection to access these videos. • . This option allows you to access the Wacom Support site for help with your Cintiq, as well UPPORT as other web sites that may help to learn more or answer your questions.
-
Page 15: Pen Features
In most applications, the eraser function is automatic. Important: • Use only the pen that came with your product, or a Wacom accessory pen specified for use with Cintiq. Other pens may not function properly, or may damage the screen. •... -
Page 16: Using The Pen
Contents Index USING THE PEN There are four basic techniques for using the pen: pointing, clicking, double-clicking, and dragging. Holding the pen The multi-touch experience Clicking Dragging Working with pressure sensitivity Drawing with tilt HOLDING THE PEN Hold the pen like you would a normal pen or pencil. Adjust your grip so that the side switch is in a convenient location where you can toggle it with your thumb or forefinger. -
Page 17: Positioning
In supported applications the pen eraser works like the eraser on a pencil. In text applications, use the eraser to select text and then lift the eraser from the Cintiq screen to delete the text. Visit the Wacom website to learn about applications that support the eraser. See Product information. -
Page 18: Pen And Digital Ink Capabilities In Windows
Contents Index PEN AND DIGITAL INK CAPABILITIES IN WINDOWS Windows 8 provides extensive support for pen input. Use Cintiq and your Wacom pen for quick, intuitive results. • Note taking. Jot notes and capture quick sketches in Windows Journal. Use the Journal search engine to locate your handwritten content. -
Page 19: Using The Expresskeys, Rocker Ring, And Windows Button
Contents Index USING THE EXPRESSKEYS, ROCKER RING, AND WINDOWS BUTTON You can use the ExpressKeys and Rocker Ring to perform frequently used functions or keystrokes, or to modify your pen or other input tool properties as you work. The four positions of the Rocker Ring (left, right, top and bottom) can be customized just like ExpressKeys. For example, you can: •... -
Page 20: The Multi-Touch Experience
PTIONS ExpressKeys and Rocker Ring. CUSTOMIZING MULTI-TOUCH You can use the Wacom Control Panel to customize your product for the way you like to use multi-touch. Select the T icon in the T list. Then select an appropriate tab to customize, and change settings OUCH using the available options. -
Page 21: Setting Multi-Touch Options
On the two tabs below, position the screen cursor over a touch option to see a static image of that function. If you do not choose a specific option to view, the Wacom Control Panel will display each option sequentially, from top to bottom. -
Page 22: Testing Multi-Touch
3. Attempt to move the screen cursor by touching your finger in different places on the display screen surface. Touch to select an item. 4. Open the Wacom Control Panel and click on the A button. In the dialog box that appears, click BOUT ... -
Page 23: Customizing Your Cintiq
You can customize your Cintiq and adjust input tool settings through the Wacom Control Panel. You can access the Wacom Control Panel from the task bar on the standard desktop, or from a tile on the Windows 8 Start screen. -
Page 24: Control Panel Overview
Index CONTROL PANEL OVERVIEW You can use the Wacom Control Panel to customize your Cintiq and your pen. When you open the Wacom Control Panel, an icon for the pen or other input tool is displayed in the T list. The appropriate tabs are displayed. - Page 25 Index Tool Tips are available for most Wacom Control Panel items. Position the screen cursor over an item and let it rest there. The appropriate Tool Tip will pop up in a few moments. Your keyboard tab and arrow keys can also be used to navigate the control panel.
-
Page 26: Calibrating The Cintiq
This is required to compensate for viewing angle, and to adjust for parallax. Place the Cintiq in its working position, then follow this procedure. 1. Open the Wacom Control Panel. If more than one tablet or pen display is... -
Page 27: Customizing The Pen
See the documentation that came with your application for details. To learn more about these and other optional tools that can be used with Cintiq, visit the Wacom web site for your region. You can also learn about applications that currently support the advanced features of these tools, and find out how to order additional pens. - Page 28 Click to the tip sensitivity. With your screen cursor positioned over an empty area of the Wacom Control Panel, press down on the pen screen with your pen tip. Use the pressure bar to determine how hard you must press on the pen to reach maximum pressure.
-
Page 29: Adjusting Eraser Feel
Click to the eraser sensitivity. With your screen cursor positioned over an empty area of the Wacom Control Panel, press down on the Cintiq’s screen with your pen eraser. Use the pressure bar to determine how hard you must press on the eraser to reach maximum pressure. -
Page 30: Customizing Pen Buttons
WITCH like the pen to work when using click functions. To access the S settings, click on the WITCH ... button at the bottom of the Wacom Control PTIONS Panel. In the O dialog box: PTIONS •... -
Page 31: Customizing Tilt Sensitivity
The tilt setting applies to both the tip and eraser of your tool. Tilt is direction sensitive and can be used in some applications to control brush orientation or other characteristics. Visit the Wacom web site to learn about applications that currently support tilt. Contents Index... - Page 32 Contents Index CUSTOMIZING THE EXPRESSKEYS AND ROCKER RING To customize the ExpressKeys or Rocker Ring, select the appropriate tab. Each key or position can be customized to perform a modifier, keystroke, or other function. The default ExpressKey and Rocker Ring settings are shown below.
-
Page 33: On-Screen Controls
Screen Key panels or Screen Touch Strip panels with your preferred functions for use with a particular task or application. The Pin icon will keep the key or touch strip open on the screen. The Wacom Control Panel icon will open the On-Screen Controls tab in the Control Panel. - Page 34 The default layout for a Screen Touch Strip panel is a 4 x 2 strip with a default function of A CROLL Wacom Control Panel icon opens Control Panel to On-Screen Controls tab...
-
Page 35: Customizing Screen Keys Or Screen Touch Strips
Contents Index CUSTOMIZING SCREEN KEYS OR SCREEN TOUCH STRIPS To customize a Screen Key panel: 1. Select the name of the panel in the P list. ANELS 2. Select the functions for each of the keys from the dropdown menus under K . - Page 36 Contents Index Contents Index...
-
Page 37: Using Screen Keys Or Screen Touch Strips
Contents Index USING SCREEN KEYS OR SCREEN TOUCH STRIPS All Screen Key and Screen Touch Strip actions can be performed using your pen, finger, or mouse. To access an on-screen control, press the associated ExpressKey or Rocker Ring button. To use the Screen Key: Press the key for the desired function. -
Page 38: Button Functions
Contents Index BUTTON FUNCTIONS Customize the Cintiq for the way you like to work. You can use the Control Panel to change the button function that is assigned to a pen tool button, ExpressKey, or Radial Menu setting. FUNCTION NAME DESCRIPTION LICKS •... - Page 39 Contents Index FUNCTION NAME DESCRIPTION Enables you to simulate keystrokes. Select this option to display the D EYSTROKE EFINE dialog box. EYSTROKE Enter a keystroke or keystroke combination in the K entry box. Keystroke combinations can include letters, numbers, function keys (such as F3) and modifier keys (such as S , or C ).
- Page 40 Contents Index FUNCTION NAME DESCRIPTION Displays the Radial Menu on your screen. Each level of the hierarchical menu ADIAL consists of eight menu slices which may contain various features and options to choose from. Simulates the B command in browser applications. Simulates the F command in browser applications.
- Page 41 Contents Index FUNCTION NAME DESCRIPTION Opens a dialog box where you can select a specific application, file, or script to launch. Click B ... to locate an ROWSE application, file, or script to launch. The selection you make appears in the N box.
- Page 42 Contents Index FUNCTION NAME DESCRIPTION Changes the mapping around the current pen tip position so that you must move RECISION the pen farther for the screen cursor to cover a specific distance on the screen. This feature can be very useful for the precise control of pen or brush strokes. You can adjust the precision setting when assigning this function to a tool button.
- Page 43 The mouse mode settings are independent of system settings. Changes you make to these settings in the Wacom Control Panel do not affect similar system settings. However, changes made to similar system settings may affect your pen display settings.
- Page 44 Contents Index FUNCTION NAME DESCRIPTION Activates (on your screen) an interactive diagram of the current ExpressKey, ETTINGS Rocker Ring, and pen settings. The current functions for each control are shown. Click on any section of the diagram to change the settings or to open the appropriate Control Panel tab to adjust the settings.
-
Page 45: Using And Customizing The Radial Menu
• To make a selection without closing the Radial Menu, hold down the button that opens the Radial Menu. In the Wacom Control Panel, use the R tab to customize the available Radial Menu functions. ADIAL 1. Select a control slice. -
Page 46: Application-Specific Settings
Contents Index APPLICATION-SPECIFIC SETTINGS You can customize your tools for use with a particular application. For example, you may prefer a firm pen tip pressure setting in one application and a soft pressure setting in another. The A list enables PPLICATION you to add an individual application to the list and then customize your tool settings for that application. -
Page 47: Creating An Application-Specific Setting
PPLICATION in the T list. Select the application and then customize the Wacom Control Panel tab settings for your tool and selected application. Once you have created application-specific settings, applications that have not been customized in this... -
Page 48: Changing Application-Specific Settings
WORKING WITH MULTIPLE TOOLS The Wacom Control Panel is designed to help you customize and keep track of the settings for your Cintiq tools. The tool you use to open the control panel is automatically selected, and the appropriate tabs for that tool are displayed. -
Page 49: Troubleshooting
If the pen or the Cintiq controls do not work as you expect, check the assigned functions or reset them to their default conditions. A quick way to return a pen to its default condition is to remove it from the Wacom Control Panel T list. - Page 50 Contents Index • The D dialog box shows dynamic information about the Cintiq and your input tool(s). IAGNOSTICS • If you are using more than one Cintiq or tablet, select the product you are testing in the T ABLET column. •...
-
Page 51: Testing The Expresskeys And Rocker Ring
LOSE Important: Some applications can override and control the ExpressKey or Rocker Ring functions. Consider closing any open applications except the Wacom Control Panel when testing the ExpressKeys or Rocker Ring. For details, see Using applications integrated for tablet control. -
Page 52: General Problems
Contents Index 3. Test tilt for the x-axis by moving the pen from a vertical position toward the right; the X T value should change from approximately 0 to +60. Now move the tool to the left of vertical; the X T value should change from approximately 0 to - 60. - Page 53 INDOWS ALIBRATE unchecked. Clicking is difficult. Open the Wacom Control Panel and go to the P tab. Try using a lighter T The pen selects everything or Open the Wacom Control Panel and go to the P tab. Move the T will not stop drawing.
- Page 54 (0.2 inch) of the Cintiq active area. Do this without pressing down on the pen tip. • In the Wacom Control Panel, verify that the side switch is set to the proper function for the application and tool you are using. •...
- Page 55 • If you are using application-specific settings, be sure you have set in the Wacom Control updated the settings for the application you are working with. Panel. The ExpressKeys or Rocker Check to be sure that Cintiq is correctly configured for your preferred Ring do not perform the handedness.
-
Page 56: Windows-Specific Problems
Contents Index WINDOWS-SPECIFIC PROBLEMS You suspect the Cintiq Use the Wacom Tablet Preference File Utility to work with preferences. preferences may be From the Windows 8 Start screen, click the W ACOM ABLET REFERENCE corrupted, or want to make tile. See Managing preferences. -
Page 57: Support Options
Obtaining software updates. Check the Support options on the Wacom website for your region. You may find answers to your questions without having to make a phone call. If you cannot solve the problem and you think your Wacom product is not working properly, contact the Wacom support staff for the area where your product was purchased. -
Page 58: Frequently Asked Questions
Can I use older Wacom input tools with the Cintiq? Pens and accessories are generally specific to each product model. Visit the Wacom website for your region and check the Support and Cintiq product pages for details. - Page 59 Contents Index How do I reset my pen and touch preferences to the default settings? Managing preferences. Can I delete all pen and touch preferences at one time? Yes. See Managing preferences. What is the best way to clean the Cintiq? Caring for the Cintiq.
-
Page 60: Care And Maintenance
The Cintiq and the pens are not made to come apart, except to personalize your pen with a color ring. Otherwise, taking apart the product will void your warranty. • You should not attempt to access, service or replace the Cintiq’s battery. If you have problems with your battery, please contact Wacom Support. See Battery status and Operation. •... -
Page 61: Replacing The Pen Nib
Contents Index REPLACING THE PEN NIB The pen nibs will wear with normal use. To protect your Cintiq from damage and for best performance, periodically replace your pen nibs. 1. To replace your pen nib, use the nib removal tool, a pair of tweezers, needle-nosed pliers, or similar instrument to pull the nib straight out of the pen. -
Page 62: Other Useful Information
Ordering parts and accessories UNINSTALLING CINTIQ It is unlikely that you will ever need to remove the Wacom driver software from your Cintiq. However, if it becomes necessary, follow the procedure below to uninstall the driver. Important: When you remove the Wacom driver software, Windows 8 will not be affected. However, your Cintiq will no longer function as a graphics tablet. -
Page 63: Managing Preferences
Contents Index MANAGING PREFERENCES Use the Wacom Tablet preferences utility to manage your Cintiq preferences for single or multiple users. 1. Close any open applications. 2. From the Windows 8 Start screen, click the W tile. If you are using... -
Page 64: Installing Multiple Tablets
To add a new pen display or tablet, connect it to the Cintiq. The system will automatically find the pen display or tablet and initialize it. An icon for the pen display or tablet will then appear in the Wacom Control Panel. -
Page 65: Importing Expert Settings
Each XML file may include customized settings for one or more applications. These settings may apply to the ExpressKeys or Rocker Ring, Radial Menu, or pen button and eraser functions. Visit the Wacom website for your region to choose from a variety of custom settings files that may be available for your product. -
Page 66: Product Specifications
For products purchased or used outside the United States and Canada, the warranty period may be determined by regional requirements. The warranty period for your pen display is described on the Support page of the Wacom web site for your region, or contact Wacom Support. -
Page 67: Ordering Parts And Accessories
Contents Index ORDERING PARTS AND ACCESSORIES For a list of available parts and accessories, visit the Wacom website for your region. You can also do the following: • In the USA or Canada, call 1.888.884.1870 (toll-free) or visit Wacom’s website at http://direct.wacom.com (USA only). -
Page 68: Glossary
Journal includes a variety of pen, marker, and highlighter tools, plus an eraser that is easily activated by the eraser end of your Wacom pen. Additionally, your handwritten content is searchable within Journal. - Page 69 Pixel. The smallest unit of measure on your screen. Pressure sensitive. A quality of the Wacom pen tip and eraser that senses the amount of pressure being applied. This is used to create natural-looking pen, brush, and eraser strokes in applications that are pressure sensitive.
- Page 70 Contents Index INDEX About the manual Eraser pressure setting, advanced Accessories Ergonomics ordering Expert settings, importing Adding a new tool ExpressKeys Applications, integrated for tablet control using Application-specific settings FAQs (Frequently Asked Questions) changing settings Front view, Cintiq creating Functions, button removing General problems working with...
- Page 71 Uninstalling Using using ExpressKeys, Rocker ring and Windows button Pen display multi-touch calibrating Pen nib, replacing Wacom Desktop Center Pens, optional Warranty Positioning, with pen Windows-specific problems, Preferences, managing troubleshooting Pressure sensitivity, working with Work area, setting up Product information...
Need help?
Do you have a question about the cintiq companion and is the answer not in the manual?
Questions and answers