Page 1
Set up your device Getting started with your pen tablet Connect wirelessly by Bluetooth Work with your pen Customize your device in Wacom Tablet Properties Use On-Screen Controls as shortcuts Access application-specific settings Wacom Desktop Center Map your device to your monitor...
Advanced pen and eraser Customize your device in Wacom Tablet Properties What can I customize in Wacom Tablet Properties? Where can I access settings and other options in Wacom Tablet Properties? Open Wacom Tablet Properties Assign settings in Wacom Tablet Properties...
Page 3
Backing up your files Updating your tablet Getting apps and products Getting Support for Wacom products Logging in with your Wacom ID Map your device to your monitor Map your device in pen mode Map your device in mouse mode...
Page 4
User's Manual Glossary Order parts and accessories Privacy Trademarks...
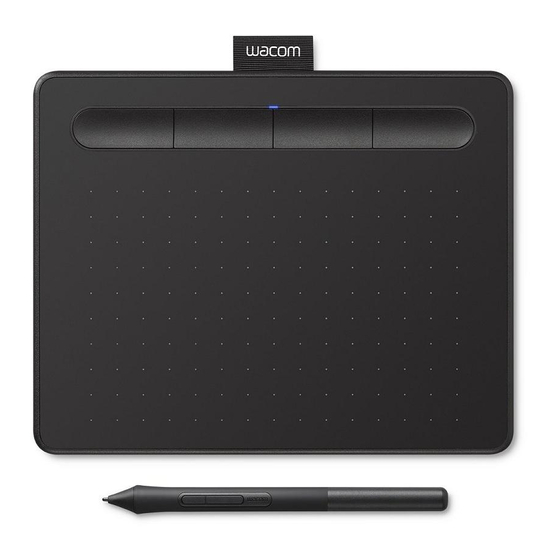
Wacom Intuos, including illustrations of your pen and tablet. The product Help topics listed in the Table of Contents on the left of this page will help you make the best use of your Wacom Intuos.
User's Manual Features of your Wacom Intuos The features of your Intuos pen tablet include: Micro USB port: Connects your Intuos to your computer. See the Quick Start Guide that came with your Intuos for instructions on connecting it to your computer. Also see About your Intuos.
User's Manual Set up your device 1. First, follow the directions in this section of user help. The Quick Start Guide included in the box contains images that can help. Attach any stands that are included with your device. Set up your work area. Get started 2.
User's Manual Set up your work area Position your tablet, pen, and keyboard for easy access. Adjust your monitor so you can view it comfortably without eyestrain, placing it about one arm's length away from you. Position the tablet so the screen cursor follows the same direction as your hand movements on the tablet. If you are using the tablet as a creative tool, consider placing the tablet below the keyboard and centered below your monitor.
From the Wacom Desktop Center, select Updates , and then click the update to install it. If the Wacom Desktop Center is not available for your device, go to the Wacom drivers page to find the latest updates. Note : Your device will not work if you uninstall the driver.
Help You can also open user help from the Wacom Desktop Center menu. Notes User help is common to Windows and Mac computers. Screenshots are from a Windows computer, unless otherwise noted.
Updates Check in the Wacom Desktop Center to make sure that you are using the latest driver. Update your operating system to the latest version. Move your tablet closer to your computer, and make sure that the space between the computer and the tablet is clear.
User's Manual 3. Repeat the connection steps at the beginning of this page with your second computer. What the LED means Quite a bit of information is conveyed by the status and color of the LED: LED Color Meaning If connected to a wall adapter by USB cable this indicates the battery is fully charged. Otherwise, it means the tablet is off.
3. Replace the cone. Specialty pens Pens designed for more advanced work, such as the Wacom Pro Pen 3D, Art Pen, or Airbrush, can be used with many pen tablets and pen displays. To discover other pens and tools that can be used with your pen tablet or pen display, go to the Wacom Store.
: Select the item with the pen tip, then slide the pen tip across the screen to move it. Pen buttons Use pen buttons as shortcuts to settings. You can view and change the assigned settings on the tab in Wacom Tablet Properties. Note : Some pens do not have any buttons.
User's Manual Store your pen Store your pen properly keep it in good condition and help the pen tip last longer. Important: Store your pen so there is no pressure on the pen tip or eraser. If your device has a pen stand, store the pen with the tip down in the stand. If your device included a pen case, store the pen in the pen case.
: Some pens do not have an eraser or buttons. Assign settings to the pen button and pen tip Open Wacom Tablet Properties. Important : The options available in Wacom Tablet Properties will vary depending on your device. 2. If there is a Tool row, select your pen.
Current Pressure : To see how hard you need to press with the pen, check your Current Pressure by pressing down with the pen tip or eraser in an empty area of the Wacom Tablet Properties window. Tip Feel Eraser...
User's Manual Replace the pen nib Extra pen nibs and a nib removal tool are provided in the end of the pen. Refer to the illustrations below for more detail: Hold the pen in both hands, one near the end and the other near side buttons. Gently twist the pen to reveal the extra nibs inside.
(Microsoft Office 2007 or later): Use the enhanced digital mark-up and inking tools found on the Review tab in applicable applications. Windows Input Panel : Use handwriting or an on-screen keyboard to directly enter text with your Wacom pen. Note: The Pen Flicks and press-and-hold-to-right-click features are disabled in some graphics applications.
User's Manual Advanced pen and eraser Customize To further customize tip or eraser pressure settings, select the Pen or Eraser tab and then click the button. Options within the Pen Feel Details dialog let you independently change the tip or eraser pressure sensitivity and click threshold settings. Pen Feel Details dialog shows the selected pressure sensitivity curve and click threshold settings.
User's Manual Customize your device in Wacom Tablet Properties You can customize your device, pen, and other tools in Wacom Tablet Properties so that they work the way you want. Open Wacom Tablet Properties to view the settings you can customize.
Wacom Tablet Properties, you can view customizable settings for your device and tools. Important : The tabs and options that you see in Wacom Tablet Properties will vary depending on your device. To open Wacom Tablet Properties: Windows and Mac:...
Some examples of customizable components that you can assign settings to are ExpressKeys™, pen buttons, the pen tip, Touch Rings, Rocker Rings, On-Screen Controls, touch gestures, and Touch Strips. Important : The customizable components and the options available in Wacom Tablet Properties will vary depending on your device. Open Wacom Tablet Properties.
6. Engage the component that you customized, and the setting that you assigned is performed. : You can assign settings that apply only in a specific application. Example of assigning a setting in Wacom Tablet Properties Here is how you can customize a pen button to Zoom In Open Wacom Tablet Properties.
You can change the settings assigned to ExpressKeys™, Touch Rings, On-Screen Controls, pen buttons, and other customizable components of your device in Wacom Tablet Properties. Then, when you engage that component, such as pressing an ExpressKey or pen button, the function that you assigned to it is performed.
Page 26
User's Manual Ink Toggle When Handwriting recognition is turned on, Ink recognizes and converts your handwriting into text and (Mac) inserts it into a document. Performs the keystroke or combination of keystrokes that you assign. Keystroke When you select Keystroke , the Define Keystroke window appears so you can...
Page 27
Displays the current settings of your customizable components, including ExpressKeys™, the Touch Ring, pen, and touch. Settings Click on any item that displays to open Wacom Tablet Properties so you can adjust setting assignments, if desired. Show Minimizes all open windows so you can view your desktop.
Page 28
Note : Some of the settings listed are not available for all devices or for all customizable components. Refer to the drop-down settings menus on the tabs in Wacom Tablet Properties to see which options are available for which components.
4. Enter a for your keystroke and click The name appears on On-Screen Controls, in Wacom Tablet Properties, and in Settings view, so enter a name that indicates the keystroke you assigned. If you are assigning numbers to a Keypad, it is best practice to name the Keystroke the number that you assigned.
ExpressKeys™ are customizable buttons on your device. When you press an ExpressKey, you activate the assigned setting, such as mouse clicks, modifiers, or navigation functions. You can view and change which settings are assigned in Wacom Tablet Properties. 1. In Wacom Tablet Properties, if there are Device Tool rows, select your device and then select Functions 2.
Page 31
User's Manual The size and placement of ExpressKeys™ vary, depending on your device. Your screen may match one of the above screenshots or may be different. The screenshots are for descriptive purposes.
User's Manual Express View You can enable Express View to see the current settings for your ExpressKeys™ at any time. Show Express View Check the checkbox on the ExpressKeys™ tab. Press any ExpressKey to view the current ExpressKeys™ settings on your screen. The display will fade out after 2 seconds on the screen.
User's Manual Customize user options Options Click on Wacom Tablet Properties to customize side switch mode and other preferences for your device. Important : The available options will vary depending on your device. Hover Click is the default and allows you to click by pressing the pen button while holding the pen tip slightly above the device surface.
: A Screen Key panel is a row of buttons that displays in the layout you choose. Radial menu : A Radial menu is a circle split into slices, and each slice has its own setting. : You can select the wrench icon to open Wacom Tablet Properties.
You must first create a new On-Screen Control, or copy an existing one, and then you can assign settings to Important : On-Screen Controls are not specific to a device. You can assign them to a customizable component of any device that appears in Wacom Tablet Properties. 1. Open Wacom Tablet Properties.
Page 36
User's Manual Size You can move the slider to change the size of the On-Screen Control when it appears on your screen. You can select Display at Cursor if you want the On-Screen Control to appear next to your cursor when you open it. If you do not select this, the On-Screen Control appears in the same location every time you open it.
You can change the settings at any time if you decide that you want different settings. 1. In Wacom Tablet Properties on the On-Screen Controls tab, select the name of the On-Screen Control in the Panels list.
Keypad, you can change the settings assigned to the buttons so that the Keypad includes the settings you want. 1. In Wacom Tablet Properties on the On-Screen Controls tab, select the name of the Keypad in the Panels list.
You can assign On-Screen Controls to ExpressKeys™, touch gestures, and pen buttons, depending on the features available on your device. In this example, you can see how to assign an On-Screen Control to an ExpressKey™. Device Open Wacom Tablet Properties and select your Functions Select ExpressKeys™...
User's Manual Access application-specific settings Settings assigned to customizable components can be further customized for a specific application. This makes performing functions in the application faster and easier. There are multiple ways to access those application-specific settings. Settings assigned by you : You can assign your own settings that change depending on the application you are working Settings assigned by applications : Some applications assign settings to customizable components so that when you...
Pen settings, the changes will apply to the Pen only while you are using that application. Application-specific settings can be used with all Wacom pen tablets and pen displays, and with the ExpressKey Remote device.
Page 42
User's Manual Tool 1. In the list, select the tool from which you want to remove the application-specific setting. Application 2. In the list, select the application you want to remove. Application Delete 3. Click on the list button. In the dialog, click to confirm your selection.
When you open that application, you are automatically using the settings assigned by it. How do I know what setting is assigned? After you open an application that assigns settings, you can view the assigned settings in Wacom Tablet Properties. Application Defined If you see...
3. Follow the prompts in the window that appears. Open Wacom Tablet Properties to view the imported settings. : You do not have to use the settings assigned by the settings file. You can change the settings in Wacom Tablet Properties.
User's Manual Wacom Desktop Center The Wacom Desktop Center helps you keep your driver and products up-to-date, customize your devices, and learn more about how to use pen tablets and pen displays. The above screenshot is for descriptive purposes; it may not match your screen.
Wacom ID so you can access the Wacom Cloud. Click your name to view and update your profile. More Click to change privacy settings, to configure how the Wacom Desktop Center starts up, to access help, and to find Wacom on social media.
User's Manual Map your device to your monitor You can customize how the surface of your device maps to your monitors and how your pen movements relate to the cursor movements on your monitor by selecting either Mouse mode. : If you frequently switch between Pen mode and Mouse mode, assign the Mode Toggle to a customizable component, like an ExpressKey or pen button, so that you can switch at the press of a button.
If you want a different mapping than what is shown, you can change it. Tool Mapping 1. In Wacom Tablet Properties, select your pen from the list and then select the tab. 2. From Mode, select By default, the active area of the device maps to your entire monitor. If you are using more than one monitor, the device maps to all monitors.
Page 49
User's Manual The above screenshot is for descriptive purposes; it may not match your screen.
The cursor stays on the point that you left it when you pick up your pen, and you interact with your device like you interact with a mousepad or trackpad. 1. In Wacom Tablet Properties, select your from the...
You can customize how the tablet active area maps to your monitors on the Mapping tab in Wacom Tablet Properties. You can toggle between working on all of your monitors at once to working on an individual monitor by using Display Toggle.
User's Manual Switch between displays using Display Toggle Display Toggle You can toggle between displays by using so that you can quickly switch between working on all of your monitors and working on an individual monitor. Display Toggle switches between the display that you set on the Mapping tab and each of your monitors one at a time.
Do not disassemble the device or the pen, except to add a color ring to the pen. Taking apart the product voids your warranty. Make sure to review the Important Product Information for additional safety precautions. You can find it in the Wacom Desktop Center, if supported for your device, or from Customer Support.
Review the Quick Start Guide and make sure that the tablet is set up correctly, including that all plugs and connectors are firmly in place. Check the User Help for information regarding the issue. Visit the Wacom website to view the product FAQs (Frequently Asked Questions) to see if any apply to your issue. Go to Customer Support to see if a new driver is available and install it.
User's Manual Test the tablet Turn on your computer. The tablet status LED should light. There may be a short delay before the device is ready to use. If the LED does not light, try these tests to potentially fix the issue yourself. 1.
If your ExpressKeys™ or a Touch Ring do not work as you expect, check the assigned functions or reset them to their default conditions. See Testing a pen or mouse for more information on testing your pen tablet components. 1. Open Wacom Tablet Properties and click on the About button. In the dialog that appears, click Diagnose ...
Page 57
If these tests fail, you may have defective hardware. See Technical Support. Important: Some applications can override and control the ExpressKey or Touch Ring functions. Consider closing any open applications except Wacom Tablet Properties when testing the Touch Ring. For details, see Using integrated applications.
4. If updating your driver does not fix the issue, in the Wacom Desktop Center. 5. If resetting does not fix the issue, diagnose issues using Wacom Tablet Properties. Diagnose issues using Wacom Tablet Properties Open Wacom Tablet Properties. Device If you have more than one device connected to your system, select the device you are using the pen with from the list.
Page 59
User's Manual Pointing Device Info Hold your pen within 10 mm (0.4 inch) of the surface of the device while watching the Proximity Device Name Device Type Device S/N You should see a value appear after , and (serial number). Move the pen along the surface of the device.
Page 60
The smallest unit of measure on your display screen. Pressure sensitive. A quality of the Wacom pen tip and eraser that senses the amount of pressure being applied. This is used to create natural-looking pen, brush, and eraser strokes in applications that are pressure-sensitive.
Page 61
Track. A motion used when navigating with touch. Touch and move a single finger across the tablet surface. Wacom Link adaptor Adapter for the MobileStudio Pro which converts USB-C connection allowing Desktop Mode to function on machines without a USB-C port.
Page 62
User's Manual Order parts and accessories To purchase parts and accessories for your device, go to the Wacom Store. You may also contact your local dealer, distributor, or Customer Support for your region. Note: Some parts and accessories may not be available in all regions.
Page 63
User's Manual Privacy At Wacom, we value your Privacy. We use Google Analytics to collect basic information about browsing to improve our User Help. Please see our Privacy Policy for more information.
Need help?
Do you have a question about the Intuos S and is the answer not in the manual?
Questions and answers