Table of Contents
Advertisement
Quick Links
Advertisement
Table of Contents

Subscribe to Our Youtube Channel
Related Manuals for Teac CRX-300i


Summary of Contents for Teac CRX-300i
- Page 1 Stereo Clock Radio for iPod and iPhone * iPhone shown is not included Owner's Manual Thank you for purchasing this Teac Stereo Clock Radio for iPod and iPhone. Please read through this manual carefully before operating. TEAC CRX-300i Manual Size:190*130mm 2011/09/19...
-
Page 3: Table Of Contents
Dear Customer, Congratulations on the purchase of this top-quality TEAC product. As with all TEAC products, this product has also been developed on the basis of the recent technical standards and manufactured using the most modern electronic components available. Please take a few minutes to carefully read the following instruction manual before using the equipment for the first time, so that you will be able to enjoy your new TEAC equipment for a long time. -
Page 4: Important Safety Instructions
IMPORTANT SAFETY INFORMATION CAUTION! RISK OF ELECTRIC SHOCK DO NOT OPEN TO REDUCE THE RISK OF ELECTRIC SHOCK DO NOT REMOVE COVER (OR BACK) This symbol indicates that there are important operating and maintenance instructions in the literature accompanying this unit. - Page 5 IMPORTANT This equipment generates, uses and can radiate radio frequency energy and, if not installed and used in accordance with the instructions, may cause harmful interference to radio communication. However, this is no guarantee that interference will not occur in a particular installation. If this equipment does cause harmful interference to radio or television reception, which can be determined by turning the equipment off and on, the user is encouraged to try to correct the interference by one of the following...
-
Page 6: Introduction
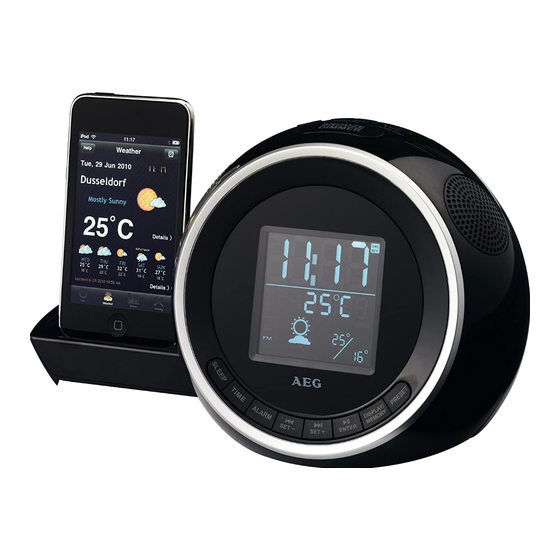
The CRX300i is a full-function clock radio with dual alarms and a retractable docking bay for an iPod or iPhone. Special features of the CRX300i enable it to share information with a docked iPod touch or iPhone (requires installation of a free TEAC iDock application on the iPhone). PRELIMINARIES UNPACKING Carefully unpack the unit. -
Page 7: Controls And Connections
CONTROLS AND CONNECTIONS FRONT VIEW... - Page 8 CONTROLS AND CONNECTIONS TOP VIEW BACK VIEW 12/24 hr AUDIO IN DC IN 5V...
-
Page 9: Display
DISPLAY DISPLAY DIMMER The display brightness can be set to one of 3 levels. Press the SNOOZE/DIMMER button repeatedly to set the display brightness to one of the options of high, medium or off. -
Page 10: Backup Battery
BACKUP BATTERY A backup battery may be fitted to your clock radio. With the backup battery fitted, your clock radio will retain your time and alarm settings in the event of a power cut. The backup battery compartment is located on the underside of the unit. To fit a backup battery: 1. -
Page 11: Getting Started
GETTING STARTED FM AERIAL Before using your clock radio for FM reception, unwrap and fully extend the aerial. You may need to adjust the position of the aerial for maximum signal strength. CONNECTING AC MAINS POWER Before connecting the power, check that the mains voltage on the rating plate of the AC adaptor is the same as the voltage in your area. -
Page 12: Selecting A Source
When you next dock your iPhone to the clock radio, these settings will synchronise. For more details of installing and using the TEAC iDock application, refer to the 'Advanced Operation' section on page 18-19. SELECTING A SOURCE... -
Page 13: Adjusting The Volume
Selecting a source: Press the INPUT button on the top panel repeatedly to scroll through the available sources. The symbol for the selected source will light on the display. ADJUSTING THE VOLUME To increase the volume: Press the VOLUME + button on the top of the unit. To decrease the volume: Press the VOLUME - button on the top of the unit. -
Page 14: Radio Presets
STATION PRESETS Radio presets Your radio can store up to 20 of your favourite stations as presets for quick recall. To store a station as a preset Tune to the station you want to store as a preset. Press and hold the DISPLAY/MEMORY button. The preset Store display will appear (P-followed by a flashing number). - Page 15 2G insert 17 nano 4G NOTE: When inserting an iPhone/iPod Touch into the CRX-300i, make sure the correct adapter is used. The adapter should have been supplied with the Apple product. If otherwise, the adapter can be purchased from Apple stores or Apple web-site( http://support.apple.com/kb/HT1353)
-
Page 16: Docking An Ipod
For first time use the message 'Application Not Installed' will be displayed on the iPhone screen. The TEAC iDock application is necessary to enable advanced features of the unit. For more details of the advanced features enabled with the application installed, refer to the Advanced Operation' section on page 18. -
Page 17: Playing Other Audio Sources
If you want to download the application from iTunes, touch 'Yes' and follow the prompts on the iPhone screen. If you want to download the application later, touch 'No' on the iPhone screen. Playing music: Select iPod operation from the iPhone menu. Navigate to your choice of music. -
Page 18: Using The Alarms
Playing the AUDIO source Press the INPUT button repeatedly to select AUX mode. The AUX symbol will be displayed. Set your personal audio player/computer to PLAY. Set the listening volume to the level you want with the volume controls on the radio or remote control. If there is no sound or if the volume level is not loud enough, you may need to increase the volume setting on your personal audio player. - Page 19 Checking the alarm time: Press the DISPLAY/MEMORY button repeatedly to change the display in the sequence - Alarm 1 time check. The Alarm 1 indicator will light and the Alarm 1 time setting will be displayed. Alarm 2 time check. The Alarm 2 indicator will light and the Alarm 2 time setting will be displayed.
-
Page 20: Advanced Operation
The alarm(s) will sound at the same time each day when set. ADVANCED OPERATION The advanced features are enabled when an iPhone or iPod touch with TEAC iDock application running is docked to the unit (iPhone in this section also applies to iPod touch). Advanced features -... - Page 21 Running the application: NOTE: The iPhone does not have to be docked to run the application. Find the 'TEAC iDock' application icon on your iPhone. Touch the application to start it. NOTE: Advanced features will only be available when the iPhone is docked with the application running.
- Page 22 3. Alarm time displays 4. Location and weather summary Setting the alarms via the application: NOTE: When an iPhone is docked and the TEAC iDock application is running, alarm settings made in the application will override alarm settings made on your clock radio.
- Page 23 From this screen you can switch each alarm on or off, set the wake-up volume and choose to activate snooze mode. Touch the set time banner to open a sub-screen that enables you to set the alarm time and day(s) and to select wake-up music from your iPhone. When the time is set, press the 'DONE' icon to return to the main alarm setting screen.
- Page 24 RADIO FUNCTION: Select the Radio function from the application menu at the bottom of the screen. The radio screen will be displayed. 1. Scroll here to tune the radio (108.0 MHz shown in this example) 2. Touch here to store a station preset 3.
-
Page 25: Sleep Function
Naming preset stations: You can name preset stations stored on your iPhone. Touch the text box below the preset number you want to rename. The text entry keypad will appear. Enter the preset name. APPLICATION SETTINGS: From the Application setting screen you can choose the following settings - Flash colon: Set to 'ON' for a flashing colon on the clock display. -
Page 26: Care & Maintenance
Checking the sleep time remaining: If you want to check the sleep time remaining during the sleep period, press the SLEEP button. Cancelling sleep mode: To cancel Sleep mode, set the unit to Standby. Sleep indicator CARE AND MAINTENANCE CARE AND CLEANING All care and cleaning operations should be carried out with the unit unplugged from the mains power. -
Page 27: Specifications
SPECIFICATIONS Conformity This device has been tested for compliance with the basic and other relevant requirements of the EMC Directive 2004/108/EC and the low Voltage Directive 2006/95/EC. Class II construction double insulated. This product must not be connected to earth. ENVIRONMENTAL PROTECTION Do not put your used batteries, nickel cadmium, rechargeable, round cell or starter batteries in with your household rubbish. - Page 28 TEAC CORPORATION 1-47, Ochiai, Tama-shi, Tokyo 206-8530, Japan UMA0565A...
Need help?
Do you have a question about the CRX-300i and is the answer not in the manual?
Questions and answers