
Related Manuals for Teac CRX23ABT


Summary of Contents for Teac CRX23ABT
- Page 1 CRX23ABT Clock Radio USER MANUAL IMPORTANT ! www.teac.com.au Trademark of TEAC Corporation JAPAN...
- Page 3 Keep your purchase receipt to enable you to proceed quickly in the event of a Warranty Service. If you require Warranty Service, please contact the TEAC Warranty Service Hotline at 1300 553 315 for assistance. Please ensure that you have the model number, serial number and purchase receipt ready when you call.
- Page 4 The serial number of the product is missing or has been tampered with. No one is authorised to assume any liability on behalf of TEAC or impose any obligation on it, in connection with the sale of any equipment other than as stated in this warranty and outlined above.
-
Page 5: Table Of Contents
TABLE OF CONTENTS Safety Information Location of Controls Power Supply Basic Functions Clock and Alarm Setting USB Charger Radio Aux Input Wireless Playback From Smart Device... -
Page 6: Safety Information
SAFETY INFORMATION Read Instructions – All the safety and operating instructions should be read before the appliance is operated Retain Instructions – The safety and operating instructions should be retained for future reference. Heed Warnings – All warnings on the appliances and in the operating instructions should be adhered to. - Page 7 10. Cables and Plugs – The mains plug shall remain readily operable. All cables should be routed so that they are not likely to be walked on or pinched by items placed upon or against them, paying particular attention to cords at plugs, convenience receptacles, and the point where they exit from the appliance.
- Page 8 components. Danger of explosion if battery is incorrectly replaced. Replace only with the same or equivalent type. Do not mix old and new batteries. Take attention to the environmental aspects of battery disposal. Batteries shall not be exposed to excessive heat such as sunshine, fire or the like. Remove batteries before disposing of the product.
- Page 9 Disposal of Used Electrical & Electronic Equipment The meaning of the symbol on the product, its accessory or packaging indicates that this product shall not be treated as household waste. Please, dispose of this equipment at your applicable collection point for the recycling of electrical &...
- Page 10 FURTHER NOTES ON THE DEVICE Setting a safe volume level if you continually listen to loud music, your hearing gradually adapts to it and gives you the impression that the volume is lower. What seems normal to you can be already for long time too loud and unhealthy ...
-
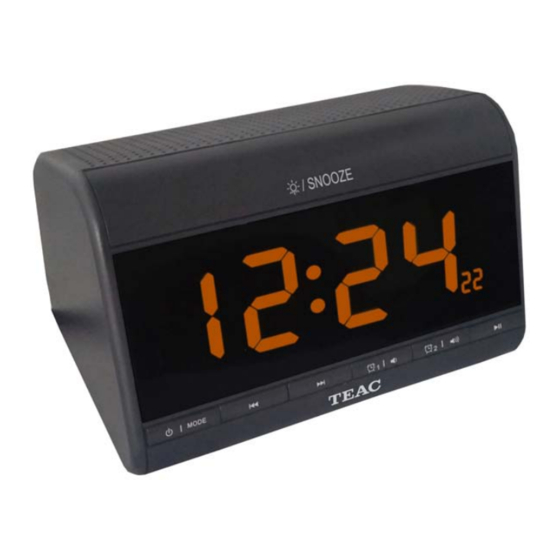
Page 11: Location Of Controls
LOCATION OF CONTROLS Front View Rear View SNOOZE / SLEEP button 6. Alarm 2 / Volume + button STANDBY /MODE button. 7. Play / Pause button I<< (PREVIOUS button) 8. DC input (connect to power adapter) >>I (NEXT button) 9. AUX in jack Alarm 1 / Volume - button 10. -
Page 12: Power Supply
POWER SUPPLY Power Adaptor 1. The unit requires DC 5V 2.0A. 2. Plug the supplied adaptor cable into the connector on the back of the unit and the other end into a suitable wall socket. 3. Make sure that the output power of the wall outlet matches the required power of the adaptor. -
Page 13: Clock And Alarm Setting
Mode Selection With the unit switched on, press the STANDBY /MODE button repeatedly to switch between the following modes: Wireless Streaming, AUX, Radio Volume Control To increase the volume, press and hold the Volume Up/Alarm 2 button. To decrease the volume, press and hold the Volume Down/Alarm 1 button. - Page 14 Android version: iOS version: Click the button ( ) or slide from the left to the right to show the menu below. ...
- Page 15 Manual Alarm Setting An alarm can only be set while the unit is in standby mode. This unit enables you to set 2 separate alarms and select to wake to Radio or Buzzer. While the unit is in standby mode, press the button and hold for 2 seconds to enter the alarm setup.
- Page 16 up mode (Radio or Buzzer), then click “Confirm ” Notes: If radio is selected for wake up mode, the unit will play the last station selected. AUX mode cannot be selected for wake up mode. Activating/Deactivating an Alarm ...
- Page 17 deactivated. To reactivate a previously set alarm, enter the alarm setting mode as described above and select a desired wake up mode. When exiting the setting mode, the symbol for the activated alarm ( and/or ) will light up in the top left corner of the display.
-
Page 18: Usb Charger
To cancel the snooze function, press the STANDBY /MODE button. Snooze via APP In the APP, when the alarm is activated, there will be a pop up “Stop” or “Snooze”. Select “Snooze” to delay the alarm for 8 minutes. Dimmer The display can be dimmed in 3 levels. -
Page 19: Radio
RADIO Switch the unit on as described above. Select radio mode by pressing the STANDBY /MODE button repeatedly. Select a desired radio station by pressing the button repeatedly. This unit has an auto store system for quick access: While in radio mode, press and hold for 2 seconds the button. - Page 20 stored on will overwrite these. Similarly, the auto store system will overwrite previously manually stored stations. If a radio station is broadcasting in stereo, “ST” will be shown on the display. Radio via APP (Both Android and iOS version) Slide to the right on your screen to open the Functions Menu and select RADIO to enter the Radio control panel.
- Page 21 Functions of Radio Controls To add the current channel into preset station << / >> Manual search previous / next available radio channel < / > Manual search radio channel step by step □ Mute function Volume level control Click this icon to show “Search”, “ Band” and “ EQ setting” Search Auto search for the Radio channel Band...
-
Page 22: Aux Input
AUX INPUT You can connect the audio output of an external device such as a CD or MP3 player to this unit to listen to the sound of that device through the amplifier of this music system. Switch the unit on as described above. Select AUX mode by pressing the STANDBY /MODE button repeatedly. -
Page 23: Wireless Playback From Smart Device
Turn on the Bluetooth function in your device. Go to your device’s Bluetooth® settings. Add or search for devices. When the model no. “CRX23ABT” appears, select the device. If you are prompted for a pass code, enter “0000”. Your device is now paired with the unit. - Page 24 Note: If there is no playback, ensure that neither the unit nor your Bluetooth® device are set to zero volume and the right device for playback is paired and connected. BT via APP (Both Android and iOS) Slide from the left to access the Menu and select Blue tooth. Functions...
- Page 25 I< / >I Previous / next song Play / Pause function Volume level control Select EQ EQ setting Select EQ (normal, Jazz, Pop, classical, soft, DBB, Rock, User) For iOS version, only have “none” :DAE” or “user” for selection, Compatibility Disclaimer ...
- Page 26 PRODUCT SPECIFICATIONS/FEATURES 3W Mono BT Speaker FM PLL Clock Radio (20 channels) Amber LCD Display Dual Alarm Clock Wake Up by Buzzer Snooze Function 3-Level Display Dimmer USB Charging Port (for mobile charging only) Aux In Supports backup batteries for clock function (2x AAA batteries, not included) Operated by AC/DC Power Adapter Unit Dimensions: 130 x 90 x 90 mm Package Dimensions: 270 x 115 x 120 mm...
- Page 28 In the event of a product failure within the warranty period, please call the TEAC Warranty Service Hotline 1300 553 315 Between Monday to Friday - 8.30AM to 5PM AEST *Please have your purchase receipt and the product’s serial number ready For other enquiries and support please visit www.teac.com.au...
Need help?
Do you have a question about the CRX23ABT and is the answer not in the manual?
Questions and answers