Advertisement
Model No. PETL62010
Serial No.
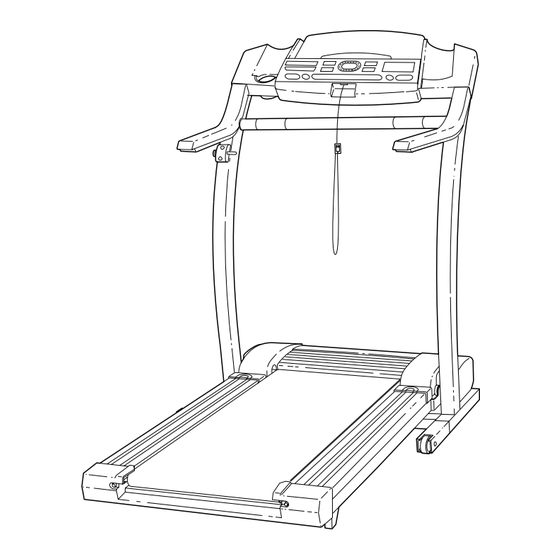
Find the serial number in the location
shown below. Write the serial number
in the space above for reference.
Serial
Number
Decal
QUESTIONS?
As a manufacturer, we are
committed to providing
complete customer satisfaction.
If you have questions, or if
there are missing parts, please
call:
08457-089009
Or write:
ICON Health & Fitness, Ltd.
Unit 4
Revie Road Industrial Estate
Revie Road
Beeston
Leeds
LS11 8JG
CAUTION
Read all precautions and instruc-
tions in this manual before using
this equipment. Save this manual
for future reference.
USER'S MANUAL
Visit our website at
www.proform.com
Class HC
Fitness Product
Advertisement
Table of Contents

Subscribe to Our Youtube Channel
Related Manuals for ProForm 620


Summary of Contents for ProForm 620
- Page 1 Unit 4 Revie Road Industrial Estate Revie Road Beeston Leeds LS11 8JG Class HC Fitness Product CAUTION Read all precautions and instruc- tions in this manual before using this equipment. Save this manual Visit our website at for future reference. www.proform.com...
-
Page 2: Table Of Contents
TABLE OF CONTENTS IMPORTANT PRECAUTIONS ..............2 BEFORE YOU BEGIN . - Page 3 11. When connecting the power cord (see page 20. Do not change the incline of the treadmill by 8), plug the power cord into an earthed cir- placing objects under the treadmill. cuit. When replacing the fuse, an ASTA ap- proved BS1362 type should be fitted to the 21.
- Page 4 The decals shown below have been placed on your treadmill. If a decal is missing or illegible, please call our Customer Service Department to order a free replacement decal (see the front cover of this manual). Apply the decal in the location shown. Note: This decal is shown at 38% of actual size.
-
Page 5: Before You Begin
BEFORE YOU BEGIN Thank you for selecting the revolutionary PROFORM ® Department at 08457-089009. To help us assist you, 620 treadmill. The PROFORM ® 620 combines ad- please note the product model number and serial num- vanced technology with innovative design to help you ber before calling. -
Page 6: Assembly
ASSEMBLY Assembly requires two people. Set the treadmill in a cleared area and remove all packing materials. Do not dispose of the packing materials until assembly is completed. Assembly requires your own Phillips screw- driver and rubber mallet Note: The underside of the treadmill walking belt is coated with high-performance lubricant. During shipping, a small amount of lubricant may be transferred to the top of the walking belt or the shipping carton. - Page 7 4. Insert a Handrail Extension (85) into the post on the left Upright (82). Align the holes in the Handrail Extension Post with the holes in the post. If necessary, tap the Handrail Extension with a rubber mallet to fully insert it. Next, attach the Handrail Extension by tightening three Short Screws (101) into the indicated holes.
-
Page 8: Operation And Adjustment
OPERATION AND ADJUSTMENT THE PERFORMANT LUBE WALKING BELT Your treadmill features a walking belt coated with PERFORMANT LUBE , a high-performance lubricant. IMPOR- TANT: Never apply silicone spray or other substances to the walking belt or the walking platform. They will deteriorate the walking belt and cause excessive wear. -
Page 9: Console Diagram
CONSOLE DIAGRAM Manual/Program Indicators Displays LED Track Displays iFIT.com Indicator Stop Incline Program Speed Start Button Buttons Button Buttons Button Clip personal trainer right in your home. Using the included CAUTION: audio cable, you can connect the treadmill to your Before operating the home stereo, portable stereo, or computer and play console, read the following precautions. - Page 10 STEP-BY-STEP CONSOLE OPERATION speed of the walking belt as desired by pressing the Speed buttons. Make sure that the on/off switch near the power To stop the walking belt, press the Stop button. cord is in the on The Time/Incline/Seg Time display will begin to Position position.
- Page 11 Cals/Watts/Pulse dis- Measure your heart rate, if desired. play—This display shows the approximate number Stand on the Sensors of calories you have foot rails and burned and your current place your power output in watts. hands on the (The console estimates watts by multiplying the metal contacts number of calories you are burning per minute by on the pulse bar.
- Page 12 maining in the current segment of the program. HOW TO USE PERSONAL TRAINER One speed setting and one incline setting are pro- PROGRAMS grammed for each segment. When only three sec- onds remain in the first segment, a series of tones will sound and the treadmill will automatically ad- Insert the key into the console.
- Page 13 HOW TO CONNECT YOUR PORTABLE STEREO HOW TO CONNECT THE TREADMILL TO YOUR CD PLAYER, VCR, OR COMPUTER Note: If your stereo has an RCA-type AUDIO OUT jack, see instruction A below. If your stereo has a 3.5 mm LINE OUT jack, see instruction B. If your To use iFIT.com CD’s, the treadmill must be con- stereo has only a PHONES jack, see instruction C.
- Page 14 HOW TO CONNECT YOUR HOME STEREO HOW TO CONNECT YOUR COMPUTER Note: If your stereo has an unused LINE OUT jack, Note: If your computer has a 3.5mm LINE OUT jack, see instruction A below. If the LINE OUT jack is see instruction A.
- Page 15 CD or video. Note: The in- structions included in the CD case describe how to use the CD with a variety of PROFORM treadmills. B. Plug one end of the audio cable into the jack on the Some instructions may not apply to this treadmill.
- Page 16 other CD or video program, press the Stop button Press the Play button on your CD player or or remove the key and go to step 1 on VCR. page 15. A moment after the button is pressed, your per- Note: If the speed or incline of the treadmill sonal trainer will begin guiding you through your does not change when a “chirp”...
- Page 17 Follow the desired links on our internet site to HOW TO USE PROGRAMS DIRECTLY FROM select a program. OUR INTERNET SITE Read and follow the on-line instructions for using a program. Our new internet site at www.iFIT.com allows you to access a large selection of programs that interactively Follow the on-line instructions to start the control your treadmill to help you achieve your specific...
- Page 18 displayed in a store. When the console is in the demo Follow your progress with the LED track and mode, the power cord can be plugged in, the key can the four displays. be removed from the console, and the displays and in- dicators on the console will automatically light in a pre- See step 5 on page 10.
-
Page 19: How To Fold And Move The Treadmill
HOW TO FOLD AND MOVE THE TREADMILL HOW TO FOLD THE TREADMILL FOR STORAGE Before folding the treadmill, adjust the incline to the lowest position. If this is not done, the treadmill may be permanently damaged. Next, unplug the power cord. CAUTION: You must be able to safely lift 20 kg (45 lbs.) in order to raise, lower, or move the treadmill. -
Page 20: Trouble-Shooting
TROUBLE-SHOOTING Most treadmill problems can be solved by following the steps below. Find the symptom that applies, and follow the steps listed. If further assistance is needed, please call our Customer Service Department. PROBLEM: The power does not turn on SOLUTION: a. - Page 21 PROBLEM: The walking belt slows when walked on SOLUTION: a. If an extension cord is needed, use only a 3-conductor, 1mm (14-gauge) cord that is no longer than 1.5 m (5 ft.). b. If the walking belt is overtightened, treadmill perfor- 5–7 cm mance may decrease and the walking belt may be- come damaged.
-
Page 22: Conditioning Guidelines
CONDITIONING GUIDELINES is to burn fat, adjust the speed and incline of the tread- WARNING: mill until your heart rate is near the lowest number in Before beginning this your training zone. or any exercise program, consult your physi- cian. This is especially important for individu- For maximum fat burning, adjust the speed and incline als over the age of 35 or individuals with pre- of the treadmill until your heart rate is near the middle... -
Page 23: Part List
PART LIST—Model No. PETL62010 R0601A To locate the parts listed below, refer to the EXPLODED DRAWING attached in the centre of this manual. No. Qty. Description No. Qty. Description No. Qty. Description Motor Belt Front Belly Pan Extension Leg Cap Pulley/Flywheel/Fan Power Supply Shock... -
Page 24: How To Order Replacement Parts
• The DESCRIPTION OF THE PART(S) (see the PART LIST on page 23 and the EXPLODED DRAWING attached in the centre of this manual). PROFORM is a registered trademark of ICON Health & Fitness, Inc. Part No. 173624 R0601A Printed in USA © 2001 ICON Health & Fitness, Inc. - Page 25 EXPLODED DRAWING—Model No. PETL62010 R0601A...
- Page 26 EXPLODED DRAWING—Model No. PETL62010 R0601A...
Need help?
Do you have a question about the 620 and is the answer not in the manual?
Questions and answers