Table of Contents
Advertisement
Advertisement
Table of Contents

Related Manuals for Electrolux LAVATHERM 56740


Summary of Contents for Electrolux LAVATHERM 56740
- Page 1 LAVATHERM 56740 User manual Condenser Dryer...
-
Page 2: Dear Customer
Dear Customer Thank you for choosing one of our high-quality products. With this appliance you will experience the perfect combination of functional design and cutting edge technology. Convince yourself that our appliances are engineered to deliver the best performance and control - indeed we are setting the highest standards of excellence. -
Page 3: Table Of Contents
Contents Contents Operating Instructions Important safety information Product description Control panel Before first use Sorting and preparing laundry Programme overview Daily use Switching machine on / switching light on Opening loading door / loading laundry Selecting the programme DELICATE (DELICAAT) function LONG ANTI-CREASE (ANTIKREUK LANG) function BUZZER (ZOEMER) function TIME (TIJD PROGR.) function... - Page 4 Contents Machine settings Technical data Consumption values Hints for test institutes Installation Appliance positioning Removing transport safety packaging Electrical connection Changing door stop Special accessories Environment Packaging material Old appliance Environmental tips Service...
-
Page 5: Operating Instructions
Important safety information Operating Instructions Important safety information In the interest of your safety and to ensure the correct use, before installing and first using the appliance, read this user manual carefully, including its hints and warnings. To avoid unnecessary mistakes and accidents, it is im- portant to ensure that all people using the appliance are thoroughly familiar with its operation and safety features. - Page 6 Important safety information • Items that have been soiled with substances such as cooking oil acetone, petrol, kerosene, spot removers, turpentine, waxes and wax removers should be washed in hot water with an extra amount of detergent before being dried in the tumble dryer.
- Page 7 Important safety information • If the tumble dryer is placed on top of a washing machine, it is compulsory to use the stacking kit (optional accessory). • This appliance is designed for domestic use. It must not be used for purposes other than those for which it was designed.
-
Page 8: Product Description
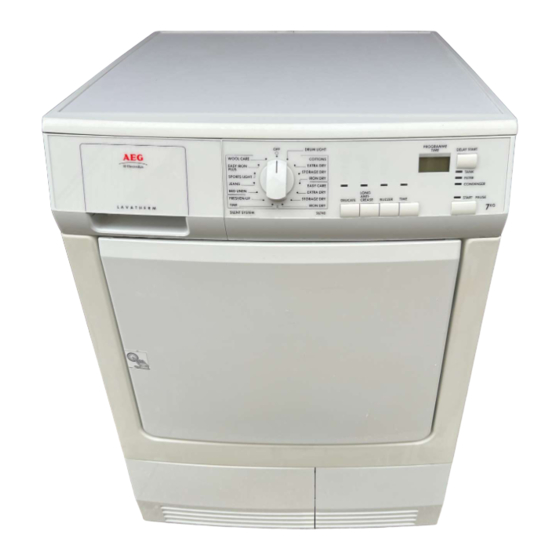
Product description Product description Control panel Drawer with condensed water container Lamp for inside light Fine strainer (lint filter) Large mesh filter (lint filter) Micro-fine filter (lint filter) Rating plate Loading door (reversible) Base door upstream of heat exchanger Button for opening door in plinth Air slots Screwed feet (with height adjustment) -
Page 9: Control Panel
Control panel Control panel Programme knob and OFF UIT switch Function buttons START PAUSE START PAUZE button DELAY START STARTUITSTEL button Display Functions and warning leds Before first use In order to remove any residues which may have been produced during production, wipe the dryer drum with a damp cloth or carry out a brief drying cycle (30 MIN) with damp cloths in the machine. - Page 10 Sorting and preparing laundry • Sorting by care label. The care labels mean: Dry at reduced Drying in the tumble Dry at normal temperature (press Drying in the tumble dryer possible in prin- DELICATE DELICAAT dryer not possible temperature ciple button!) Do not place in the appliance any wet laundry which is not specified on the care label as being suitable for tumble-drying.
-
Page 11: Programme Overview
Programme overview Programme overview Additional func- tions Application/properties Thorough drying of thick or multi- lay- EXTRA DRY 7 kg • • • • ered fabrics, e.g. terry towelling items, EXTRA DROOG bathrobes. CUPBOARD Thorough drying of fabrics of even DRY KAST- 7 kg •... - Page 12 Programme overview Additional func- tions Application/properties BED LINEN Bed linen (single and double sheet, pil- 3 kg • • • • BED LINNEN lowcase, bedspread, duvet cover). For leisure clothing, such as jeans, sweat-shirts, etc., of different material JEANS 7 kg •...
-
Page 13: Daily Use
Daily use Daily use Switching machine on / switching light on Turn the programme selector to any programme or turn it to LIGHT LICHT AAN. The machine has been switched on. When the loading door is opened, the drum is illuminated. -
Page 14: Long Anti-Crease (Antikreuk Lang) Function
Daily use To activate it: 1. Choose the drying programme. 2. Press DELICATE DELICAAT button - the led above is on. To deselect function press again DELICATE DELICAAT button. Led above is off. LONG ANTI-CREASE (ANTIKREUK LANG) function A long anti-crease phase lengthen the anti-crease phase (30 min.) at the end of the drying additionally by 60 minutes. -
Page 15: Time (Tijd Progr.) Function
Daily use To activate it: 1. Choose the drying programme. 2. Press BUZZER ZOEMER button - the led above is on. To deselect function press again BUZZER ZOEMER button. Led above is off. TIME (TIJD PROGR.) function To select the programme duration after setting the TIME programme. You can select a programme duration from 10 mins to 3 hrs in 10-minute steps. -
Page 16: Child Lock Function
Daily use 2. Press the DELAY STARTUITSTEL but- ton as many times as necessary until the required start delay appears on the display, e.g. 12h if the programme is to be started in 12 hours. If the display is showing 20h and you press the button again, the time delay will be cancelled. -
Page 17: Starting The Programme
Daily use Starting the programme Press the START PAUSE START PAUZE button. Led above stops flashing, becomes steady. The programme is started. Display shows elapsing cycle time or delay time if activated. Changing programme To change a programme which has been selected by mistake once the programme has started, first turn the programme selector to OFF UIT and then reset the pro- gramme. - Page 18 Daily use The drying cycles are automatically followed by an anti-crease phase which lasts around 30 minutes. The drum rotates at intervals during this phase. This keeps the laundry loose and free of creases. The laundry can be removed at any time during the anti-crease phase.
-
Page 19: Care And Cleaning
Care and cleaning Care and cleaning Cleaning fluff filter The filters collect all the fluff which accumulates during drying. To ensure that the dryer works perfectly, the fluff filters (micro-fine filter and fine strainer) must be cleaned after every drying cycle. The warning led is on to remind you this operation. - Page 20 Care and cleaning Push down unlock button on large mesh filter. Large mesh filter jumps up. Take out fine strainer. Remove fluff from fine strainer. It is best to use a damp hand for this purpose. Clean the entire filter area The strainer area does not have to be cleaned after every drying cycle, but should be checked regularly...
-
Page 21: Cleaning The Door Seal
Care and cleaning If the fine strainer is not fitted, the large mesh filter will not snap into place and the loading door cannot be closed. Cleaning the door seal Wipe the door seal with a damp cloth immediately after the drying cycle has finished. -
Page 22: Cleaning Heat Exchanger
Care and cleaning 2. Pour condensed water out into a ba- sin or similar receptacle. 3. Slide outlet connections in and refit condensate tank. If the programme has been interrup- ted as a result of the condensate tank being full: Press the START PAUSE button to continue the drying cycle. -
Page 23: Cleaning The Drum
Care and cleaning 4. Turn both lock washers inwards. 5. Use the handle to pull the heat exchanger out of the base and carry it horizontally to prevent any re- maining water from spilling. 6. To empty the heat exchanger, hold vertically over a washing-up bowl. -
Page 24: Clean Operating Screen And Housing
Care and cleaning Clean operating screen and housing CAUTION! Do not use furniture cleaners or aggressive cleaning agents to clean the machine. Use a damp cloth to wipe down the operating screen and housing. -
Page 25: What To Do If
What to do if ... What to do if ... Troubleshooting by yourself E... If, during operation, the error code plus number or letter) appears on the LCD: Switch the machine off and on again. Reset programme. Press the START PAUSE START PAUZE button If the error is still displayed, please inform your local Service Force Centre and quote the error code. -
Page 26: Changing The Bulb For Interior Lighting
What to do if ... Replace light bulb (see next sec- Defective light bulb. tion). Displayed programme Programme time is corrected time changes automatically depending on type Automatic process; this is not a ma- erratically or stays un- and volume of laundry and level of chine fault. - Page 27 What to do if ... 3. Screw cover back down. Check the correct positioning of o-ring gasket before screwing back the door light cover. Do not operate the dryer when missing o-ring gasket on door light cover. WARNING! For safety reasons, the cover must be screwed down tightly. If this is not done, the dryer must not be operated.
-
Page 28: Machine Settings
Machine settings Machine settings Setting Implementation ZOEMER BUZZER permanent 1. Turn the programme selector to any programme. 2. Press simultaneously the DELICATE DELICAAT and LONG ANTI-CREASE ANTIKREUK LANG buttons and hold down for approx. 5 seconds. 3. The buzzer is by default always off. You can use BUZZER ZOEMER button to activate or deactivate sound but machine does not memorize your selection. -
Page 29: Technical Data
Technical data Technical data This appliance conforms with the following EU Directives: – 73/23/EEC dated 19.02.1973 Low Voltage Directive – 89/336/EEC dated 03.05.1989 EMC Directive inclusive of Amending Directive 92/31/EEC – 93/68/EEC dated 22.07.1993 CE Marking Directive Height x width x depth 85 x 60 x 58 cm Depth with loading door open 109 cm... -
Page 30: Hints For Test Institutes
Hints for test institutes Hints for test institutes Parameters possible to checked by the Test Institutes: • Energy consumption (corrected with final humidity) during the CUPBOARD DRY COTTON KATOEN KASTDROOG cycle with nominal load. • Energy consumption (corrected with final humidity) during the CUPBOARD DRY COTTON cycle with half load. -
Page 31: Removing Transport Safety Packaging
Installation The hot air emitted by the tumble dryer can reach temperatures of up to 60°C. The appliance must therefore not be installed on floors which are not resistant to high temperatures. When operating the tumble dryer, the room temperature must not be lower than +5°C and higher than +35°C, as it may affect the performance of the appliance. -
Page 32: Changing Door Stop
Installation Connect the machine to an earthed socket, in accordance with current wiring regulations. WARNING! The manufacturer declines any responsibility for damage or injury through failure to comply with the above safety precautions. Should the appliance power supply cable need to be replaced, this must be carried out by our Service Center. -
Page 33: Special Accessories
Available from your Service Force Centre or your specialist dealer These intermediate installation kits can be used to arrange the dryer and an automatic AEG-Electrolux washing machine (60cm wide, front loading) as a space- saving washer/dryer stack. The automatic washing machine is at the bottom and the dryer is at the top. -
Page 34: Environment
Environment – with extractable stacker plate 916.018 903 Read carefully the instructions supplied with the kit. Installation kit for external condensate drain Attached to your product Installation kit 125 122 510 for direct draining of condensate into a basin, siphon, gully, etc. -
Page 35: Environmental Tips
Environment WARNING! Remove mains plug from socket when you have no further use for the machine. Cut off mains cable and dispose of together with plug. Destroy loading door hook. Children cannot then lock themselves in the machine and put their lives at risk. Environmental tips •... -
Page 36: Service
Service In the event of technical faults, please first check whether you can remedy the problem yourself with the help of the operating instructions (Chapter “What to do if…”). If you were not able to remedy the problem yourself, please contact the Customer Care Department or one of our service partners. - Page 40 www.aeg-electrolux.be...
Need help?
Do you have a question about the LAVATHERM 56740 and is the answer not in the manual?
Questions and answers