
Related Manuals for GMC TS1800


Summary of Contents for GMC TS1800
-
Page 1: Table Saw
1800W TABLE SAW TS1800 INSTRUCTION MANUAL Black Magenta Code: TS1800 Cyan Yellow Date: 060913 Edition: 02 Op: DCR... -
Page 2: Table Of Contents
Before using the table saw Know your product Components Assembling the stand Fitting the table saw to the stand Fitting the push stick mounting brackets Fitting the height adjustment handle and locking knob Fitting the riving knife Fitting the blade guard... -
Page 3: Introduction
Introduction Your new GMC power tool will more than satisfy your expectations. It has been manufactured under stringent GMC Quality Standards to meet superior performance criteria. You will find your new tool easy and safe to operate, and, with proper care, it will give you many years of dependable service. -
Page 4: General Safety Instructions
General safety instructions To use this tool properly, you must observe the safety regulations, the assembly instructions and the operating instructions to be found in this Manual. All persons who use and service the machine have to be acquainted with this Manual and must be informed about its potential hazards. -
Page 5: Additional Safety Rules For Table Saws
If you need to use an extension cable, make sure its conductor cross-section is large enough for the saw’s power consumption. Minimum cross-section: 1.0mm • Do not use or leave the saw in the rain and never use it in damp, humid, or wet conditions. • Provide good lighting. - Page 6 • When working with a long work piece, use an additional support such as a saw table to prevent the blade from grabbing the work. • When cutting round wood, use clamps that prevent the work piece from turning on the table.
-
Page 7: Unpacking
Failure to do so could result in serious personal injury. 1. Remove all loose parts from the carton. 2. Remove the packing materials from around the saw. 3. Carefully lift the saw from the carton and place it on a level work surface. Before using the table saw 1. -
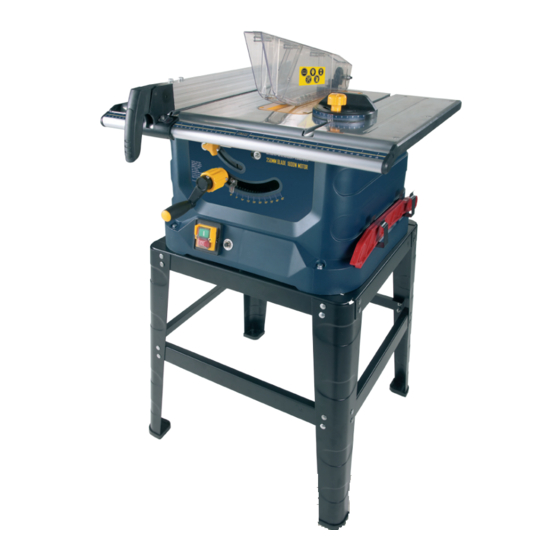
Page 8: Know Your Product
Know your product Before using the saw, familiarise yourself with all the operating features and safety requirements. 1. Table top 2. Table insert 3. On/off switch 4. Riving knife 5. Saw blade 6. Blade guard 7. Rip fence 8. Rip fence locking lever 9. -
Page 9: Components
Components The GMC TS1800 is supplied with the following components: a. Table saw body fitted with carbide tipped saw blade b. Height adjustment handle c. Height adjustment locking knob d. Blade guard e. Riving knife f. Mitre gauge g. Rip fence h. -
Page 10: Assembling The Stand
2. Align the holes on the stand with the matching holes in the base of the table saw, the holes at the front of the table top are further apart than the holes at the back of the table saw housing. -
Page 11: Fitting The Riving Knife
2. Secure the height adjustment knob by tightening the Phillips head screw (Fig. J). 3. Fit the height adjustment handle onto the shaft ensuring that the flat on the handle locates onto the flat at the front of the shaft (Fig. K). 4. -
Page 12: Dust Extraction
(Fig. T). Turning on and off 1. To turn the table saw ON, press the green push button marked (Fig. U). 2. To turn the table saw OFF, press the red push button marked (Fig. -
Page 13: Using The Mitre Gauge
3. Rotate the mitre gauge to select the required angle. 4. Re-tighten the locking knob. Operation The table saw can be used to make a variety of cuts including longitudinal cuts, bevel cuts and mitre cross cuts. The below section defines a common list of table saw terms: Through Sawing. -
Page 14: Tips To Avoid Kickback
After each new adjustment it is advisable to carry out a trial cut in order to check the set dimensions. After switching on the saw, wait for the blade to reach its maximum speed of rotation before commencing with the cut. -
Page 15: Making Bevel Cuts
1. Push the mitre gauge into one of the two slots of the table saw and set it to the required angle. If you also want to set the saw blade at an angle, use the slot, which prevents your hand and the mitre gauge coming into contact with the saw blade. -
Page 16: Maintenance
After replacing the saw blade, make sure the saw blade runs freely by turning the blade by hand. 14. Plug the machine into a mains socket and run the saw at no load before using it to cut any materials. - Page 20 GMC customer assist If your product needs repairing, replacing, technical service or you simply need help or advice, please contact us on our Customer Assist Line 1300 880 001 (Australia) or 0800 445 721 (New Zealand). For prompt service we suggest you log your service request online at www.gmcservice.com.au.
Need help?
Do you have a question about the TS1800 and is the answer not in the manual?
Questions and answers