Table of Contents
Advertisement
Advertisement
Table of Contents

Related Manuals for AEG BE7614000


Summary of Contents for AEG BE7614000
- Page 1 EN OVEN BE7614000 USER MANUAL BE7714000...
- Page 2 Please spend a few minutes reading to get the very best from it. ACCESSORIES AND CONSUMABLES In the AEG webshop, you’ll find everything you need to keep all your AEG appliances looking spotless and working perfectly. Along with a wide range of accessories...
-
Page 3: Table Of Contents
Contents CONTENTS 4 Safety information 8 Product description 9 Control panel 11 Before first use 12 Daily use 14 Clock functions 16 Automatic programmes 17 Using the accessories 19 Additional functions 21 Care and cleaning 26 What to do if… 27 Installation 29 Environment concerns The following symbols are used in this user... -
Page 4: Safety Information
Safety information SAFETY INFORMATION Before the installation and use, read this manual carefully: • For your personal safety and the safety of your property • For the respect of the environment • For the correct operation of the appliance. Always keep these instructions with the appliance also if you move or sell it. The manufacturer is not responsible if incorrect installation or use results in damage. -
Page 5: Electrical Connection
Safety information • You must have correct isolation devices: line protecting cut-outs, fuses (screw type fuses removed from the holder), earth leakage trips and contactors. • The shock protection parts must be fixed in such a way that they cannot be undone without tools. -
Page 6: Risk Of Fire
Safety information • The interior of the appliance becomes hot during use. There is the risk of burns. Use gloves when you insert or remove the accessories or pots. • Be careful when you remove or install the accessories to prevent damage to the oven enamel. -
Page 7: Oven Lamp
Safety information • Do not let sparks or open flames come near the appliance when you open the door. • Do not put flammable products or items that are wet with flammable products, and/or fusible objects (made of plastic or aluminium) in, near or on the appliance. Oven lamp •... -
Page 8: Product Description
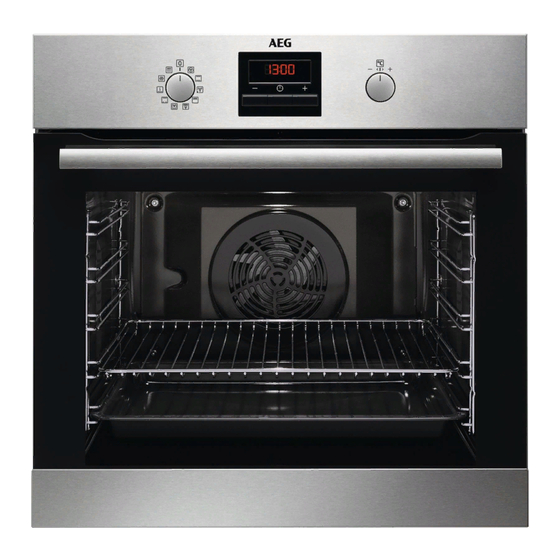
Product description PRODUCT DESCRIPTION General overview Control panel Electronic programmer Grill Oven lamp Rating plate Socket for the core temperature sensor Oven accessories • Wire shelf For cookware, cake tins, roasts. • Flat baking tray For cakes and biscuits. • Deep roasting pan To bake and roast or as pan to collect fat. -
Page 9: Control Panel
Control panel CONTROL PANEL Electronic programmer Use the sensor fields to operate the appliance. Sensor Field Function Description DISPLAY Shows the current settings of the appliance. ON/OFF To activate and deactivate the appliance. OPTIONS To set an oven function or programme. Straight access to the oven function when the appliance is off. -
Page 10: Heat Up Indicator
Control panel Display Oven function symbol Temperature/Time display Clock/Residual heat display (also Minute minder and Time of day) Residual heat indicator Indicators for the clock functions (refer to the table "Clock functions") Heat up indicator Number of oven function/programme Other indicators of display Symbols Name Description... -
Page 11: Before First Use
Before first use Residual heat indicator Display shows the residual heat indicator (residual heat symbol) after end of every cooking sessions when the temperature inside oven cavity is more then 40°C. Display also shows the oven temperature. BEFORE FIRST USE WARNING! Refer to "Safety information"... -
Page 12: Daily Use
Daily use DAILY USE WARNING! Refer to "Safety information" chapter. To operate the appliance you can use: • manual mode -to set an oven function, the temperature and the cooking time manually. • automatic programmes -to prepare a dish when you do not have a knowledge or expe- rience in cooking. -
Page 13: Changing The Oven Temperature
Daily use Changing the oven temperature Touch to change the temperature in steps of 5 °C. When the appliance is at the set temperature, an acoustic signal operates three times and the Heat up indicator goes off. Examining the oven temperature You can examine the temperature in the appliance when the function or programme oper- ates. -
Page 14: Clock Functions
Clock functions CLOCK FUNCTIONS SYMBOL FUNCTION DESCRIPTION COUNT UP TIMER To set count up. It shows how long the appliance operates. This function has no effect on the operation of the appliance. TIME OF DAY To examine the time of day. For changing the time of day re- fer to 'Setting the time of day'. -
Page 15: Setting The Time Delay Function
Clock functions flashes in the display. 3. Use to set END (first you set minutes and then hours) and to con- firm. 4. When the set time ends, an acoustic signal operates for two minutes. symbol and time setting flash in the display. The appliance deactivates. 5. -
Page 16: Automatic Programmes
Automatic programmes 5. Touch any sensor field or open the oven door to stop an acoustic signal. AUTOMATIC PROGRAMMES WARNING! Refer to "Safety information" chapter. There are 20 automatic programmes and recipes. Use an automatic programme or recipe when you do not have a knowledge or experience how to prepare a dish. You can find the recipes for the automatic programmes in the "Recipe book". -
Page 17: Using The Accessories
Using the accessories 2. Install the core temperature sensor (refer to "The core temperature sensor"). 3. Touch to set the core temperature sensor programme. When a core temperature sensor programme is set, the display shows the cooking time, 4. Touch or the settings save automatically after five seconds. - Page 18 Using the accessories 2. Put the point of the core temperature sensor in the centre of the meat. 3. Put the plug of the core temperature sen- sor in the socket at the side wall of the appliance. The display shows a flashing symbol and the default set core temperature.
-
Page 19: Additional Functions
Additional functions When you cook with the core temperature sensor, you can change the temperature shown in the Temperature/Time display. After you put the core temperature sensor in the socket and set an oven function and temperature, the display shows the current core temperature. Touch again and again to see three other temperatures: •... -
Page 20: Control Lock
Additional functions 3. An acoustic signal sounds. SAFE goes on in the display when you touch any key. If the oven has "Pyro Cleaning" function, the door is locked. Control Lock The Control Lock prevents you to accidentally change the oven functions. You can activate the Control Lock only when the appliance operates. - Page 21 Care and cleaning 4. Touch 5. Touch to change the value of the setting. 6. Touch Automatic switch-off The appliance deactivates after some time: • if you do not deactivate the appliance; • if you do not change the oven temperature. Oven temperature Switch-off time 30°C - 115°C...
-
Page 22: Telescopic Shelf Runners
Care and cleaning • Clean all oven accessories (with a soft cloth with warm water and cleaning agent) after each use and let them dry. • If you have nonstick accessories, do not clean them using an aggressive agents, sharp edged objects or dishwasher. - Page 23 Care and cleaning WARNING! Before you remove the heating element switch off the appliance. Make sure that the appli- ance is cold. There is a risk of burns! 1. Remove the screw which holds the heat- ing element. At first time, use a screw- driver.
-
Page 24: Cleaning The Oven Door
Care and cleaning 4. Install the glass cover. Cleaning the oven door The oven door has three panels of glass installed one behind the other. You can remove the glass panels to clean them. The oven door is not reversible. Removing the glass panels 1. -
Page 25: Care And Cleaning
(D). Refer to the illustration. BE7714000 BE7614000 The middle panel has a dot in one of the corners. When you install this panel, make sure that the dot is in the top left corner of the glass panel. -
Page 26: What To Do If
What to do if… WHAT TO DO IF… WARNING! Refer to "Safety information" chapter. Problem Possible cause Solution The appliance The appliance is deactiva- Activate the appliance does not heat The time of day is not set. Set the clock. Refer to "First setting the time of day" The necessary settings are Make sure, the settings are correct not set... -
Page 27: Installation
Installation We recommend that you write the data here: Model (MOD.) ......... Product number (PNC) ......... Serial number (S.N.) ......... INSTALLATION WARNING! Refer to "Safety information" chapter. Building In Overall oven dimensions Spacers to be removed. In column building-in min. 550 560-570... -
Page 28: Electrical Installation
Installation Building-in under kitchen counter min. 550 560-570 80-100 Securing the appliance to the cabinet Electrical installation WARNING! Only a qualified and competent person must do the electrical installation. The manufacturer is not responsible if you do not follow safety precautions from chapter "Safety information". -
Page 29: Environment Concerns
Environment concerns Total power Section of the cable maximum 1380 W 3 x 0,75 mm² maximum 2300 W 3 x 1 mm² maximum 3680 W 3 x 1,5 mm² The hearth cord (green/yellow cable) must be 2 cm longer than phase and neutral cables (blue and brown cables). - Page 32 892940809-A-352010...
Need help?
Do you have a question about the BE7614000 and is the answer not in the manual?
Questions and answers