Chauvet 4BAR User Manual
Hide thumbs
Also See for 4BAR:
- Quick start manual ,
- Quick reference manual (36 pages) ,
- User manual (21 pages)

Related Manuals for Chauvet 4BAR


Summary of Contents for Chauvet 4BAR
-
Page 1: User Manual
Snapshot 4BAR™ Use on Dimmer Outdoor Use Sound Activated Master/Slave Auto-ranging Power Supply Replaceable Fuse User Serviceable Duty Cycle User Manual (Included) 4BAR™ User Manual 2/8/2012 10:53 AM... -
Page 2: Table Of Contents
ASTER LAVE PERATION ..................................10 OOTSWITCH OPERATION There is no need to modify any settings for the 4BAR™ before connecting the footswitch. It will operate properly in any mode..................................11 Disconnecting the Footswitch ............................. 11 ................................12 ENERAL ROUBLESHOOTING ...................................... -
Page 3: Before You Begin
Manual Conventions CHAUVET® manuals use the following conventions to differentiate certain types of information from the regular text. EANING... -
Page 4: Ac Power
Avoid direct eye exposure to the light source while it is on. There are no user serviceable parts inside the unit. Do not open the housing or attempt any repairs yourself. In the unlikely event your unit may require service, please contact CHAUVET® at: 954-929-1115. 4BAR™ User Manual 2/8/2012 10:53 AM... -
Page 5: Introduction
000 ó 255 Green 3 0% ó 100% 000 ó 255 Blue 3 000 ó 255 Red 4 RGB Color Mixing 000 ó 255 Green 4 0% ó 100% 000 ó 255 Blue 4 4BAR™ User Manual 2/8/2012 10:53 AM... -
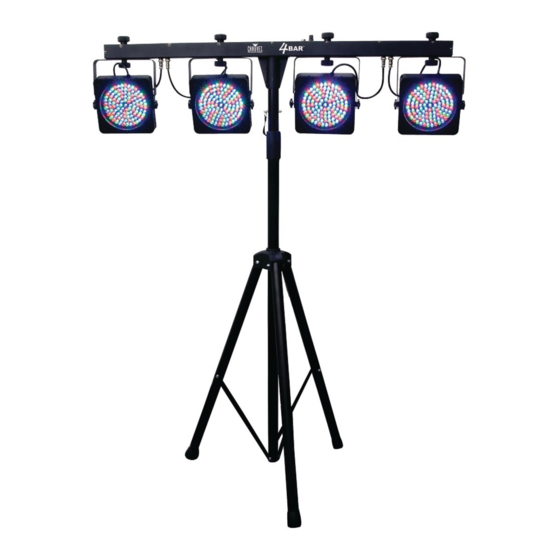
Page 6: Product Overview
Product Overview Fuseholder Power In 4-pin Footswitch Connection Microphone Control Panel Sound Sensitivity Adjustment Knob DMX Out DMX In 4BAR™ User Manual 2/8/2012 10:53 AM... -
Page 7: Setup
The clamps for hanging are sold separately. When using the clamp hanging bolts, BOTH of the two hanging positions MUST be used. Clamp hanging bolts (2) two total Light pan angle adjustment knob Light tilt angle adjustment knob 4BAR™ User Manual 2/8/2012 10:53 AM... -
Page 8: Navigating The Control Panel
Wait for 5 seconds, until the display reads “ ”. A*** Press <MENU> until the display reads “ ”. Then, use the <UP> and <DOWN> buttons to select the DMX starting address. 4BAR™ User Manual 2/8/2012 10:53 AM... -
Page 9: Automatic Mode
Immediately, press the <UP> button until is displayed (not necessary if already displayed). Wait for 5 seconds. Then, use the <SOUND SENSITIVITY ADJUSTMENT KNOB> to adjustment the sensitivity of the program to the sound received from the microphone. 4BAR™ User Manual 2/8/2012 10:53 AM... -
Page 10: Slave Operation
Connect the footswitch to the first 4BAR™. Then, connect from the DMX Out of the Master 4BAR™ to the DMX In of the Slave unit. Set the DMX starting address of the Slave(s) to “... -
Page 11: Footswitch Operation
Connect the footswitch to the 4BAR™ via the 4-pin connection cable with plug. Press pedal # 1 (Preset) to activate control. When this is operating properly, the LEDs on the 4BAR™ will light white (first function on pedal # 1) -
Page 12: General Troubleshooting
ü power the fixture and it will automatically enter into this mode If you still have a problem after trying the above solutions, please contact CHAUVET® Technical Support at the location on the next page. 4BAR™ User Manual 2/8/2012 10:53 AM... -
Page 13: Contact Us
5200 NW 108th Avenue Sunrise, FL 33351 voice: 954.929.1115 fax: 954.929.5560 toll free: 800.762.1084 Technical Support CHAUVET® 5200 NW 108th Avenue Sunrise, FL 33351 voice: 954.929.1115 (Press 4) fax: 954.929.5560 (Attention: Service) World Wide Web www.chauvetlighting.com 4BAR™ User Manual 2/8/2012 10:53 AM... -
Page 14: General Maintenance
Package must be clearly labeled with a Return Merchandise Authorization Number (RMA #). Products returned without an RMA # will be refused. Call CHAUVET® and request RMA # prior to shipping the fixture. Be prepared to provide the model number, serial number and a brief description of the cause for the return. -
Page 15: Technical Specifications
Data output ................... locking 3-pin XLR female socket Data pin configuration ................pin 1 shield, pin 2 (-), pin 3 (+) Protocols........................USITT DMX512-A DMX Channels ............................. 15 ORDERING INFORMATION 4BAR™............................4BAR WARRANTY INFORMATION Warranty ......................2-year limited warranty 4BAR™ User Manual 2/8/2012 10:53 AM...
Need help?
Do you have a question about the 4BAR and is the answer not in the manual?
Questions and answers