Table of Contents
Advertisement
INSTALLATION AND
OPERATION MANUAL
"THE MASTER"
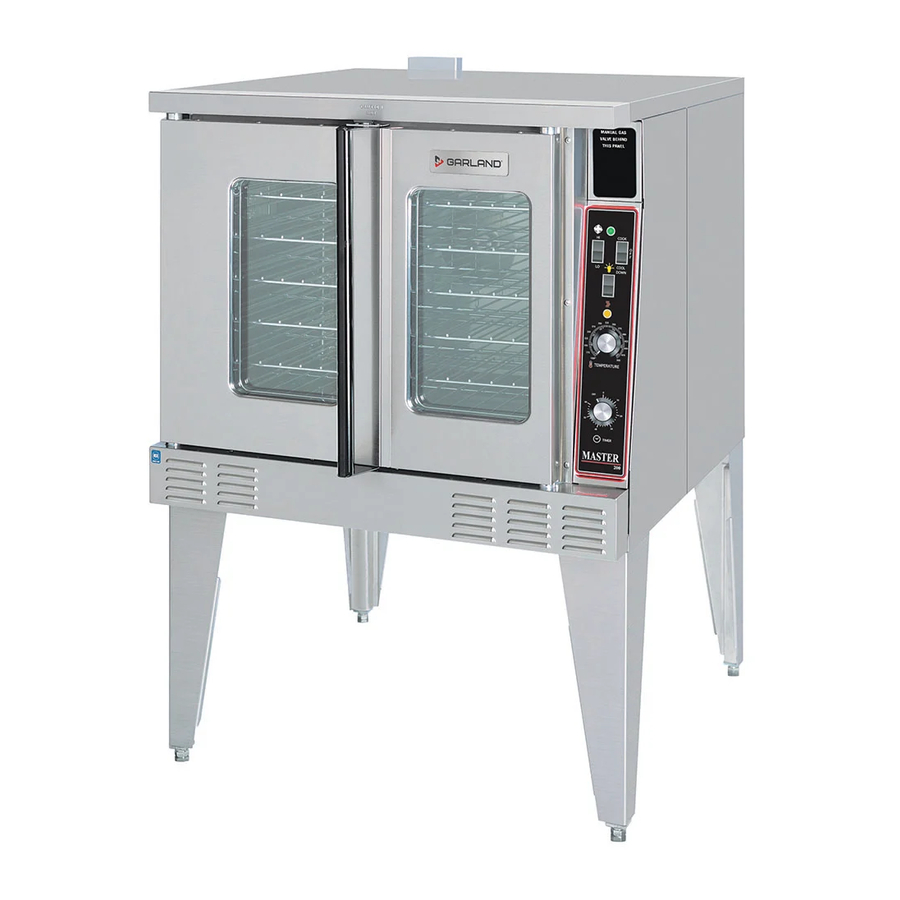
GAS CONVECTION OVEN
FOR YOUR SAFETY:
DO NOT STORE OR USE GASOLINE
OR OTHER FLAMMABLE VAPORS OR
LIQUIDS IN THE VICINITY OF
THIS OR ANY OTHER
WARNING:
IMPROPER INSTALLATION, ADJUSTMENT,
ALTERATION, SERVICE OR MAINTENANCE
CAN CAUSE PROPERTY DAMAGE, INJURY,
OR DEATH. READ THE INSTALLATION,
OPERATING AND MAINTENANCE
INSTRUCTIONS THOROUGHLY
BEFORE INSTALLING OR
SERVICING THIS EQUIPMENT
Users are cautioned that maintenance and repairs must be performed by a Garland authorized service agent
using genuine Garland replacement parts. Garland will have no obligation with respect to any product that has been
improperly installed, adjusted, operated or not maintained in accordance with national and local codes or installation
instructions provided with the product, or any product that has its serial number defaced, obliterated or removed,
or which has been modified or repaired using unauthorized parts or by unauthorized service agents.
For a list of authorized service agents, please refer to the Garland web site at http://www.garland-group.com.
The information contained herein, (including design and parts specifications), may be superseded and is subject
to change without notice.
Manufactured by:
Cleveland Range
1333 East 179th Street
Cleveland,Ohio USA 44110
Part # 1955200 Rev 6 (07/03/12)
APPLIANCE
PLEASE READ ALL SECTIONS OF THIS MANUAL
AND RETAIN FOR FUTURE REFERENCE.
THIS PRODUCT HAS BEEN CERTIFIED AS
COMMERCIAL COOKING EQUIPMENT AND
MUST BE INSTALLED BY PROFESSIONAL
PERSONNEL AS SPECIFIED.
IN THE COMMONWEALTH OF MASSACHUSETTS
THIS PRODUCT MUST BE INSTALLED BY A
LICENSED PLUMBER OR GAS FITTER. APPROVAL
NUMBER: G-1-07-05-28
For Your Safety:
Post in a prominent location, instructions to be
followed in the event the user smells gas. This
information shall be obtained by consulting
your local gas supplier.
GARLAND COMMERCIAL RANGES, LTD.
1177 Kamato Road, Mississauga, Ontario L4W 1X4
CANADA
Phone: 905-624-0260
Fax: 905-624-5669
© 2005 Garland Commercial Industries, LLC
Enodis U
Swallowfiel
Telephone:
Fax: 081-84
Advertisement
Table of Contents

Related Manuals for Garland MASTER


Summary of Contents for Garland MASTER
-
Page 1: For Your Safety
Users are cautioned that maintenance and repairs must be performed by a Garland authorized service agent using genuine Garland replacement parts. Garland will have no obligation with respect to any product that has been improperly installed, adjusted, operated or not maintained in accordance with national and local codes or installation instructions provided with the product, or any product that has its serial number defaced, obliterated or removed, or which has been modified or repaired using unauthorized parts or by unauthorized service agents. -
Page 2: Important Information
IMPORTANT INFORMATION WARNING: This product contains chemicals known to the state of California to cause cancer and/or birth defects or other reproductive harm. Installation and servicing of this product could expose you to airborne particles of glass wool/ceramic fibers. Inhalation of airborne particles of glass wool/ceramic fibers is known to the state of California to cause cancer. -
Page 3: Table Of Contents
INSTALLATION . . . . . . . . . . . . . . . . . . . . . . . . . 5 (Master 475) ......14 Installation Notes: . -
Page 4: Dimensions & Specifications
4. A 6 ft. line cord is provided for each 120V deck with a (NEMA #5-15P) plug. SINGLE DECK 5. Garland recommends a separate 15 AMP circuit for each 120V unit. FR ONT VIEW Gas Input ratings shown here are for installations up to 2,000-ft. (610m) above sea level. Specify altitudes over 2,000 ft. -
Page 5: Introduction
NOTE: When checking pressure be sure that all other equipment on the same gas line is on. An internal pressure regulator is supplied with GARLAND Convection Ovens. Regulator is preset to deliver gas at pressure shown on the rating plate. -
Page 6: Installation Of Double Deck Models
INSTALLATION Continued Installation Of Double Deck Models 90 Degrees Street Elbow A. Position insert in bottom leg opening and tap insert up into leg till it seats at collar. Attach six inch (6") legs to lower oven section. Raise unit or lay on its left side. Place the front legs on the oven so as to line up with four (4) attaching bolt holes. -
Page 7: Gas Connection
INSTALLATION Continued Gas Connection When the installation of a canopy type exhaust hood is impossible the oven may be direct vented. Before direct The 1" NPT inlet at the rear must be considered in piping the venting check your local codes on ventilation, in the absence gas supply for double stack units or ¾"... -
Page 8: Testing & Lighting Instructions
Lower settings will keep oven warm and ready for next use period. Master 400 Replace all service panels and covers before operation. Series controls have an auto setback feature that is user programmable to help with these applications. -
Page 9: Operation
OPERATION Master 200 Solid State Control With Electromechanical Timer In Off Mode When the oven is off, there are no lights or indicators. Start Up Press the Cook/Off/Cool Down rocker switch to the “Cook” position. The green lamp will light indicating the oven is powered in cook mode. -
Page 10: Timer
The buzzer is turned off by rotating the dial counter-clockwise to the off position as shown on the control panel. NOTE: The timer does not control heating. Master 450 Electronic Control With Cook-N-Hold And Master 455 Electronic Control With Cook-N-Hold & Core Probe In Off Mode When the controller is off, the display will show "OFF". -
Page 11: Fahrenheit/Celsius
OPERATION continued Pressing the FAN PULSE key will activate the lower fan speed and light its LED. The fan will be active for 30 seconds then off for 30 seconds, and continues this cycle. Pressing the SETBACK key will cool the oven cavity to a preprogrammed temperature, see: Setting "Set-Back"... -
Page 12: Cook-N-Hold Operation
250º F (121ºC) and the time to zero. will flash “DONE” and change to count "UP" the hold time. The oven will switch to the programmed hold temperature. Master 475 Electronic Programmable Control Setting the cook temperature, hold temperature and time are Manual cooking done in the same manner. -
Page 13: Programming Product Keys (Master 475)
OPERATION Continued 10. Press SET key - ready to cook 11. Press START/CANCEL to begin manual cooking Programming Product Keys (Master 475) NOTE: Cooking time(s) is the element of the program that tells the controller that other information (temperature, fan speed, etc.) will be inputted into the controller. -
Page 14: Cooking Using The Product Keys
Set the second cooking time using the dial. key. The actual hold time will be displayed. Repeat as you did for cooking time, for all the profiles Selecting Fahrenheit or Celsius (Master 475): desired. Press PROG and ACTUAL TEMP keys at the same time, NOTE: The controller will only accept cooking temperatures F or C will be displayed. -
Page 15: Performance Recommendations
OPERATION Continued Two trays of product are going to be cooked in the oven at 5. Press product key 6, then shelf key 4. the same time. The first tray will use product key 1 and will be 6. Press the START/CANCEL key to start cooking on shelf 4. placed in rack position 2. -
Page 16: Cooking Guide
COOKING GUIDE The following suggested times and temperatures are provided as a starting guide. Elevation, atmospheric conditions, gas supply, recipe, cooking pans, and oven loading may affect your actual results. Product °F Time Product °F Time White Sheet Cakes – 5 lb 300°... -
Page 17: Cook And Hold
COOK AND HOLD Please refer to the operating instructions to program the 450 and 455 control units for cook and hold feature. The times and temperatures listed below are to be used as a starting guide. Your actual results may vary greatly depending on your elevation, gas supply, atmospheric conditions and other items being cooked at the same time. -
Page 18: Problems / Solutions
PROBLEMS / SOLUTIONS Problem Solution If cakes are dark on the sides and not done in the center Lower oven temperature. If cakes edges are too brown Reduce number of pans or lower oven temperature. If cakes have light outer color Raise temperature. -
Page 19: Cleaning & Maintenance
5. Reinstall the air baffle, rack guides and oven racks. This simple practice, if performed on a regular basis will keep your Garland oven operating at peak performance. Part # 1955200 Rev.6 07/03/12) Page 19... -
Page 20: Motor Care
MOTOR CARE The motor on your convection oven is maintenance free since At the end of the day, press the ON/OFF key, for the 400 series it is constructed with self-lubricating sealed ball bearings. controllers to activate the Auto Cool Down feature. The fan It is designed to provide durable service when treated with will run on high until the oven cavity drops below 150°F ordinary care. - Page 21 Part # 1955200 Rev.6 07/03/12) Page 21...
- Page 22 Part # 1955200 Rev.6 (07/03/12) Page 22...
- Page 23 Part # 1955200 Rev.6 07/03/12) Page 23...
- Page 26 Page (07/03/12) Rev.6 1955200 Part...
- Page 27 Page (07/03/12) Rev.6 1955200 Part...
- Page 28 Page (07/03/12) Rev.6 1955200 Part entrouverte. four porte avec obtenu optimal refroidissement NOTA OFF. bascule à commutateur régler refroidi, four fois COOL. position bascule à commutateur pousser 200, série contrôleurs prématurée. usure d’une four moteur protège fonction Cette s’éteint. four (66°C), 150°F au-dessous...
- Page 29 Retirer four. Refroidir déversement. tout même jour essuyer régulier nettoyage calendrier Établir impeccable. fonctionnement intérieur Nettoyage état dans Garland four votre maintiendra régulièrement, réalisée elle simple pratique Cette électriques. composants endommager pourrait commandes cavité dans l’humidité pénétrer four.
- Page 30 Page (07/03/12) Rev.6 1955200 Part moules. taille nombre Réduire inégale couleur sont mollets pains four. dure croûte viandes dans l’eau avec plat placer température Réduire d’humidité. quantité Limiter cuisson. temps Réduire roussies cuites bien sont viandes cuisson. centre cuites mais dorées sont viandes...
- Page 31 Page (07/03/12) Rev.6 1955200 Part 6.25 4.75 10.25 7.25 6.25 4.75 7.25 4.25 3.25 9.75 4.25 3.25 5.75 4.25 6.75 4.25 3.25 4.25 9.25 4.25 6.25 3.75 2.75 3.75 8.75 3.75 2.75 3.75 8.25 2.75 4.75 7.75 5.75 2.75 4.75 7.75 3.25 5.25...
- Page 32 Page (07/03/12) Rev.6 1955200 Part Temps (°F) Produit 300° sans veau Rôti 375° d’agneau Côtelettes 350° farcies porc Côtelettes 300° – bœuf Côte Temps (°F) Produit 325° – bœuf Rôti 350° Bacon 350° four terre Pommes 325° viande Pain 350° farcis Poivrons (fraîches)
- Page 33 Page (07/03/12) Rev.6 1955200 Part régulière. cuisson assurer pour moule chaque dans produits mesurer peser pâtisserie, Pour four. l’intérieur à l’air circulation bonne permettre pour grilles également répartir four dans plats Centrer cuire. faire trop éviter pour possible vite aussi four retirés être...
- Page 34 à différents grilles niveaux chacun indépendamment niveau minuter pour utilisée niveau minuterie L’option touche ensuite produit touche Appuyez 475): (Master niveau four dans aliments Chargez niveau minuterie avec Cuisson LOAD. affiche four fois grille position dans placé temps. même...
- Page 35 à consiste étape première contrôleur. dans entrées être vont etc.) ventilateur, vitesse température deuxième suivie (température, informations d’autres contrôleur programme l’élément cuisson temps REMARQUE: cadran. 475) (Master produit touches Programmation l’aide à cuisson température première Réglez suite FONCTIONNEMENT...
- Page 36 Appuyez s’allume. ventilateur sélectionné mode PULSE) LOW, (HIGH, ventilateur touches trois utilisant ventilateur fonctionnement mode Sélectionnez s’allume. touche Appuyez 350°F). usine (préréglé cadran l’aide à température Réglez s’allume. TEMP touche Appuyez manuelle Cuisson Master Série Programmable Électronique Commande SUITE FONCTIONNEMENT...
- Page 37 Page (07/03/12) Rev.6 1955200 Part zéro. minuterie (121ºC) 250º température régler puissance,r réduction fonction désactiver Pour REMARQUE: programmation. mode sortir pour touche fois encore Appuyer SET. touche appuyer puis cadran, avec programmation. temps Régler usine). à réglé » Temps « s’allume arrête SET,...
- Page 38 Page (07/03/12) Rev.6 1955200 Part entrouverte. porte avec four optimal refroidissement obtient prématurée. panne contre four moteur protège fonction Cette s’arrête. four (66°C), 150°F inférieure four température Lorsque ». AUTO « indique l’affichage temps, Pendant (66°C). 150°F au-dessous descende four intérieure température jusqu’à...
- Page 39 ON/OFF touche d’appuyer fait ». « indique l’affichage désactivé, contrôleur Lorsque (Off) d’arrêt mode Thermique Sonde Attente Cuisson Avec Master Électronique Commande Attente Cuisson Avec Master Électronique Commande chauffage. commande minuterie NOTA commande. panneau indiqué comme », « position montre d’une...
- Page 40 à commence four cuisson. mode tension sous four indiquant s’allume, vert témoin ». Cook « position Down Cook/Off/Cool bascule à commutateur Mettre Démarrage indicateur. voyant aucun n’y éteint, four Quand d’arrêt mode Électromécanique Minuterie Avec Master Transistorisée Commande FONCTIONNEMENT...
- Page 41 Activer gaz. redondant point automatique fonction possèdent Master combiné robinet située d’arrêt robinet Ouvrir série commandes suivante. d’utilisation période pour prêt chaud four maintiendront plus réglages essai.
- Page 42 Page (07/03/12) Rev.6 1955200 Part climatisation. chauffage local spécialiste contacter équilibre, obtenir Pour équilibrées. bien être doivent frais d’air évacué d’air quantités correctement, fonctionne d’air d’évacuation système qu’un Pour pièce. DIMENSIONNÉS! dans d’air vide crée puissant d’extraction ventilateur SOUS- VENTILATION CONDUITS UTILISER sol.
- Page 43 Page (07/03/12) Rev.6 1955200 Part combustibles. matières rapport nécessaire dégagement Maintenir l’appareil. fumées ventilation volts. d’alimentation système obstruer peut Cela tionnement. prise dans unité chaque cordon Brancher fonc- pendant supérieur four l’arrière four. l’intérieur à d’objets placer devra l’appareil. à grille ordinaire charpentier...
- Page 44 NOTA être doivent individuel d’arrêt robinet L’appareil Arrière signalétique. Côtés plaque indiquée pression à débite qu’il pour régulateur Régler GARLAND. convection à incombustibles: fours avec livré interne pression régulateur combustibles murs rapport Dégagement allumés. sont conduite même équipements L’installation...
- Page 45 Dégagements mbar) C.E. naturel 34" l’installation Remarques collecteur Pression [1386mm] volts. appareil 54-9/16" chaque pour séparé circuit d’un l’installation recommande Garland #5-15P). (NEMA prise avec 120V [816mm] section chaque avec fourni pieds d’alimentation cordon 32-1/8" tr/mn. 1725 1140 60/50Hz, 200-240V, H.P.
- Page 46 ..... rodage. Période NETTOYAGE Cuisson Avec Master Électronique Commande Attente Cuisson Avec PROBLÈMES/SOLUTIONS Master Électronique Commande ..
- Page 47 Page (07/03/12) Rev.6 1955200 Part combustibles produits stocker dégagés l’appareil abords Maintenir reproductifs. problèmes d’autres congénitales malformations causer pouvant comme Californie l’état reconnue carbone monoxyde L’inhalation réglage. mauvais carbone monoxyde exposer vous peut produit L’utilisation cancer. causant comme Californie l’état reconnue céramiques fibres...
- Page 48 QU’ÉQUIPEMENT APPAREIL AUTRE TOUT APPAREIL PROXIMITÉ À INFLAMMABLES TANT HOMOLOGUÉ ÉTÉ PRODUIT LIQUIDES VAPEURS D’AUTRES ULTÉRIEUREMENT. D’ESSENCE UTILISER STOCKER REPORTER S’Y POUR CONSERVER MANUEL SÉCURIT: VOTRE POUR PRÉSENT SECTIONS TOUTES LIRE » MASTER « CONVECTION À FOUR D’UTILISATION D’INSTALLATION INSTRUCTIONS...
Need help?
Do you have a question about the MASTER and is the answer not in the manual?
Questions and answers