Table of Contents
Advertisement
Advertisement
Table of Contents

Related Manuals for AirLive WT-2000AP


Summary of Contents for AirLive WT-2000AP
- Page 1 WT-2000AP Turbo-G Wireless Access Point User’s Manual...
-
Page 2: Declaration Of Conformity
5F., NO.6, Lane 130, Min-Chuan Rd., Hsin-Tien City, Taipei County, Taiwan Declare that the product Turbo 802.11g Wireless Broadband Router AirLive WT-2000R / WT-2000AP is in conformity with In accordance with 89/336 EEC-EMC Directive and 1999/5 EC-R & TTE Directive Clause Description Electromagnetic compatibility and Radio spectrum Matters (ERM);... - Page 3 1999/5/CE. Ar šo OvisLink Corp. deklarē, ka AirLive WT- Hér með lýsir OvisLink Corp yfir því að AirLive WT- Latviski [Latvian] 2000R/WT-2000AP atbilst Direktīvas 1999/5/EK Íslenska [Icelandic] 2000R/WT-2000AP er í samræmi við grunnkröfur og būtiskajām prasībām un citiem ar to saistītajiem...
-
Page 4: Ce Declaration Of Conformity
CE Declaration of Conformity This equipment complies with the requirements relating to electromagnetic compatibility, EN 55022/A1 Class B. The specification is subject to change without notice. AirLive WT-2000AP User’s Manual... -
Page 5: Table Of Contents
4.8.5 Reset to default ..........................25 4.8.6 Reboot .............................. 25 APPENDIX A TCP/IP CONFIGURATION FOR WINDOWS 95/98 ............26 APPENDIX B 802.1X SETTING ......................... 31 APPENDIX C WDS SETTING ........................35 APPENDIX D FAQ AND TROUBLESHOOTING ..................38 AirLive WT-2000AP User’s Manual... -
Page 6: Chapter 1 Introduction
Congratulations on your purchase of this outstanding AirLive Wireless AP This product is specifically designed for Small Office and Home Office needs. Instructions for installing and configuring this product can be found in this manual. Before you install and use this product, please read this manual carefully for fully exploiting the functions of this product. -
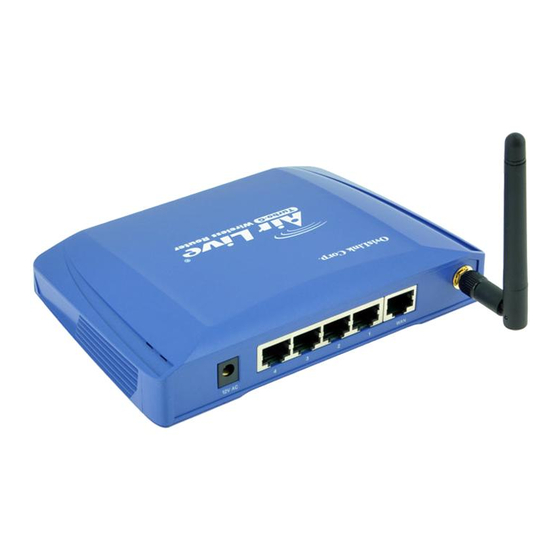
Page 7: Chapter 2 Hardware Installation
Link status Green LAN port. The corresponding LAN port is sending or receiving Blinking Speed data. 10/100 Data Rate Green Data is transmitting in 100Mbps on the corresponding LAN port. Reset To reset system settings to factory defaults AirLive WT-2000AP User’s Manual... -
Page 8: Procedure For Hardware Installation
ON for about 10 seconds, and then M1 will be flashed 3 times to indicate that the self-test operation has finished. Finally, the M1 will be continuously flashed once per second to indicate that this product is in normal operation. AirLive WT-2000AP User’s Manual... -
Page 9: Chapter 3 Network Settings And Software Installation
Tip: The LAN LED of this product and the link LED of network card on your computer must be lighted. Is the TCP/IP environment of your computers properly configured? Tip: If the IP address of this product is 192.168.1.254, the IP address of your computer must be 192.168.1.X and default gateway must be 192.168.1.254. AirLive WT-2000AP User’s Manual... -
Page 10: Chapter 4 Configuring Wireless Access Point
After the connection is established, you will see the web user interface of this product. There are two appearances of web user interface: for general users and for system administrator. A window would pop-up asking for Login and Password. Please enter “admin” for login, and “airlive” for password. -
Page 11: Status
D. Security Type: shows Wireless Security type information 4.3 View Log Click the View Log button on System Status Page You can see the access logs from this screen also you can download the logs and save to your computer. AirLive WT-2000AP User’s Manual... -
Page 12: Client List
LAN function and turn it on. then just workable. 4.5 Wizard ”Next >” Setup Wizard will guide you through a basic configuration procedure step by step. Press AirLive WT-2000AP User’s Manual... - Page 13 Setup Wizard – LAN IP Address: enter the IP address of this machine. Setup Wizard – Wireless Setting : for details , please read the Basic Setting Wireless.: Setup Wizard – Configuration is Completed : save and Reboot this machine AirLive WT-2000AP User’s Manual...
-
Page 14: Basic Setting
Entering the IP Address: default ip is 192.168.1.254, you can change ip address in this field and Press “Save” 4.6.2 DHCP Server The settings of DHCP server include the following items: DHCP Server: Choose “Disable” or “Enable.” AirLive WT-2000AP User’s Manual... - Page 15 Gateway: The Gateway Address would be the IP address of an alternate Gateway. This function enables you to assign another gateway to your PC, when DHCP server offers an IP to your PC. press “Client List >” button into client list page AirLive WT-2000AP User’s Manual...
- Page 16 26 or 10 hexadecimal (0, 1, 2…8, 9, A, B…F) digits. Pass-phrase Generator: Since hexadecimal characters are not easily remembered, this device offers a conversion utility to convert a simple word or phrase into hex. AirLive WT-2000AP User’s Manual...
- Page 17 1. Select Encryntion and Preshare Key Mode If you select HEX,you have to fill in 64 hexadecimal (0, 1, 2…8, 9, A, B…F) digits If ASCII,the length of preshare key is from 8 to 63. 2. Fill in the key, Ex 12345678 AirLive WT-2000AP User’s Manual...
- Page 18 If you select HEX,you have to fill in 64 hexadecimal (0, 1, 2…8, 9, A, B…F) digits If ASCII,the length of preshare key is from 8 to 63. Key value shared by the RADIUS server and this router. This key value is consistent with the key value in the RADIUS server. AirLive WT-2000AP User’s Manual...
- Page 19 If you select HEX, you have to fill in 64 hexadecimal (0, 1, 2…8, 9, A, B…F) digits If ASCII, the length of Pre-share key is from 8 to 63. Key value shared by the RADIUS server and this router. This key value is consistent with the key value in the RADIUS server. AirLive WT-2000AP User’s Manual...
- Page 20 If you select HEX, you have to fill in 64 hexadecimal (0, 1, 2…8, 9, A, B…F) digits If ASCII, the length of Pre-share key is from 8 to 63. 2. Fill in the key, Ex 12345678 AirLive WT-2000AP User’s Manual...
- Page 21 WDS operation as defined bythe IEEE802.11 standard has been made available. Using WDS it is possible to wirelessly connect Access Points, and in doing so extend a wired infrastructure to locations where cabling is not possible or inefficient to implement. AirLive WT-2000AP User’s Manual...
- Page 22 Check "Connection control" to enable the controlling of which wired and wireless clients can connect to this device. If a client is denied to connect to this device, it means the client can't access to the Internet either. Choose AirLive WT-2000AP User’s Manual...
- Page 23 MAC address of the client you select to the ID selected in the “ID” Combobox. Previous page and Next Page To make this setup page simple and clear, we have divided the “Control table” into several pages. You can use these buttons to navigate to different pages. AirLive WT-2000AP User’s Manual...
-
Page 24: Advanced Settings
4.7 Advanced Settings 4.7.1 System Time Set Date and Time using PC’s Date and Time Use PC Date and Time as Machine Set Date and Time manually Selected if you want to Set Date and Time manually. AirLive WT-2000AP User’s Manual... -
Page 25: Maintenance
4.8 Maintenance 4.8.1 Change Password You can change Password here. We strongly recommend you to change the system password for security reason. AirLive WT-2000AP User’s Manual... -
Page 26: View Log
4.8.2 View Log You can View system log by clicking the View Log button 4.8.3 Firmware Upgrade You can upgrade firmware by clicking Firmware Upgrade button. AirLive WT-2000AP User’s Manual... -
Page 27: Backup Setting
Firmware Upgrade button and use the bin file you saved. 4.8.5 Reset to default You can also reset this product to factory default by clicking the Reset to default button. 4.8.6 Reboot You can also reboot this product by clicking the Reboot button. AirLive WT-2000AP User’s Manual... -
Page 28: Appendix A Tcp/Ip Configuration For Windows 95/98
1. Click Start button and choose Settings, then click Control Panel. 2. Double click Network icon. Select the TCP/IP line that has been associated to your network card in the Configuration tab of the Network window. AirLive WT-2000AP User’s Manual... - Page 29 3. Click Properties button to set the TCP/IP protocol for this NAT Router. 4. Now, you have two setting methods: AirLive WT-2000AP User’s Manual...
- Page 30 Select Obtain an IP address automatically in the IP Address tab. b. Don’t input any value in the Gateway tab. AirLive WT-2000AP User’s Manual...
- Page 31 192.168.1.254. So please use 192.168.1.xxx (xxx is between 1 and 253) for IP Address field and 255.255.255.0 for Subnet Mask field. b. In the Gateway tab, add the IP address of this product (default IP is 192.168.1.254) in the New gateway field and click Add button. AirLive WT-2000AP User’s Manual...
- Page 32 In the DNS Configuration tab, add the DNS values which are provided by the ISP into DNS Server Search Order field and click Add button. AirLive WT-2000AP User’s Manual...
-
Page 33: Appendix B 802.1X Setting
3. DUT and Windows 2000 Radius Server Setup 3-1-1. Setup Windows 2000 RADIUS Server We have to change authentication method to MD5_Challenge or using smart card or other certificate on RADIUS server according to the test condition. AirLive WT-2000AP User’s Manual... - Page 34 3.If choosing use smart card or the certificate as the EAP type, we select to use a certificate on this computer. (Fig 3) 4. We will change EAP type to fit the variable test condition. Figure 2: Enable IEEE 802.1X access control AirLive WT-2000AP User’s Manual...
- Page 35 6. Windows XP will prompt that the authentication process is success or fail and end the authentication procedure. ( Fig 6) 7. Terminate the test steps when PC1 get dynamic IP and PING remote host successfully. Figure 4: Certificate information on PC1 AirLive WT-2000AP User’s Manual...
- Page 36 2.PC2 is on Windows XP platform with Service Pack 1a. 3.PEAP is supported on Windows XP with Service Pack 1 only. 4.Windows XP with Service Pack 1 allows 802.1x authentication only when data encryption function is enable. AirLive WT-2000AP User’s Manual...
-
Page 37: Appendix C Wds Setting
If you can not find the information of Mac, please make the cable to plug in lan-port of ap and ping the lan ip address then arp –a. There are some information in the screen. For example: AP 1: AP2: AP3: IP:192.168.1.254 IP:192.168.1.253 IP:192.168.1.252 Mac:00-50-18-00-0f-fe Mac:00-50-18-00-0f-fd Mac:00-50-18-00-0f-fc SSID:Default SSID:Default SSID:Default Channel:11 Channel:11 Channel:11 Dhcp Server:Enable AirLive WT-2000AP User’s Manual... - Page 38 Black Line:Wire If the Settings are ok,the client1 and client2 can get ip from dhcp server of AP1.Then Client1 and Client2 can get information each other. AP1 Setting: AP1 AP2(Remote Mac: 00-50-18-00-0f-fd) AP1 AP3(Remote Mac: 00-50-18-00-0f-fc) AirLive WT-2000AP User’s Manual...
- Page 39 AP2 Setting: AP2 AP1(Remote Mac: 00-50-18-00-0f-fe) AP3 Setting AP3 AP1(Remote Mac: 00-50-18-00-0f-fe) AirLive WT-2000AP User’s Manual...
-
Page 40: Appendix D Faq And Troubleshooting
If the client can not access your wireless router, please refresh network list again. However, I still can not fine the device which ssid is “default”, please refer to Q3. Choose the one that you will want to connect and Connect: AirLive WT-2000AP User’s Manual... - Page 41 A: First, you must check if the driver of wireless client supports AES encryption. Please refer to the below: If SSID is default and click “Properties” to check if the driver of wireless client supports AES encryption. AirLive WT-2000AP User’s Manual...
- Page 42 AirLive WT-2000AP User’s Manual...
Need help?
Do you have a question about the WT-2000AP and is the answer not in the manual?
Questions and answers