Table of Contents
Advertisement
Quick Links
Advertisement
Table of Contents
Troubleshooting

Related Manuals for Acomdata external E5 Serial ATA(SATA)


Summary of Contents for Acomdata external E5 Serial ATA(SATA)
-
Page 1: Important
external hard drive Serial ATA (SATA) User’sGuide... -
Page 2: Table Of Contents
Product Registration for Warranty Coverage ..7 Precautions ............8 Package Contents ..........9 System Requirements ........10 AcomData E5 SATA Drive at a Glance ....11 PCI Cards at a Glance ......... 12 Features Explored ..........13 Serial ATA ...................13 Hot-Pluggable .................14... - Page 3 Frequently Asked Questions ......47 Troubleshooting ..........50 Troubleshooting for PC Users ..........51 Troubleshooting for Mac users .........53 One Year Limited Warranty ....... 55 Arranging for Service ........57 How to Purchase Accessories ......58 Notices ..............59 AcomData Contact Information ....... 60...
-
Page 5: Welcome
Drive’s stand. This guide contains important information for the proper installation, use, and care of your AcomData E5 Drive. Please read this guide carefully and retain it for future reference. - Page 6 Symbols used in this guide: This symbol alerts the reader to a warning or to some very important information. This symbol alerts the reader to helpful tips and other information that may be useful. The Apple logo alerts the reader to important information specific to Mac users.
-
Page 7: Product Registration For Warranty Coverage
3. You get your own personalized support page: • download software updates • access all online support services • view all of your registered AcomData products • manage your personal profile; 4. If you need warranty service, arranging product returns is faster and easier if you registered online. -
Page 8: Precautions
PCI card. Always handle the card by its edges. • AcomData strongly recommends that you backup your Drive. AcomData is not responsible for data loss or cor- ruption. AcomData will not perform data recovery. • Do not open the device or attempt to disassemble or modify it. -
Page 9: Package Contents
ACKAGE ONTENTS PCI Host Bus AcomData E5 SATA Drive & Stand Adapter Card Power Cable SATA Cable Molex Cable Registration Software CD User’s Guide Card Rubber Feet If you are missing any item listed above, please contact Customer Service at customerservice@acomdata.com, or call 800-470-4495. -
Page 10: System Requirements
YSTEM EQUIREMENTS System Requirements ��������� for Windows PCs ������� • Minimum 233 MHz Pentium processor or equivalent (Celeron, AMD, etc.) • Windows XP (Service Pack 1 or later), 2000 (Service Pack 3 or later), Server 2003, 98SE, or Me • 64 MB of RAM •... -
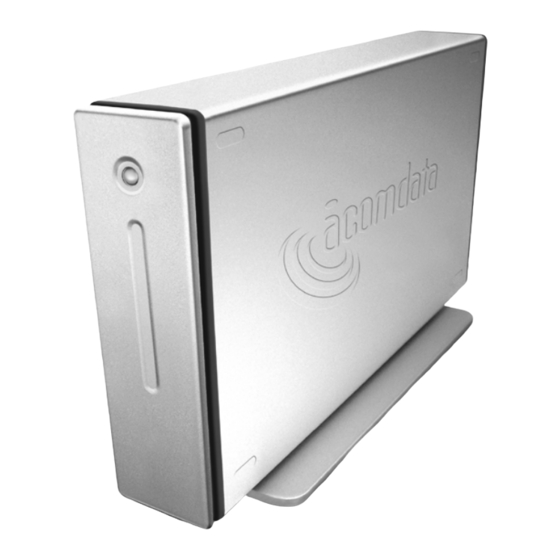
Page 11: Acomdata E5 Sata Drive At A Glance
E5 SATA RIVE AT A LANCE Power-Data Light Lights up blue when the Drive is powered on. Flashes red when reading or writing data. Zinc Alloy Stand Can be removed for horizontal placement or stacking of Drives. Power Switch You can turn the Drive off when you’re not using it. -
Page 12: Pci Cards At A Glance
PCI C ARDS AT A LANCE Your AcomData E5 SATA Drive was bundled with one of the SATA PCI cards shown below. SATA E/I PCI CARD Allows you to connect one Internal SATA Port White Power external and one internal SATA Connector hard drive. -
Page 13: Features Explored
EATURES XPLORED Serial ATA Parallel ATA technology has served computers well for about two decades. However, increasingly faster hard disk transfer rates have forced the ATA interface specifi- cation to be continuously updated to avoid becoming the limiting factor in disk I/O performance. At the same time, popular applications––such as digital video creation and editing, digital audio storage and playback, file sharing over high-speed networks, and... -
Page 14: Hot-Pluggable
Hot-Pluggable You can turn the Drive on and off (and disconnect it) while your computer is running (i.e. “hot”), in order to conserve energy. If the Drive was not hot-pluggable, you would either have to shut down your computer every time you wanted to turn the Drive on or off; or you would have to leave the Drive running until you turned off your computer. -
Page 15: Hardware Command Queuing
Hardware Command Queuing Queuing increases data performance, particularly when random accesses are frequent. The most noticeable performance increases are I/Os per second. The PCI card features embedded hardware support for ATA-7 Tagged Command Queuing and SATA-II Native Command Queuing. The queuing engine operates in synchroniza- tion with each attached drive for the fastest possible ordering and re-ordering with the out of sequence command operations. -
Page 16: Specifications
PECIFICATIONS E5 SATA External Hard Drive Model #: ............HDxxxSE5-72-PCI Physical (without stand) Dimensions: ..4.6” X 1.37” X 8.13”; 117 X 35 x 206.5 mm Weight ..............2.4 lbs./1.09 Kg Configuration/Performance Interface ................Serial ATA Chassis (approved/recognized) ......FCC/CE/UL Interface transfer rate (max) ........150 MB/s Data buffer ....2 MB (@<... -
Page 17: Sata Pci Host Bus Adapter Card
SATA PCI Host Bus Adapter Card Bandwidth: 1.5 Gbps Interface Transfer Rate: 150 MB/s Burst Transfer Rate: 264 MB/s (using a SATA RAID array) Supports two SATA Drives on independent Direct Memory Access channels RAID Level 0 and Level 1 support Built in hardware bus master engine 256 Byte data FIFO each channel Tag Command Queue support... -
Page 18: Installing The Pci Card
PCI C NSTALLING THE Accessing the PCI Slot 1. Save all your work and shut down the computer. Disconnect all cables except the power cord. Make sure you will have unobstructed access to your com- puter’s interior. 2. Touch the metal PCI access covers on the back of the computer to discharge any static electricity (Figure 1). - Page 19 ����������������� ��������������������� ��������������������� ��������������� FIGURE 2 Installing the PCI Card Do not touch the gold connectors or any of the components on the card. Handle the card by its edges. Adapter cards are sensitive to electrostatic discharge (ESD) damage. 1. Carefully remove the PCI card from the packaging. Handle the card by its edges.
- Page 20 FIGURE 3 • Do not rock the card from side to side; press the card straight down into the slot. • Don’t force the card. If you encounter a lot of resis- tance, pull the card out and check the connectors and slot for damage or obstructions, then try insert- ing the card again.
- Page 21 Connect the Molex Cable ���������� ��������� ������������ ��������� ���������� ��������� FIGURE 4 1. Connect the 4-pin mini power connector of the Molex cable (Figure 4) onto the white power connector on the SATA card (Figure 5). The mini power connector is keyed so it will only plug in one way.
- Page 22 2. Locate a free Molex cable inside your computer. The cable would come from your computer’s power sup- ply. Connect the male connector of the supplied Molex cable to a female connector on a Molex cable from the computer’s power supply. The female con- nector of the supplied Molex cable is an extra con- nection you can use for powering another internal device.
-
Page 23: Installing The Software
NSTALLING THE OFTWARE Windows Users: This software installation installs both the RAID Manager software and the driver needed to operate the Drive on ��������� ������� Windows. Even if you never plan to set up a RAID volume, you must install this software for your Drive to work. Mac Users: The RAID Manager software is compatible with Windows only, and you do not need to install a driver. - Page 24 4. Read the licensing agreement. If you agree to the terms, check “I Agree” and click Next. 5. The default location for the installation is the Programs folder on your computer’s C drive. You can change the location if you wish. Click Next (Figure 7). FIGURE 7 6.
- Page 25 FIGURE 8 FIGURE 9 – 25 –...
- Page 26 9. In the next screen, the Wizard will inform you that the installation is finished. Click Finish. 10. Next, the Raid Interface Installer will appear (Figure 10). Select “Install the software automatically (Recommended)” and click Next. FIGURE 10 11. On the next screen, press “Continue Anyway. ” 12.
- Page 27 “DMI Raid Interface” and “Dura Micro SATA Raid Adapter” (Figure 11). FIGURE 11 For instructions on setting up and managing a RAID array with the RAID Manager software, see the E5 SATA Drive support page at www.acomdata.com. – 27 –...
-
Page 28: Setting Up The Drive
ETTING UP THE RIVE Choosing an Orientation Your AcomData E5 Drive can be placed on your desktop in either the vertical or horizontal position. If you do not plan to stack on additional E5 Drives, we recommend the vertical position, as this orien- tation takes up the minimum amount of desktop space. - Page 29 the end of each screw just far enough to hold the nut to the screw. Do not tighten the nuts. 2. With both screws and nuts in place, push down on each screw head to make sure the screws extend through the holes as far as they will go.
-
Page 30: Horizontal Placement
Horizontal Placement Do not discard the stand. Your Drive’s Model and Serial numbers are printed on the label affixed to the underside of the stand. In the event that you need warranty service, you will need to send us the stand along with the Drive. Removing the stand Use a screw driver with the proper type and size head to loosen the two screws located on the underside of... - Page 31 the horizontal position, and select the appropriate side on which to affix the feet. 2. Remove one of the rubber feet from the paper back- ing and carefully position the foot inside one of the four oblong indentations, with the adhesive side down.
-
Page 32: Connecting The Drive To Your Computer
ONNECTING THE RIVE OMPUTER Before you install the Drive, we recommend that you restart your computer or shut it down and connect the Drive with the computer turned off. 1. The pins of the power cable’s plugs are arranged such that the plugs can be inserted only one way. - Page 33 – 33 –...
-
Page 34: Naming Your Drive
AMING RIVE Now that your Drive has been connected and mounted to your operating system, you may want to give it a name to distinguish it from other storage devices con- nected to your computer. If you are going to re-format the Drive, go to “Re-For- matting the Drive”... -
Page 35: Re-Formatting The Drive
DRIVE, BE SURE TO SAVE A COPY OF ANY FILES YOU WISH TO KEEP TO ANOTHER STORAGE DEVICE. Your AcomData the Drive was formatted at the factory with the FAT32 file system. This makes the Drive both Mac and PC compatible right out of the box, and allows you to share files between platforms. - Page 36 Mac OS 10.2 Users: Hard drives or drive partitions larger than 128 GB and formatted with FAT32/MS DOS will not mount on Mac OS 10.2. There are several ways to deal with this issue: 1) Re-format the Drive using the Mac OS Extended file system;...
-
Page 37: Formatting The Drive In Windows Xp Or 2000
Formatting the Drive in Windows XP or 2000 1. Disable any anti-virus software you may have running. 2. Double-click on My Computer. In the My Computer window you should see the icon/letter for the Drive (labeled “External’). 3. Right-click on the Drive letter/icon and select Format…... -
Page 38: Formatting The Drive In Windows 98Se Or Me
Formatting the Drive in Windows 98SE or Me 1. Disable any anti-virus software you may have running. 2. Double-click on the My Computer icon. In the My Computer window you should see the icon/letter for the Drive (labeled “External”). 3. Right-click on the Drive icon/letter and select Format. In the Format window, verify the capacity;... - Page 39 Formatting the Drive in Mac OS X 1. Disable any anti-virus software you may have running. 2. Launch the Disk Utility application (Applications folder ––> Utilities folder ––> Disk Utility). 3. You should see the Drive, listed in the left window as “External.
-
Page 40: How To Safely Turn Off The Drive
OW TO AFELY FF THE RIVE NEVER TURN OFF A HARD DRIVE WITHOUT FIRST UNMOUNTING IT. YOU MAY LOSE DATA OR DAMAGE THE DRIVE. The Importance of Mounting and Unmounting A hard drive requires two types of connections to "talk" to a computer: a physical connection, which is made using the interface cable, and which serves as the line of communication;... - Page 41 PC Users 1. In the system tray at the bottom of your screen, click the safely remove/icon (the icon with the green arrow)… On Windows 2000 and XP you will see the alert mes- sage “Safely Remove…” or “Stop…” followed by the drive letter.
-
Page 42: Stacking Drives
TACKING RIVES Even with the large storage capacities offered by AcomData External Hard Drives, as your storage needs grow, one Drive may not be enough. We designed our E5 Drives to be stackable so that you can add more hi- performance data storage without taking up any more desktop space. -
Page 43: Maintaining Your Drive
AINTAINING RIVE A hard drive is a very sophisticated and sensitive device that requires proper care and maintenance to ensure the longest possible life, reliable operation, and most of all, the integrity of your stored data. Backup Your Data The single most important action you can take to safeguard your valuable data is to backup the data to another storage device. - Page 44 clusters that were previously occupied become avail- able for new data. However, there may not be enough space for the drive to write a new file in a contiguous set of clusters. The drive uses the clusters it can, and if more are needed, the drive uses other clusters in other locations.
-
Page 45: Examining And Repairing A Hard Drive
Examining and Repairing a Hard Drive There are a number of reasons why a hard drive may become damaged or the data may become corrupted. Regular examination of your disk with a quality disk examination and repair utility is the best way to prevent irreparable disk damage and avoid data loss. -
Page 46: Cleaning The Drive Case
by downloading and sharing infected files via e-mail and other Internet services. You can protect your data against viruses by using ant-virus software. These pro- grams are designed to seek out and eradicate viruses before they can cause damage. There are a number of good anti-virus programs on the market for both PC and Mac. -
Page 47: Frequently Asked Questions
REQUENTLY SKED UESTIONS Q: Do I have to format my AcomData Drive prior to using it? A: No. All AcomData Drives are formatted at the factory with the FAT32 file system, making them compatible with all sup- ported platforms right out of the box. You can re-format the Drive if you wish to use a file system other than FAT32. - Page 48 Q: What is the cache size on my AcomData Drive? A: All drives under 250 GB have 2MB caches; drives that are 250 GB or larger have 8MB caches. Q: Why doesn’t the Drive need a fan? A: All hard drives generate some heat during normal opera- tion.
- Page 49 The actual amount may vary depending on the operating system. Q: Can I use my AcomData Drive to copy an operating sys- tem from one computer to another? A: You cannot transfer an installed operating system to anoth- er computer or hard drive simply by copying the operating system’s files.
-
Page 50: Troubleshooting
ROUBLESHOOTING If you experience a problem with your AcomData prod- uct, you should take the following actions in the order specified: 1. Make sure you followed all of the instructions in this guide properly. 2. Consult the Troubleshooting sections of this guide. -
Page 51: Troubleshooting For Pc Users
The other possibility is that the Drive has mal- functioned and requires service. I don’t see my AcomData Drive in My Computer, but it appears in Device Manager. (Windows XP & 2000 only) A: Right-click on My Computer. Select Manage in the... - Page 52 New Partition in the pop-up menu. When the Partition Wizard appears, select Primary Partition and click on Next. You will see a default value for the AcomData Drive; click Next. You will then see a drive letter (you can change this drive letter if you wish); click Next. You will then be asked to format the AcomData Drive.
-
Page 53: Troubleshooting For Mac Users
‘untitled’.” A: If you get this alert message, your Mac is not recog- nizing your AcomData Drive and the mouse cursor may actually freeze on screen. If this happens, hold down the Apple/Control key and press the Period “. ” key. You should regain control of your mouse. - Page 54 I can’t transfer files larger than 2 GB. A: This is a limitation of the FAT32 file system. If you plan to use the AcomData Drive on a Mac OS only, and you do not need Windows compatibility, consider re-format- ting the AcomData Drive using the Mac OS Extended file system.
-
Page 55: One Year Limited Warranty
This Limited Warranty is invalid if the factory applied serial number has been altered or removed from the Product. Repair or replacement, as provided under this warranty, is the exclusive remedy of the consumer. AcomData shall not be liable for any inciden- – 55 –... - Page 56 Product with a degree of protection equivalent to that of the original packaging. AcomData is not responsible for any damage to, or loss of, any pro- grams, data, or other information stored on any media or any part of any product serviced hereunder.
-
Page 57: Arranging For Service
RMA can only be generated if the product has been registered online at www.acomdata.com. If your AcomData product is not registered at the time you need service, you must register the product online or your Technical Support Specialist can register it for you. -
Page 58: How To Purchase Accessories
OW TO URCHASE CCESSORIES You can purchase accessories by contacting Customer Service at customerservice@acomdata.com. In your e-mail, please include: • your name; • phone number; • mailing address; • model number or description of item (e.g. SATA cable); • quantity per item. -
Page 59: Notices
OTICES OPYRIGHTS Copyright © 2005 AcomData. All rights reserved. No part of this publication may be reproduced stored in a retrieval system, or transmitted in any form or by any means, electronic, mechanical photocopying, recording or otherwise, without the prior writ- ten consent of AcomData. -
Page 60: Acomdata Contact Information
ONTACT NFORMATION Address: 3410 Pomona Blvd. Pomona, CA 91768 Telephone: (909) 348-0680 Fax: (909) 598-8663 Web Site: www.acomdata.com Customer Service: customerservice@acomdata.com Technical Support: techsupport@acomdata.com Pre-Sales Questions: sales@acomdata.com – 60 –... - Page 61 Copyright © 2005 AcomData. All rights reserved. The AcomData name and its logos are registered trademarks of AcomData. Other trademarks mentioned or appearing in this document are the property of their respective owners. Prices and specifica- tions are subject to change without notice.
Need help?
Do you have a question about the external E5 Serial ATA(SATA) and is the answer not in the manual?
Questions and answers