Table of Contents
Advertisement
Advertisement
Table of Contents
Troubleshooting

Related Manuals for Acomdata E5 External Hard Drives


Summary of Contents for Acomdata E5 External Hard Drives
- Page 1 external hard drives User’s Guide...
- Page 2 MPORTANT 1) Retain the bill of sale from the purchase of your AcomData product. A copy of the bill of sale is needed in the event that you require warranty service. 2) Please write the Model and Serial numbers of your AcomData product in the spaces provided below.
-
Page 3: Table Of Contents
System Requirements for Mac ......... 11 Using Your Drive for Routine Tasks ......... 40 AcomData E5 Drives at a Glance (Front View) ....12 How to Safely Dismount & Turn Off the Drive ....41 AcomData E5 Drives at a Glance (Back Panel) ....13 PC Users ......................41... -
Page 4: Important
Drive’s stand. This guide contains important information for the proper installation, use, and care of your AcomData Drive. Please read this guide carefully and retain it for future reference. – 5 –... -
Page 5: Product Registration For Warranty Coverage
You may also register via mail by filling out and returning the Registration Card included in the package. When registering your AcomData product you will need the Model number and Serial number. Both of these are printed on the UPC label affixed to the bottom of the box, and on the label affixed to the underside of the Drive’s stand. -
Page 6: Precautions
(as opposed to a backup device) AcomData strongly recommends that you backup the files stored on 6-pin to 6-pin the device. AcomData is not responsible for data loss or USB cable FireWire cable corruption; nor will AcomData perform recovery of lost ��������... -
Page 7: System Requirements For Pc
��������� ������� System Requirements for PC System Requirements for Mac • Minimum 233 MHz processor (Pentium, Celeron, AMD, etc.) • Power Macintosh (G5, G4, G3, iBook, PowerBook or iMac) • Windows 98SE, Me, 2000, or XP • Mac OS 9 or Mac OS X •... -
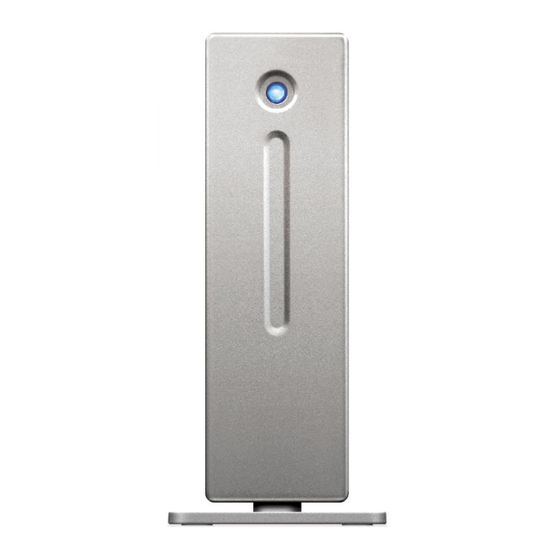
Page 8: Acomdata E5 Drives At A Glance (Front View)
AcomData E5 Drives AcomData E5 Drives at a Glance at a Glance (Front View) (Back Panel) Actual layout may not be exactly as shown. PushButton Drives USB 2.0 Drives FireWire Drives PushButton Power Switch Power Switch Lights up blue when the Drive is pow- ered on. -
Page 9: Acomdata E5 Features Explored
AcomData E5 Features Peer-to-peer architecture FireWire devices are host-independent, meaning data Explored transmissions between FireWire devices on the same bus can take place without the need for input from the host If you have a PushButton Drive, refer to the PushButton computer. -
Page 10: Hi-Speed Usb 2.0 (Usb 2.0-Equipped Drives Only)
Mac & PC Ready 480 Mbps is equivalent to 60 Megabytes per second. Put Your AcomData E5 Drive is ready to use on either a Mac or another way, it is possible to transfer a full gigabyte of data a PC right out of the box––no formatting is required. The in just under 18 seconds. -
Page 11: Fanless Design
Technical Specifications would either have to shut down your computer every time you wanted to turn the Drive on or off, or you would have to leave the Drive running all day unnecessarily. Always dis- mount the Drive or turn off your computer before turning off and Model #: disconnecting the Drive. -
Page 12: Setting Up The Drive
Choosing an Orientation AC Input ............ 100-240V~, 50/60Hz 1.2A (Vertical or Horizontal) DC output ............12V@1.2A ; 5V@2.0A Your AcomData E5 Drive can be placed on your desktop in Environmental characteristics (operating) either the vertical or horizontal Ambient temperature ............5ºC – 55ºC position. -
Page 13: Vertical Placement
Vertical Placement Horizontal Placement Most likely, your Drive was packaged with the zinc alloy Do not discard the stand. Your Drive’s Model and Serial num- stand attached to the Drive case, so you can place the Drive bers are printed on the label affixed to the underside of the on your desktop vertically right out of the box. -
Page 14: Connecting The Drive To Your Computer
Drive to your computer. Data Software CD, which contains the USB 2.0 driver. Before connecting the Drive, insert the AcomData Software CD into your CD drive. The CD will launch automatically and you will Before you install the Drive, we recommend that you restart see the Retrospect Express start screen. -
Page 15: Mounting A Firewire-Connected Drive
Mounting a FireWire- 2. On the next screen (Figure 2), select “Install the software automatically (Recommended). ” Click Next. Connected Drive Mac Users: Once the Drive has been properly connected and powered on, it should mount to your Desktop. Windows 2000/XP Users: Once the Drive has been properly connected and powered on, you should see a new hard drive icon with a new drive letter in My Computer/Windows Explorer. -
Page 16: Mounting A Usb-Connected Drive
Mounting a USB-Connected Drive Mac Users: Once the Drive has been properly connected and powered on, it should mount to your Desktop. Windows 2000/XP Users: Once the Drive has been properly connected and powered on, you should see a new hard drive icon with a new drive letter in My Computer/Windows Explorer. - Page 17 4. In the next screen, select “Specify a location” and in the 11. In the next screen, select “Specify a location” and in the text field type: C:\ and then click Next (Figure 5). text field type: C:\ and then click Next. 12.
-
Page 18: Windows 98Se Users With Non-Pushbutton Drives
Naming Your Drive Windows 98SE Users with non-PushButton Drives: Now that your Drive has been connected and mounted to 1. After the Drive has been properly your operating system, you may want to give it a name to connected and turned on, the Add distinguish it from other storage devices connected to your New Hardware Wizard should computer. -
Page 19: Re-Formatting The Drive
Hard drives or drive partitions that are larger than 128 GB and formatted with the FAT32/MS DOS file system will not Your AcomData E5 Drive was formatted at the factory with mount on Mac OS 10.2 through 10.2.8. If your Drive is larger the FAT32 file system. -
Page 20: Formatting The Drive In Windows 2000 Or Xp
Computer/Explorer window you should see the icon and Computer window you should see an icon and drive let- drive letter for the AcomData Drive. (If you are not sure ter for the AcomData Drive. (If you are not sure which... -
Page 21: Formatting The Drive In Mac Os 9
Drive to highlight it. Information about the Drive will appear in the Information window. 3. With your AcomData Drive connected and powered on, restart the computer and hold down the C key while the 4. Click on the Erase tab. In the Erase window you will see a computer is starting up. -
Page 22: Using Your Drive For Routine Tasks
“Safely Remove…” or “Stop…” followed by the drive letter. 3. Double-click the Drive icon to open it. 2. Select the AcomData Drive. After a few seconds, Windows 4. If you want to copy the file or folder to a specific folder on will give you a message that it is safe to remove the device. -
Page 23: Stacking Drives
Stacking Drives Maintaining Your Drive & Safeguarding Your Data Even with the large storage capacities offered by AcomData External Hard Drives, as your storage needs grow, one Drive A hard drive is a very sophisticated and sensitive device that may not be enough. We designed our E5 Drives to be stack-... -
Page 24: Examining And Repairing A Hard Drive
to write a new file in a contiguous set of clusters. The drive ing, it’s a good idea to examine a disk for damage at least uses the clusters it can, and if more are needed, the drive once a month. uses other clusters in other locations. -
Page 25: Frequently Asked Questions
A: Yes, but you may need to update the software/firmware for the card. We recommend you check with the card’s manufacturer for Q: Do I have to format my AcomData Drive prior to using it? the latest updates. A: No. All AcomData Drives are formatted at the factory with the... - Page 26 The actual amount may vary depending on the operating system. A: It is possible to use an AcomData Drive as a boot volume on Mac OS 9 and Mac OS X. Follow the instructions in your Mac OS Q: Can I use my AcomData Drive to copy an operating system manual for the proper installation of the Mac OS.
-
Page 27: Troubleshooting
Technical Support using one of the following options: I don’t see my AcomData Drive in My Computer, but it does a) via the online Technical Support form at our web site, appear in Device Manager. (Windows XP & 2000 only) www.acomdata.com;... -
Page 28: Troubleshooting For Mac Users
A: Windows 2000 and XP users will get this alert message if sleep. The immediate solution is to restart your computer. you plugged the AcomData Drive into a USB port that only To prevent this problem from recurring, go into your Energy support USB 1.x. -
Page 29: Glossary
Buffer – RAM cache that temporarily stores data so it can be deliv- ered to a device as it is needed. I set up my AcomData Drive on Mac OS 9 and it was Bus – An electronic link that can transmit data between digital working fine. -
Page 30: One Year Limited Warranty
Product in conjunction with accessories, products or ancillary or periph- based. eral equipment, or where it is determined by AcomData that there is no fault with this Product itself; (2) improper installation, operation, testing or main- Software – A set of instructions that enable a computer to perform tenance of this Product;... -
Page 31: Obtaining Service For Your Acomdata Product
2) A Returned Merchandise Authorization (RMA) number that is assigned to your product by your TSS. An RMA When sending an AcomData Product in for service you must take the can only be generated if the product has been registered... -
Page 32: Notices
Notices OPYRIGHTS Copyright © 2005 AcomData. All rights reserved. No part of this publication may be reproduced stored in a retrieval sys- tem, or transmitted in any form or by any means, electronic, mechanical photocopying, recording or otherwise, without the prior written consent of AcomData. - Page 33 Microsoft Windows Copyright © 2005 AcomData. All rights reserved. The AcomData name and its logos are registered trademarks of AcomData. Retrospect is a registered trademark of EMC corporation. Other trademarks mentioned or appearing in this document are the property of their respective owners. Prices and specifications are subject to change without notice.
Need help?
Do you have a question about the E5 External Hard Drives and is the answer not in the manual?
Questions and answers