Oce 3165 User Manual
Hide thumbs
Also See for 3165:
- Operator's manual (103 pages) ,
- Quick start manual (13 pages) ,
- System data (4 pages)
Table of Contents
Advertisement
Quick Links
Advertisement
Table of Contents

Subscribe to Our Youtube Channel
Related Manuals for Oce 3165


Summary of Contents for Oce 3165
- Page 1 Océ 3165 User Manual...
- Page 2 This manual, which can be kept at the inside of the copiers paper compartment door, contains a description of the Océ 3165 Network Copier and the copying and printing that can be done with it. The introduction (chapter 1) contains a general description of the working methods for using the copier and it is recommended that you read at least this chapter.
- Page 3 Océ-Technologies B.V. Licences The following products and technologies are the subject of certain patents and/or copyrights and are used in the Océ 3165 under a licence from their following respective owners. FIVE-E Printer Language Emulation © Copyright 1988-1995 Xionics Document Technologies, Inc.
- Page 4 Océ 3165 User Manual...
-
Page 5: Table Of Contents
What’s new in this release? 15 The operating panel 16 Graphical overview of copy jobs 22 Switching the Océ 3165 on and off 26 Gaining access to the Océ 3165 28 Copying and printing using a coin or credit card 28 Copying and printing using a PIN code 29 Claiming the Océ... - Page 6 Installing the Océ 3165 printer driver (PCL or PS) 75 Installing the Océ 3165 PPD (PS only) 78 Connecting a local port to the Océ 3165 print queue 83 Testing the printer driver installation 86 Setting up the Océ 3165 printer driver 87...
- Page 7 Submitting jobs in a central printing environment Introduction 136 Getting started 138 Installing the Océ 3165 Job SubmitIT application software 138 Installing the Océ 3165 Job SubmitIT driver 141 Starting and closing the application 145 Submitting a job for printing 146...
- Page 8 Safety information Instructions for safe use 184 Safety data sheets 186 Safety data sheet Océ 3165 Digital Copier 187 Safety data sheet Océ 3165 Network Copier 188 Safety data sheet Océ Master 189 Safety data sheet Océ F11 toner 191...
-
Page 9: Introduction
This chapter also provides a graphical survey of the most common copy jobs and where to find them in this manual. And finally it explains how to access or claim the Océ 3165 and how to stop and interrupt jobs. -
Page 10: The Océ 3165
After the image has been scanned from the original, each page is read into memory. The Océ 3165 scans at the rate of 56 pages per minute. The desired number of copies can then be reproduced from memory at a rate of 62 pages per minute. -
Page 11: How Is This Manual Organised
How is this manual organised? This manual describes tasks and related information which apply to the Océ 3165 Digital Copier as well as to the Océ 3165 Network Copier and the Océ 3165 PRO. Below mentioned table describes what chapters are interesting for which configuration. -
Page 12: Overview Of The Océ 3165
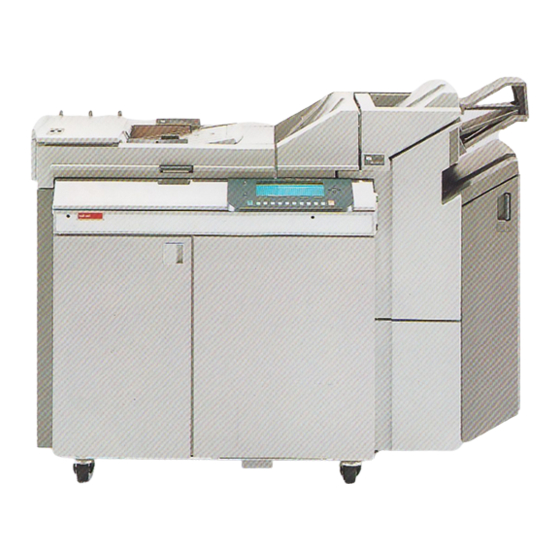
To assist you in finding parts of the copier and the functions on the operating panel quickly, an illustration of the Océ 3165 is presented on the inside front cover and of the operating panel on the inside back cover, both of which can be folded out. -
Page 13: Types Of Users
1-sided and delivered face-up into the upper output tray. Types of users Various users are mentioned in this manual which are related to the Océ 3165. In this section it is explained what type of user is meant when a specific term is used. - Page 14 Océ 3165. The key The key user user takes care of installing the printer driver on the workstations of the various PC-users and takes care of the user questions regarding the printing of files.
-
Page 15: What's New In This Release
What’s new in this release? For those who upgraded their system from release 1.3 to 2.2 we include the following list of changes. New functionality in release 2.2 Access control and accounting for copying and printing Chapter 1 External copy charge device connection (optional) Automatic paper selection Chapter 2 Automatic reduction/enlargement... -
Page 16: The Operating Panel
(see figure 2 on page 17) or a list of users who use the Océ 3165 for printing (see figure 3 on page 17). It can be defined by the key operator what initial mode is used. - Page 17 [1] Initial mode of Océ 3165 Digital Copier [2] Initial mode of Océ 3165 Network Copier when set to copying [3] Initial mode of Océ 3165 Network Copier when set to printing Pressing a section button gives you access to a Section and function buttons field in which related settings are gathered.
- Page 18 In that case, one of the function buttons acts as a card selection button. When using the Océ 3165 Digital Copier, this will be the left function button. In the Océ 3165 Network Copier, this will be the second-left function button.
- Page 19 [5] Card selection When standard settings are changed for a new job, the involved Dog ear section is marked with a ‘dog-ear’ (see figure 6). This ‘dog-ear’ in a section label or a subsection label indicates to the user that at least one setting in that section (or any of its subsections) does not reflect the default value.
- Page 20 [7] Copy job counter When operating the Océ 3165 Network Copier, you will also be informed on the running print job through the print job counter. The following information is shown (see figure 8): in the first line the current set of the total number of sets in the second line the user of the print job in the third line the file name of the print job...
- Page 21 When operating the Océ 3165 Network Copier, the key operator can also preset whether the machine is mainly used for printing or for copying. If you press the correction button a third time, the machine switches to its initial mode, which can be ‘Printing’...
-
Page 22: Graphical Overview Of Copy Jobs
............................................... Copying damaged or otherwise special originals from the glass platen (see page 43) ................................................................................................................................................................................ Océ 3165 User Manual... - Page 23 Copies of books and magazines (see page 43). Stopping a job (see page 33). STOP Finished reports with covers, separation sheets and/or appendices on different paper, with or without staples (see page 49).. International International Conference on Conference on International International Safety Safety...
- Page 24 ......................................................................and/or ..........................................................................................................................................................................................................................Océ 3165 User Manual...
- Page 25 Copying multiple pages onto one page (see page 66). two pages on one page side Improving quality of copies with text and/or photographs (see page 69).................................................................................................
-
Page 26: Switching The Océ 3165 On And Off
If the Océ 3165 is equipped with the optional key switch (see figure 9), the copier can only be turned on or off if the key is in the switch. - Page 27 The Digital Access Controller which is part of the Océ 3165 Network Note: Copier should remain switched on. Switching off Check that no job is in progress. If available, insert the key into the key switch and turn it to the left.
-
Page 28: Gaining Access To The Océ 3165
Copying and printing using a coin or credit card The Océ 3165 may be equipped with a copy charge device to which a coin box and/or credit card unit may be connected. If such a unit is installed, the message “Use the copy charge system” will appear in the display (see figure 10) while the labels on the display are... -
Page 29: Copying And Printing Using A Pin Code
The key operator allocates a 5-digit PIN code to users to gain access to the Océ 3165. Each PIN code is unique and the key operator is the only person authorised to change it. Each account has its own copy counter, which keeps track of the number of copies made. - Page 30 Then press the correction button once more to deselect the account. The message “Enter your PIN code” is shown again and the Océ 3165 is no longer available for use. See also chapter 5, ‘Basic print jobs’ on page 99 for more information on printing jobs while using a PIN code.
-
Page 31: Claiming The Océ 3165 Network Copier
You can use the Océ 3165 Network Copier for both copying and printing. When using the Océ 3165 Network Copier for copying, you have to access the ‘Copy’ mode of the machine in which you can make settings for copy jobs whereas the ‘Print’... - Page 32 Claiming the Océ 3165 Network Copier for printing while ‘Copy’ mode is active Press the application button once to switch to the ‘Print’ mode. When the Océ 3165 is waiting to print a direct print job, you can start Note: this job immediately by pressing the start button ( ).
-
Page 33: Stopping A Job
Océ 3165 to stop as soon as the current print job is finished. A print job being printed can also be cancelled. When you do, the job is cleared from the memory. - Page 34 Stopping a print job Press the stop button twice. The job is stopped and all data are deleted. The owner of the print job has to submit the job again. Océ 3165 User Manual...
-
Page 35: Basic Copy Jobs
Océ 3165 User Manual Chapter 2 Basic copy jobs This chapter describes all the available functions needed for a typical range of copy jobs. However, the functions are not limited to the jobs described here. If you have entered conflicting settings, a message will be displayed. -
Page 36: Copying Sets Of A4 Originals
38). However, it is then important that the A4 originals are fed in using the long side (portrait orientation as viewed by the operator). And, you can use covers, separation sheets, appendices and blank pages (see chapter 3, Océ 3165 User Manual... - Page 37 ‘Extended copy jobs’ on page 47) to retrieve a completed document from the finisher (see the inside of the front cover). When making 2-sided copies, it can be defined in which direction the copies are to be bound. You can also set an extra margin for the front and rear side of 2-sided copies (see ‘Defining the location and size of the binding edge’...
-
Page 38: Stapling Copies
Stapling copies The finisher of the Océ 3165 is provided with a stapler that can automatically staple up to 35 or 50 sheets of A4 paper weighing 80 g/m (depending on the machine version). Copies in other sizes must be stapled by hand. The stapling slot is identified with a ’. - Page 39 Slide the set of copies to be stapled (face down with the top to the left) into the staple slot and move the set to the left as indicated in figure 15. [15] Stapling copies by hand Wait until the staple has been inserted through the sheets. If no staple is inserted, place the set against the left side of the slot again Note: and push it in a little further.
-
Page 40: Copying Standard Original Sizes
Copying standard original sizes The Océ 3165 can automatically process 1 and 2-sided originals of different sizes and print them either 1-sided or 2-sided. To make a full-size copy (1:1) of an A4 , A4 or A3 original placed in the automatic feeder, you need only press the start button . - Page 41 The orientation of the original in the automatic feeder must correspond with the feed orientation of the paper in the paper tray (see figure 18). This is the only way a copy can be made that will match the page. paper sizes shown on feed direction of feed direction of an...
- Page 42 Then use the function button below the paper sizes to select the required paper size and orientation. Enter the desired number of sets using the copy quantity buttons. If A3 paper size is selected, adjust the A3 output support. Press the start button ( ). Océ 3165 User Manual...
-
Page 43: Copying Special Originals
Copying special originals Books and magazines, as well as originals smaller than 148.5x210 mm (A5) cannot be copied using the automatic feeder. Damaged originals, and originals with excessive curl, and some paste-up originals may also cause problems in the automatic feeder. Use the glass platen for these types of originals (up to A3 size). - Page 44 Press the function button ‘Source’ to activate the option ‘Tray’ or ‘Special feeder’ and select the corresponding paper size and orientation. If necessary, choose the reduction or enlargement percentage needed for an enlarged or reduced copy by pressing the reduction or enlargement function within the ‘Basic’ section. Océ 3165 User Manual...
- Page 45 Use ‘ ’ or ‘ ’, to select one of the pre-set standard values. Use ‘ ’ or ‘ ’, to select a percentage between 25 and 400%. The enlargement or reduction percentage is measured from the upper Note: left corner. Define other settings as desired.
- Page 46 Océ 3165 User Manual...
-
Page 47: Extended Copy Jobs
Océ 3165 User Manual Chapter 3 Extended copy jobs Certain more complex jobs may not be carried out very frequently. Options for these jobs are grouped in the sections ‘Paper’ and ‘Extra’. This chapter describes settings available in these sections. -
Page 48: Introduction
Settings remain active until either the automatic reset time has expired or settings are reset by pressing the correction button twice. Océ 3165 User Manual... -
Page 49: Making Finished Reports
Making finished reports Document sets such as large reports and manuals usually consist of several parts. For example a report can consist of a title page, table of contents, several chapters, appendices and so on. You can distinguish between these separate parts of a report by using: covers separation sheets... -
Page 50: Using Covers
Reports look more attractive and professional if they have a cover. The Océ 3165 can provide either a front or a back cover, or both a front and a back cover during the copying process. If none of these options is selected on the operating panel, copies will be delivered without covers. - Page 51 first. Both paper and covers must be of the same size. If this is not the case, Note: the Océ 3165 will remind you. If required, enter other settings. Select the required number of sets, using the copy quantity buttons.
-
Page 52: Using Separation Sheets
Indicate whether the originals are 1 or 2-sided and choose 1 or 2-sided copies using the ‘Original’ and ‘Copy’ function buttons. Open the section ‘Paper’ by pressing the section button. Select ‘Page settings’. In the graphic display, the pages of the report are shown. Océ 3165 User Manual... -
Page 53: Copying Appendices
Using the ‘Page settings’ is only possible when you are copying a set Note: with one paper size. Fill the required trays with the required copy material (e.g. coloured material) and/or different paper weight, but the material must be of one size. For information on how to load paper into the trays, see ‘Loading paper’... - Page 54 If you change your mind about the selection, press the ‘Appendix’ Note: button again to cancel the selection. [27] Appendix function Make other selections as required. Place the originals in the automatic document feeder. Press the start button Océ 3165 User Manual...
-
Page 55: Specifying Blank Pages
Specifying blank pages Normally, when making double-sided copies of a set of originals consisting of both double-sided and single-sided pages, the blank sides of the original are copied too. You can specify the blank page number(s) in the set, so these blank pages will not be charged for. -
Page 56: Defining The Location And Size Of The Binding Edge
Document in booklet form portrait oriented original binding edge: short landscape oriented original binding edge: long (Even pages 180˚ (Even pages 180˚ rotated) rotated) Document in calendar form Document in calendar form [29] Various binding positions Océ 3165 User Manual... - Page 57 The binding edge is either long or short. The position of the binding edge defines whether the information on the rear side of the copy is rotated 180 degrees or not (see figure 29). When selecting a long binding edge, copy material this results in a document in booklet form, copy material this results in a document in calendar form When selecting a short binding edge:...
-
Page 58: Copying Calendar Originals
With the Océ 3165 Network Copier, you can make a copy of such an original with a horizontal page turn in one step while using other features of the machine at the same time. -
Page 59: Altering The Margin (Image Shift)
When making 1 or 2 sided copies of 1 or 2 sided originals, margins and images can shift in relation to each other. The Océ 3165 Network Copier offers you the possibility to alter the margins on front and back pages concurrently and/or independently. - Page 60 Place the originals in the automatic feeder. Make sure you place the originals in the right position ( Indicate whether the originals are 1 or 2 sided and choose 1 or 2 sided copies using the ‘Original’ and ‘Copy’ function buttons. Océ 3165 User Manual...
- Page 61 Open the section ‘Extra’. Select the ‘Copy binding’ settings. Press the function buttons ‘Margin shift front’ and/or ‘Margin shift back’ to specify a margin shift on the front pages and/or back pages of your copy. Use the arrow buttons to indicate to what extent the image is shifted to the left or to the right (max.
-
Page 62: Copying Onto Special Material (Overhead Sheets Etc.)
4. In the case of punched paper, the holes should be to the right in tray 1, 2 and 3 and the holes should be to the left in tray 4 (see figure 35 on page 63). Océ 3165 User Manual... - Page 63 When printing onto heavy materials, you will find that certain heavy materials do not move into the finisher smoothly. In that case, you need to change the output location into upper tray. All copied output is then delivered into the upper output tray but automatic stapling is no longer possible.
-
Page 64: Copying Onto Special Material Via The Special Feeder
Open the section ‘Paper’and select the ‘Paper input’ settings. Select ‘Special feeder’ with the function button. Indicate the required paper size using the corresponding function button. Océ 3165 User Manual... - Page 65 Open the special feeder above the paper compartment door using the notched grip (see figure 37). notched grip [37] Opening the special feeder Insert a sheet of copy material with the side to be copied face-down. [38] Inserting special copy material in the special feeder The orientation of the copy material must match the orientation of the Note: original to be copied.
-
Page 66: Copying Two Originals Onto One Page Side
Copying two originals onto one page side As the Océ 3165 works with scanned, digital images, it is possible to manipulate these images. You can print two original pages (like two 1-sided originals or the front and rear side of a 2-sided original) on one side of the page. - Page 67 Open the ‘Extra’ section. Select the ‘Layout’ settings. Press the function button ‘Layout’ and select ‘2-images’. The Océ 3165 will automatically select A4 and the required zoom factor. If required, open the section ‘Paper’, select the ‘Paper input’ settings and select another paper size.
- Page 68 Press the function button ‘Layout’ and select ‘2-images’. Press the ‘Switch images’ function button and select ‘Yes’. The Océ 3165 will automatically select A4 and the required zoom factor. It is possible to staple your output as your output will be on A4 Note: If required, open the section ‘Paper’, select the ‘Paper input’...
-
Page 69: Improving The Copy Quality
Improving the copy quality The Océ 3165 can detect photo’s, rasters and fine lines on the original. The scanned original is processed automatically with a very high quality. Using the function ‘Optimize’ (in the section ‘Extra’) is only necessary for special originals. - Page 70 Océ 3165 User Manual...
-
Page 71: Installing The Océ 3165 As A Printer
Installing the Océ 3165 as a printer This chapter describes how to install the Océ 3165 printer driver and the Océ 3165 PPD file on the different operating systems. Furthermore, this chapter provides details on setting up the printer driver and its options. -
Page 72: Introduction
Introduction To print to the Océ 3165 Network Copier, you need the Océ 3165 printer driver or the Océ 3165 PPD (PostScript Printer Description). The Océ 3165 printer driver makes all the special features of the Océ 3165 Network Copier available, whereas when using the PPD, the printer features are limited to the possibilities of the driver in which the PPD is used. - Page 73 HP-PCL and PostScript. As the Océ 3165 is a PCL printer, it needs data written in PCL to be able to print it. So, you need the Océ 3165 PCL printer driver to translate the pages of your document into PCL and to send the PCL data thus created to the printer.
- Page 74 Océ 3165 on the network (see ‘Connecting a local port to the Océ 3165 print queue’ on page 83). When you are obliged to create files which will be submitted to the Océ 3165 by a central operator, the driver can also be connected to a central directory on the network in which to place the print files.
-
Page 75: Installing The Océ 3165 Printer Driver
Installing the Océ 3165 printer driver (PCL or PS) If your Océ 3165 is a PCL printer, you must install the Océ 3165 PCL printer driver. If your Océ 3165 is also a PostScript printer, you can choose between the Océ... - Page 76 Océ 3165 print queue’ on page 83). If you have an Océ 3165 PRO it is possible that you are not allowed to print files to the Océ 3165 directly but must create a print file instead and store it in a central directory on the network.
- Page 77 In the lower entry box, select the network port which will be used for printing to the Océ 3165 Network Copier. If there is no network port to the Océ 3165 in the pull down menu of this entry box, click ‘Add Network Port’ and browse to the location of the printer on the network (ask your system administrator for details).
-
Page 78: Installing The Océ 3165 Ppd (Ps Only)
PostScript printer driver to a Océ 3165 printer driver in which the main features of the Océ 3165 are available. Where to find the different features depends on the lay-out of the standard printer driver of your operating system. - Page 79 (see ‘Connecting a local port to the Océ 3165 print queue’ on page 83). If you have an Océ 3165 PRO it is possible that you are not allowed to print files to the Océ 3165 directly but must create a print file instead and store it in a central directory on the network.
- Page 80 The Océ 3165 printer driver is now ready for use. Move the icon of the floppy disk to the trash can to remove it from the drive. Installing the Océ 3165 PPD in Windows NT3.5x Login to the network and start windows NT 3.5x.
- Page 81 In the next window, enter the network path (server name and queue name) which is assigned to the Océ 3165 or select ‘Browse’ to browse to the location of the printer on the network (ask your system administrator for details).
- Page 82 “A:\NT40”. Click the ‘OK’ button. The ‘Add Printer Wizard’ window appears again with “Océ 3165 Network Copier” in the printers box. Click ‘OK’ once more. The ‘Connect to Printer - Copying Files’ window appears on which you can follow the progress of copying files.
-
Page 83: Connecting A Local Port To The Océ 3165 Print Queue
Océ 3165 on this server. For example, \\fs1\3165q, in which fs1 is the name of the server and 3165q is the name of the print queue: in a Novell network environment, the server name is the name of the Novell server to which the Océ... - Page 84 Click ‘OK’ to return to the Details tab. When finished, click on ‘OK’ to finalize the setup. Connecting a port to the Océ 3165 printer queue in Windows NT 3.5x Select and start the Control Panel program by double-clicking the Control Panel icon (usually available in the Main group).
- Page 85 Click ‘OK’ to return to the Network - Printer Connections window, and click the ‘Close’ button in this window. Click ‘OK’ in the Connect window to return to the Printers window and click ‘Close’ to finalize the MS-Windows Printer Setup. Quit and restart MS-Windows. Installing the Océ 3165 as a printer...
-
Page 86: Testing The Printer Driver Installation
Select and hold the option Settings. Select the option Printers (and release the button). The Printers window appears. Click the icon of the Océ 3165 printer driver. From the File menu, select the option ‘Properties’. Click the button ‘Print Test Page’ on the General tab. -
Page 87: Setting Up The Océ 3165 Printer Driver
Setting up the Océ 3165 printer driver When printing a document to the Océ 3165 Network Copier, the Océ 3165 print window will pop up after selecting the print command in an application. In this window you can define the way the document will be printed, like number of copies, stapling, 1 or 2 sided printing and so on. -
Page 88: Opening The Setup Window
Océ (see ‘Default settings of Océ 3165 printer drivers’ on page 176 for an overview). Resetting the Océ defaults is only possible in the setup window and can be done for each separate group of settings (presented on one tab). -
Page 89: Customizing General Settings
Main tab. All settings which are available on this tab are also selectable in the Océ 3165 print window and can be overruled for specific jobs. [44] The ‘Main’ tab of the setup window of the Océ 3165 Network Copier printer driver The ‘General’, ‘Details’ and ‘Capture Settings’ tabs -if present- are only Note: available in the Windows 95 and NT4 Printer Properties window. -
Page 90: Customizing Layout Settings
6, ‘Extended print jobs’ on page 117 for more information on these settings. Customizing layout settings Open the setup window of the Océ 3165 printer driver as described in ‘Opening the setup window’ on page 88. Click the ‘Layout’ tab (see figure 45 on page 91). -
Page 91: Customizing Quality Settings
[45] The ‘Layout’ tab of the setup window of the Océ 3165 Network Copier printer driver The options ‘Scale’ and ‘Image settings’ are only available in the Note: Océ 3165 PostScript printer driver. Customizing quality settings The settings which are related to print quality of graphics and solid grey areas are gathered on the Layout tab (see figure 46 on page 92). - Page 92 [46] The ‘Quality’ tab of the setup window of the printer driver for PCL5 Customizing quality settings Open the setup window of the Océ 3165 printer driver as described in ‘Opening the setup window’ on page 88. Click the ‘Quality’ tab (see figure 46).
-
Page 93: Customizing Output Settings
When you are not allowed to print directly to the Océ 3165, you must hand over a print file to the Océ 3165 print operator who takes care of printing your file (see chapter 7, ‘Submitting jobs in a central printing environment’... -
Page 94: Customizing Font Settings
Customizing font settings in the PCL printer driver Open the setup window of the Océ 3165 printer driver as described in ‘Opening the setup window’ on page 88. Click the ‘Output’ tab (see figure 48 on page 95). - Page 95 Apply the changed setup and click ‘OK’ to close the window. [48] The ‘Fonts’ setting of the setup window of the Océ 3165 Network CopierPCL printer driver Customizing font setting in the PS printer driver Open the setup window of the Océ 3165 printer driver as described in ‘Opening the setup window’...
- Page 96 [Type 1]’. Fonts 9 pts are sent to the printer as outline fonts, fonts < 9 pts are sent as a bitmap. [49] The ‘Fonts’ tab of the setup window of the Océ 3165 Network CopierPS printer driver Select the required ‘Use Printer Fonts for all TrueType Fonts’ setting:...
- Page 97 When installing additional system fonts on the PC, these will Note: automatically be added to the list and replaced in this list by a soft font. Apply the changed setup and click ‘OK’ to close the window. Installing the Océ 3165 as a printer...
-
Page 98: Using Online Help
Using online help In the Océ 3165 printer drivers for PCL5 and PS, functionality of the printer driver is also explained in the online help information. You can access the online help information by clicking the ‘Help’ button, which is available on all tabs in your open printer driver window. The Océ... -
Page 99: Basic Print Jobs
User Manual Chapter 5 Basic print jobs This chapter describes the functions needed for a typical range of printing jobs using the Océ 3165 Network Copier. It also explains the use of the mailbox, a unique feature of the Océ 3165. -
Page 100: Introduction
Introduction Having installed the Océ 3165 printer driver or the Océ 3165 PPD file, you can print directly to the Océ 3165 Network Copier (see chapter 4, ‘Installing the Océ 3165 as a printer’ on page 71). The Océ 3165 Network Copier offers a very high print quality as it prints with a resolution of 600x600 dpi. - Page 101 Direct printing possible. Charges are booked on an account in your user name. PIN code needed to access the Océ 3165 and print documents from your mailbox. When switching to print mode, your mailbox is automatically selected. You can print and delete documents from your mailbox.
-
Page 102: Printing A Document
(see ‘Setting up the Océ 3165 printer driver’ on page 87). A direct print job will be started on the Océ 3165 as soon as it arrives at the top of the queue of jobs waiting to be printed (unless the key operator has disabled direct printing). - Page 103 Options in your print window may differ, depending on the Note: application you are using. If not yet selected, select the Océ 3165 in the ‘Printer’ box. Leave the number of copies set to ‘1’ in this window. Note: Click ‘OK’.
- Page 104 Click ‘OK’. Printing a document using the Océ 3165 PPD (Macintosh) Make sure, you have selected the Océ 3165 Network Copier as your current printer by selecting Chooser from the Apple menu. From the File menu of your application, select the option Page Setup and ensure that the right paper size is selected for the Paper option and that the Océ...
-
Page 105: Creating A Print File
Having installed the driver, select FILE as the port to be connected to. Each time you print a file with the Océ 3165 printer driver, a print file is created. At the time of printing you can specify a filename and path (= directory). This means you will not be able to print files to the Océ... - Page 106 Note: must be moved to the destination directory afterwards. [51] Creating a print file from a document Click ‘OK’. The Océ 3165 printer driver window appears. Enter the required settings. Click ‘OK’. A print version of your document is placed in the indicated directory.
-
Page 107: Storing A Document In Your Mailbox
first. It also means that you can clearly distinguish your print jobs when they come out of the Océ 3165 and that less paper is used, because no banner pages need to be printed. -
Page 108: Printing Jobs From Your Mailbox
Settings can be changed as required. This allows you to make a proof print before production is started. Printing jobs stored in your mailbox Walk up to the Océ 3165. If required, enter your user PIN code or insert money or your copy credit card. Open the section ‘Mailbox’. - Page 109 You are now in the print mode and the operating panel shows a list of mailboxes (see figure 54). [54] Mailbox section If you entered a PIN code to access the Océ 3165, your own mailbox Note: is already opened and all jobs which have not yet been printed (new jobs) are selected.
-
Page 110: Printing Confidential Documents
Leave the number of copies set to ‘1’ in this window. Note: Click ‘Print’ (in some applications you must select ‘OK’). The Océ 3165 printer driver window appears (see figure 56). [56] Printing confidential documents Enter the required number of copies. - Page 111 Click ‘OK’. The job is transferred to the mailbox on the Océ 3165 Network Copier. To have your document printed, walk up to the Océ 3165. If required, enter your user PIN code or insert money or your copy credit card.
-
Page 112: Skipping The Queue Of Direct Print Jobs
Print jobs without specific settings which require user intervention are added to the print queue of the Océ 3165 and printed when they arrive at the top of the queue. If you arrive at the Océ 3165 to collect such direct print job and you find it has not yet been printed, you can skip the queue and print your job as... -
Page 113: Removing Jobs From Your Mailbox
Ask your key operator for more details. Removing jobs from your mailbox Walk up to the Océ 3165. If required, enter your user PIN code or insert money or your copy credit card. Open the section ‘Mailbox’ by pressing the section button. -
Page 114: Printing Multiple Files With Same Settings
Having done so, you can also hide the Océ 3165 print command window, so that each time you print, you only have to press OK once in the print command window of the application to send the job to the Network Copier. -
Page 115: Hiding The Print Command Window
‘OK’, the Océ 3165 printer driver window appears. In case you need to print a large number of files with identical settings, you may not want the Océ 3165 printer window to pop up for each document. You can then define to hide this window. Settings, however, are still valid. - Page 116 Océ 3165 User Manual...
-
Page 117: Extended Print Jobs
Océ 3165 User Manual Chapter 6 Extended print jobs Certain more complex print jobs may not be carried out very frequently. This chapter describes all available print functions which can be carried out with the Océ 3165 Network Copier. -
Page 118: Printing Finished Reports
Using covers The Océ 3165 can provide either a front or a back cover, or both a front and a back cover during the printing process. If none of these options is selected in the print command window, prints will be delivered without covers. -
Page 119: Defining The Location And Size Of The Binding Edge
Note: Define other settings as required. Click ‘OK’. The document is now transferred to the Océ 3165 Network Copier. [60] Printing a document with a front and a back cover Defining the location and size of the binding edge Reports are often bound or perforated. In some cases, the margin is not wide enough so text gets lost when binding or perforating. - Page 120 You are now in the print window of the application. Do not enter the required number of copies in this window. Note: Click ‘OK’ (or ‘Print’). The Océ 3165 printer window appears. Enter the required number of copies. Océ 3165 User Manual...
- Page 121 The ‘Back (mm)’ setting is only available if your document is printed Note: 2-sided. Define other settings as required. When combining this setting with stapling and/or covers you can Note: print a finished report. Click ‘OK’. The document is now transferred to the Océ 3165 Network Copier. Extended print jobs...
-
Page 122: Printing Reduced/Enlarged Documents (Ps)
fit on the paper. In the setup window of the Océ 3165 PostScript printer driver, you can set a scale factor for your print document in a range of 25 % to 400 % (in steps of 1 %) until it fits the required paper size. - Page 123 Select ‘OK’ to close the setup window of the Océ 3165 printer driver. Select ‘OK’ to close the Print Setup window. Open the File menu from your application and select ‘Print’. You are now in the print window of the application.
-
Page 124: Printing Onto Special Material
You are now in the print window of the application. Do not enter the required number of copies in this window. Note: Click ‘Print’ (in some applications you must select ‘OK’). The Océ 3165 printer driver window appears. Océ 3165 User Manual... - Page 125 If you want to load the material yourself, check ‘To mailbox’. You can then walk up to the Océ 3165, select your job in the mailbox and define the required settings on the operating panel. For loading the material yourself, see ‘Loading paper’...
- Page 126 Click ‘OK’. The document is now transferred to your mailbox. Walk up to the Océ 3165. If required, enter a PIN code or insert a coin or credit card. Open the section ‘Mailbox’. If you already entered a PIN code, your mailbox is automatically opened.
- Page 127 Use the arrow buttons to select the job you want to print on special material (see figure 66). [66] Selecting a job in the mailbox section If required, you can still make additional settings on the operating panel (see ‘Printing jobs stored in your mailbox’ on page 108). Open the special feeder above the paper compartment door using the notched grip (see figure 67).
- Page 128 When ready, press the start button to start printing. The print will be delivered into the upper output tray. Close the special feeder when printing is completed. Do not forget to remove the job from the mailbox. Note: Océ 3165 User Manual...
-
Page 129: Mirrored Image For Overheads (Ps)
Mirrored image for overheads (PS) With the Océ 3165 PostScript printer driver, you can automatically mirror images on the copy material. For example, when you print overhead sheets in this way, you can still write on them on the front side without smearing the toner. -
Page 130: Printing Negative Images (Ps)
The Océ 3165 printer window appears. Enter the required number of copies. Check ‘Negative’ in the Image box. Define other settings as required. Click ‘OK’. The document is now transferred to the Océ 3165 Network Copier. [70] Printing negative images Océ 3165 User Manual... -
Page 131: Creating An Eps File (Ps)
This setting is only available in the setup window of the PostScript printer driver. Creating a Encapsulated PostScript file from a document Open the setup window of the Océ 3165 printer driver from your application as described in ‘Storing a document in your mailbox’ on page 107. Click on the ‘Output’ tab. - Page 132 Press ‘OK’. The file name and path is entered in the file name box. [73] Creating an EPS file Select ‘OK’ to close the setup window of the Océ 3165 printer driver. Select ‘Close’ to close the Print Setup window.
-
Page 133: Improving Print Quality Of Solid Grey Areas
File menu of your application and click ‘OK’ (or ‘Print’). The Océ 3165 printer window appears. If you are using the PCL driver, open the setup window of the Océ 3165 printer driver from your application as described in ‘Temporarily customizing your printer driver’... - Page 134 The picture represents the influence of changing the halftone. When stripes appear in the grey areas of your document, the filter Note: may be too fine. Define other settings as required. Click ‘OK’ to close the window. Océ 3165 User Manual...
-
Page 135: Submitting Jobs In A Central
Submitting jobs in a central printing environment This chapter contains information for central operators of an in-house repro department or copy shop who use the Job SubmitIT application to print files created by others. Job SubmitIT is standard software with the Océ 3165 PRO. -
Page 136: Introduction
In an inhouse repro department, files can be stored in a central directory on the network which is accessible to both users and the central operator (see figure 75). Users can create such files by printing to file using the Océ 3165 printer driver. - Page 137 The Job SubmitIT printer driver allows to change settings of a print file which is already converted into the printer language whereas the print file itself is left unchanged. If you also print application files you need the Océ 3165 printer driver as well. Submitting jobs in a central printing environment...
-
Page 138: Getting Started
Océ 3165 Job SubmitIT driver’ on page 141). After installation of the Océ 3165 Job SubmitIT application, you still need to install the Océ 3165 Job SubmitIT printer driver for printing to the Océ 3165. Installing the Océ 3165 Job SubmitIT application software The Job SubmitIT application software has to be installed on the PC of the central operator. - Page 139 The main Job SubmitIT Setup window appears (see figure 77). In this window you can define in which directory the Océ 3165 Job SubmitIT software is to be installed and what directory the Océ 3165 Job SubmitIT browser will open when starting the application.
- Page 140 If required, click the ‘Change Directory’ button to change in the “Destination directory” field the directory in which the Océ 3165 Job SubmitIT will be installed. If not changed the application will be installed in the preset directory. If required, you can change the extension of the print files that will be recognized by Océ...
-
Page 141: Installing The Océ 3165 Job Submitit Driver
After installation this driver is known as the “Océ Job SubmitIT” driver. You must connect this driver to the same port as the “Océ 3165 Network Copier” printer driver. In this way, the Job SubmitIT application uses its own “Océ Job SubmitIT”... - Page 142 Click the ‘Close’ button. Close the Control Panel window. The Océ 3165 Job SubmitIT printer driver is now ready for use. Installing the Océ 3165 Job SubmitIT printer driver on Windows 95 Login to the network and start Windows 95.
- Page 143 The Océ 3165 Job SubmitIT printer driver is being installed. Select at ‘Printer name’ the text “Océ Job SubmitIT”. Close all dialogues using the ‘OK’ button. The Océ 3165 Job SubmitIT printer driver is now ready for use. You will find the files for this driver on the floppy disk, but not in a Note: directory.
- Page 144 Functionality of the printer driver is also explained in the on-line help. When you click the ‘Help’ button the Océ 3165 Help Contents window appears. The on-line help is described more detailed in chapter 4. Océ 3165 User Manual...
-
Page 145: Starting And Closing The Application
Double click the Océ 3165 Job SubmitIT icon to open the application. Click the Output tab. Click the Printer box and select the Océ 3165 Network Copier from the pull down menu. After printing, the application can be closed. The Océ 3165 Job SubmitIT shortcut stays on the screen. -
Page 146: Submitting A Job For Printing
If necessary, you can overrule the settings defined by the user. You may decide to have the print jobs printed at a later time as the Océ 3165 is occupied at the moment you like to print. Using the ‘Print only to file’ option enables you to change and/or overrule settings for the waiting print jobs at this moment and saves the file and its new settings for printing at a more... - Page 147 To make sure the Océ 3165 Job SubmitIT is selected on your current driver, click the ‘Output’ tab and select in the Printer pull down menu ‘Océ 3165 Network Copier *JSIT*’. Click the ‘File’ button. The Océ 3165 Job SubmitIT browser window appears (see figure 81).
- Page 148 [82] Settings of the document creator appear If required adjust the settings in the ‘Main’, ‘Layout’ or ‘Quality’ tab (for information on print settings, refer to ‘Setting up the Océ 3165 printer driver’ on page 87). Océ 3165 User Manual...
- Page 149 If required, the information which will be printed on the banner page can be visualized when clicking the About tab. Click the ‘Print’ button to submit the file to the Océ 3165 Network Copier. The Océ 3165 Job SubmitIT application does not remove the actual file Note: from the directory.
- Page 150 Saving the print file for printing at a later time Open the Océ 3165 Job SubmitIT application. Import the file to be printed. Define the required settings. Open the ‘Output’ tab and check the ‘Print only to file’ option. An entry box with the file name of the selected file appears.
-
Page 151: Submitting A List Of Jobs For Printing
Submitting a list for printing Open the application (see page 145). Click the ‘File’ button. The Océ 3165 Job SubmitIT browser window appears. Browse to the directory in which the print files are stored. Select the file type from the File types box. - Page 152 Click the ‘Up’or ‘Down’ button to sort the files into the correct sequence. To remove files from the Selected files list, select the file you want to remove, then click the ‘Remove’ button. When ready, click ‘OK’. Océ 3165 User Manual...
- Page 153 The files are now available in the Selected files pull down menu (see figure 86). [86] Multiple files available in the Input file pull down menu Select the first document to be printed in the Selected files box. The settings done by the document creator appear. If required adjust the settings in the ‘Main’, ‘Lay-out’...
- Page 154 Saving the print files for printing at a later time Open the Océ 3165 Job SubmitIT application. Import the files to be printed. Define the required settings. Open the ‘Output’ tab and check the ‘Print only to file’ option. An entry box with the file name of the first selected file appears.
-
Page 155: Maintenance
User Manual Chapter 8 Maintenance A message in the display indicates when the Océ 3165 requires maintenance, such as refilling paper, staples, and so on. You will normally be requested to call the key operator. If the key operator allows you to load paper, the display will request you to load paper instead of calling the key operator. -
Page 156: Loading Paper
Loading paper The Océ 3165 has four paper trays. Paper trays 1, 2 and 3 can each hold 500 sheets of 80 g/m paper in various sizes, between A5 and A3. Between jobs, tray 1 can be adjusted so that it can hold a different paper size (between A5 and A3) between jobs. - Page 157 When loading overhead transparencies, pre-printed Loading special material paper or punched paper (or other copy material with a specific page orientation) take into consideration that the image is rotated 180˚ during the copying process. This means that the special material must be loaded into the paper trays as shown in figure 35 on page 63.
- Page 158 Close the paper compartment door. The tray will move up automatically. Loading paper (trays 1,2,3) Open the paper compartment door (see figure 89). Pull out the paper tray as in the figure below: [91] Sliding the paper tray out of the paper compartment Océ 3165 User Manual...
- Page 159 Take the paper out of the pack. In case of wrapped paper, remove the top and bottom sheets. Hold each pack of paper at the two short sides and bend it slightly. Then place it in the tray. If you are filling paper tray 1, slide the two guides against the sides of the paper, as in figure 92.
-
Page 160: Refilling Staples
Refilling staples The staple unit of the Océ 3165 is located on the front of the finisher. When the staples run out, a message will appear in the display. There are two different types of staple units: a 35 sheet stapler and a 50 sheets stapler (depending on your machine version). - Page 161 Open the top cover of the finisher. [94] Opening the top cover of the finisher Open the stapler by lifting the lever. [95] Opening the 35 sheets stapler If the key-operator is the only person authorized to refill staples, you will Note: not be able to open the stapler because it will have been latched.
- Page 162 By doing so, the strip of staples will move a bit towards the mouth of the stapler. Repeat the manual stapling 4 to 6 times, until a staple is inserted through the set of paper. The stapler is now ready for operation. Océ 3165 User Manual...
- Page 163 Refill staples (50 sheet stapler version) Open the paper compartment door. Slide the frame to the right with the blue handle marked ‘A’. [98] Sliding the frame of the paper compartment to the right Open the top cover of the finisher. [99] Opening the finisher top cover Maintenance...
- Page 164 first strip of staples does not slide out of the staple cartridge. Close the stapler and pull the lever to the left to lock it. Close the top cover. Slide the frame to the left until it locks into place. Close the paper compartment door. Océ 3165 User Manual...
- Page 165 Slide several sheets of paper into the stapling slot, as shown below. [102] Manual stapling By doing so, the strip of staples will move a bit towards the mouth of the stapler. Repeat the manual stapling 4 to 6 times, until a staple is inserted through the set of paper.
-
Page 166: Cleaning The Glass Platen
Cleaning the glass platen If the glass platen is soiled it must be cleaned in order to maintain good copy quality. Cleaning the glass platen Open the cover and wipe the glass platen with a soft, moist cloth. Océ 3165 User Manual... -
Page 167: Problem Solving
Océ 3165 User Manual Chapter 9 Problem solving When a problem occurs, the display provides all the information required to resolve it. Therefore, this chapter simply provides some general information about possible problems which may arise. -
Page 168: Introduction
Therefore, this chapter gives you some general information about how original and copy paper jams are reported by the Océ 3165 and how to identify doors, covers and handles referred to in the instructions displayed. Océ 3165 User Manual... -
Page 169: Clearing Paper Jams
Clearing paper jams If copy material or originals stop unexpectedly in the copier, a cover or door will be displayed with an arrow indicating in which part of the copier the sheets have stopped (see figure 103) for an example. (as soon as a step of the instruction above is completed, a next illustration appears. - Page 170 Once the error has been cleared, the display will give you instructions on how to continue the job correctly. Do not forget to remove any bad copies from the lower output tray. Océ 3165 User Manual...
-
Page 171: Overview And Tables
Océ 3165 User Manual Appendix A Overview and tables... -
Page 172: Product Specifications
(Image Logic). Zoom 25 - 400%, manual enlargement or reduction More information regarding the product specifications can be found in Note: the Océ 3165 safety information sheet in appendix B. Océ 3165 User Manual... -
Page 173: Originals That Can Be Used
Originals that can be used Originals Specifications Original sizes Glass platen max. 297x431,8 mm Automatic document min. 127x203 mm feeder max. 297x432 mm Original weight Glass platen any weight (max.10 kg) Automatic document 50 sheets of 80 g/m feeder Original type Glass platen any type original Automatic document... -
Page 174: Copy Materials That Can Be Used
All kinds of plain < 65 and > 120 g/m unperforated paper 60-120 g/m 75-120 g/m (including - Non-Océ capacity perforated paper) specialities 1750 or 2000 -Overhead film sheets of (see considerations) 80 g/m (depending on machine version) Océ 3165 User Manual... -
Page 175: Considerations
Copy material Excellent Good recommended Special size Océ labeled paper - Non-Océ feeder A4 landscape and 50-200 g/m specialities portrait, A3, folio, quarto, - Overhead film commercial, (see considerations foolscap folio, below) 8.5 x 10" 8.5 x 10.5" - All kinds plain 8.5 x 11"... -
Page 176: Default Settings Of Océ 3165 Printer Drivers
When setting up the printer driver, settings can be reset to their default value, being the factory settings of the driver, defined by Océ. There are also some differences between the Océ 3165 PostScript and PCL5 printer driver. Some settings which are described in this manual, may not be available in the PCL5 printer driver and vice versa. - Page 177 Factory settings of Océ 3165 PostScript PCL5 printer drivers printer driver printer driver Fonts tab not applicable - Send to printer as TrueType (Type 42) - Font substitution Use printer fonts for all TrueType fonts Overview and tables...
-
Page 178: Functional Overview Copy Mode
Front cover Back cover Paper input Source Extra Special settings Binding of original Output tray System Management Layout Layout Switch images Copy binding Binding Margin shift front Margin shift back Image quality Optimize Lighter or darker Océ 3165 User Manual... -
Page 179: Functional Overview Print Mode
Functional overview print mode Section Subsection Settings Basic Print Staple Paper Covers Front cover Back cover Paper input Source Size Extra Special settings Banner page Output tray System management Image quality Halftone Copy binding Binding Margin shift front Margin shift back Mailbox User Show documents... -
Page 180: Overview Of Possible Access Limitations On Network Copiers
Error page will be booked on the KO account in the data base on the Océ 3165. “You are allowed to print at all” means that there is an account with Note: your user name in the accounting data base (or can be added automatically) and this account is not closed. - Page 181 CCD and on the CCD entry in the accounting data base on the Océ 3165. If you used a PIN to gain access to the Océ 3165 then all printed jobs will be booked on the account of the mailbox owner in the data base on the Océ...
- Page 182 Buy more CCD Ask KO for PIN credits Mailbox is You entered a Ask KO for PIN protected with correct mailbox PIN? PIN? You can delete any job in the Access control for mailbox mailbox Océ 3165 User Manual...
-
Page 183: Safety Information
Océ 3165 User Manual Appendix B Safety information... -
Page 184: Instructions For Safe Use
Do not move the machine yourself, but contact your Customer Service. If for some reason you have to move the machine yourself, please make sure that the mains power point has the right fuse capacity. See the Océ 3165 safety data sheet in this appendix for information about maximum current. - Page 185 Do not place the machine in rooms which are subject to excessive vibration. Do not place the copier in rooms which are too small or insufficiently ventilated. See the Océ 3165 safety data sheet in this appendix for information about space and ventilation requirements.
-
Page 186: Safety Data Sheets
If and in so far as limitation of liability is permitted under the applicable laws, we do not accept liability for any inaccuracy that may occur in this information. Océ 3165 User Manual... -
Page 187: Safety Data Sheet Océ 3165 Digital Copier
Safety data sheet Océ 3165 Digital Copier Océ (UK) Ltd Langston Road telephone 0181.508.5544 Loughton, Essex IG10 3SL fax 0181.508.6689 United Kingdom Model Océ 3165 Description Electrostatic copying machine, cons powder toner , automatic duplexing Max. process speed 62 A4 copies/min or 30 A3 copies/m... -
Page 188: Safety Data Sheet Océ 3165 Network Copier
Safety data sheet Océ 3165 Network Copier Océ (UK) Ltd Langston Road telephone 0181.508.5544 Loughton, Essex IG10 3SL fax 0181.508.6689 United Kingdom Model Océ 3165 Description Electrostatic copying machine, cons powder toner , automatic duplexing Max. process speed 62 A4 copies/min or 30 A3 copies/m... -
Page 189: Safety Data Sheet Océ Master
July 1997 Page 1 of 2 Océ Master, Part No. 2985808 1. Product and company identification Product name Océ Master, Part No. 2985808 (OPC for Océ 3165) Packing Cardboard box Company Océ (UK) Ltd. Address Langston Road, Loughton, Essex IG10 3SL... -
Page 190: Material Safety Data Sheet
16. Other information Use: photoconductor for copiers. Revision of E-193-a-UK dated May 1996. Modification:none ©1997 Océ-Technologies B.V. The content of this safety data sheet is subject to the disclaimer of liability on page 186 of this manual. Océ 3165 User Manual... -
Page 191: Safety Data Sheet Océ F11 Toner
Safety data sheet Océ F11 toner MATERIAL SAFETY DATA SHEET (93/112/EEC and ISO 11014-1) Océ F11 Toner 1. Product and company identification Product name Océ F11 Toner Packing Polyethylene bottle, contents 0,80 kg Company Océ (UK) Ltd. Address Langston Road, Loughton, Essex IG10 Telephone 0181-508 5544 (contact product safety c Telefax... - Page 192 * At high concentration in air the powder may c lth ff t ©1997 Océ-Technologies B.V. The content of this safety data sheet is subject to the disclaimer of liability on page 186 of this manual. Océ 3165 User Manual...
-
Page 193: Epa Energy Star
You are encouraged to duplex (make double-sided copies) as often as feasible or to choose double-sided copying as the default setting. 1. For power consumption data: see ‘Safety data sheet Océ 3165 Digital Copier’ on page 187 or ‘Safety data sheet Océ 3165 Network Copier’ on page 188. - Page 194 This copier is designed to use recycled paper. Product literature on recommended types of recycled copier paper can be obtained from your local Océ company or Océ Headquarters (Océ-Technologies B.V.) in Venlo, the Netherlands. ® Energy Star is a U.S. registered mark. Océ 3165 User Manual...
-
Page 195: Removing The Nickel Cadmium Battery
Removing the Nickel Cadmium battery This machine is fitted with one nickel-cadmium battery containing substances which may pollute the environment. After this battery has been dismounted from the machine, it must be disposed of in accordance with the local laws and regulations. - Page 196 Loosen the printed board screws. Remove the blue plastic (battery) holder from the printed board. If you cannot dispose of the printed board as toxic waste, you may return it to: Océ-Technologies B.V., P.O.B. 101, 5900 MA Venlo, the Netherlands. Océ 3165 User Manual...
- Page 197 Océ 3165 User Manual Appendix C Miscellaneous...
-
Page 198: Notation Conventions
There are a number of notation conventions used in this manual. This consistent style enables you to quickly become conversant with the use of this manual and consequently the Océ 3165. Each section or subsection contains a description of the feature or Description operation identified in the title. -
Page 199: Reader's Comment Sheet
Reader’s comment sheet Have you found this manual to be accurate? Could you operate the product after reading this manual? Does this manual provide enough background information? Is the format of this manual convenient in size, readability and arrangement (page layout, chapter order, etc.)? Could you find the information you were looking for? Always Most of the times... - Page 200 (If you prefer to remain unknown, please do fill in your occupation) Name Occupation: Company: Phone: Address: City: Country: Please return this sheet to: Océ-Technologies B.V. For the attention of ITC user documentation. P.O. Box 101, 5900 MA Venlo The Netherlands Océ 3165 User Manual...
-
Page 201: Addresses Of Local Océ Organisations
Addresses of local Océ organisations Océ-Australia Ltd. Océ-France S.A. P.O.Box 196 32, Avenue du Pavé Neuf, Cheltenham VIC 3192 93882 Noisy-le-grand Australia Cedex France Océ-Österreich GesmbH Postfach 95 Océ-Deutschland GmbH 1233 Vienna Postfach 101454 Austria 45481 Mülheim an der Ruhr Deutschland Océ-Belgium N.V./S.A. - Page 202 Osona 2 08820 El Prat del Llobregat (Barcelona) Spain Océ-Svenska AB P.O.box 1231 164 28 Kista Sweden A. Messerli AG Sägereistrasse 29 CH8152 Glattbrugg Switzerland Océ (Taiwan) Ltd. No. 99-24 Nan-Kang Road Sec 2 Taipei Taiwan, ROC Océ 3165 User Manual...
-
Page 203: Index
clearing paper jams 169 confidential documents 110 Index connecting a local port windows 3.x 83 windows 95 84 2-sided 36 windows nt 3.5x 84 2-up, see switch images copy charge device 101 35 sheet stapler 160 copy charge device 28 50 sheet stapler 163 copy materials 174 pre-printed 159... - Page 204 4.0 143 multi-page copying 67, 68 installing ppd apple macintosh 79 windows 95 81 windows nt 3.5 80 windows nt 4.0 81 installing printer driver negative images 130 windows 3.x 76 windows 95 76 windows nt 77 Océ 3165 User Manual...
- Page 205 100 print quality 133 printer driver océ 3165 default settings 88 digitale copier 10 installing 75 network copier 10 setting up 87 pro 10 setting up temporarily 114 online help 98 test page 86 operating panel 16 printing 129 operator 14 a list of print files 151...
- Page 206 38 when printing 103 manually when copying 38 when printing 102 staple slot 13 start button 20 stickers 170 stop button 21 switch images 68 switching off 27 switching on 26 system administrator 14 Océ 3165 User Manual...
Need help?
Do you have a question about the 3165 and is the answer not in the manual?
Questions and answers