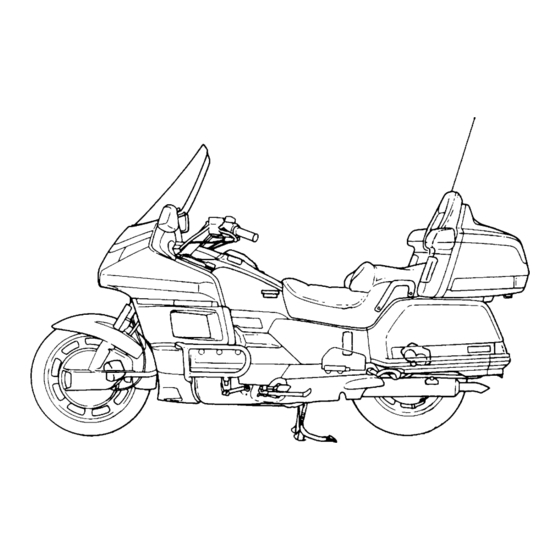
Honda GOLDWING GL1500 Owner's Manual
Hide thumbs
Also See for GOLDWING GL1500:
- Owner's manual (114 pages) ,
- Service manual (762 pages) ,
- Owner's manual (118 pages)
Table of Contents
Advertisement
Quick Links
Advertisement
Table of Contents

Related Manuals for Honda GOLDWING GL1500


Summary of Contents for Honda GOLDWING GL1500
- Page 1 HONDA GOLDWING GL1500 OWNER'S MANUAL • MANUAL DE EXPLICACIONES • INSTRUKTIEBOEK •...
- Page 2 IMPORTANT NOTICE • OPERATOR AND PASSENGER This motorcycle is designed to carry the operator and one passenger. Never exceed the maximum weight capacity as shown on the tyre information label. • ON-ROAD USE This motorcycle is designed to be used only on the road. •...
- Page 3 All information in this publication is based on the latest produc- tion information available at the time of approval for printing. HONDA MOTOR CO., L TO. reserves the right to make changes at any time without notice and without incurring any obligation.
- Page 4 If you have the required mechanical "know-how" and tools, your dealer can supply you with an official Honda Service Manual to help you perform many maintenance and repair tasks. Pleasant riding, and thank you for choosing a Hondal...
-
Page 5: Table Of Contents
CONTENTS OPERATION Page Page 1 MOTORCYCLE SAFETY Helmet Holders Safe Riding Rules Travel Trunk And Protective Apparel Saddlebags Modifications Fairing Pockets Loading and Accesso- Trunk Side Pockets ries Windshield Height Ad- justment 9 PARTS LOCATION Headlight Beam Instruments and Indi- justment cators Ventilation Louvers... - Page 6 CONTENTS MAINTENANCE Page Page 71 MAINTENANCE Side Stand Maintenance Schedule Front Wheel Removal Tool Kit Rear Wheel Removal Serial Numbers Brake Pad Wear Colour Label Battery Maintenance Precau- Fuse Replacement tions Air Cleaner 101 CLEANING Crankcase Breather Engine Oil 103 STORAGE GUIDE Spark Plugs Storage Final Drive Oil...
-
Page 7: Motorcycle Safety
MOTORCYCLE SAFETY DRIVE CAUTION LABEL ACCESSORIES AND LOADING WARNING LABEL... - Page 8 MOTORCYCLE SAFETY TVRE INFORMATION LABEL I "...
- Page 9 WINDSHIELD WARNING LABEL AIR ADJUST CAUTION LABEL...
-
Page 10: Safe Riding Rules
MOTORCYCLE SAFETY • Motorcycle riding requires special efforts on your part to en- sure your safety. Know these requirements before you ride: SAFE RIDING RULES 1. Always make a pre-ride inspection (page 61) before you start the engine. You may prevent an accident or equipment damage. 2. -
Page 11: Protective Apparel
PROTECTIVE APPAREL 1. Most Motorcycle accident fatalities are due to head injuries: ALWAYS wear a helmet. You should also wear a face shield or goggles as well as boots, gloves, and protective clothing. A passenger needs the same protection. 2. The exhaust system becomes hot during operation, and it remains hot for a while after stopping the engine. -
Page 12: Loading And Accessories
130 km/h (80 mph). And remember that this 130 km/h (80 mph) limit may be reduced by installation of non-Honda accessories, im- proper loading, worn tyres and overall motorcycle condi- tion, poor road or weather conditions. These general guidelines may help you decide whether or how to equip your motorcycle, and how to load it safely. - Page 13 4. Do not attach large, heavy items to the handlebars, front forks, or fender. Unstable handling or slow steering response may result. 5. Do not exceed maximum capacity load of Honda acces- sories. Travel trunk: 9 kg (20 Ibs) Saddlebags:...
- Page 14 MOTORCYCLE SAFETY 3. Accessories which alter your riding position by moving hands or feet away from controls may increase reaction time in an emergency. 4. Do not add electrical equipment that will exceed the motor- cycle's electrical system capacity. A blown fuse could cause a dangerous loss of lights or engine power.
-
Page 15: Parts Location
PARTS LOCATION Instruments And Indicators Clutch Fluid Front Brake Fluid Reservoir Reservoir Ignition Switch Windshield Height Lever Audio Switch Left Handlebar Control Front Brake Lever Clutch Lever Throttle Grip Fairing Pocket -...-:::'----+---tlE~ Ventilation Fairing Pocket Louvers Radio/Cassette Air Pressure Control Deck - - - - - - - - -.. - Page 16 PARTS LOCATION Trunk Side Pocket Trunk Main Fuse A Rear Brake Fluid Reservoir Saddlebag Main Fuse B Final Drive Rear Brake Cooling Front Brake Pedal Oil Filler Cap Caliper...
- Page 17 Cooling Fan Reverse Lever Fuel Tank Cap Trunk Side Pocket Fuse Box Front Brake Gear Shift Side Rear Brake Saddlebag Caliper Caliper Pedal Stand Center Stand...
-
Page 18: Instruments And Indicators
PARTS LOCATION INSTRUMENTS AND INDICATORS The indicators and warning lights are incorporated in the in- strument panel. Their functions are described on the following pages. Digital Clock, Air Pressure And Speedometer Audio System Display Tachometer Trip Meter Digital Clock Reset Button Coolant Fuel Gauge adjust knob... - Page 19 Speedometer: shows riding speed. Digital Clock, Air Pressure And Audio System Display: Shows time, pressure radio/cassette deck functions (page 17, 19, 51, 54) Tachometer: shows engine rpm. Never allow the tachometer needle to enter the red zone, even after the engine has been broken in. CAUTION: •...
- Page 20 PARTS LOCATION Neutral Indicator (green) Lights when the transmission is in neutral. Reverse System Indicator Lights when the reverse system is engaged. SIDE Side Stand Indicator (amber) STAND Lights when the side stand is put down. Before parking, check that the side stand is fully down; the light only indicates the side stand ignition cut-off system (page 87) is activated.
- Page 21 Oil Pressure Warning Light (red) Lights when engine oil pressure is below the normal operating range. Should light when the ignition switch is ON and the engine is not running. Should go off when engine starts, ex- cept for occasional flickering at or near idling speed when engine is warm.
- Page 22 PARTS LOCATION Fuel Gauge The fuel gauge shows the approximate fuel supply available. At F (Full) there are 24.0 liters (5.3 Imp gal, 6.3 US gal), in- cluding the reserve supply. When the gauge needle enters the red band, fuel will be low and you should refill the tank as soon as possible.
- Page 23 Digital Clock Shows the hour and minutes. To adjust time, proceed as follows: H (Hour) - Turn and hold the adjust knob to H. M (Minute) - Turn and hold the adjust knob to M. Display ,=, .•-, .-, f"·LfLf Adjust Knob (page 12) Hour Minute...
-
Page 24: Major Components
MAJOR COMPONENTS (Information you need to operate this motorcycle) !lImB • the Pre-ride Inspection (page 61) is not performed, severe personal injury or vehicle damage may result. REAR SUSPENSION The rear suspension of this motorcycle can provide the desired ride and level under various rider/cargo weights and riding con- ditions through adjustments of the air pressure. - Page 25 The air suspension system adjusts the rear suspension's air pressure by means of the air pressure control. Preparation: Place the motorcycle on its center stand on firm level ground. NOTE: • We recommend that you do not use the radio and other electrical accessories when the INCREASE button is being operated to prevent over discharging of the battery.
- Page 26 MAJOR COMPONENTS (Information you need to operate this motorcycle) To supply air pressure from the outlet valve: 1. Turn the ignition switch to the P position. 2. To inflate a tyre, connect an air supply hose to the outlet valve. 3.
-
Page 27: Brakes
(page 95), there is probably air in the brake system and it must be bled. See your authorized Honda dealer for this service. Brake Fluid Level: !BIll •... - Page 28 MAJOR COMPONENTS (Information you need to operate this motorcycle) REAR CAUTION: • Handle brake fluid with care because it can damage plastic and painted surfaces. • When adding brake fluid, be sure the reservoir is horizontal before the cap is removed or brake fluid may spill out. •...
-
Page 29: Clutch
See you authorized Honda dealer for this service. Fluid level: Check that the fluid level is above the LOWER level mark with the motorcycle in an upright position. -
Page 30: Coolant
MAJOR COMPONENTS (Information you need to operate this motorcycle) COOLANT Coolant Recommendation The owner must properly maintain the coolant to prevent freez- ing, overheating, and corrosion. Use only high quality ethylene glycol antifreeze containing corrosion protection inhibitors specifically recommended for use in aluminum engines. (SEE ANTIFREEZE CONTAINER LABEl). - Page 31 • Keep hands and clothing away from the cooling fan, as it starts atltomatically. If the reserve tank is empty, or if coolant loss is excessive, check for leaks and see your authorized Honda dealer for repair. Reserve Tank Dipstick...
-
Page 32: Fuel
If spark knock or pinking persists, consult your authorized Honda dealer. Failure to do so is considered misuse, and damage caused by misuse is not covered by Honda's Limited Warranty. Occasionally you may experience light spark knock while operating under heavy loads. - Page 33 Install the fuel tank cap turning it clockwise. Close the fuel strainer compartment lid pushing it. IBIII • Petrol is extremely flammable and is explosive under cer- tain conditions. Refuel in a well-ventilated area with the engine stopped. Do not smoke or allow flames or sparks in the area where the engine is refueled or where petrol is stored.
- Page 34 If you decide to use a petrol containing alcohol (gasohol), be sure it's octane rating is at least as high as that recommended by Honda. There are two types of "gasohol": one containing ethanol, and the other containing methanol. Do not use...
-
Page 35: Engine Oil
ENGINE OIL Engine Oil Level Check Check engine oil level each day before riding the motorcycle. The level must be maintained between the upper and lower level marks on the dipstick. 1. Place the motorcycle on its center stand on firm, level ground and remove the front right side cover. -
Page 36: Final Drive Oil
MAJOR COMPONENTS (Information you need to operate this motorcycle) FINAL DRIVE OIL Oil Level Check Check the final drive oil level when specified by the maintenance schedule. 1. Place the motorcycle on its center stand on firm, level ground. 2. Remove the oil filler cap. 3. -
Page 37: Tubeless Tyres
Check the tyres for cuts, imbedded nails or other sharp ob- jects. Check the rims for dents or deformation. If there is any damage, see your authorized Honda dealer for repair, replace- ment, and balancing. Front Rear... - Page 38 MAJOR COMPONENTS (Information you need to operate this motorcycle) DIIII • Improper tyre inflation will cause abnormal tread wear and create a safety hazard. Underinflation may result in the tyre slipping on, or coming off of the rim causing tyre deflation that may result in a loss of vehicle control.
- Page 39 Proper wheel balance is necessary for safe, stable handling of the motorcycle. Do not remove or change any wheel balance weights. When wheel balancing is required, see your authorized Honda dealer. Wheel balancing is required after tyre repair or replacement. •...
-
Page 40: Essential Individual Components
ESSENTIAL INDIVIDUAL COMPONENTS IGNITION SWITCH The ignition switch is on the handlebar cover. Function Position Removal All electrical circuits closed. Key cannot Engine and lights can be be removed. operated. All electrical circuits are off except Key cannot be removed. for the ACC circuit. -
Page 41: Right Handlebar Controls
RIGHT HANDLEBAR CONTROLS Engine Stop Switch The three position engine stop switch is next to the throttle grip. When the switch is in the RUN position, the engine will operate. When the switch is in either OFF position, the engine will not operate. - Page 42 ESSENTIAL INDIVIDUAL COMPONENTS Cruise Control Switch • The Cruise Control automates the function of the throttle to maintain your motorcycle at a constant speed. This can be a convenience on long trips, but it can also be a danger if there are any other vehicles on the road or if the road is un- familiar.
- Page 43 To Cancel the Cruise Control: Simply push the CRUISE CONTROL master switch until the in- dicator light goes off (this also erases the memory of the set speed). If you must temporarily disengage the system (but re- tain the memory of the set speed); pull the front brake lever or clutch lever or step on the brake pedal slightly, or close the throttle.
- Page 44 ESSENTIAL INDIVIDUAL COMPONENTS To change to a slower speed: Push and hold the SET/DECEL switch and the motorcycle will slow down; when you reach the desired slower speed, release the switch and the system will be reprogrammed. For temporary acceleration above the set speed, such as for passing, use the throttle conventionally.
-
Page 45: Left Handlebar Controls
LEFT HANDLEBAR CONTROLS The controls next to left handlebar grip are: Headlight Switch The headlight switch has three positions, IIH", IIplI and 1I0FF" marked by dot. H: Headlight, taillight, position light and meter lights on. P: Position light, taillight and meter lights on. OFF (dot): Headlight, taillight, position light and meter lights off. - Page 46 ESSENTIAL INDIVIDUAL COMPONENTS CAUTION: • Be sure to turn the switch off when the hazard warning is no longer required, or the turn signals will not work proper- ly, and may confuse other drivers. Headlight Dimmer Switch Hazard Warning System Switch - - ~ Horn Button Headlight...
-
Page 47: Features (Not Required For Operation)
FEATURES (Not required for operation) STEERING LOCK To lock the steering, turn the handlebars all the way to the left or right, turn the key to P or LOCK while pushing in. Remove the key. !BIll • Do not turn the key to P or LOCK while riding the motorcy- cle;... -
Page 48: Travel Trunk And Saddlebags
FEATURES (Not required for operation) TRAVEL TRUNK AND SADDLEBAGS To open the travel trunk with the ignition key: Insert the ignition key and turn it counterclockwise. The trunk can be opened without the latch. Close the trunk lid and make sure the trunk is locked. To open the travel trunk with the latch: Insert the ignition key and turn it clockwise. - Page 49 To open the saddlebags: Insert the ignition key and turn it clockwise. Pull down the right latch lever to open the right saddlebag. Pull down the left latch lever to open the left saddlebag. To lock the saddlebags, close the saddlebags and turn the igni- tion key counterclockwise.
- Page 50 FEATURES (Not required for operation) Inner bags: The inner bags are provided so that articles stored in the travel trunk or saddlebags can be carried with the rider when the motorcycle is parked. Inner Bags Documents: The owner's manual and other documents should be stored in the saddlebag.
- Page 51 Alternate method to open the saddlebag: If a saddlebag becomes jammed and will not open by its rear latch lever: 1. Open the travel trunk and remove the plug from the right or left access hole in the floor of the trunk. 2.
-
Page 52: Fairing Pockets
FEATURES (Not required for operation) FAIRING POCKETS The left fairing pocket can be used by unsnapping the cover. To remove the right pocket lid, insert the ignition key, turn it clockwise and open the lid. To attach the right pocket lid, slide the prong at the front of the lid into the slot in the fairing pocket, then push the other end of the lid down until it locks. -
Page 53: Trunk Side Pockets
TRUNK SIDE POCKETS The side pockets are located on both sides of the trunk. Open the lid, by pulling up the handle. NOTE: • The side pockets are for lightweight items. Do not carry more than 0.5 kg (1 Ib) in each side pocket. •... -
Page 54: Headlight Beam Adjustment
FEATURES (Not required for operation) HEADLIGHT BEAM ADJUSTMENT The headlight beam can be raised or lowered by turning the ver- tical beam adjusting knob. Obey local laws and regulations con- cerning headlight adjustment. • Do not adjust the headlight beam while riding the motorcy- cle. -
Page 55: Seat
SEAT The seat can be removed by removing the bolts in each side. Pull up -< Front Prong ACC TERMINAL The ACC terminal is in the fuse box (page 99) and provides 12V DC power for electrical accessories. A maximum of 60 Watts (5 amps) may be connected to the terminal. -
Page 56: Protection Against Water
FEATURES (Not required for operation) PROTECTION AGAINST WATER The radio/cassette deck is designed to be weather proof. However, it is not designed to be sprayed directly with a hose. CAUTION: • When washing the motorcycle, avoid spraying high pressure water (typical in coin-operated car washes) near the audio system. - Page 57 HANDL~BAR LEFT CONTROLS DISPLAY Search Lever/Tape '$"1'#1 AMB. Program Direction Muting Switch Selector Lt.L ST.' '~'·t,r, fe·L.fLt RADIO/CASSETTE DECK Headset/Speaker Mode Radio/Cassette Butson Button Channel Button Ambience Button AM/FM Band -+--+--+-i----H-+~ Memory Button Button I c==-Hl-+4-f- ~-------------' Cassette Lid --1---+--+-+- Fast-forward And , r - - - - - - - H f + - Rewinding Button...
-
Page 58: Am/Fm Radio
FEATURES (Not required for operation) AM/FM RADIO The radio can be used with the ignition switch at ACC, ON or P. Power Switch/Volume Control Knob When this knob is turned clockwise, power is applied to the radio, and the display indicates" AM" or "FM." Turning the knob further increases the volume. - Page 59 Search Lever You can find the station you wish by the search lever. When the lever is pushed up, the frequency moves up, and when the lever is pushed down, it moves down. If the lever is depressed once, the AM frequency display moves in 9 kHz steps and the FM frequency in 50 kHz.
-
Page 60: Cassette Deck
FEATURES (Not required for operation) CASSETTE DECK Loading Push the eject button to open the cassette lid and slide the tape into the deck, following the inserting direction shown on the lid. CAUTION: • Check there is no slack in the tape before inserting the cassette tape into the deck. - Page 61 Tape player Maintenance The head in the cassette tape player can pick up dirt or tape deposits each time a cassette is played. The result is low or muddy" sound from one or both channels, as if the treble tone control were turned all the way down. To prevent this, you should periodically clean the head with a commercially available cleaning cassette.
- Page 62 FEATURES (Not required for operation) Tape Program Direction Selector (PRO) This switch can be used to change the direction of the tape. The indicator in the display will be changed to the following. This switch can be also used to stop the fast winding. Tape Program Direction Selector (PRO) Indicators ~ I~dic~te...
- Page 63 Ambience button (AMB) The" ambience" circuit blends and boosts certain frequencies from both channels, for a "live performance" effect. To use the circuit, push the AMB button until" AMB." appears in the display. AMB is usable for stereo programs from both tape and FM.
- Page 64 FEATURES (Not required for operation) Auto Volume Control Knob This function increases the volume as the speed of the motorcycle increases. Turning the knob clockwise raises the operating level. Set the knob at the center position under normal conditions and then adjust the volume control for desired sound level.
- Page 65 Headset/speaker Mode Button If you use the headset, push this button. The display wi" in- "fiI)" dicate (headset). To hear sound through the speakers, push this button again. Headset/Speaker Mode Button Intercom Volume Control Knob • Some local governments prohibit the operator from using a headset;...
-
Page 66: Radio Antenna
FEATURES (Not required for operation) Intercom Mute Knob intercom mute system automatically lowers music/program volume when you speak through the intercom. With the knob turned clockwise, you must speak more loudly activate mute circuit. With knob turned counterclockwise, the mute will activate even at low speaking levels. -
Page 67: Operation
9. Ignition cut-off system - check for proper function (page 87). 10. Battery electrolyte-check the level and add if necessary (page 96). Correct any discrepancy before you ride. Contact your authorized Honda dealer for assistance if you cannot correct the problem. -
Page 68: Starting The Engine
OPERATION STARTING THE ENGINE • Never run the engine in a closed area. The exhaust con- tains poisonous carbon monoxide gas that can cause loss of consiousness and may lead to death. • Do not flood the engine by twisting the throttle repeatedly. The carburetor has an accelerator pump. - Page 69 Starting Procedure To restart a warm engine, follow the procedure for High Air Temperature. " Normal Air Temperature 10° -35°C (50° -95°F): 1. Push the choke lever down all the way to Fully Open (B). 2. Start the engine, leaving the throttle closed. NOTE: •...
- Page 70 OPERATION Low Air Temperature 10°C (50°F) or below: 1. Follow steps 1 - 2 under "Normal Air Temperature." 2. When engine rpm begins to pick up, operate the choke lever to keep fast idle at 2,200- 2,800 rpm. 3. To speed warm up, open and close the throttle, keeping engine rpm below 2,800.
-
Page 71: Running-In
RUNNING-IN During initial running-in, newly machined surfaces will be in contact with each other and these surfaces will wear in quick- ly. Running-in maintenance at 1,000 km (600 miles) is design- ed to compensate for this initial minor wear. Timely perfor- mance of running-in maintenance will ensure optimum service life and performance from the engine. -
Page 72: Riding
OPERATION RIDING IImIII • Review Motorcycle Safety (pages 1-8) before you ride. NOTE: • Make sure the function of the side stand mechanism (See MAINTENANCE SCHEDULE on page 72, 73 and explana- tion for SIDE STAND on page 87.) Proper shifting will provide better fuel economy. DIIII •... -
Page 73: Reverse Riding
REVERSE RIDING For reverse maneuvering, make sure there are no obstacles or people in the area; avoid steep or uneven surfaces. I11III • Do not carry a passenger while moving in reverse. The weight of a passenger will increase the possibility and results of maneuvering errors. - Page 74 OPERATION 3. Push the start/reverse button and guide the motorcycle backward cautiously. CAUTION: • Do not push the start/reverse button more than a minute to prevent battery discharge. 4. Release the start/reverse button, and the motorcycle will stop. After stopping the motorcycle, disengage the reverse lever, and make sure the reverse gear indicator goes off and the neutral indicator comes on.
-
Page 75: Braking
BRAKING This motorcycle is equipped with a unified braking system. Depressing the brake pedal applies the rear brake and the left front disc. Operating the brake lever applies the right front disc. For full braking effectiveness, use both the pedal and lever simultaneously, as you would with a conventional motorcycle brake system. -
Page 76: Parking
OPERATION PARKING 1. After stopping the motorcycle, shift the transmission into neutral, turn the ignition switch OFF and remove the key. Use the side or center stand to support the motorcycle while parked. CAUTION: • Park the motorcycle on firm, level ground to prevent it from falling over. -
Page 77: Maintenance
MAINTENANCE • When service is required, remember that your authorized Honda dealer knows your motorcycle best and is fully equipped maintain repair scheduled maintenance and the anticipated maintenance may also be performed by a qualified service facility that normally does this kind of work;... -
Page 78: Maintenance Schedule
The following items require some mechanical knowledge. Cer- tain items (particularly those marked * and * *) may require more technical information and tools. Consult your authorized Honda dealer. Perform the Pre-ride Inspection (page 61) at each scheduled maintenance period. - Page 79 - - - STEERING HEAD BEARINGS - - - SHOULD BE SERVICED BY AN AUTHORIZED HONDA DEALER, UNLESS THE OWNER HAS PROPER TOOLS AND SERVICE DATA AND IS MECHANICALLY QUALIFIED. REFER TO THE OFFICIAL HONDA SERVICE MANUAL. IN THE INTEREST OF SAFETY, WE RECOMMEND THESE ITEMS BE SERVICED ONLY BY AN AUTHORIZED HONDA DEALER.
-
Page 80: Tool Kit
MAINTENANCE TOOL KIT The tool kit is in the saddlebag. Some roadside repairs, minor adjustments and parts replacement can be performed with the tools contained in the kit. • 0.7 mm Feeler gauge • Breaker bar • 0.8 mm Feeler gauge •... -
Page 81: Serial Numbers
SERIAL NUMBERS The frame and engine serial numbers are required when registering your motorcycle. They may also be required by your dealer when ordering replacement parts. Record the numbers here for your reference. The frame number is stamped on the right side of the steering head. -
Page 82: Maintenance Precautions
Stop the engine and support the motorcycle securely on a firm, level surface before performing any maintenance. • Use new, genuine Honda parts or their equivalent for maintenance and repair. Parts which are not of equivalent quality may impair the safety of your motorcycle. -
Page 83: Air Cleaner
AIR CLEANER (Refer to the maintenance precautions on page 61.) The numbers are shown in sequence of disassembly. -
Page 84: Crankcase Breather
MAINTENANCE The air cleaner should be serviced at regular intervals (page 73). Service more frequently when riding in unusually wet or dusty areas. 1. Remove the seat (page 49). 2. Remove the parts in sequence, according to the order in the illustration. -
Page 85: Engine Oil
ENGINE OIL (Refer to the maintenance precautions on page 61.) Engine Oil Good engine oil has many desirable qualities. Use only high detergent, quality motor oil certified on the container to meet or exceed requirements for service SE, SF or SG. Viscosity: Viscosity grade of engine oil should be barsed on average at- mospheric temperature in your riding area. - Page 86 MAINTENANCE Engine Oil and Filter Engine oil quality is the chief factor affecting engine service life. Change the engine oil as specified in the maintenance schedule (page 61 ). NOTE: • Change the engine oil with the engine at normal operating temperature and the motorcycle on its center stand to assure complete and rapid draining.
- Page 87 2. Remove the under cover and oil filter with a filter wrench. Discard the oil filter. Filter Under Cover 3. Apply a thin coat of engine oil to the new oil filter rubber seal. --¥c~~ Rubber Seal Oil Filter 4. Install the new oil filter and tighten it: 10 N·m (1.0 kg-m, 7 ft-Ib)
- Page 88 MAINTENANCE 5. Check that the sealing washer on the drain plug is in good condition and Install the drain plug. Oil Drain Plug Torque: 40 N·m (4.0 kg-m, 29 ft-lb) 6. Fill the crankcase with the recommended grade oil; approximately: 3.7 £...
-
Page 89: Spark Plugs
SPARK PLUGS (Refer to the maintenance precautions on page 61.) 1. Remove the parts in sequence, according to the order in the following illustration (Left side shown; right side similar). Installation note: When installing, the sequence should be: 4, 8, 7, 6, 5, 3, 2, 1. Spark Plug Cap >~l Recommended plugs:... - Page 90 MAINTENANCE 4. Inspect the electrodes and center porcelain for deposits, erosion or cabon fouling. If the erosion or deposit is heavy, replace the plug. Clean a carbon or wet-fouled plug with a plug cleaner, otherwise use a wire brush. Check the spark plug gap using a wiretype feeler gauge. If adjustment is necessary, bend the side electrode carefully.
-
Page 91: Final Drive Oil
FINAL DRIVE OIL (Refer to the maintenance precautions on page 61.) Change the oil as specified in the maintenance schedule. NOTE: • Change the oil with the final drive at normal operating temperature and the motorcycle upright on firm, level ground to assure complete and rapid draining. -
Page 92: Idle Speed
The idle speed adjustment procedure given here should only be used when changes in altitude affect normal idle speed as set by your dealer. See your authorized Honda dealer for regularly scheduled carburetor adjustments, including individual car- buretor adjustment and synchronization. -
Page 93: Side Stand
3. Move the side stand fully down. 4. The engine should stop as you put the side stand down. If the side stand system does not operate as described, see your authorized Honda dealer for service. Spring------tI9/... -
Page 94: Front Wheel Removal
MAINTENANCE FRONT WHEEL REMOVAL (Refer to the maintenance precautions on page 61.) For related torque specifications, see page 91. The numbers are shown in sequence of disassembly. - Page 95 Wheel removal requires mechanical skill and professional tools such as a floor jack and torque wrench. We recom- mend it be done only by your authorized Honda dealer or other qualified mechanic. 1. Raise the front wheel off the ground by placing a support block under the engine.
- Page 96 MAINTENANCE Installation 1. Reassemble removed parts in the reverse order of removal. NOTE: • When installing the wheel, position the speedometer gear- box so that the lug on the gearbox is against the rear of the stopper lug on the left fork. CAUTION: •...
- Page 97 !BIll • a torque wrench was not used for installation, see your authorized Honda dealer as soon as possible to verify pro- per assembly. Improper assembly may lead to loss of brak- ing capability. 3. If the feeler gauge cannot be inserted easily, pull the left...
-
Page 98: Rear Wheel Removal
MAINTENANCE REAR WHEEL REMOVAL ® (Disconnect the -~T-- lead connector of--" each side.) (Loosen bolts of each side) (Each side) - Page 99 • Wheel removal requires mechanical skill and professional tools such as a torque wrench. We recommend it be done only by your authorized Honda dealer or other qualified mechanic. 1. Place the motorcycle on its center stand. 2. Remove the parts in sequence, according to the order in the illustration.
- Page 100 • If a torque wrench was not used for installation, see your authorized Honda dealer as soon as possible to verify pro- per assembly. Improper assembly may lead to loss of brak- ing .capability. Specified torque: Axe nut: 110 Nom (11.0 kg-m, 80 ft-Ib)
-
Page 101: Brake Pad Wear
If either pad wears to the wear limit, both pads must be replaced as a set. NOTE: • Use only genuine Honda replacement friction pads offered by authorized Honda dealers. When brake service is necessary consult your Honda dealer. -
Page 102: Battery
If rapid loss of electrolyte is experienced, or if your battery seems to be weak, causing slow starting or other electrical problems, see your authorized Honda dealer. Battery Electrolyte: The battery is under the seat. Remove the rear right side cover to check the battery electrolyte. - Page 103 CAUTION: • When checking the battery electrolyte level, or adding distilled water, make sure the breather tube is connected to the battery breather outlet. • Use only distilled water in the battery. Tap water will shorten the service life of the battery. •...
-
Page 104: Fuse Replacement
MAINTENANCE FUSE REPLACEMENT (Refer to the maintenance precautions on page 61 .) The main fuse@, 30A, is attached to the starter magnetic switch. The main fuse@, 55A, is located near the battery. The reverse system fuses, 5A, are near the battery. Remove the rear right side cover (page 96) for access to fuses. - Page 105 When frequent fuse failure occurs, it usually indicates a short circuit or an overload in the electrical system. See your authorized Honda dealer for repair. CAUTION: • Turn the ignition switch OFF before checking or replacing fuses to prevent accidental short-circuiting.
- Page 106 MAINTENANCE amIII • Never use a fuse with a different rating from that specified. Serious damage to the electrical system or a fire may result, causing a dangerous loss of lights or engine power. Blown Fuse Fuse Remover...
-
Page 107: Cleaning
CLEANING Clean your motorcycle regularly to protect the surface finishes and inspect for damage, wear, and oil, coolant, or hydraulic fluid seepage. 1. Clean the windshield with a soft cloth or sponge and plenty of water. Dry with a soft clean cloth. Remove minor scrat- ches with commercially available plastic polishing com- pound. - Page 108 CLEANING Aluminum Wheel Maintenance Aluminum corrodes when it comes in contact with dust, mud, road salt, etc. After riding, clean the wheels with a wet sponge and mild detergent, then rinse well with water and wipe dry with a clean cloth. After cleaning, apply wax to the cleaned surfaces thoroughly.
-
Page 109: Storage Guide
STORAGE GUIDE STORAGE Extended storage, such as for winter, requires that you take certain steps to reduce the effects of deterioration from non- use of the motorcycle. In addition, necessary repairs should be made BEFORE storing the motorcycle; otherwise, these repairs may be forgotten by the time the motorcycle is removed from storage. -
Page 110: Removal From Storage
STORAGE GUIDE 6. Wash and dry the motorcycle. Wax all painted surfaces. Coat chrome with rust-inhibiting oil. 7. Inflate the tyres to their recommended pressures. Place the motorcycle on blocks to raise both tyres off the ground. 8. Cover the motorcycle (don't use plastic or other coated materials) and store in an unheated area, free of dampness with a minimum of daily temperature variation. -
Page 111: Specifications
SPECIFICATIONS DIMENSIONS 2,630 mm (103.5 in) Overall length 955 mm ( 37.6 in) Overall width Overall height 1,525 mm ( 60.0 in) 1,700 mm ( 66.9 in) Wheelbase 5.5 in) Ground clearance m m ( WEIGHT Dry weight 366 kg (807 Ibs) CAPACITIES 3.5 £... - Page 112 SPECIFICATIONS POWER TRANSMISSION 1.592 Primary reduction 0.971 Secondary reduction 2.667 Gear ratio, 1st 1.722 1.273 0.964 0.759 2.833 Final reduction ELECTRICAL 12V-20AH Battery 0.55 kw/5,OOO rpm Generator LIGHTS Headlight 12V-60/55W 12V-5/21W Tail/stoplight 12V-21W Turn signal light 12V 5W Position light 12V 5W License light 65A, 5A (Reverse fuse)
- Page 113 NOISE CONTROL SYSTEM (AUSTRALIA ONLY) TAMPERING WITH NOISE CONTROL SYSTEM PROHIBITED Owners are warned that the law may prohibit: (a) The removal or rendering inoperative by any person other than for purposes of maintenance, repair or replacement, of any device or element of design incorporated into any new vehicle for the purpose of noise control prior to its sale or delivery to the ultimate purchaser or while it is in use;...