Cisco 9951 User Manual
Hide thumbs
Also See for 9951:
- User manual (23 pages) ,
- Quick start manual (8 pages) ,
- Datasheet (7 pages)
Table of Contents
Advertisement
Quick Links
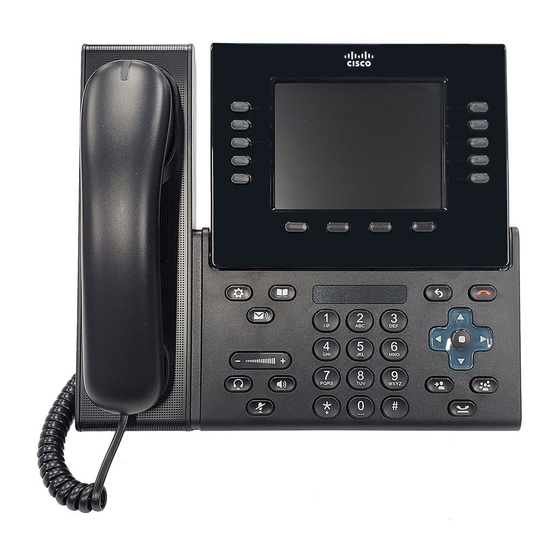
Cisco IP Phone 9951 User Guide
Cisco IP Phone 9951 User Guide........................................................................................ 1
Placing a call ................................................................................................................... 2
Soft Keys ......................................................................................................................... 2
Status Messages .............................................................................................................. 2
Forwarding calls to another phone .................................................................................. 2
Transferring a call ........................................................................................................... 3
Initiating a conference call (ad-hoc) ............................................................................... 3
Method One (Conference) .......................................................................................... 3
Method Two (other callers call you) ........................................................................... 4
Displaying users in a conference call.............................................................................. 4
Do Not Disturb (DND) ................................................................................................... 4
Diverting a call to voicemail (Divert) ............................................................................. 5
Checking your voicemail from the phone ....................................................................... 5
Viewing call logs and using the corporate directory ...................................................... 5
Changing Phone Preferences .......................................................................................... 5
Ringtones .................................................................................................................... 5
Brightness ................................................................................................................... 6
Camera Settings .......................................................................................................... 6
Communications Manager User Options Webpage ............................................................ 7
Accessing speed dial and other user settings .................................................................. 8
Line Settings ................................................................................................................... 9
Incoming Call Forwarding ........................................................................................ 10
Message Waiting Lamp ............................................................................................ 10
Audible Message Waiting Indicator ......................................................................... 10
Add/Update your Contacts (Speed Dials) ................................................................. 10
Add a Contact (manual) ............................................................................................ 11
Add a Contact (Directory Search) ............................................................................ 12
Directory ....................................................................................................................... 12
Advertisement
Table of Contents

Subscribe to Our Youtube Channel
Related Manuals for Cisco 9951


Summary of Contents for Cisco 9951
-
Page 1: Table Of Contents
Cisco IP Phone 9951 User Guide Cisco IP Phone 9951 User Guide..................1 Placing a call ........................2 Soft Keys ......................... 2 Status Messages ......................2 Forwarding calls to another phone .................. 2 Transferring a call ......................3 Initiating a conference call (ad-hoc) ................3 Method One (Conference) .................. -
Page 2: Placing A Call
Placing a call To place a call on the Cisco IP Telephony (IPT) system you will follow similar dial patterns that are used with your existing phone. For all on-campus calling you will dial the 5 digit extension. For all off-campus dialing, you must enter a 9, then dial the full telephone number, beginning with a 1 + area code for long distance calls. -
Page 3: Transferring A Call
Transferring a call While on an incoming call press the “Transfer” button located on the bottom right of your phone. The current caller will be placed on hold. Once a transfer number has been dialed you can press the “Transfer” button at anytime to transfer the caller. Initiating a conference call (ad-hoc) An add-hoc conference call can have several participants and provides the same functionality as Centrex three-way calling or a six-way conference. -
Page 4: Method Two (Other Callers Call You)
Method Two (other callers call you) While on a call have the other caller call you, answer their call this will place the initial caller on hold. Now press the conference button . This will bring up a menu to select a Speed Dial, new number or Active Call. -
Page 5: Diverting A Call To Voicemail (Divert)
Diverting a call to voicemail (Divert) You must have a voicemail account for this feature to work correctly. If you are at your desk and your phone begins to ring you have the option of immediately diverting the call to your voicemail if you don’t want to answer the phone. To use the feature press the “Divert”... -
Page 6: Brightness
1. Press Applications 2. Use the Navigation pad and Select button to scroll and select Accessories. 3. Select Cisco Unified Video Camera > Auto Transmit Video. 4. Select On to enable automatic video transmission or Off to disable the feature. -
Page 7: Communications Manager User Options Webpage
3. Select Cisco Unified Video Camera > Brightness. 4. Select Brightness. To increase brightness, press the up arrow on the Navigation pad. To decrease brightness, press the down arrow on the Navigation pad. 5. Press Save to set the brightness, or press Exit to return to the Setup screen. - Page 8 To configure basic phone settings select the “Phone Settings” menu item. It will take you to a page like the one below. On this screen you will see several items the first being the name of the device. This name is not configurable and most likely will not mean anything to you. If you have...
-
Page 9: Line Settings
more then one phone associated to your account will have a drop down box with several phones listed. Each phone has its own configuration settings it is important that you have the correct phone selected for the remainder of the instructions. The “model”... -
Page 10: Add/Update Your Contacts (Speed Dials)
This option will turn on or off a stutter tone when you pick up the receiver to announce you have voicemail. This option is turned off by default on the system. It is not recommended to turn it on. Make sure that if you make any changes on this page that you click the “save” button or icon before ending your session. -
Page 11: Add A Contact (Directory Search)
Add a Contact ( Directory Search) To add a contact/speed dial from the BGSU directory select the directory option at the top of the page. This will bring up the directory listing to search select the filter button on the right side of the screen as shown below. Once you’ve found the contact you’d like to add select the add button to the right of their row. -
Page 12: Directory
Directory The “directory” menu option will give you access to the phones “BGSU directory” from the web. This directory only contains faculty and staff members on campus and can not be edited.
Need help?
Do you have a question about the 9951 and is the answer not in the manual?
Questions and answers