Cisco 8961 User Manual
Cisco unified ip phone 8961
Hide thumbs
Also See for 8961:
- Administration manual (378 pages) ,
- User manual (180 pages) ,
- Features (35 pages)
Table of Contents
Advertisement
Quick Links
Advertisement
Table of Contents

Related Manuals for Cisco 8961


Summary of Contents for Cisco 8961
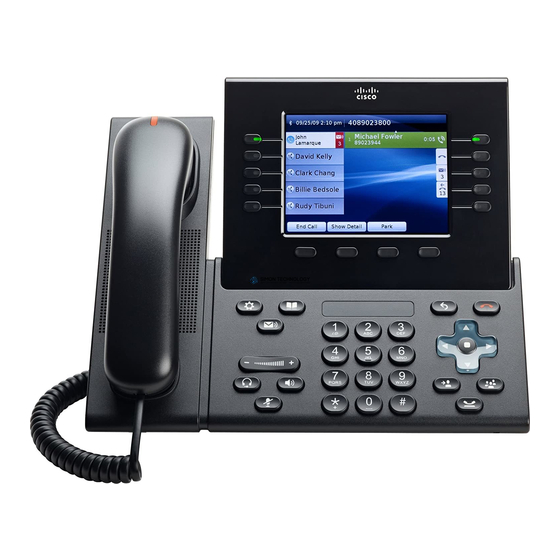
- Page 1 Cloud Voice Service Cisco Unified IP Phone 8961 User Guide (Version 1.0)
-
Page 2: Table Of Contents
Cloud Voice Service Table of Content Phone Set Features and Functions ..................3 Operation for IP Phone 8961 ..................3 Location of Control ......................4 Preference Setup ........................7 Adjust Brightness ......................7 Adjust Ringtone ......................7 2.2.1 Change Volume ...................... 7 2.2.2... -
Page 3: Phone Set Features And Functions
IEEE 802.3af and 802.3at power enabled. Computer port (10/100/1000 PC) connection Headset connection (optional). Analog headset connection Anti-theft security lock connector Notes: IP Phone 8961 cannot function properly when there is a failure in power supply. Version 1.0 ©Wharf T&T Limited 2013... -
Page 4: Location Of Control
Cloud Voice Service Location of Control Item Description Phone screen Shows information about your phone, including directory number, call information (for example caller ID, icons for an active call or call on hold) and available soft keys. Session buttons Each corresponds with an active call or a call function. Pressing the button takes the default action: •... - Page 5 Cloud Voice Service • Pulsing green —Held call. Pressing this button resumes the held call. • Solid red —Shared line in-use remotely. Pressing this button allows you to barge in on the call (if Barge is enabled). • Pulsing red —Shared line call put on hold remotely.
- Page 6 Cloud Voice Service Applications button Opens/closes the Applications menu. Depending on how your system administrator sets up the phone, use it to access applications such as call history, preferences, and phone information. Contacts button Opens/closes the Contacts menu. Depending on how your system administrator sets up the phone, use it to access personal directory, corporate directory, or call history.
-
Page 7: Preference Setup
Cloud Voice Service Preference Setup Adjust Brightness As the display of IP Phone may be affected by the lighting of office environment, you can adjust the brightness in order to have best performance on the display accordingly. 1. Press the Applications button 2. -
Page 8: Adjust Wallpaper
Cloud Voice Service 4. Press the Play soft key to play a sample. 5. Press the Set soft key to select the ringtone. 6. Press the Apply soft key to confirm your selection, or press the Cancel soft key to go back to the Ringtone screen. Adjust Wallpaper There are some standard IP phone wallpaper background templates prepared by Wharf T&T . -
Page 9: Basic Features
Cloud Voice Service Basic Features Placing a Call There are 4 options for placing a new call: 1. When using the handset, lift the handset and dial the number. 2. To make a new call on the current line, press the NewCall soft key and dial the number. -
Page 10: Muting A Call
Cloud Voice Service Muting a Call 1. Press the Mute button. 2. To disengage mute, press the Mute again. Note: If you are using mute along with the speakerphone, lifting the handset will disengage the mute function Call Management Features Putting a Call on Hold During the call conversation, you can put the other call party temporarily on- hold. -
Page 11: Transferring A Call To Another Party
Cloud Voice Service Transferring a Call to another Party During the call conversation (not ‘On-hold’ mode), if you wish to transfer your call conversation to another party, you can: 1. Press the Transfer button 2. Enter 8-digits local number * / 4-digits extension number of the recipient 3. -
Page 12: Setting Up Call Forwarding From Your Mobile
Cloud Voice Service 4.5.2 Setting up Call Forwarding from your mobile 1. Dial 2112 1113 to access Remote Call Forwarding hotline. 2. Follow the voice prompts and select the language by pressing ‘1’ for Cantonese/ ‘2’ for English. 3. Enter your Cloud Voice Number followed by “#”. 4. -
Page 13: Placing A Conference Call
Cloud Voice Service Placing a Conference Call During the phone conversation, you can invite more business partners to join the conversation by means of N-way Conference Call. 1. During an active call conversation, press the Conference button 2. Enter 8-digits local number / 4-digits extension number of the other invited party. -
Page 14: Directed Call Pickup (Specific Group Member)
Cloud Voice Service 4.7.2 Directed Call Pickup (Specific Group Member) 1. Press Group Pickup. 2. Enter the extension number of the phone line with the call that you want to pick up. (For example, if the call is ringing on line extension number ‘1234’, please enter ‘1234’.) 3. -
Page 15: Switching Phone Conversation From Mobile Back To Ip Phone
Cloud Voice Service 4. Pickup the call on your mobile and you can continue the phone conversation on your mobile. 4.8.3 Switching Phone Conversation from Mobile back to IP Phone If you pickup the call dialed at your Cloud Voice Number on your mobile, you can switch the call back to your IP phone. -
Page 16: Voicemail Service
Cloud Voice Service VoiceMail Service Activating VoiceMail on your IP Phone 1. Press the Message button on your IP Phone 2. Enter your VoiceMail PIN followed by “#” 3. Follow the voice prompts to change the VoiceMail PIN to activate the VoiceMail service. -
Page 17: Remote Access To Voicemail
Cloud Voice Service Remote Access to VoiceMail 1. Dial the access number 2112-1234. [Please dial (852) 2112-1234 when you are accessing VoiceMail service from overseas.] 2. A welcome greeting message will be announced and please select the language by pressing ‘1’ for Cantonese / ‘2’ for English. 3. -
Page 18: Visual Voicemail
Cloud Voice Service Visual VoiceMail By using Visual VoiceMail service, your voicemail messages will be displayed in your IP phone so that you can prioritize which messages to listen first. 1. Press the Message button and select Visual Voicemail. 2. Enter your VoiceMail PIN for your voicemail account. (Toggle on Remember Me to keep you sign-in status) 3. -
Page 19: Using Phone Log
Cloud Voice Service Using Phone Log If your phone display indicates that you have missed calls, you can use the Missed Call option on the Directory menu to view your call history and to call back the person that you have missed. You can also view call history and place calls from the Received Calls and Placed Calls directories. -
Page 20: Extension Mobility
Cloud Voice Service Extension Mobility The Extension Mobility feature allows you to associate your phone number and user profile with any IP Phone. When you use your Extension Mobility Personal Identification Number (PIN) to log into an IP Phone, your assigned telephone number, and the settings that you have established will be associated with that phone. -
Page 21: Password Management
New Cloud Voice Password will be applied to the following services: Cloud Voice User Portal Presence Communicator Service – Cisco Unified Personal Communicator (Account and VoiceMail Login) Mobility Apps Services – Cisco Jabber (Configuration of VoiceMail, Desk Phone Integration and Corporate Directory) Retrival of VocieMail via Outlook 2000 Version 1.0... -
Page 22: Change The Ip Phone Pin
Cloud Voice Service Change The IP Phone PIN 1. Visit Wharf T&T Cloud Voice User Portal at http://www.wharftt.com/cloudvoice 2. Enter your Cloud Voice Number and Cloud Voice Password 3. Click Login 4. Click here in the foot note of the Call Management page 5.
Need help?
Do you have a question about the 8961 and is the answer not in the manual?
Questions and answers