
Related Manuals for Axminster MCB100A


Summary of Contents for Axminster MCB100A
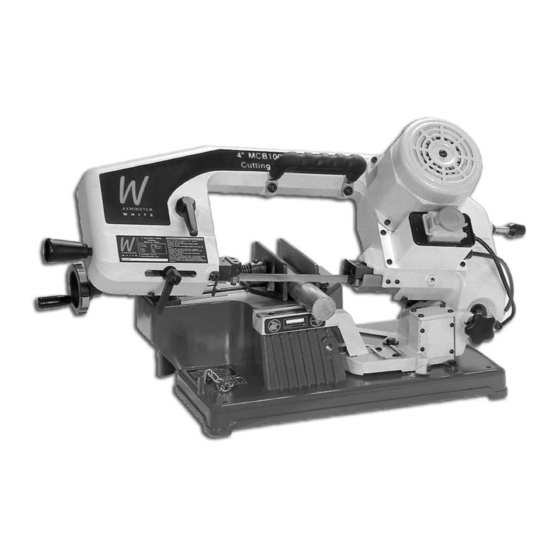
- Page 1 4" MCB100A Metal Cutting Bandsaw A X M I N S T E R W H I T E Axminster Reference No:MCB100A w w w. a x m i n s t e r. c o . u k...
-
Page 2: Table Of Contents
Table of Contents 1 General Safety Rules……………………………………………………………1 Electrical Schematic………………………………………………………………2 2 The Quick Vise and Work Set Up……………………………………………...3 3 Special Safety Rules for Metal Saw…………………………………………...4 Before Using the Saw……………………………………………………………..4 Before Each Use…………………………………………………………………..4 Whenever Saw is Running……………………………………………………….5 4 Power Supply……………………………………………………………………..6 Motor Specifications………………………………………………………………6 Earth………………………………………………………………………………...6 Motor Safety Protection…………………………………………………………...6 Wire Sizes………………………………………………………………………….7... -
Page 3: Electrical Schematic
1. General Safety Rules become obscured or removed. WARNING 11. Make certain the motor switch is in “off” position while connecting the machine into the power supply. 1. Read and understand instructions of this manual entirely before operating the 12. Pay your work undivided attention. machine. -
Page 4: The Quick Vise And Work Set Up
BEFORE CUTTING Loosen the lock plate (A) in Fig 1 to release this saw. After service, must replace the lock plate, and fasten it properly for your safety and carry. Failure to comply with the warning could result in personal injury and machine damage. -
Page 5: Special Safety Rules For Metal Saw
compliance with DIN58214 could 3.Special Safety Rules For result in severe injury form breakage of the eye protection. Metal Saw B. For dusty operations, wear a face shield along with safety goggles. WARNING: For your own safety, do C. To avoid injury from jams, slips or not operate your metal saw until it is thrown piece: completely assembled and installed... -
Page 6: Whenever Saw Is Running
workpiece shift after it is cut in two. Whenever saw is running c. Use jigs, fixture or a different tool for unstable workpieces. WARNING: Do not allow familiarity • Never cut more than one workpiece at a (gained from frequent use of your time. -
Page 7: Power Supply
DANGER frequently to keep sawdust from interfering • Keep hands out of sawblade path. with normal motor ventilation. • Never cut anything freehand. • Never reach behind or beneath blade. 1. If the motor does not start, release the • To avoid electric shock, do not expose to trigger switch immediately. -
Page 8: Wire Sizes
Wire sizes The use of any extension cable will cause some loss of power. To keep this to a minimum and to prevent overheating and motor burn-out, use the table below to determine the minimum wire size (lead cross-section) of an extension cable. For circuits that are more than 40m away from the electrical service box, the wire size must be increased proportionately in order to... -
Page 9: Description And Characteristics
unusual happens your gear transmission system, do not try to fix or D e s c r i p t i o n A n d restore it personally. Send it back to your dealer for check-up or repairmen. Failure Characteristics to comply can result in machine damage. -
Page 10: Operating
3. If the pointer is matched by the right 7.Operating degree on the scale. Tighten the bolt, and a perfect angle cut will be given. INFORMATION BEFORE OPERAION Be sure the table isn’t in contact with the work when the motor is started. Run the motor, allow the saw to come to full speed. -
Page 11: Changing Blade
! WARNING guide bearings. Make sure the teeth of Disconnect machine from the power blade face down toward the bed source! 6. Fasten the tension handle clockwise No mater when, where, or how. Pay move the blade by pulling it down with extra attention to the saw during it in one hand and it will be tracked onto transportation, operation, maintenance,... -
Page 12: Vertical Cutting
VERTICAL CUTTING 1. Fasten the supporting bar (A) in Fig. 6 into the slot at the saw head. 2. Raise saw head to vertical position by lifting up the knob (B) a little to release the lock-pin and slide it into the slot which is set for 90 degree. -
Page 13: Adjustment
8.Adjustment ADJUSTING BLADE GUIDE An unbounded handle is mounted on the unit for freely changing direction by lifting it up and turning a little bit. It’s designed for your convenience to adjust blade guide easily and quickly at any time, and under any situation. Adjustment of this blade guide is in accordance with the sizes of work pieces. -
Page 14: Maintain Gear Transmission
MAINTAIN GEAR TRANSMISSION WARNING SHUT OFF THE POWER SOURCE BEFORE MACHINE RUNNING The gears of the transmission system ADJUSTMENT, MAINTENANCE, OR equipped with this machine are made of a REPAIRMENT. special kind of steel. The quality insures that the gears will be more sturdy and durable. -
Page 17: Part List
Part List PART PART DESCRIPTION Q’TY DESCRIPTION Q’TY Base Cut Off Power Cam Transport Lock 48-1 Screw M8x10 Thick Washer (large) 6mm Key 4x4x20 Hex. Bolt M6x25 Joint Shaft Set Cap Nut Key 4x4x12 Hex. Bolt M6x12 Screw M6x10 0º~45º Lock Washer Support Plate Stop Rod Swivel Support Elbow... - Page 18 Part List PART PART DESCRIPTION Q’TY DESCRIPTION Q’TY Blade Tension Handle Shaft Switch Case Blade Wheel Seat Tooth 132-1 Cross Screw ST 4x10 Blade Wheel Swat Cross Screw M5x10 Nut M6 Nut M12 Blade Tension Block Washer (Large) 12mm Compression Spring Lock Bolt Ball Bearing 625z U-Shape Plate 136-1...
- Page 20 Axminster Reference No:MCB100A Axminster Devon EX13 5PH UK A X M I N S T E R W H I T E FREEPHONE 0800 371822 www.axminster.co.uk...
Need help?
Do you have a question about the MCB100A and is the answer not in the manual?
Questions and answers