Table of Contents
Advertisement
Razor
Owner/Operator Manual
Manuel du Propriétaire/Utilisateur
E10
The use of any gasoline exceeding 10% ethanol (E10) or
10% MTBE will void the product warranty.
L'utilisation d'une essence contenant plus de 10% d'éthanol
(E10) ou de 10% de MTBE annulent la garantie.
ENGLISH
FRENCH
Models
911173 – LMP
(SN 000101+)
911175 – LMSP
(SN 000101+)
911179 – LMSPE
(SN 000101+)
04527400B 4/13
Printed in USA
Advertisement
Table of Contents

Related Manuals for Ariens Razor Push


Summary of Contents for Ariens Razor Push
- Page 1 Razor Owner/Operator Manual Manuel du Propriétaire/Utilisateur Models 911173 – LMP (SN 000101+) 911175 – LMSP (SN 000101+) 911179 – LMSPE (SN 000101+) The use of any gasoline exceeding 10% ethanol (E10) or 10% MTBE will void the product warranty. L’utilisation d’une essence contenant plus de 10% d’éthanol (E10) ou de 10% de MTBE annulent la garantie.
-
Page 2: Table Of Contents
Numbers are located on the product registration form in the literature package. They are printed on a serial number label, • Record Engine Model and Serial numbers located on the frame of your unit (Figure 1). here. © Copyright 2013 Ariens Company EN - 2... -
Page 3: Product Registration
The descriptions and penalties. Emission controls and components specifications contained in this manual were can only be adjusted by an Ariens Company in effect at printing. Equipment described dealer or an authorized engine within this manual may be optional. Some manufacturer's service center. -
Page 4: Safety
SAFETY 4. Notice NOTICE: Indicates information or procedures Read these safety rules and follow them that are considered important but not hazard closely. Failure to follow these rules could related. If not avoided property damage could lead to loss of control of unit, severe personal result. - Page 5 2. Safety Decal Description Do not operate mower unless guards are in operating position or entire 1. DANGER! bagger is attached. 1.3 Tipping Hazard DANGER! SERIOUS INJURY OR DEATH MAY RESULT FROM MACHINE ROLLOVER Read and understand the operator’s manual before operating unit.
-
Page 6: Safety Rules
SAFETY RULES Never allow children to operate the machine. This cutting machine is capable of amputating Use extreme care when approaching blind hands and feet and throwing objects. Failure corners, shrubs, trees, or other objects that to observe the following safety instructions may block your view of a child. - Page 7 Do not pull machine backward unless Operation absolutely necessary. Always look down and The engine/blade control feature on mower behind before and while moving backward. stops engine and blade within 5 seconds Stop engine before removing grass catcher whenever operator releases PTO lever. or unclogging chute.
- Page 8 Gasoline is extremely flammable and the Use only Ariens Company-recommended vapors are explosive. attachments that are appropriate to your use Ethanol blends must not exceed E10. Higher and can be used safely in your application.
- Page 9 Service Transporting Unit Maintain or replace safety and instruction Use extra care when loading or unloading labels, as necessary. the machine onto a truck or into a trailer. Keep unit free of debris. Clean up oil or fuel Secure unit chassis to transport vehicle. spills.
-
Page 10: Assembly
ASSEMBLY ASSEMBLY CAUTION: AVOID INJURY. Read 1. Remove mower and grass bag from Safety and understand the entire carton. section before proceeding. 2. 911173: Loosen handlebar mounting hardware. See Figure 4. CARTON CONTENTS 3. 911173: Rotate handlebar to the desired position and tighten mounting hardware. - Page 11 4. 911175, 179: Pull the handlebar into the 5. Check engine oil level and add if upright position. Push the bail control necessary. See engine manual. handle forward and rotate handlebar to 6. Set up mower for bagging, side the desired position. See Figure 5. discharge or mulching.
-
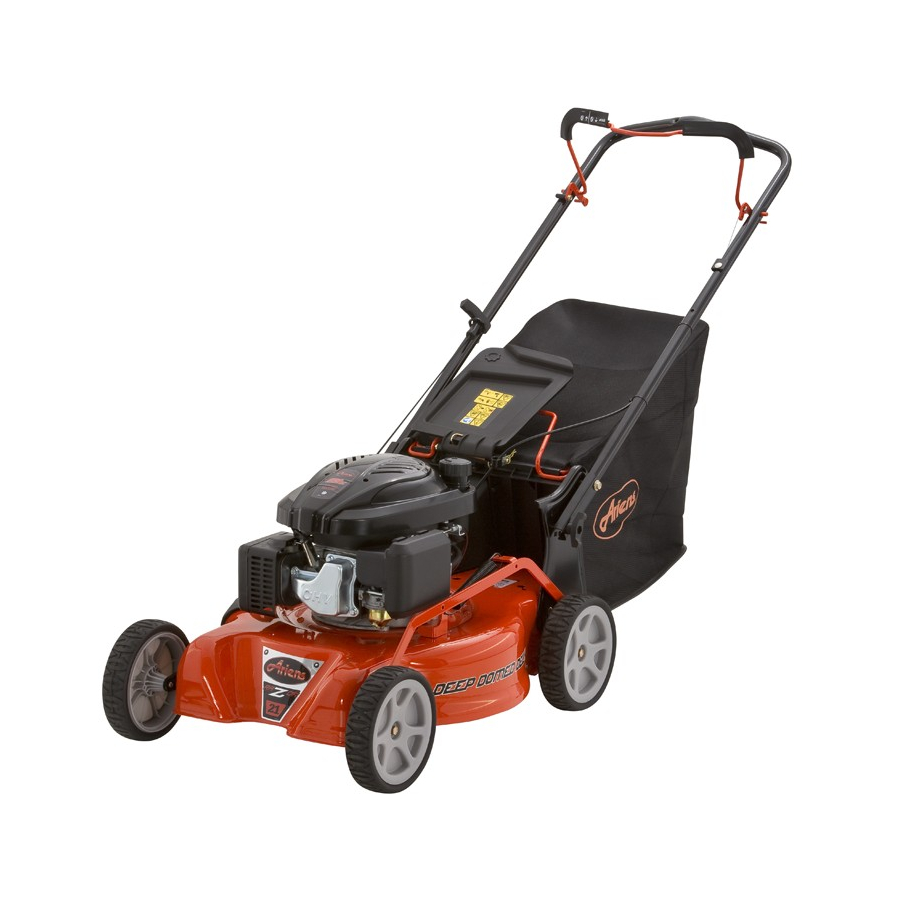
Page 12: Controls And Features
CONTROLS AND FEATURES Figure 6 1. Engine/Blade Control 2. Wheel Drive Control (911175, 179) 3. Handlebars 4. Grass Bag 5. Rear Door 6. Fuel Tank and Cap 7. Oil Fill/Dipstick 8. Muffler and Muffler Guard 9. Cutting Height Lever 10. Air Filter 11. -
Page 13: Operation
OPERATION CONTROLS AND FEATURES CUTTING HEIGHT ADJUSTMENT See Figure 6 for locations. DANGER: Avoid injury from rotating blade. WARNING: Improper operation ALWAYS shut off engine before can lead to injury. Learn what the controls do and how they work. adjusting cutting height. Thoroughly read and understand entire Operator Manual. -
Page 14: Filling Fuel Tank
Ignition Switch (911179) OPTIONAL CONTROLS Wheel Drive Control Lever A removable key operates the ignition switch. Turn the (911175, 179) key to the start position (2) to start the unit. The key CAUTION: Unit will move forward will spring back to the at engine start if wheel drive “RUN”... - Page 15 To Discharge Clippings to the Side frequently for necessary replacement. Replace worn or See Figure 11. damaged bag with Ariens original 1. Shut off unit. equipment replacement bag only. 2. Remove grass bag. 3. Lift rear door and install mulch plug (see See Figure 10.
-
Page 16: Electric Start
Side Discharge Chute Removal Electric Start (911179) See Figure 11. 1. Lift mulch cover. Recoil may also be used to start the engine 2. Lift side discharge chute off of tabs to Manual Start (see on page 16). release from mower and remove chute. IMPORTANT: DO NOT start engine while the To Mulch Clippings charger is connected to wiring harness. -
Page 17: Maintenance Schedule
If the engine and blade continue to Ariens Dealers will provide any service, parts run, adjust or repair control immediately. or adjustments which may be required to keep your unit operating at peak efficiency. - Page 18 DO NOT Sharpen to This Pattern CAUTION: Mower blades are sharp and can cut you. Wrap the blades or wear gloves, and use extra caution when servicing them. To remove blade: 1. Stop engine, wait for all moving parts to stop, and disconnect spark plug wire.
-
Page 19: Check Drive Belt
It should need no routine lubrication. If the transmission leaks grease, bring the mower to your local Ariens dealer for repair. CHECK SPARK PLUG Spark plug should be replaced every 100 hours of operation or each year. -
Page 20: Service And Adjustments
SERVICE AND ADJUSTMENTS CAUTION: AVOID INJURY. Read Safety and understand the entire section before proceeding. SERVICE POSITION Put unit into service position for easy access to bottom of deck. CAUTION: Avoid fuel spills. Follow steps below to help prevent fuel spills. -
Page 21: Drive Belt Replacement
5. Remove drive pulley guide, belt channel guides and engine pulley with key. 6. Pull belt over end of crankshaft to allow belt to slide out through belt channel. 7. Rotate transmission backward to remove hardware, then adjust to loosen belt. -
Page 22: Engine/Blade Control Adjustment
6 hours engine or blade within 3 seconds, take the even if mower is not used. unit to an authorized Ariens dealer for repairs. IMPORTANT: DO NOT attempt to jump start mower. BATTERY... -
Page 23: Wheel Drive Control Adjustment
WHEEL DRIVE CONTROL ADJUSTMENT (911175, 179) See Figure 21. NOTICE: The unit should stop immediately when the wheel drive control is released, and the unit should not creep forward when the wheel drive control is disengaged with the engine running. The unit’s forward speed should increase as the wheel drive control gets closer to the handlebar. -
Page 24: Storage
These deposits can damage the carburetor scratched surfaces to prevent rust. Matching and the fuel hoses, filter and tank. Prevent touch-up paint is available from your Ariens deposits from forming in the fuel system Dealer. Do not use abrasives, solvents, or during storage by adding a quality fuel harsh cleaners. -
Page 25: Service Parts
7. See WHEEL DRIVE 7. Drive seems to slip or speed is CONTROL ADJUSTMENT too slow. on page 23. SERVICE PARTS Always use genuine Ariens parts to keep your mower running like new. Description Part Number Air Filter 21100121 Spark Plug... -
Page 26: Specifications
Cutting Width – in. (cm) 21 (53.3) Cutting Height – in. (cm) 1 – 4 (2.5 – 10.2) Engine, 4 cycle Ariens Max Rotation Speed of 3,300 Cutting Edge – RPM Governed RPM (May be 3,200 ± 100 different from maximum rpm.) -
Page 27: Warranty
Register the product immediately at the time of sale. If the dealer does not register the product, the customer must complete the product registration card in the literature package and return it to the Ariens Company, or register the unit online at www.ariens.com, www.gravely.com, www.countax.com. - Page 28 Exclusions – Items Not Covered by This Warranty • Parts that are not genuine Ariens, Gravely or Countax service parts are not covered by this warranty and may void the warranty. • Damages resulting from the installation or use of any part, accessory, or attachment which is not approved by the Ariens Company for use with product(s) identified herein are not covered by this warranty.
- Page 30 Ariens 655 West Ryan Street Brillion, WI 54110 920-756-4688 Fax 920-756-2407 www.ariens.com...
Need help?
Do you have a question about the Razor Push and is the answer not in the manual?
Questions and answers