Table of Contents
Advertisement
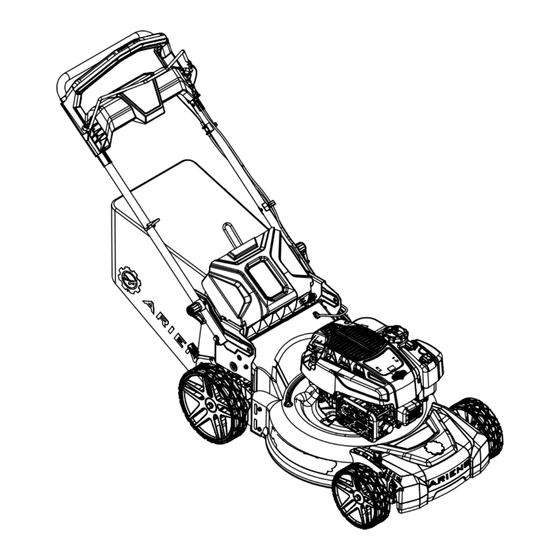
Models / Modelos
911607 – Push
(SN 000101 +)
911609 – Self-Propelled with REFLEX™ Drive
(SN 000101 +)
911614 – Self-Propelled Dual Blade with REFLEX™ Drive
(SN 000101 +)
911608 – Self-Propelled
(SN 000101 +)
ENGLISH
FRANÇAIS
ESPAÑOL
E10
RAZOR
Operator's Manual
Manuel du Utilisateur
Manual del operador
®
•
30202400
8/23
Advertisement
Table of Contents

Related Manuals for Ariens RAZOR 911607


Summary of Contents for Ariens RAZOR 911607
- Page 1 RAZOR ® Operator’s Manual Manuel du Utilisateur Manual del operador Models / Modelos 911607 – Push (SN 000101 +) 911609 – Self-Propelled with REFLEX™ Drive (SN 000101 +) 911614 – Self-Propelled Dual Blade with REFLEX™ Drive (SN 000101 +) 911608 – Self-Propelled (SN 000101 +) ENGLISH FRANÇAIS...
-
Page 2: Table Of Contents
TABLE OF CONTENTS WELCOME ..... . 1 Stop Engine ..... . 14 Mowing Tips. -
Page 3: Welcome
WELCOME Congratulations on your purchase and welcome to the Ariens family! Every machine in the Ariens lineup is designed for long-lasting and unsurpassed performance. We are confident your machine will be part of your family for many years to come. -
Page 4: Safety
Emission controls and components manual. Read and understand all safety can only be adjusted by an Ariens Company messages. dealer or an authorized engine 1. Danger manufacturer's service center. -
Page 5: Safety Decals
5. Important 1.1 Amputation Hazard IMPORTANT: Indicates general reference information worthy of special attention. To avoid amputation hazard SAFETY DECALS DO NOT put hands near rotating blades. The safety decals on your machine are visual reminders of the important safety information in this manual. -
Page 6: Safety Rules
Improper use of power equipment can cause 1.3 Tipping Hazard serous permanent injury or death to the operator or a bystander. SERIOUS INJURY OR Understand: DEATH MAY RESULT • How to operate all controls FROM MACHINE ROLLOVER • The functions of all controls •... - Page 7 NEVER modify or adjust as necessary or have the unit remove safety devices. inspected and repaired by an authorized Ariens dealer before using. DO NOT pull machine backward unless absolutely necessary. ALWAYS look down Be sure the area is clear of bystanders and behind before and while moving before operating.
- Page 8 Stop the engine (motor) and wait until the DO NOT operate near drop-offs, ditches, or blade(s) comes to a complete stop before embankments. You could lose your footing cleaning the machine, removing grass or balance. catcher, or unclogging the discharge guard. Fuel On self-propelled models, wheel drive must be disengaged when starting engine.
- Page 9 Keep machine free of grass, leaves, or other Use only Ariens Company-recommended debris build-up. Clean up oil or fuel spillage attachments that are appropriate to your use and remove any fuel-soaked debris. Allow and can be used safely in your application.
-
Page 10: Assembly
ASSEMBLY ASSEMBLY 1. Remove contents from box. 2. Remove protective film from engine and other components. CAUTION: AVOID INJURY. Read 3. Adjust handlebar to the desired operating and understand the Safety section position. See Adjust Handlebar Height on before proceeding. page 13. -
Page 11: Controls & Features
CONTROLS & FEATURES Models 911609, 911614 Model 911608 Model 911607 Figure 4 1. Operator Presence Control (OPC) Lever 8. Mulch Plug 2. Wheel Drive Control Lever (Model 9. Fuel Tank and Cap 911608) 10. Oil Fill / Dipstick 3. REFLEX Drive Handle (Models 911609, 11. -
Page 12: Operator Presence Control (Opc) Lever
The closer its position to the bottom of the pace match guide the faster the mower drives forward. Figure 5 Slow IMPORTANT: Releasing the OPC lever stops engine and blade within 3 seconds. If feature fails, see your Ariens dealer. Fast Figure 6 EN - 10... -
Page 13: Wheel Drive Control Lever
87. DO NOT use E85 blended fuels; the engine is not E15 / E20 / E30 / E 85 compatible. The maximum recommended ethanol content is 10%. Ariens recommends using a quality fuel stabilizer in Slow all fuel. - Page 14 Bagging Grass Clippings Rear Discharging Grass Clippings 1. Stop engine and wait for moving parts to CAUTION: Bag wears from stop and for hot parts to cool. normal use. Check bag frequently 2. Remove grass bag. See Empty Grass for wear and replace if necessary. Bag on page 11.
-
Page 15: Adjust Cutting Height
ADJUST CUTTING HEIGHT See Figure 14. 2. Position handlebar at desired height. 1. Stop engine and wait for all moving parts to stop and for hot parts to cool. 3. Align handlebar with desired mounting holes. 2. Pull HOC adjustment lever out of notch and rotate lever to desired height setting. -
Page 16: Operation
REVERSE MOWER OPERATION IMPORTANT: Mower does not have a powered reverse. IMPORTANT: If mower wheels lock when CAUTION: AVOID INJURY. Read pulling in reverse push mower forward to and understand the Safety section unlock wheels. If problem persists see Adjust before proceeding. -
Page 17: Maintenance
SERVICE PARTS MAINTENANCE See your Ariens dealer to purchase service parts for your unit. CAUTION: AVOID INJURY. Read Description Part No. and understand the Safety section Air Cleaner (Models 911607, 21575020 before proceeding. 911609, 911608) Air Filter 21575023 Your Ariens dealer can provide service and... -
Page 18: Check Engine Oil
Check grass bag frequently for wear. Remove grass bag, empty grass clippings, wash with garden hose and allow it to dry. Replace worn or damaged bag with Ariens original equipment only. Clean grass clippings and other debris from 1. Hose Coupler mower pan. -
Page 19: Storage Position
9. Pull lock collar away from washout port and remove hose from port. See Figure 18. 1. Lock Collar Figure 18 Figure 19 10. Remove coupler from hose end. 11. Start engine and engage blade for 5. Models 911609, 911614 Only: Place unit approximately 2 –... -
Page 20: Check Mower Blade(S)
Remove Blades NOTICE: Some dual blade machines feature an additional spacer. Configure per machine specifications. Model 911614 1. Stop engine and wait for all moving parts to stop and for hot parts to cool. 2. Disconnect spark plug wire. 3. Place unit in service position. See Service Position on page 15. - Page 21 Sharpen Blade NOTICE: DO NOT sharpen laser edge blades. See Figure 24. CAUTION: AVOID INJURY. DO NOT sharpen blade while attached to unit. 1. Remove mower blade. Discard blade if: • More than 1.3 cm (1/2") of metal is Figure 25 gone.
-
Page 22: Check Drive Belt
Model 911614 Figure 27 2. Torque hardware to 61 N*m (45 lb-ft). 3. Return unit to operating position and reconnect spark plug wire. Figure 29 Install Blades Model 911614 2. Torque center bolt to 61 N*m (45 lb-ft), NOTICE: Some dual blade machines feature torque outer two bolts to 40.7 N•m (30 lb- an additional spacer. -
Page 23: Service & Adjustments
3. Model 911608: Place front of unit in 5. Reinstall wheels and secure with highest height of cut position. Remove previously removed hardware. locking nuts from behind wheel plates. 6. Torque shoulder bolts and locking nuts to Remove shoulder bolts retaining front 16.3 N•m (144 in-lbs). - Page 24 Models 911609, 911614 Model 911608 Increase Cable Tension / Speed 1. Extension Spring 2. Transmission Bracket Figure 32 Models 911609, 911614 Decrease Cable Tension / Speed 1. Adjustment Cable 2. Cable Guide Clamp Figure 34 Model 911608 Increase Cable Tension / Speed 1.
-
Page 25: Adjust Operator Presence Control (Opc) Lever
Figure 37. CONTROL (OPC) LEVER The OPC lever is non-adjustable. If engine and / or blade does not stop within 3 seconds of releasing the OPC lever, see your Ariens dealer. REPLACE DRIVE BELT Models 911609, 911614, 911608 Remove Drive Belt All Models: 1. - Page 26 1. Hex Screws Figure 40 2. Cover 3. Extension Spring Models 911609, 911614 only: Figure 38 1. Remove and retain six hex screws from support bracket and remove bracket. See 4. Remove and retain three Torx head Figure 41. screws from transmission bracket. See Figure 39.
- Page 27 5. Disconnect extension spring from transmission bracket. See Figure 42. Figure 44 Install Drive Belt Figure 42 Models 911609, 911614 only: See Figures 45 and 46. 6. Remove transmission assembly. See 1. Install drive belt around transmission Figure 43. pulley. 2.
- Page 28 Model 911608 Model 911609 1. Transmission Pulley 2. Transmission Bracket 3. Spindle Pulley 1. Transmission Pulley 2. Transmission Bracket Figure 47 3. Spindle Pulley Figure 46 4. Reinstall front cover using original hardware. 5. Reconnect extension spring.to 5. Reconnect extension spring to transmission bracket.
-
Page 29: Troubleshooting
Check fuel level. Fill tank if necessary. Spark plug wire loose or off. Check connection. Engine will not start. Operator presence control See your Ariens dealer. (OPC) lever disconnected, broken or out of adjustment. Engine is difficult to Mower clogged with grass Clear debris from under mower. -
Page 30: Storage
For the best effectiveness, add stabilizer to all fuel containers whenever purchasing fuel. Add the stabilizer to the See your Ariens dealer for a complete list of container before adding fuel. compatible accessories and attachments for a. Add Ariens fuel stabilizer (see Service your unit. -
Page 31: Specifications
SPECIFICATIONS Model Number 911607 911609 Self-Propelled with Description Push REFLEX™ Drive ® Briggs & Stratton Briggs & Stratton Engine EXi 725 EX 625 150 (9.2) 163 (9.9) Displacement – cm Maximum RPM – No load. 3200 ± 100 Crank Case Capacity – liter (oz) 0.4 (15) Air Cleaner Paper Element... -
Page 32: Specifications
SPECIFICATIONS Model Number 911614 911608 Dual Blade with Description Self-Propelled REFLEX™ Drive Briggs & Stratton Briggs & Stratton Engine EXi 875 EXi 725 190 (11.6) 163 (9.9) Displacement – cm Maximum RPM – No load. 3200 ± 100 Crank Case Capacity – liter (oz) 0.5 (18) 0.4 (15) Air Cleaner... -
Page 33: Warranty
“Commercial Use.” If any product is rented or leased, then the duration of these warranties shall be 90 days after the date of purchase. An authorized Ariens dealer will repair any defect in material or workmanship, and repair or replace any defective part, subject to the conditions, limitations and exclusions set forth herein. Such repair or replacement will be free of charge (labor and parts) to the original purchaser;... - Page 34 Exclusions – Items Not Covered by This Warranty • Parts that are not genuine Ariens service parts are not covered by this warranty and may void the war- ranty if the parts result in premature wear or damage to the product.
- Page 35 • Ensure that the maintenance and adjustments explained in the Operator’s Manual are routinely completed. • Promptly notify AriensCo or an authorized Ariens service representative of the need for warranty service. • Transport the product to and from the place of warranty service at owner’s expense.
- Page 36 AriensCo shall not be held liable for damages, including premature wear and tear, or injuries caused by installation of unauthorized parts and accessories or for parts and accessories not installed by an authorized Ariens dealer. Australian Consumer Law The following applies solely to warranties subject to Subsection 102(1) of the Australian Consumer Law: Our goods come with guarantees that cannot be excluded by the Australian Consumer Law.
- Page 38 655 West Ryan Street Brillion, WI 54110 www.ariens.com parts.ariens.com...
Need help?
Do you have a question about the RAZOR 911607 and is the answer not in the manual?
Questions and answers