Table of Contents
Advertisement
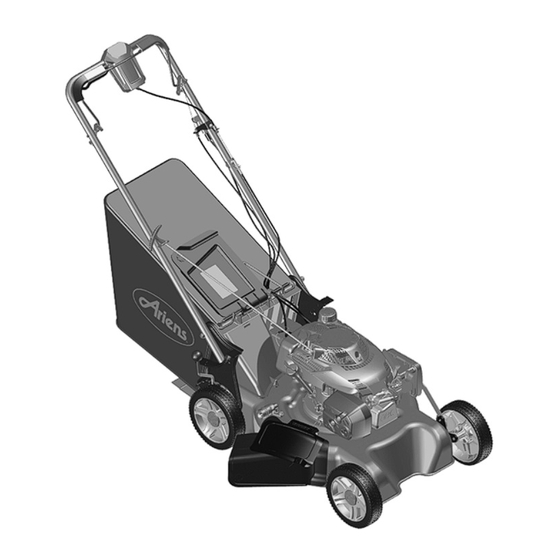
Razor
Owner/Operator Manual
Manuel du Propriétaire/Utilisateur
E10
The use of any gasoline exceeding 10% ethanol (E10) or
10% MTBE will void the product warranty.
L'utilisation d'une essence contenant plus de 10%
d'éthanol (E10) ou de 10% de MTBE annulent la garantie.
ENGLISH
FRANÇAIS
Models
911173 – LMP
(SN 028000 +)
911175 – LMSP
(SN 028000 +)
911177 – LMSP BBC
(SN 028000 +)
911179 – LMSPE
(SN 028000 +)
911188 – LMSP
(SN 000101 +)
911189 – LMSP BBC
(SN 000101 +)
911190 – LMSPE
(SN 000101 +)
04832200
Printed in USA
•
11/14
Advertisement
Table of Contents

Related Manuals for Ariens 911173


Summary of Contents for Ariens 911173
- Page 1 Razor Owner/Operator Manual Manuel du Propriétaire/Utilisateur Models 911173 – LMP (SN 028000 +) 911175 – LMSP (SN 028000 +) 911177 – LMSP BBC (SN 028000 +) 911179 – LMSPE (SN 028000 +) 911188 – LMSP (SN 000101 +) 911189 – LMSP BBC (SN 000101 +) 911190 –...
-
Page 2: Table Of Contents
See Figure Figure 1. PRODUCT REGISTRATION The Ariens dealer must register the product at the time of purchase. Registering the product will help the company process warranty claims or contact you with the latest service information. - Page 3 Emission controls and components unit. can only be adjusted by an Ariens Company dealer or an authorized engine DEALER DELIVERY manufacturer's service center. Contact your...
-
Page 4: Safety
SAFETY Read these safety rules and follow them 4. Notice closely. Failure to follow these rules could NOTICE: Indicates information or procedures lead to loss of control of unit, severe personal that are considered important but not hazard injury or death to you or bystanders or result related. - Page 5 Safety Decal Description Do not operate mower 1. DANGER! unless guards are in operating position or entire bagger is attached. DANGER! 1.3 Tipping Hazard SERIOUS INJURY OR DEATH MAY RESULT FROM MACHINE Read and understand the ROLLOVER operator’s manual before operating unit.
- Page 6 SAFETY RULES Use extreme care when approaching blind corners, shrubs, trees, or other objects that This cutting machine is capable of amputating may block your view of a child. hands and feet and throwing objects. Failure to observe the following safety instructions Keep children out of the mowing area and in could result in serious injury or death.
- Page 7 If the machine should start to vibrate Operation abnormally, stop the engine (motor) and Models 911173, 175, 179, 188, 190: check for the cause immediately. Vibration is Releasing the operator presence control generally a warning of trouble. (OPC) handle stops engine and blade within Keep safety devices or guards in place and 3 seconds.
- Page 8 You could lose your footing the manufacturer’s recommended parts or balance. when necessary. Use only Ariens Company-recommended Fuel attachments that are appropriate to your use and can be used safely in your application. To avoid personal injury or property damage, use extreme care in handling gasoline.
- Page 9 Service Maintain or replace safety and instruction labels, as necessary. Keep unit free of debris. Clean up oil or fuel spills. Do not change engine governor setting or overspeed the engine. Never make any adjustments or repairs with the engine (motor) running. *Disconnect the spark plug wire and ground against engine to prevent unintended starting.
-
Page 10: Assembly
7. Washout Port 8. Hose Coupling Figure 3 ASSEMBLY 1. Remove mower and grass bag from carton. 2. Model 911173: Remove handlebar mounting hardware, rotate handlebar to desired position and secure with mounting hardware. See Figure 4. EN - 10... - Page 11 3. Models 911175, 177, 179, 188, 189, 8. Connect spark plug wire. 190: Pull handlebar to upright position. 9. Models 911173, 175, 179, 188, 190: Push operator presence control handle Check the operator presence control (operator presence control / blade brake...
-
Page 12: Controls And Features
CONTROLS AND FEATURES Models 911177, 189 Models 911173, 175, 179, 188, 190 Figure 6 1. Operator Presence Control (OPC) 14. Handlebar Adjustment Holes Handle (Models 911173, 175, 179, 188, 15. Recoil Starter Handle 190) 16. Ignition Switch (Models 911179, 190) 2. - Page 13 Operator Presence Control (OPC) Recoil Starter Handle Handle When pulled, handle will turn engine over. Models 911173, 175, 179, 188, 190 Cutting Height Lever See Figure 7. Move lever to adjust cutting height. See ADJUSTING CUTTING HEIGHT on page 16.
- Page 14 To drive forward: inspected and repaired by an authorized Slowly squeeze the wheel drive control lever Ariens dealer before using. toward the handlebar until you reach a comfortable ground speed. Hold the lever BLADE ENGAGED against the handlebar for full speed.
-
Page 15: Operation
2. Remove fuel cap. replacement. Replace worn or IMPORTANT: Refer to engine manual for damaged bag with Ariens original correct type and grade of fuel. equipment replacement bag only. 3. Fill fuel tank to the bottom of filler neck. - Page 16 1. Side Discharge Chute 2. Side Discharge 3. Tabs 1. Rear Door Figure 11 2. Bagger 3. Bag Mount To remove side discharge chute: 4. Mulch Plug 1. Lift side discharge cover. Figure 10 2. Lift side discharge chute off of tabs to release from mower and remove chute.
- Page 17 Once the engine has started, place throttle lever in the high speed position. 3. Models 911173, 175, 179, 188, 190: Hold operator presence control handle against the handlebar. 4. Grasp starter handle and pull rope slowly until it pulls harder.
- Page 18 Shut Off 1. Park unit on a level surface, within reach of hose and in a location where the 1. Release wheel drive control lever and dispersal of wet grass clippings is allow unit to stop completely (self- acceptable. propelled models). 2.
- Page 19 MOWING TIPS Cut grass when it is dry. Keep mower blades sharp. Do not set cutting height too low. For tall grass, mow twice. Do not mow too fast. Mow with engine at full throttle. Discharge clippings into areas already cut. Vary cutting pattern with each mowing.
-
Page 20: Maintenance Schedule
CHECK OPERATOR PRESENCE CAUTION: AVOID INJURY. Read CONTROL (OPC) HANDLE and understand the entire Safety Models 911173, 175, 179, 188, 190 section before proceeding. The engine and blade must stop within 3 seconds after releasing OPC handle. If the Ariens Dealers will provide any service, parts... - Page 21 An 3. Install mower blade on unit. imbalanced mower blade will cause excessive vibration and 4. For Models 911173, 175, 179, 188, 190 eventual damage to unit. Check torque bolt to 37.5 – 50 lbf-ft mower blade balance before (51 –...
- Page 22 GENERAL LUBRICATION NOTICE: The mower transmission is lubricated and sealed at the factory. It should need no routine lubrication. If the transmission leaks grease, bring the mower to your local Ariens dealer for repair. EN - 22...
-
Page 23: Service And Adjustments
(operator presence control / blade brake clutch handle on Models 911177, 189) ADJUST HANDLEBAR HEIGHT forward and rotate handlebar to desired Model 911173 position. To adjust handlebar height: See Figure 16. 1. Remove hardware from lower handlebar mounting holes. - Page 24 8. Remove belt and pull through the belt REPLACE DRIVE BELT channel. See Figure 20. Remove Drive Belt Models 911173, 175, 179, 188, 189, 1. Disconnect spark plug wire. 2. Move cable adjuster to loosen wheel drive cable. 3. Disconnect the drive cable spring from the transmission bracket.
- Page 25 Remove Drive Belt Models 911177, 189 1. Remove two bolts from blade and remove blade. See Figure 21. 1. Blade Bolts 2. Blade Figure 21 2. Remove center bolt and two washers. See Figure 22. 1. Blade 2. Blade Adapter 3.
- Page 26 Figure 24 11. Remove belt from engine sheave and remove belt. Install Drive Belt Models 911173, 175, 179, 188, 189, See Figure 20. 1. Route new belt through belt channel. 2. Route belt around transmission pulley and reinstall transmission bracket and hardware.
- Page 27 6. Using prybar, rotate BBC assembly or blade within 3 seconds, take the unit to an clockwise until anti-rotation arm is authorized Ariens dealer for repairs. aligned with shoulder bolt bracket. Install ADJUST OPERATOR PRESENCE bolt and fully tighten. See Figure 25.
- Page 28 To install battery: 1. Reinstall battery into unit. 2. Connect black, negative (–) connector to black, negative (–) battery terminal. 3. Connect red, positive (+) connector to red, positive (+) battery terminal. 1. Battery Bracket 2. Black, Negative (–) Connector and 1.
-
Page 29: Storage
Touch up all adjuster down the handlebar. scratched surfaces to prevent rust. Matching To decrease speed, move the cable touch-up paint is available from your Ariens adjuster up the handlebar. Dealer. Do not use abrasives, solvents, or harsh cleaners. -
Page 30: Service Parts
Inspection SERVICE PARTS Inspect mower and repair or replace worn or damaged parts to avoid delays when Always use genuine Ariens parts to keep beginning use again. your mower running like new. Regularly check all hardware and keep Description Part Number fasteners tight. -
Page 31: Troubleshooting
TROUBLESHOOTING PROBLEM PROBABLE CAUSE CORRECTION Engine will not 1. Fuel tank empty or low. 1. Check fuel level. Fill tank if start necessary. 2. Spark plug wire loose or off. 2. Check connection. 3. Operator presence control 3. Check cable. Adjust, repair cable (operator presence or replace as necessary. - Page 32 SPECIFICATIONS Model Number 911173 911175 911177 911179 Model Razor Description Push Self- Self-Propelled Self-Propelled Propelled Blade Brake Electric Start Clutch Length – in. (cm) 70 (177.8) Height – in. (cm) 47 (119.4) Width – in. (cm) 21.5 (54.6) Actual Weight – lbs (kg) 91 (43.1)
-
Page 33: Specifications
SPECIFICATIONS Model Number 911188 911189 911190 Model Razor Description Self-Propelled Self-Propelled Self-Propelled Blade Brake Electric Start Clutch Length – in. (cm) 70 (177.8) Height – in. (cm) 47 (119.4) Width – in. (cm) 21.5 (54.6) Actual Weight – lbs (kg) 98 (44.5) 104 (47.2) Cutting Width –... -
Page 34: Warranty
Register the product immediately at the time of sale. If the dealer does not register the product, the customer must complete the product registration card in the literature package and return it to the Ariens Company, or register the unit online at www.ariens.com, www.gravely.com, www.countax.com. - Page 35 Exclusions – Items Not Covered by This Warranty • Parts that are not genuine Ariens, Gravely or Countax service parts are not covered by this warranty and may void the warranty. • Damages resulting from the installation or use of any part, accessory, or attachment which is not approved by the Ariens Company for use with product(s) identified herein are not covered by this war- ranty.
- Page 36 Ariens 655 West Ryan Street Brillion, WI 54110 920-756-4688 Fax 920-756-2407 www.ariens.com www.ariens.com.au...
Need help?
Do you have a question about the 911173 and is the answer not in the manual?
Questions and answers
Oil change 911173 How many ozs
The crankcase capacity for the engine is 18 ounces (0.53 liters) of oil.
This answer is automatically generated