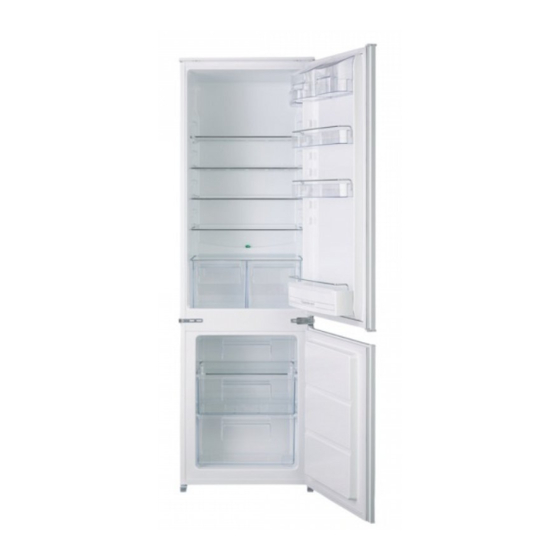
Summary of Contents for Kuppersbusch IKE3260-1-2T
- Page 1 Gebruiks- Notice Benutzer- User manual aanwijzing d'utilisation information Koel-vries- Réfrigérateur/ Kühl-Gefrier- Fridge-Freezer combinatie congélateur schrank IKE3260-1-2T...
-
Page 2: Table Of Contents
Contents Safety information Care and cleaning Operation What to do if… First use Technical data Daily use Installation Helpful hints and tips Environmental concerns Subject to change without notice Safety information In the interest of your safety and to ensure ance. - Page 3 Warning! Any electrical component • Do not place carbonated or fizzy drinks in (power cord, plug, compressor) must the freezer compartment as it creates be replaced by a certified service agent pressure on the container, which may or qualified service personnel to avoid cause it to explode, resulting in damage hazard.
-
Page 4: Operation
Service in either its refrigerant circuit or insula- tion materials. The appliance shall not • Any electrical work required to do the be discarded together with the urban servicing of the appliance should be car- refuse and rubbish. The insulation foam ried out by a qualified electrician or com- contains flammable gases: the appli- petent person. - Page 5 Place the fresh food to be frozen on the top compartment. Storage of frozen food When first starting-up or after a period out of use, before putting the products in the compartment let the appliance run at least 2 hours on the higher settings. If large quantities of food are to be stored, remove all drawers and baskets from appli- ance and place food on cooling shelves to...
-
Page 6: Helpful Hints And Tips
Helpful hints and tips Hints for energy saving • the maximum quantity of food which can be frozen in 24 hrs. is shown on the rat- • Do not open the door frequently or leave ing plate; it open longer than absolutely necessary. •... -
Page 7: Care And Cleaning
Care and cleaning Caution! Unplug the appliance before It is important to periodically clean the de- carrying out any maintenance frost water drain hole in the middle of the operation. refrigerator compartment channel to pre- vent the water overflowing and dripping on- This appliance contains hydrocarbons to the food inside. -
Page 8: What To Do If
sin underneath to collect the defrost Warning! Never use sharp metal tools water to scrape off frost from the evaporator as you could damage it. In order to speed up the defrosting Do not use a mechanical device or any process, place a pot of warm water in artificial means to speed up the thaw- the freezer compartment. - Page 9 Problem Possible cause Solution The compressor oper- The temperature is not set cor- Set a higher temperature. ates continually. rectly. The door is not closed correctly. Refer to "Closing the door". The door has been opened too Do not keep the door open longer frequently.
-
Page 10: Technical Data
Closing the door 1. Clean the door gaskets. 2. If necessary, adjust the door. Refer to "Installation". 3. If necessary, replace the defective door gaskets. Contact the Service Center. Technical data Dimension of the recess Height 1780 mm Width 560 mm Depth 550 mm Rising Time... - Page 11 ance to a separate earth in compliance with current regulations, consulting a qualified electrician. The manufacturer declines all responsibility if the above safety precautions are not ob- served. This appliance complies with the E.E.C. Di- rectives. Door reversibility The door of the appliance opens to the right.
- Page 12 50 - min. 200 cm min. 200 cm Installing the appliance Caution! Make sure that the mains 3. Adjust the appliance in the niche. cable can move freely. Make sure that the distance between the appliance and the cupboard front- Do these steps.
- Page 13 5. Remove the correct part from the hinge 7. Connect the appliance laterally to the cover (E). Make sure to remove the part kitchen furniture sidewall: DX, in the case of right hinge, SX in op- a) Loosen the screws of the part (G) posite case.
- Page 14 Put together the appliance door and the furniture door and mark the holes. 8 mm 9. Install the part (Ha) on the inner side of the kitchen furniture. 12. Remove the brackets and mark a dis- ca. 50 mm tance of 8 mm from the outer edge of the door where the nail must be fitted 90°...
-
Page 15: Environmental Concerns
14. Press the part (Hd) on the part (Hb). Do a final check to make sure that: • All screws are tightened. • The sealing strip is attached tightly to the cabinet. • The door opens and closes correctly. Environmental concerns consequences for the environment and The symbol on the product or on its... - Page 16 222346786-A-082011...


Need help?
Do you have a question about the IKE3260-1-2T and is the answer not in the manual?
Questions and answers