DAVIS Vantage Pro Console Manual
Hide thumbs
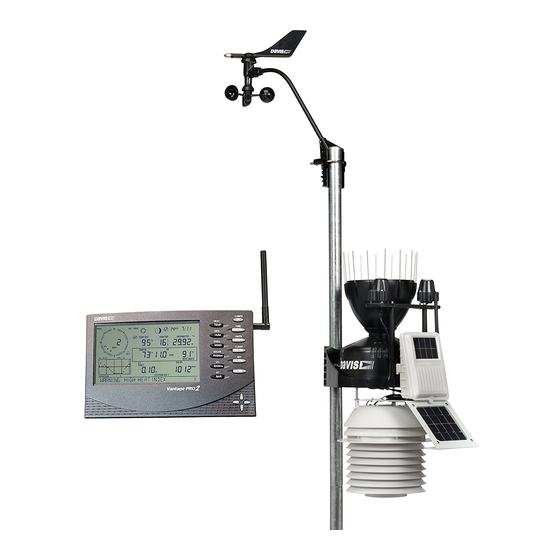
Also See for Vantage Pro:
- Console manual (64 pages) ,
- User manual & setup manual (60 pages) ,
- Reference manual (52 pages)

Related Manuals for DAVIS Vantage Pro


Summary of Contents for DAVIS Vantage Pro
-
Page 1: Weather Station
Vantage Pro Weather Station Console Manual Product #6310, 6310 , 6310 , 6310 , 6310 , 6310... -
Page 3: Table Of Contents
NSTALLATION Powering your Vantage Pro ......11 Changing batteries ........12 Connecting the Cabled Console to the Integrated Sensor Suite (ISS) . - Page 4 ..... 45 ROUBLESHOOTING UIDE ....45 IMITED ARRANTY . 45 UESTIONS ONTACT THE AVIS ERVICE ENTER Page 4 Vantage Pro Console Manual...
- Page 5 ........62 EVICE Vantage Pro Manual Page 5...
- Page 6 Page 6 Vantage Pro Console Manual...
-
Page 7: Welcome To Vantage Pro
E L C O M E T O A N T A G E Welcome to Davis Instruments’ Vantage Pro Console. The Console, part of the comprehensive Vantage Pro system, displays a wealth of weather information and a forecast based on the latest meteorological algorithms. The console is also a powerful weather computer, collecting, storing, and displaying histori- cal weather data. -
Page 8: Console Modes
Set, clear, and review alarm settings in Alarm mode. • Graph Explore the console’s advanced graphing capabilities in Graph mode. Multiple Stations / Sensors The Wireless Vantage Pro system can receive transmissions from up to eight different transmitters. See “Optional Sensors” below. PTIONAL ENSORS The Vantage Pro system is extremely flexible. -
Page 9: Optional Accessories
Measures and transmits leaf wetness and temperature data from up to four leaf wetness sensors and four temperature probes. Note: The Wireless Vantage Pro console can receive from up to eight total transmitters. Please see the see “Maximum Transmitters per wireless Console/Receiver” on page 20 for description. - Page 10 Welcome to Vantage Pro Page 10 Vantage Pro Console Manual...
-
Page 11: Console Installation
• WARNING: The Vantage Pro system uses power differenly from the way older Davis stations did. Use only a Davis Vantage Pro AC power adapter. Using an older Davis adapter will damage your Vantage Pro! Powering your Vantage Pro •... -
Page 12: Changing Batteries
(or flat) terminal first. Note: To remove batteries, place the Vantage Pro Console face down on a flat, firm surface. Insert a finger- tip between the two exposed batteries. Press the middle battery down toward the notch (toward the “hidden”... -
Page 13: Connecting The Cabled Console To The Integrated Sensor Suite (Iss)
Connecting the Cabled Console to the Integrated Sensor Suite (ISS) The Vantage Pro comes with 100 feet (30m) of cable. Maximum cable length from ISS to console is 1000 feet. See “Optional Accessories” on page 9 to pur- chase additional cable. -
Page 14: Displaying The Console
3. Pull up on the stand to close it. It will be a little tight, so it’s okay to push hard enough to get it to slide. Page 14 Vantage Pro Manual... -
Page 15: Wall Display
1. Hold the template provided on page 17 flat against the wall and use a pencil to mark the location of the two keyholes. If you are installing a standard Vantage Pro console with sensor cable run- ning inside the wall, attach the console over an empty switch box. - Page 16 Console Installation Page 16 Vantage Pro Manual...
- Page 17 Displaying the Console Use this template to hang the console on a wall. Vantage Pro Manual Page 17...
- Page 18 Console Installation Page 18 Vantage Pro Manual...
-
Page 19: Using The Console
S I N G T H E O N S O L E The Vantage Pro display and keyboard are designed for easy access to the most important weather information. The large LCD display is your window on cur- rent and past environmental conditions, as well as the place to find the forecast. -
Page 20: Screen 1: Activetransmitters
Leaf Wetness/Temperature Station Soil Moisture/Temperature Station Temperature Station Temperature/Humidity Station Screen 2: Selecting transmitters Use setup screen 2 to tell the console/receiver which transmitter IDs to listen to, and what kind of station each transmitter represents. Page 20 Vantage Pro Console Manual... - Page 21 • Cabled station owners, simply press “DONE” and proceed to setup screen 3. Setup Screen 2: Here’s what should greet most new Vantage Pro owners. The console comes factory pre-set at transmitter ID 1. “ON” means the console will receive signals from that ID and will assume the transmitter is an ISS.
-
Page 22: Screen 3: Retransmit
The console/receiver can re-transmit data to other console/receivers, or to the Davis Weather Echo and Weather Echo Plus. Note: This feature is not available in the cabled Vantage Pro station. Setup screen 3 lets you switch the retransmit feature on or off. Use the "+" or "-"... -
Page 23: Screen 5: Latitude
Use the "+" and "-" keys to view the choices. If your time zone is not shown, press the 2ND key to enter your UTC offset. Vantage Pro Console Manual Page 23... -
Page 24: Screen 8: Daylight Savings Settings
Royal Observatory in Greenwich, England. For example, Hayward, California, the home of Davis Instruments, observes Pacific Standard Time. The UTC offset for Pacific Standard Time is -8:00, or eight hours behind Universal Time. When it’s 7:00 pm (1900 hours) UT, it’s 19 - 8 = 1100 hours, or 11:00 am in Hayward. -
Page 25: Screen 10: Elevation
Screen 11: Wind Cup Size All Vantage Pro Stations come with large wind cups. Switch this setting to small only if you have separately purchased and installed small wind cups. Use the "+" and "-" arrow keys to switch between large and small. Press and release the DONE key to move to screen 12. -
Page 26: Screen 13: Rain Season
Press and hold down the DONE key to exit setup mode. The screen will return to the current conditions screen. Re-enter setup mode at any time by pressing and holding the DONE key, then pressing the "-" key. Page 26 Vantage Pro Console Manual... -
Page 27: Current Weather Mode
The current weather screen is the heart of the display and where you’ll likely spend most of your time. Up to ten weather variables are displayed simulta- neously on the Vantage Pro’s LCD screen. The following variables are always displayed: barometric pressure, outside temperature, outside humidity, and wind direction. -
Page 28: Temperature
• Current Dew Point Press and release the 2ND key, then press the DEW PT DEW PT key to select the Dew Point field. Dew Point is displayed in either degrees Farenheit (ºF) or Centigrade (ºC). Page 28 Vantage Pro Console Manual... -
Page 29: Barometric Pressure
See “UV (Ultra Violet) Radiation” on page 55. Heat Indices • Heat Index Press and release the 2ND key, then press the HEAT key to display the Heat Index. See HEAT “Apparent Temperature Measures” on page 51. TEMP Vantage Pro Console Manual Page 29... -
Page 30: Rain Year, Rain Month, And Rain Rate
Season” on page 26.) Year-to-date precipitation is displayed in inches (in) or millimeters (mm). Note: The“Year-to-date” and “Month-to-date” registers record precipitation accumulation for one year and one month respectively; however, you may start each counting period whenever you wish. Page 30 Vantage Pro Console Manual... -
Page 31: Daily Rain And Rain Storm
Note: To display solar radiation readings, you must have installed the optional Solar Radiation sensor. (See “Optional Sensors” on page 8) ET (Evapotranspiration) • Current ET Press and release the 2ND key, then press the ET key to display the current evapotranspiration reading. Vantage Pro Console Manual Page 31... -
Page 32: Selecting Units
UNITS key. The units field will display millibars, millimeters, inches, or hecto- Pascals. Repeating these steps cycles through all four selections. Stop when the the desired unit appears. BAROMETER BAROMETER BAROMETER Barometric Pressure: millibars (mb), millimeters (mm) and inches (in) Page 32 Vantage Pro Console Manual... -
Page 33: Calibrating, Setting, And Clearing Variables
You can calibrate inside and outside temperature, inside and outside humidity, as well as any extra temperature or humidity sensors you have transmitting to Vantage Pro. 1. Select the variable you’d like to calibrate. 2. Press and hold the SET key. -
Page 34: Setting Variables
If, while installing, you accidentally cause a click or two in the rain collec- tor, you can correct the reading by clearing the daily rain total. Page 34 Vantage Pro Console Manual... - Page 35 Clears daily ET and subtracts the old daily ET total from the monthly and yearly ET totals. • Monthly ET Clears the current monthly ET total. Does not affect †he yearly ET total. • Yearly ET Clears the current yearly ET total. Vantage Pro Console Manual Page 35...
-
Page 36: Highs And Lows Mode
Using the Console IGHS AND The Vantage Pro records highs and lows for many weather conditions over three different periods: days, months, and years. Except for Yearly Rainfall, all high and low registers are cleared automatically at the end of each period. For example, daily highs are cleared at midnight, monthly highs are cleared at month–end midnight, yearly highs are cleared at year–end midnight. -
Page 37: Exit Highs And Lows Screen
field will appear in the upper right of the screen. Exit Highs and Lows screen • To exit the Highs and Lows mode, simply press and release the DONE key. The console display will switch to the Current Weather mode. Vantage Pro Console Manual Page 37... -
Page 38: Alarms Mode
To silence a sounding alarm, press the DONE key until the sound stops. See below to clear an alarm value. Note: See Table “Vantage Pro Console Graphs & Alarms” on page 40 for a listing of the Vantage Pro Con- sole’s alarms. -
Page 39: Alarm Mode.
• Press 2ND, then press and hold CLEAR. The threshold value will blink. When the value changes to all dashes, you have cleared the value. Silencing Alarms Press DONE to silence an alarm. Vantage Pro Console Manual Page 39... - Page 40 Using the Console Table 3: Vantage Pro Console Graphs & Alarms Graphs Alarms Reading H,L H,L Barometric Pressure Trend § Evapotranspiration Inside Humidity H,L H,L Outside Humidity H,L H,L Humidity & Dewpoint Dew Point H,L H,L Extra Humidity Leaf Wetness...
- Page 41 Current values are shown in the right-most column of graph, and are the most recent records. All graphed historical values are the last 24 on record. * Requires wireless Vantage Pro and optional Leaf Wetness Station. Requires wireless Vantage Pro and optional Soil Moisture Station Vantage Pro Console Manual...
-
Page 42: Graph Mode
100 graphs of different kinds - all without connecting to a personal computer. Table two above details the graphs that the Vantage Pro Console can display. Note especially that different weather variables may have different graphs available. - Page 43 6. Use DONE to return to current weather mode. Remember that different variables have different graphs - you will have dif- ferent choices, depending on what you’re graphing. Refer to Table two above to see the choices. Vantage Pro Console Manual Page 43...
- Page 44 Using the Console Page 44 Vantage Pro Console Manual...
-
Page 45: Troubleshooting , Repair , & Warranty
ROUBLESHOOTING UIDE While the Vantage Pro is designed to provide years of trouble-free operation, occasional problems may arise. If you are having problems with your unit, please check the following guide before sending the unit in for repair. You will be able to solve many of the problems yourself. - Page 46 24 hours a day, seven days a week. • Davis Instruments Web Site: http://www.davisnet.com. Check here under ”support” for troubleshooting FAQs, the latest updates, PDFs of all Davis product manuals, as well as application notes and technical documents . • Technical support email: support@davisnet.com...
- Page 47 Make sure the console or other tempera- ture sensor is not near an air conditoning vent. Check calibration number and adjust if necessary. Vantage Pro Manual Page 47...
- Page 48 North Wind chill reading Check calibration numbers for tempera- ture and wind speed. Remember, wind seems too high or too chill depends on temperature and wind speed. Make sure they’re working. Page 48 Vantage Pro Manual...
- Page 49 ROBLEMS Transmission by radio signal is convenient, however, there are limitations. While we have tested Vantage Pro extensively, each installation is different. Obstructions, particularly metal, will often cut down reception distance. You should test reception in your location before permanently mounting your ISS or other transmitter(s).
-
Page 50: Receiver Gain Status
IAGNOSTIC CREEN As part of Davis’ emphasis on customer service, we include here some infor- mation on Vantage Pro’s diagnostic screen. The information can help you diag- nose problems; however, it’s probably best used in conjunction with a call to Davis Technical Support. - Page 51 This section outlines each of the weather conditions measuredor calculated by the Vantage Pro. Each section includes a brief discussion of the weather condi- tion and a listing of the various ways in which the unit displays or stores that condition.
- Page 52 “feels” higher than the actual air temperature, because per- spiration evaporates more slowly. Note: Vantage Pro measures Heat Index only when the air temperature is above 57˚ F (14˚ C), because it’s insignificant at lower temperatures. (Below 57˚, Heat Index = the air temperature.) The Heat Index is not calculated above 135˚...
- Page 53 Rainfall Vantage Pro provides four separate registers for tracking rainfall totals: “rain storm”, “daily rain”, “monthly rain”, and “yearly rain”. The Vantage Pro also calculates the rate of rainfall by measuring the interval of time between each .01 in or 0.254 mm rainfall increment. Vantage Pro physically measures incre- ments of 0.01 in.
- Page 54 Watts /sq. m (W/m Note: The Vantage Pro measures energy received in the spectral band between 400 and 1100 nm. Page 54...
- Page 55 !! CAUTION: Be aware, however, that the Vantage Pro’s UV readings do not take into account UV reflected off snow, sand, or water, which can significantly increase the amount of UV to which you are exposed.
- Page 56 Type II (Environment Canada) skin type might choose 0.75 MED as the maximum for the day; in contrast, a person with Type V (Environment Canada) Skin Type might consider 2.5 MEDs a reasonable dose for the day. NOTE: the Vantage Pro assumes a Fitzpatrick (Environ- ment Canada) Skin Type of II.
- Page 57 The leaf wetness reading ranges from 0 (dry) to 15. Note: Leaf Wetness is only available with the wireless Vantage Pro and the optional Leaf Wetness station. 1. Wind run is a measurement of the “amount” of wind passing a given point during a specific amount of time.
- Page 58 A high soil moisture reading indi- cates dryer soil; a lower soil moisture reading means wetter soil. Note: Soil Moisture is only available with the wireless Vantage Pro with the optional Soil Moisture station. Time The Vantage Pro has a clock and a calendar for tracking time and date.
- Page 59 CCESSORY Vantage Pro Manual Page 59...
- Page 60 Specifications CCESSORY Page 60 Vantage Pro Manual...
- Page 61 CCESSORY Vantage Pro Manual Page 61...
- Page 62 916.5 MHz: < 1 mW, no license required 868.35 MHz: < 15 mW, no license required Temperature range: -40 to 140 ˚F (-40 to 60 ˚C) Power Input: 4 to 12 VDC output @ 1.5 mA Page 62 Vantage Pro Manual...
- Page 63 Vantage Pro Manual Page 63...
- Page 64 Shielded cables must be used for this equipment to comply with the relevant FCC regulations. Changes or modifications not expressly approved in writing by Davis Instruments may void the user's authority to operate this equipment. Product Numbers: 6310, 6310C, 6310EU, 6310UK, 6310CEU,...
Need help?
Do you have a question about the Vantage Pro and is the answer not in the manual?
Questions and answers