DAVIS Vantage Connect User Manual
Hide thumbs
Also See for Vantage Connect:
- Manual (12 pages) ,
- User manual (9 pages) ,
- User manual (48 pages)
Table of Contents
Advertisement
Quick Links
Download this manual
See also:
Manual
Advertisement
Table of Contents

Related Manuals for DAVIS Vantage Connect


Summary of Contents for DAVIS Vantage Connect
- Page 1 USER MANUAL Vantage ™ Connect ™ ™ For Vantage Pro2 , Vantage Pro2 Plus , ™ Vantage Vue and Weather Envoy Product number 6620 Davis Instruments, 3465 Diablo Avenue, Hayward, CA 94545-2778 U.S.A. • 510-732-9229 • www.davisnet.com...
- Page 2 3465 Diablo Ave., Hayward, CA 94545 USA Declares that the product: Vantage Connect, models 6620OV, 6620CG, 6620SOV, 6620CS and 7315.234 Complies with the essential requirements of Article 3 of the R&TTE 1999/5/EC Directive, if used for its intended use and that the following standards have been applied: 1.
-
Page 3: Contents Of Package
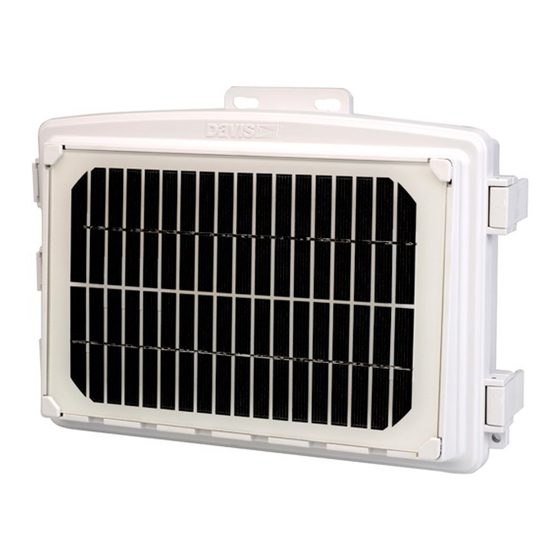
PC with ® WeatherLink software. Vantage Connect is available in different packages depending on country of use. Contents of Package Weather station status LED Cell modem antenna Receptacle for... - Page 4 Register Online Note: Register your Vantage Connect online and wait 5 to 10 minutes BEFORE you power it up to avoid a delay in uploading data. If you already powered up before registering, remove power from the Vantage Connect, register, then repower.
-
Page 5: Configure And Set Up Your Vantage Connect
Enter the transmitter ID number of each of the transmitters that will be reporting to your Vantage Connect (up to 8). Choose a station type for each. (For example, Vantage Pro2 ID: 1, Leaf and Soil Moisture Station: ID 2.) If using repeaters, check the “Enable Repeaters”... - Page 6 Manage Stored Data. Note: These settings and configurations will be pushed to the Vantage Connect at the first update after it is set up and powered. The changes will then be sent to your WeatherLink.com page at the next update. So the changes will not appear on your page after at least 2 update intervals.
-
Page 7: Prepare For Installation
Main power jack Main power cable Connect the battery The Vantage Connect is shipped with one battery cable (the red, or positive cable) disconnected to prevent battery drain. Connect the red cable to the red terminal. -
Page 8: Install The Vantage Connect
ISS or additional station.) Mount the Vantage Connect shelter Choose a location for your Vantage Connect. It can be mounted on a pole or a flat surface such as a wall or a wooden post. The shelter should be mounted within transmission range of your ISS. -
Page 9: Weather Station
Vantage Connect, register, then repower. 1. If using Vantage Connect with a cabled ISS, remove the plug from one of the holes in the bottom of the shelter. Run the ISS cable up through the hole. -
Page 10: Access Data
(5, 15 or 60 minutes, depending on your service plan.) Note: It takes up to 2 minutes for the data received from Vantage Connect to be processed to the web site. For example, if you have a 5-minute update plan, the data received at 12:05 may not appear on the web site until 12:07. -
Page 11: Troubleshooting
To set up a communication link between WeatherLink software and your WeatherLink.com account, you must first set up the software. 1. Install WeatherLink software from the included CD. 2. Start WeatherLink. n the File pull-down menu, choose New Station... Enter a name for the database that will store this station’s data. - Page 12 PC with an internet connection, you can connect a laptop (or PC) directly to the Vantage Connect and download all of the archive records in its memory using the supplied WeatherLink software. You will need an interface cable.
- Page 13 7011.025. If your installation is in a warmer climate, you may replace the battery with a 6-volt, 12 Ah, gel cell battery which will only charge at temperatures above 0°C. See Battery Specifications on page 13. (With either battery, your Vantage Connect can function down to -40°F/C.) ...
-
Page 14: Contacting Davis Technical Support
Contact Tech Support. data from the transmitter(s). Contacting Davis Technical Support For questions about installing or operating your Vantage Connect, please contact Davis Technical Support. We’ll be glad to help. Online www.davisnet.com See the Weather Support section for copies of user manuals, product specifications, application notes, software updates, and more. -
Page 15: Specifications
-4°F (-20°C), charging may be inhibited. You may use Davis’s Optional AC Charger Kit, product number 6710, to charge the battery. The kit allows you to replace the solar charger with AC power. The adapter has a universal input (100 -240V, 50-60 Hz) and will work anywhere in the world. - Page 16 • Consult the dealer or an experienced radio/TV technician for help. Changes or modification not expressly approved in writing by Davis Instruments may void the warranty and void the user's authority to operate this equipment. FCC ID: RI7GE865 IC: 5131A-GE865 This product complies with the essential protection requirements of the EC EMC Directive 2004/108/EC;...
Need help?
Do you have a question about the Vantage Connect and is the answer not in the manual?
Questions and answers