Table of Contents
Advertisement
Advertisement
Table of Contents

Related Manuals for La Crosse Technology WS-9035TWC


Summary of Contents for La Crosse Technology WS-9035TWC
- Page 1 WS-9035TWC Wireless 433 MHz Radio-controlled Weather Station Instruction Manual...
-
Page 2: Table Of Contents
TABLE OF CONTENTS Topic Page Inventory of Contents/Additional Equipment About WWVB Quick Set-Up Guide Detailed Set-Up Guide Battery installation Program Mode Program Sequence and Default Settings Function Keys Setting the LCD Contrast Setting the Time Zone Daylight Saving Time Setting Radio-controlled Time Setting 12/24-hour Time Setting Setting the Time... -
Page 3: Inventory Of Contents/Additional Equipment
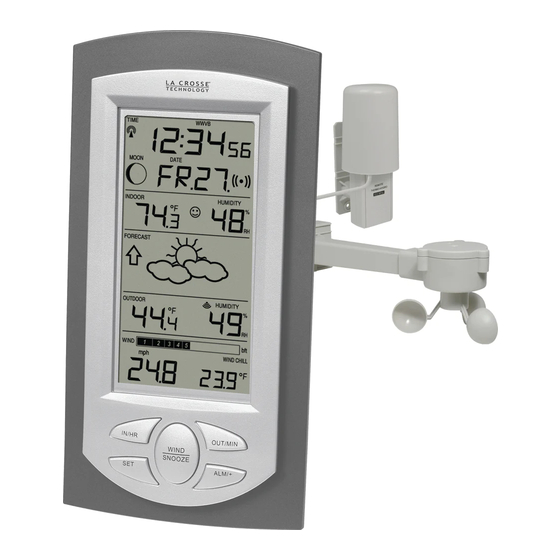
INVENTORY OF CONTENTS 1. The WS-9035U weather station (Figure 1). 2. One TX8U remote temperature/humidity sensor (Figure 2). 3. One TX15U wind speed sensor (Figure 3). 4. Mounting hardware 5. Instruction manual and warranty card. Figure 1 Figure 2 Time LCD Date LCD Moon Phase LCD Indoor LCD... -
Page 4: Quick Set-Up Guide
QUICK SET-UP GUIDE Hint: Use good quality Alkaline Batteries and avoid rechargeable batteries. 1. Have the indoor weather station, remote temperature/humidity sensor and wind speed sensor 3 to 5 feet apart. 2. Insert the telephone plug (RJ-11) from the wind speed sensor into the receptacle on the remote temperature/humidity sensor. -
Page 5: Program Mode
1. Remove the battery cover. To do this, insert a solid object in the space provided at the lower-central position of the battery cover, then push up and pull out on the battery cover. 2. Observe the correct polarity, and install 3 AA batteries. 3. -
Page 6: Setting The Lcd Contrast
III. SETTING THE LCD CONTRAST 1. Press and hold the SET button for 5 seconds. 2. “LCD” will show in the TIME LCD and the number setting will flash. Note: There are 8 LCD contrast levels to choose from—“Lcd 0” is the lightest, and “Lcd 7” is the darkest. 3. -
Page 7: 12/24-Hour Time Setting
2. “LCD” will show in the TIME LCD and the number setting will flash. 3. Press and release the SET button three times. 4. “RCC” will appear in the DATE LCD and “ON” or “OFF” will flash in the TIME LCD. 5. -
Page 8: Setting The Year, Day And Month
IX. SETTING THE YEAR, DAY AND MONTH Note: Reception of the WWVB signal will also set the date and day. The reception of the signal will override any programmed date and day. 1. Press and hold the SET button for 5 seconds. 2. - Page 9 4. Either “1”, “2” or “3” will flash in the TIME LCD and the forecast icon and tendency arrows will flash in the FORECAST LCD. 5. Press and release the ALM/+ button to select the forecast sensitivity 6. Press and release the SET button to confirm the forecast sensitivity and complete the programming. FEATURES OF THE WS-9035U Radio-controlled WWVB Tower...
-
Page 10: Indoor Temperature, Humidity, & Comfort
Sunny—indicates that the weather is expected to improve (not that the weather will be sunny). Sun with Clouds—indicates that the weather is expected to be fair (not that the weather will be sunny with clouds). Clouds with Rain—indicates that the weather is expected to get worse (not that the weather will be rainy). These icons indicate the expected weather change in the next 12 to 24 hours. -
Page 11: Moon Phase
2. Press and release the OUT/MIN button again (once while “MAX” is still displayed, twice otherwise). “MIN” appears to the right of the outdoor temperature, indicating that the minimum temperature and the time and date of occurrence are displayed. 3. While “MIN” is still displayed press and release the OUT/MIN button again to return to the current data display. -
Page 12: Beaufort Scale
1. Press and hold the SET button for 5 seconds. 2. The record will now be reset and show the current time in the TIME LCD and dew point reading in the OUTDOOR LCD. To return to the outdoor temperature/humidity viewing mode: 1. - Page 13 Wind Speed Beaufort Number Description Effects Land / Sea or Force km/hr knots Still, calm air, smoke will rise vertically. <1 <1 <1 Calm Water is mirror-like. Rising smoke drifts, wind vane is inactive. Light Air knots Small ripples appear on water surface.
-
Page 14: Time Alarm
Slight damage occurs to buildings, shingles are blown off of roofs. 47-54 75-88 41-47 Strong Gale High waves (6 meters), knots rolling seas, dense foam, Blowing spray reduces visibility. Trees are broken or uprooted, building damage is considerable. 55-63 89-102 48-55 Large waves (6-9 Whole Gale or Storm... -
Page 15: Mounting
MOUNTING Note: Before permanently mounting ensure that the indoor weather station is able to receive WWVB signals from the desired location. Also, extreme and sudden changes in temperature will decrease the accuracy of the indoor weather station, and changes in elevation will result with inaccurate weather forecasting for the next 12 to 24 hours. These changes will require a 12 to 24 hour wait before obtaining reliable data. -
Page 16: Troubleshooting
2) Place the indoor weather station onto the screw using the hanging hole on the backside. 3) Gently pull the indoor weather station down to lock the screw into place. TROUBLESHOOTING NOTE: For problems not solved, please contact La Crosse Technology. Problem: No reception of WWVB time signal. Solution: 1) Wait overnight for signal. -
Page 17: Maintenance & Care
Clean displays and units with a soft, damp cloth. Do not use solvents or scouring agents; they may mark the displays and casings. • Do not submerge in water. • Immediately remove all low powered batteries to avoid leakage and damage. • Opening the casings invalidates the warranty. Do not try to repair the unit. Contact La Crosse Technology for repairs. -
Page 18: Specifications
SPECIFICATIONS Weather data measuring range: Indoor: 14.2°F to 139.8°F with 0.1°F resolution (0°C to 59.9°C with 0.1°C resolution) “OFL” displayed if outside this range Outdoor and dew point: -21.8°F to 157.8°F with 0.1°F resolution (-29.9°C to 69.9°C with 0.1°C resolution) “OFL” displayed if outside this range Wind chill: -21.8°F to 157.8°F with 0.1°F... -
Page 19: Warranty Information
La Crosse Technology provides a 1-year warranty on this weather station. Contact La Crosse Technology immediately upon discovery of any defects covered by this warranty. Before sending the Weather Station in for repairs, contact La Crosse Technology. The Weather Station will be repaired or replaced with the same or similar model.
Need help?
Do you have a question about the WS-9035TWC and is the answer not in the manual?
Questions and answers