Paradox DGP2-641 System Manager's Manual
Lcd keypad module
Hide thumbs
Also See for DGP2-641:
- Reference and installation manual (44 pages) ,
- System manager's manual (32 pages) ,
- User manual (7 pages)

Related Manuals for Paradox DGP2-641


Summary of Contents for Paradox DGP2-641
- Page 1 LCD Keypad Module DGP2-641 System Manager’s Manual for DGP-848 Systems Also includes Operating Instructions...
-
Page 3: Table Of Contents
TABLE OF CONTENTS INTRODUCTION ............4 Delayed Fire Zone ............17 Fire Safety Tips..............18 Legend ................4 Minimizing Home Fire Hazards......... 18 Home Fire Warning System..........18 BASIC OPERATION ............. 4 Burglar Alarm..............18 Auditory Feedback (Beep Tones) ........4 Confidential Mode .............. -
Page 4: Introduction
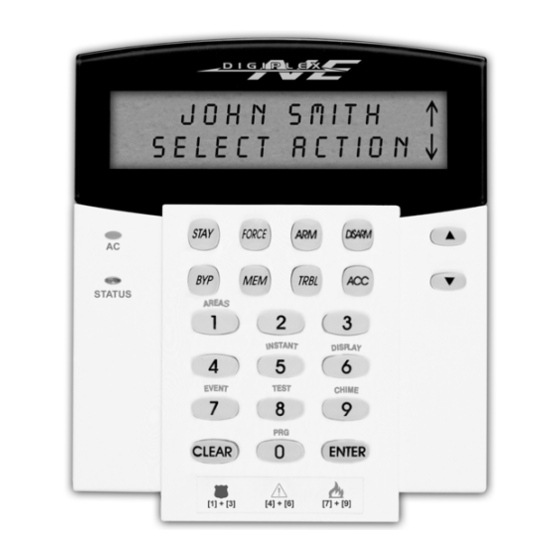
1.0 INTRODUCTION Your Digiplex Security System is an advanced technology security system that will provide you with reliable security protection and powerful features that are easy to use. The elegant and user-friendly LCD keypad will allow you easy access to your security system's functions and information at the touch of a button. The 32-character LCD screen will display messages and menus to guide you through the system’s operations. -
Page 5: Confidential Mode
CONFIDENTIAL MODE Your Installer can program keypads to not display the status of your system automatically by changing the LCD screen to Confidential Mode. In Confidential Mode: • The zones and status messages will NOT be displayed • The indicator lights will NOT illuminate •... -
Page 6: Stay Arming
STAY ARMING Stay arming will partially arm your system to permit you to remain in your home or office by arming the outer zones (perimeter) of the protected area (i.e. doors and windows). 1. Enter your [ ACCESS CODE 2. Press the [ ] button. -
Page 7: One-Touch Buttons
ONE-TOUCH BUTTONS If enabled by your Installer, you can access the following features without using your User Access Code by pressing and holding the desired One-Touch button. BUTTON FEATURE BUTTON FEATURE Regular arm Disarm a Stay/Instant armed area DISARM Stay arm Instant arm STAY Force arm... -
Page 8: Alarm Memory Display
To Disarm a system in alarm: 1. Enter your [ ACCESS CODE 2. In the case of a false alarm, call your Central Monitoring Station quickly to advise them of the false alarm. In the case of a burglar alarm, leave the premises and call the Police from a safe place. ALARM MEMORY DISPLAY Your system will record all the alarms that occurred during the last armed period. - Page 9 Figure 5.1: Programming User Access Codes Enter your [ ] (System Master Code or User Access Code with Master ACCESS CODE feature). Press [0] to enter the Programming Menu. From Programming Menu, press [ Enter the 2-digit User Number you want to program; press the [ ] button to scroll the list of codes then press [ ] once the desired code appears on the screen.
- Page 10 Users are able to perform actions (arming, disarming, etc.) only in the area(s) they are assigned. To assign an area(s) to a User Access Code, enter the number corresponding to the area you wish to assign (i.e. [1] = area 1, ...[4] = area 4). Press the [ ] button to return to the User Options;...
-
Page 11: User Options
USER OPTIONS Options [1] and [2]: Master Feature When option [1] is OFF, the User cannot program other Users into the system. When option [1] is ON and option [2] is OFF, the User can only modify existing User Access Codes. When both options [1] and [2] are ON, the User has Full Master rights. -
Page 12: Using Access Control
Option [8]: Access to Armed Access Control Doors When option [8] is enabled, the Access Control Card can be used to open an armed Access Control Door. When a valid Access Control Card is presented to a reader that is assigned to a zone and the zone is armed, access will be granted and the Entry Delay will begin. -
Page 13: How Access Control Works
HOW ACCESS CONTROL WORKS To illustrate how Access Control functions, we will use three simple Access Control System examples: Figure 6.1: Example A Bonnie’s Access Control Card is programmed with Access Level 01 and Schedule 01. If she presents her card to the reader on Door 02 on Tuesday, August 3 at 3 p.m., she will gain access to the room. -
Page 14: Trouble Display
7.0 TROUBLE DISPLAY If your system experiences any problems, “Trouble(s) [TRBL] to View” will appear on the LCD screen. The Trouble Display will only display the troubles that occur in the area(s) to which the keypad has been assigned. Potential troubles have been sorted into eight groups. Only the troubles which are relevant to you are listed and described below. -
Page 15: Additional Features
8.0 ADDITIONAL FEATURES PROGRAMMABLE OUTPUTS (PGMS) Your system includes Programmable Outputs (PGMs) that can be programmed by your Installer. A PGM triggers when a predetermined event or series of events occurs in your system. The PGMs can be programmed to reset smoke alarms, turn on light switches, open or close garage doors and much more. -
Page 16: Programming Chime Zones
3. Press the [1] button to chime a zone. Then enter the number corresponding to the zone to be chimed, or use the [ ] and [ ] buttons to scroll the list of zones. Press the [ ] button to chime or unchime the zone that appears on the screen. -
Page 17: Fire Alarm Testing
SYSTEM TEST Speak to your Installer before conducting a System Test since the system must be programmed to respond to the test instructions. It is normally recommended that you conduct the system test once a week, but contact your Installer for instructions concerning your particular system. To conduct a system test: 1. -
Page 18: Fire Safety Tips
Figure 10.1: Delayed Fire Zone 10.3 FIRE SAFETY TIPS How should you prepare in case of a fire in your home or business? • Remind everyone to escape first, then call for help. • Develop a fire escape plan and designate a meeting place outside. •... -
Page 19: Voice-Assisted Arm/Disarm Module
Operating Instructions 11.0 INTRODUCTION Congratulations on choosing the Paradox InTouch Voice-Assisted Arm/Disarm Module (APR3-ADM2). InTouch turns any touch-tone telephone into a keypad. With InTouch, you can now arm or disarm your Digiplex security system as well as activate or deactivate your InTouch’s output all from your telephone. Using detailed voice prompts to guide your way, the InTouch is as simple as picking up your telephone. -
Page 20: When Using Your Intouch
• Your installer can program the output to deactivate either manually or follow a timer. If programmed to be deactivated manually, the output will remain activated until you deactivate it. If programmed to follow a timer, the output will deactivate after the timer has elapsed. 14.4 WHEN USING YOUR INTOUCH... -
Page 21: Intouch System Checklist
The InTouch then prompts Nelson with the following: “Area 1 Disarmed” “Area 2 Armed” “Output is Deactivated” “To modify, enter Area number” Nelson presses the [2] key on his telephone to disarm Area 2. The InTouch then prompts Nelson with the following: “Area 1 Disarmed”... - Page 22 © 2002-2003 Paradox Security Systems Ltd. Digiplex, InTouch and WinLoad are trademarks or registered trademarks of Paradox Security Systems Ltd. or its affiliates in Canada, the United States and/or other countries. All rights reserved. Specifications may change without prior notice.
-
Page 23: Index
INDEX Chime Zones ............16 Clock, Set Time and Date ..........15 Access Codes ............5 Confidential Mode Deleting .............8 InTouch Access Codes ........19 Programming ............8 ............8 System Master ...............15 Date, Set User ..............8 Deactivating a Security System ........7 Access Control Delay Timer Card Assignment ..........10 Entry... - Page 24 Keyswitch Arming ............7 System Maintenance ..........17 System Test .............17 Time, Set ...............15 ............7 Timed Auto-Arming LCD Keypad ..............4 Timer ............10 Level, Access ............7 Entry Delay Exit Delay ............5 Trouble Master Code .............8 ............14 AC Failure .........11 Master Feature, in User Options Battery ............14 Bell/Siren Disconnected...
- Page 25 Notes...
Need help?
Do you have a question about the DGP2-641 and is the answer not in the manual?
Questions and answers