Table of Contents
Advertisement
Quick Links
Download this manual
See also:
User Manual
Advertisement
Table of Contents

Related Manuals for Crestron TPMC-3X


Summary of Contents for Crestron TPMC-3X
- Page 1 Crestron TPMC-3X Isys™ 2.8” Handheld WiFi Touchpanel Operations Guide...
- Page 2 Rockleigh, NJ 07647 1-888-CRESTRON Regulatory Compliance As of the date of manufacture, the TPMC-3X has been tested and found to comply with specifications for CE marking and standards per EMC and Radiocommunications Compliance Labelling. Federal Communications Commission (FCC) Compliance Statement This device complies with part 15 of the FCC Rules.
-
Page 3: Table Of Contents
Problem Solving ........................40 Troubleshooting......................40 Reference Documents....................41 Further Inquiries ......................42 Future Updates ......................42 Appendix: Roaming with a TPMC-3X ................... 43 What is roaming?....................... 43 Setup Considerations ....................43 Recommendations ..................... 43 Roaming Network ..................... 44 Roaming Modes ......................44 Software License Agreement.................... -
Page 5: Isys™ 2.8" Handheld Wifi Touchpanel: Tpmc-3X
Isys™ 2.8” Handheld WiFi Touchpanel: TPMC-3X Introduction ® Simply stated, the TPMC-3X Handheld Wifi Touchpanel from Crestron delivers the best remote control available for home theater, home automation and AV presentation, marrying style and ergonomics with the ultimate in performance and ease of customization. - Page 6 Extended Battery Life Instant waking also allows the TPMC-3X to be put to sleep within seconds of putting it down, helping to extend its battery life for several days of typical usage on a single charge. Even under continuous use at full brightness, the TPMC-3X lasts an incredible five hours.
- Page 7 An optional wall mount docking station is also available (TPMC-3X-DSW, sold separately). Included; refer to the latest revision of the TPMC-3X-DS guide (Doc.6791) for additional details. It is available from the Crestron Web site (www.crestron.com/manuals).
-
Page 8: Applications
(e.g., Port A = 128.x.x.x; Port B = 192.x.x.x). For additional information on setting up and understanding an Ethernet network, refer to the latest version of the Crestron e-Control Reference Guide (Doc. 6052). 4 • Isys™ 2.8” Handheld WiFi Touchpanel: TPMC-3X... -
Page 9: Specifications
Crestron TPMC-3X Isys™ 2.8” Handheld WiFi Touchpanel TPMC-3X with Multiple Networks Specifications Specifications for the TPMC-3X are listed in the following table. TPMC-3X Specifications SPECIFICATION DETAILS Touchscreen Display Display Type TFT active matrix color LCD Size 2.8 inch (72 mm) diagonal... - Page 10 0.6 Amps @ 100-240 Volts AC, 50-60 Hz Default IP ID Minimum 2-Series Control Version 3.155.1240 or later 4, 5 System Update File (Continued on following page) 6 • Isys™ 2.8” Handheld WiFi Touchpanel: TPMC-3X Operations Guide – DOC. 6789F...
- Page 11 2. Refer to “Appendix: Roaming with a TPMC-3X” which starts on page 43. 3. Power connection made via the included TPMC-3X-DS docking station/charger. 4. The latest software versions can be obtained from the Crestron Web site. Refer to the NOTE following these footnotes.
-
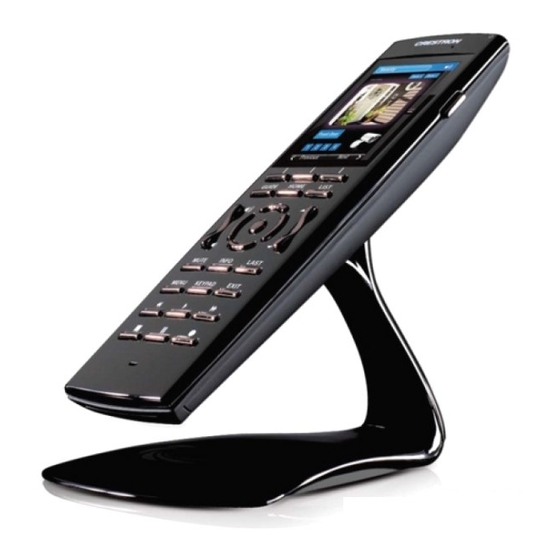
Page 12: Physical Description
Battery must be recycled. Deliver the battery to an appropriate recycling facility. Physical Description This section provides information on the connections, controls and indicators available on your TPMC-3X. TPMC-3X Physical View 8 • Isys™ 2.8” Handheld WiFi Touchpanel: TPMC-3X Operations Guide – DOC. 6789F... - Page 13 TPMC-3X Overall Dimensions (Front and Side Views) 1.04 in 2.07 in (27 mm) (53 mm) 2.64 in (67 mm) 7.94 in (202 mm) 2.55 in (65 mm) Isys™ 2.8” Handheld WiFi Touchpanel: TPMC-3X • 9 Operations Guide – DOC. 6789F...
- Page 14 Isys™ 2.8” Handheld WiFi Touchpanel Crestron TPMC-3X TPMC-3X-DS Docking Station/Charger Dimensions (Front, Side, Rear and Bottom Views) 4.26 in (109 mm) 5.88 in (150 mm) 4.58 in (117 mm) FROM (included) DC POWER PACK 10 • Isys™ 2.8” Handheld WiFi Touchpanel: TPMC-3X...
- Page 15 (1) Programmable rocker button with white Up/Down EL backlit “Up” and “Down” arrows USB (bottom) (1) Mini Type AB female, behind battery cover; USB 1.1 computer console port, for installer use only Isys™ 2.8” Handheld WiFi Touchpanel: TPMC-3X • 11 Operations Guide – DOC. 6789F...
-
Page 16: Setup
The IP ID is set within the TPMC-3X’s table using Crestron Toolbox™. For information on setting an IP table, refer to the Crestron Toolbox help file. The IP IDs of multiple TPMC-3X devices in the same system must be unique. -
Page 17: Power
NOTE: Before using the TPMC-3X for the first time, charge its internal battery for at least two hours by placing on the TPMC-3X-DS docking station/charger. The green LED on the front of the TPMC-3X will blink while the battery is charging. Charging is complete when the LED remains on without blinking. -
Page 18: Battery Calibration
Isys™ 2.8” Handheld WiFi Touchpanel Crestron TPMC-3X NOTE: The TPMC-3X can become unresponsive when battery strength is low. Battery Calibration For optimum performance after shipping or any time the unit’s power has been off for an extended period of time, Crestron recommends the following procedure be performed: 1. -
Page 19: Configuring The Touchpanel
Programming” on page 34. 3. If the system bar is visible at the top of the display, you can also access the setup screen by touching the Crestron swirl logo in the upper left corner. Isys™ 2.8” Handheld WiFi Touchpanel: TPMC-3X • 15... - Page 20 The top of the setup screen contains the system bar, which includes bar graph indicators for battery strength and Wi-Fi signal strength. Panel Setup Options These setup options control the basic operation of the TPMC-3X. WiFi Setup Touch WiFi Setup to display information about your WiFi Signal Strength, WAP...
- Page 21 (WAP). Crestron recommends using a dedicated CEN-WAP-ABG-1G or CEN-WAP-ABG-CM (both sold separately) and having only one access point for each TPMC-3X in the system. “Wireless Information” Screen A list of available access points in shown. Use the volume up/down buttons to scroll through the list.
- Page 22 Touch the appropriate hard key for OK to save settings or for Cancel to exit without saving. NOTE: The control system connection may not be made until you exit setup. “Control System Information” Screen 18 • Isys™ 2.8” Handheld WiFi Touchpanel: TPMC-3X Operations Guide – DOC. 6789F...
- Page 23 USE STATIC, which allows you to manually enter an IP Address, Subnet Mask and Gateway. The TPMC-3X ships with DHCP enabled by default. “IP Settings” Screen If you are using a static IP address, touch DNS Servers to enter the “DNS Servers”...
- Page 24 Volume and Mute as well as buttons providing access to the Key Click Settings and Wav Settings screens. Touch Back to return to the “Panel Setup Options” screen. “Audio Settings” Screen 20 • Isys™ 2.8” Handheld WiFi Touchpanel: TPMC-3X Operations Guide – DOC. 6789F...
- Page 25 Touch Wav Settings to enter the “Wav Settings” screen, which has controls for Wav Volume and Mute as well as a Play Test Wav button. Touch Back to return to the “Audio Settings” screen. “Wav Settings” Screen Isys™ 2.8” Handheld WiFi Touchpanel: TPMC-3X • 21 Operations Guide – DOC. 6789F...
- Page 26 Touch Standby Setup to enter the “Standby Timeouts” screen, which has controls for adjusting standby timeout when the TPMC-3X is docked and undocked, as well as a Power Off timeout when the touchpanel is undocked. Touch Back to return to the “Panel Setup Options”...
- Page 27 Isys™ 2.8” Handheld WiFi Touchpanel Keypad Test Touch Keypad Test to view the “Keypad Test” screen. Pressing the corresponding button on the TPMC-3X will cause its likeness on the screen to light up. Touch Back to return to the “Diagnostics” screen. “Keypad Test” Screen Touch Test From the “Diagnostics”...
- Page 28 “Diagnostics” screen. NOTE: The field at the bottom of the screen is to be used when under the supervision of a Crestron technical support representative during telephone support. “Battery Diagnostics” Screen 24 • Isys™ 2.8” Handheld WiFi Touchpanel: TPMC-3X...
- Page 29 “Battery Diagnostics” screen. NOTE: The gauge should be reset after any battery replacement. “Confirm Reset” Screen Touch Recondition Battery to drain and recondition the TPMC-3X’s battery. The “Confirm Recondition” screen will appear. “Confirm Recondition” Screen Touch YES, Recondition Battery to start the process. The “Battery Reconditioning”...
- Page 30 From the “Diagnostics” screen, touch Tilt Test to enter the “Tilt Sensor Test” screen. The text in the box should change from Flat to Tilt when the TPMC-3X is held upright and from Tilt to Flat when it is placed flat, for example on a desk.
- Page 31 LCD Settings From the “Panel Setup Options” screen, touch LCD Settings to enter the “Display Settings” screen, with controls for screen brightness when the TPMC-3X is docked and when it is undocked. Lower brightness settings extend battery life. This screen also allows you to turn the Hardkey Wakes LCD option On or Off.
-
Page 32: General Use And Safety
Keypad Settings From the “Panel Setup Options” screen, touch Keypad Settings to enter the “Keypad Settings” screen, with controls for keypad brightness when the TPMC-3X is docked and when it is undocked. Lower brightness settings extend battery life. This screen also provides a Keypad Test button, which is the same as the one described earlier. -
Page 33: Programming Software
Have a question or comment about Crestron software? Answers to frequently asked questions (FAQs) can be viewed in the Online Help section of the Crestron Web site. To post a question or view questions you have submitted to Crestron’s True Blue Support, log in at http://support.crestron.com. - Page 34 C2Net Device, Slot 8 2. If additional TPMC-3X devices are to be added, repeat step 1 for each device. Each TPMC-3X is assigned a different IP ID number as it is added.
-
Page 35: Programming With Visiontools Pro-E
There are no special programming requirements to use the functions of the TPMC-3X in a room control system. Multi-Mode Objects... - Page 36 Pre-recorded WAV files for voice prompts and responses are available from Crestron. These files can be stored into and programmed for use in the touchpanel directly or may be edited with the Sound Recorder. For example, the individual files can be combined to create custom messages.
- Page 37 Properties” windows in VT-Pro-e. Refer to the following illustrations. VT Pro-e “Page Properties” Window – Bit Depth Selection VT Pro-e “Image Properties” Window – Bit Depth Selection Isys™ 2.8” Handheld WiFi Touchpanel: TPMC-3X • 33 Operations Guide – DOC. 6789F...
-
Page 38: Multibyte International Characters
You can enter Chinese characters or numbers in separate strings or you can pad each number with “\x00” to make it multibyte and then combine it with Chinese characters in the same string. 34 • Isys™ 2.8” Handheld WiFi Touchpanel: TPMC-3X Operations Guide – DOC. 6789F... -
Page 39: Embedded Applications
The embedded applications have the following features: • All embedded applications listed in the VT Pro-e ProjectView workspace are created by default for a new TPMC-3X project. • All applications are created at project-level – one instance per project. •... - Page 40 Isys™ 2.8” Handheld WiFi Touchpanel Crestron TPMC-3X “Embedded Application Property” Window 36 • Isys™ 2.8” Handheld WiFi Touchpanel: TPMC-3X Operations Guide – DOC. 6789F...
-
Page 41: Uploading And Upgrading
1. Establish wireless communication between TPMC-3X and PC via the CEN-WAP-ABG-1G or CEN-WAP-ABG-CM. 2. The TPMC-3X has DHCP enabled by default. If you wish to use a static IP address, disable DHCP (refer to “IP Config” on page 19) and enter the IP address, IP mask and default router of the TPMC-3X via Crestron Toolbox (Functions | Ethernet Addressing). -
Page 42: Programs, Projects And Firmware
Crestron Toolbox The USB port on the TPMC-3X connects to the USB port on the PC: 1. Use a USB cable to connect the TPMC-3X to a PC running the Crestron Toolbox. 2. Open the “System Info” window; click the “Enter an address …” icon (pencil) to display the “Edit Address”... - Page 43 3. A defined IP table can be saved to a file or sent to the device. Edit the control system’s IP table to include an entry for the TPMC-3X. The entry should list the TPMC-3X’s IP ID (specified on the TPMC-3X’s IP table) and the internal gateway IP address 127.0.0.1.
-
Page 44: Problem Solving
Isys™ 2.8” Handheld WiFi Touchpanel Crestron TPMC-3X Problem Solving Troubleshooting The following table provides corrective action for possible trouble situations. If further assistance is required, please contact a Crestron customer service representative. TPMC-3X Troubleshooting TROUBLE POSSIBLE CAUSE(S) CORRECTIVE ACTION Touchpanel does... -
Page 45: Reference Documents
Reference Documents The latest version of all documents mentioned within the guide can be obtained from the Crestron Web site (www.crestron.com/manuals). This link will provide a list of product manuals arranged in alphabetical order by model number. List of Related Reference Documents... -
Page 46: Further Inquiries
Crestron's award winning customer service team by calling Crestron at 1-888-CRESTRON [1-888-273-7876]. You can also log onto the online help section of the Crestron Web site (www.crestron.com/onlinehelp) to ask questions about Crestron products. First-time users will need to establish a user account to fully benefit from all available features. -
Page 47: Appendix: Roaming With A Tpmc-3X
Arrange access points so that overlapping coverage areas are limited to locations where TPMC-3X use will be rare. For example, a staircase or hallway would be a good place to allow overlap, so when the unit does the switch from one WAP to the other, as the end user is not in a place that will be affected by the disturbance of the connection. -
Page 48: Roaming Network
TPMC-3X. Crestron strongly recommends the use of this type of network equipment if uninterrupted roaming is required for the TPMC-3X and that it be set up by qualified manufacturer certified technicians. -
Page 49: Software License Agreement
This Agreement may only be modified by a writing signed by an authorized officer of Crestron. Updates may be licensed to You by Crestron with additional or different terms. This is the entire agreement between Crestron and You relating to the Software and it supersedes any prior representations, discussions, undertakings, communications or advertising relating to the Software. - Page 50 “applets” incorporated into the Software), the accompanying media and printed materials and any copies of the Software are owned by Crestron or its suppliers. The Software is protected by copyright laws and international treaty provisions. Therefore, you must treat the Software like any other copyrighted material, subject to the provisions of this Agreement.
-
Page 51: Return And Warranty Policies
Purchasers should inquire of the dealer regarding the nature and extent of the dealer's warranty, if any. CRESTRON shall not be liable to honor the terms of this warranty if the product has been used in any application other than that for which it was intended or if it has been subjected to misuse, accidental damage, modification or improper installation procedures. - Page 52 Crestron Electronics, Inc. Operations Guide – DOC. 6789F 15 Volvo Drive Rockleigh, NJ 07647 (2023712) Tel: 888.CRESTRON 01.11 Fax: 201.767.7576 Specifications subject to www.crestron.com change without notice.
Need help?
Do you have a question about the TPMC-3X and is the answer not in the manual?
Questions and answers