Table of Contents
Advertisement
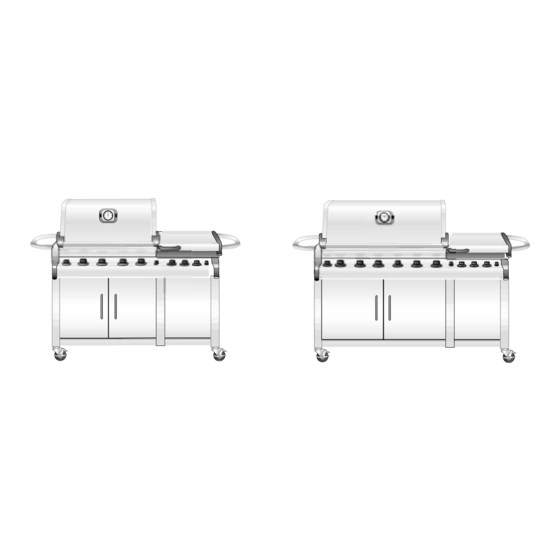
Liquid Propane Gas Grill Owner's Guide
Vieluxe
If you smell gas:
1. Shut off gas to the appliance.
2. Extinguish any open flames.
3. Open lid.
4. If odor continues, keep away from the
appliance and immediately call your
gas supplier or your fire department.
Leaking gas may cause a fire or
explosion which can cause serious
bodily injury or death, or damage to
property.
1. Do not store spare liquid propane
cylinder within 10 feet (3m of this
appliance.)
2. Do not store or use gasoline or other
flammable liquids or vapors within
25 feet (8m) of this appliance.
Y
OU MUST READ THIS
®
44 Inch
DANGER
WARNING
O
'
WNER
S
WARNING: Follow all leak-check
procedures carefully in this manual prior
to grill operation. Do this even if grill was
dealer-assembled.
NOTICE TO INSTALLER: These
instructions must be left with the owner
and the owner should keep them for
future use.
THIS GAS APPLIANCE IS DESIGNED
FOR OUTDOOR USE ONLY.
WARNING: Do not try to light this
appliance without reading "Lighting"
instructions section of this manual.
G
UIDE BEFORE OPERATING YOUR GAS GRILL
Vieluxe
®
56 Inch
60695
06/24/02
Advertisement
Table of Contents
Troubleshooting

Related Manuals for Weber Vieluxe 44 Inch


Summary of Contents for Weber Vieluxe 44 Inch
- Page 1 Liquid Propane Gas Grill Owner’s Guide Vieluxe ® 44 Inch Vieluxe ® 56 Inch DANGER WARNING: Follow all leak-check procedures carefully in this manual prior If you smell gas: to grill operation. Do this even if grill was 1. Shut off gas to the appliance. dealer-assembled.
- Page 2 DANGER Failure to follow the Dangers, Warnings and Cautions contained in this Owner’s Manual may result in serious bodily injury or death, or in a fire or an explosion causing damage to property. WARNINGS Do not store a spare or disconnected liquid propane cylinder under or near this grill. Improper assembly may be dangerous.
-
Page 3: Table Of Contents
TABLE OF CONTENTS WARRANTY MANUALLY LIGHTING THE FRONT AND REAR SIDE BURNERS FOR INSTALLATION IN CANADA TO EXTINGUISH STORAGE GENERAL MAINTENANCE 35-42 OPERATING CHECK FOR GAS LEAKS GENERAL INSTRUCTIONS REMOVE CONTROL PANEL 35-36 ASSEMBLY SUPPLIES NEEDED CHECK FOR GAS LEAKS (CONTINUED) REMOVE PACKAGED CONTENTS REINSTALL CONTROL PANEL INSTALL FLAVORIZER... -
Page 4: Warranty
Customer Service Toll Free at 1-866-VIELUXE If Weber-Stephen confirms the defect and approves the claim, Weber-Stephen will elect to replace such parts without charge. If you are required to return defective parts, transportation charges must be prepaid. Weber-Stephen will return parts to the purchaser, freight or postage prepaid. -
Page 5: For Installation In Canada
GENERAL INSTRUCTIONS Your Vieluxe ® gas grill is a portable outdoor cooking appliance. With the Vieluxe ® grill you can grill, roast and bake with results that are difficult to duplicate with indoor kitchen appliances. The closed lid and Flavorizer ®... -
Page 6: Assembly Supplies Needed
ASSEMBLY SUPPLIES NEEDED You will need a soap and water solution to check for gas leaks. (See Step "Check for gas leaks.") Note: Remove all packaging materials from the grill, the front, back, sides, inside the grill cart, and the bottom shipping platform. Once the packaging material is removed, carefully roll the grill off the shipping platform and lock the casters. -
Page 7: Install Flavorizer
INSTALL FLAVORIZER ® BARS Vieluxe ® 44 Inch Parts required: (2) Flavorizer ® bar assemblies & (1) single Flavorizer ® bar. Set the Flavorizer ® bar assemblies and single Flavorizer ® bar front to back over the burners in the slots of the Flavorizer ®... -
Page 8: Add Cooking Grates
INSTALL SMOKER Parts required: smoker box and smoker flues. Set the smoker box into the left side of the cooking box next to the Flavorizer ® bars. Then insert smoker flues with tabs into the cut-out of smoker box. The flues need to lay flat on top of the Flavorizer ®... -
Page 9: Install Warming Rack
INSTALL WARMING RACK Part required: warming rack. Install the warming rack into the slots at the right and left side of the cooking box. Vieluxe ® 44 Inch Vieluxe 56 Inch ® INSTALL BOTTOM TRAY Parts required: bottom tray and catch pan holder. Note: It will be easier to install the catch pan holder by removing the catch pan from the holder. -
Page 10: Install Catch Pan
Slide the bottom tray into the mounting slots under the bottom of the cooking box with the handle of the catch pan toward you. CAUTION: Do not line the bottom tray with aluminum foil. It can cause grease fires by trapping the grease and not allowing grease to flow into the catch pan. -
Page 11: Accessing And Removing Liquid Propane Cylinder
ACCESSING AND REMOVING LIQUID PROPANE CYLINDER Open access door and pull locking pin up and out of inner locking hole. Swing tank out until locking pin drops into outer locking hole. This will hold the tank mounting mechanism in place while the LP cylinder is being changed. -
Page 12: Checking The Fuel Level In Your Tank
CHECKING THE FUEL LEVEL IN YOUR TANK Check the fuel level by viewing the color indicator level line on the side of the tank scale. Empty Medium Full IMPORTANT LP CYLINDER INFORMATION Failure to follow these DANGER statements exactly may result in a fire causing death or serious injury. DANGER NEVER store a spare LP Cylinder under or near this grill. -
Page 13: Connect Filled Liquid Propane Cylinder
CONNECT FILLED LIQUID PROPANE CYLINDER WARNING: Make sure that the cylinder valve is closed. Close by turning clockwise. We utilize various LP tank manufacturers. Some of the tanks have differing top collar assembles. (The top collar is the metal protective ring around the valve.) One series of tanks mount with the valve facing front. The other tanks mount with the valve facing away from the fuel scale. -
Page 14: Liquid Propane Cylinder Requirements
• Treat "empty" LP cylinders with the same care as when full. Even when the LP tank is empty of liquid there still may be gas pressure in the cylinder. Always close the cylinder valve before disconnecting. • CAUTION: When transporting the LP cylinder make sure the plastic dust cover is in place over the valve. -
Page 15: Lighting The Heat Zones
LIGHTING THE MAIN BURNERS Summary lighting instructions are printed on a card located inside of right hand access door of grill. EACH SET OF LEFT AND RIGHT BURNERS LIGHT INDEPENDENTLY. Note - Always light the LEFT burner first. Each RIGHT burner ignites from the LEFT burner adjacent to it. Crossover ®... -
Page 16: To Extinguish
Select and light each LEFT and RIGHT burner set independently. Push LEFT burner control knob down and turn to HI / START in each burner set. WARNING: Do not lean over the open grill while lighting. Push and hold down the Igniter button until burner ignites. You will hear the igniter sparking. Check that the burner is lit by looking down through the cooking grates. -
Page 17: Manually Lighting The Heat Zones
MANUALLY LIGHTING THE BURNERS Summary lighting instructions are printed on a card located inside of right hand access door of grill. EACH SET OF LEFT AND RIGHT BURNERS LIGHT INDEPENDENTLY. Note: Always light the LEFT burner first. Each RIGHT burner ignites from the LEFT burner adjacent to it. Crossover ®... -
Page 18: To Extinguish
Select and light each LEFT and RIGHT burner set independently. Put a match in the match holder and strike the match. Insert match holder and lit match down through cooking grates and Flavorizer ® bars to ignite LEFT burner in each selected burner set. -
Page 19: Using The Vieluxe
USING THE VIELUXE ® SMOKER The Vieluxe ® smoker uses presoaked wood chips. For best results with faster cooking foods like steaks, burgers and chops, etc., we recommend using finer wood chips because they ignite and create smoke faster. For longer cooking foods such as roasts, chicken and turkeys, etc., we recommend using larger wood chunks because they ignite slowly and provide smoke for a longer period of time. -
Page 20: Lighting The Smoker Burner
LIGHTING THE SMOKER BURNER Summary lighting instructions are printed on a card located inside of right hand access door of grill. WARNING: Check hose before each use of grill for nicks, cracking, abrasions or cuts. If the hose is found to be damaged in any way, do not use the grill. -
Page 21: To Extinguish
WARNING: Do not lean over the open grill while lighting. Push smoker burner control knob down and turn to HI / START. Push and hold down the Igniter button until burner ignites.You will hear the igniter sparking. Check that the burner is lit by looking through the cooking grate. DANGER: If the smoker burner does not light, turn the burner control knob to OFF and wait 5 minutes to let the gas clear before you try again or try to light with a match. -
Page 22: Manually Lighting The Smoker Burner
MANUALLY LIGHTING THE SMOKER BURNER Summary lighting instructions are printed on a card located inside of right hand access door of grill. WARNING: Check hose before each use of grill for nicks, cracking, abrasions or cuts. If the hose is found to be damaged in any way, do not use the grill. -
Page 23: To Extinguish
Note - Cover the rotisserie burner with rotisserie burner cover when not in use. Turn on the gas supply. Put a match in the match holder and strike the match. Insert match holder and lit match down through cooking grates and Flavorizer ®... -
Page 24: Rotisserie Assembly
ROTISSERIE ASSEMBLY Parts required: rotisserie motor bracket(1), rotisserie 3. Put the spit forks on the rotisserie shaft motor(1), rotisserie shaft(1), spit forks(2 for 44” grill, 4 Slide a spit fork from each side onto the shaft so that for 56” grill), and fork screws(2 for 44” grill, 4 for 56” the tines are facing each other. -
Page 25: Using The Vieluxe
USING THE VIELUXE ® ROTISSERIE Note - Before using your Vieluxe ® rotisserie, measure your food at the widest point. If it exceeds 9 1/2”, it is too large to fit the rotisserie. If it is too large, food can be prepared using a roast holder and the Indirect Cooking Method. -
Page 26: Operating
USING THE VIELUXE ® ROTISSERIE WARNING: Setup up the rotisserie with food before lighting rotisserie burner. Operating Remove rotisserie shaft from grill. Remove one spit fork. 2. Push the rotisserie shaft through the center of the food. 3. Slide the spit fork onto the shaft. Insert the tines of both spit forks into the food. The food should be centered on the shaft. -
Page 27: Lighting The Rotisserie Burner
LIGHTING THE ROTISSERIE BURNER Summary lighting instructions are printed on a card located inside of right hand access door of grill. WARNING: Check hose before each use of grill for nicks, cracking, abrasions or cuts. If the hose is found to be damaged in any way, do not use the grill. -
Page 28: To Extinguish
WARNING: Do not lean over the open grill. Push rotisserie burner control knob down and turn to HI/START. Continue to hold the control knob down. Continue to the next lighting step. Push and hold down the Igniter button until burner ignites. You will hear the igniter sparking Continue to hold the control knob down until ten seconds after the burner has ignited. -
Page 29: Manually Lighting The Rotisserie Burner
MANUALLY LIGHTING THE ROTISSERIE BURNER Summary lighting instructions are printed on a card located inside of right hand access door of grill. WARNING: Check hose before each use of grill for nicks, cracking, abrasions or cuts. If the hose is found to be damaged in any way, do not use the grill. -
Page 30: To Extinguish
Put a match in the match holder and strike the match. Hold match holder and lit match by right side of rotisserie burner. WARNING: Do not lean over the open grill. Push rotisserie burner control knob down and turn to HI/START. Continue to hold the control knob down. -
Page 31: Lighting The Front And Rear Side Burners
LIGHTING THE FRONT AND REAR SIDE BURNERS Summary lighting instructions are printed on a card located inside of right hand access door of grill. WARNING: Check hose before each use of grill for nicks, cracking, abrasions or cuts. If the hose is found to be damaged in any way, do not use the grill. -
Page 32: To Extinguish
WARNING: Do not lean over the open grill. Push side burner control knob down and turn to HI/START. Push and hold down the igniter button until burner ignites. You will hear the igniter sparking. Check that the burner is lit by looking down through the side burner grate. DANGER: If the side burner does not light, turn the burner control knob to OFF and wait 5 minutes to let the gas clear before you try again or try to light with a match. -
Page 33: Manually Lighting The Front And Rear Side Burners
MANUALLY LIGHTING THE FRONT AND REAR SIDE BURNERS Summary lighting instructions are printed on card inside right access door of grill. WARNING: Check hose before each use of grill for nicks, cracking, abrasions or cuts. If the hose is found to be damaged in any way, do not use the grill. -
Page 34: To Extinguish
Put a match in the match holder and strike the match. Insert match holder and lit match down through side burner grate to desired burner. WARNING: Do not lean over the open grill while manually lighting. Push side burner control knob down and turn to HI / START. -
Page 35: General Maintenance
GENERAL MAINTENANCE Check for gas leaks WARNING The gas connections of your Vieluxe ® gas grill have been factory tested. We do however recommend that you leak check all gas connections before operating your Vieluxe gas grill. ® Remove control panel Part required: Screwdriver. - Page 36 GENERAL MAINTENANCE Completely remove the control panel from the cooking box assembly exposing the valves, burners, igniters, and manifold. Vieluxe ® 44 Inch Vieluxe ® 56 Inch DANGER Do not use an open flame to check for gas leaks. Be sure there are no sparks or open flames in the area while you check for leaks.
-
Page 37: Check For Gas Leaks (Continued)
GENERAL MAINTENANCE Check for gas leaks (continued) WARNING: If there is a leak at the valve to manifold connections (a), (b), or, gas line to manifold connection (c) turn OFF the gas and retighten the fitting with a wrench and recheck for leaks with soap and water solution. -
Page 38: Reinstall Control Panel
GENERAL MAINTENANCE Reinstall control panel Parts required: control panel, screws, and burner control knobs. Place the control panel back onto the control panel brackets on either side of the front of the cooking box. Line up screws with screw holes on both the control panel and control panel brackets. Tighten screws. Vieluxe ®... -
Page 39: Inspection And Cleaning Of The Spider/Insect Screens
GENERAL MAINTENANCE Spider/Insect screens Your Vieluxe ® gas grill, as well as any outdoor gas appliance, is a target for spiders and other insects. They can nest in the Venturi (1) section of the burner tubes. This blocks the normal gas flow and can cause the gas to flow back out of the air shutter. -
Page 40: Main Burner Flame Pattern
GENERAL MAINTENANCE Main burner flame pattern The Vieluxe ® gas grill burners have been factory set for the correct air and gas mixture. The correct flame pattern is shown at right. 1) Burner tube 2) Tips occasionally flicker yellow 3) Light blue 4) Dark blue If the flames do not appear to be uniform throughout the burner tube, follow the burner cleaning procedures. -
Page 41: Replacing Main Burners
GENERAL MAINTENANCE Replacing main burners 1. Your Vieluxe ® gas grill must be OFF and cool. 2. Turn OFF gas at source. 3. Disconnect regulator. 4. Remove cooking grates. 4. Remove Flavorizer ® bars. 5. To remove control panel refer to “Remove the control panel” under Check for Gas Leaks on page 35. -
Page 42: Crossover
GENERAL MAINTENANCE 9. To reinstall the burners, reverse steps 3 through 8. CAUTION: The burner openings (1) must be positioned properly over the valve orifices (2). Check proper assembly before fastening manifold in place. WARNING: After reinstalling the gas lines, they should be leak checked with a soap and water solution before using the grill. -
Page 43: Heat Zone Troubleshooting
HEAT ZONE TROUBLESHOOTING Problem Cure Check Burners burn with a yellow or orange Clean Spider/Insect screens and Inspect Spider/Insect screens for flame, in conjunction with the smell of inspect burners. (See Maintenance possible obstructions. (Blockage gas. of holes.) Section.) Burner does not light, or flame is low Is LP fuel low or empty? Refill LP tank. -
Page 44: Rotisserie Burner Troubleshooting
ROTISSERIE BURNER TROUBLESHOOTING WARNING: Before attempting any troubleshooting steps, all gas controls and supply valves should be in the OFF position. Problem Check Cure Burner does not light. Did you hold the burner control Try to relight burner by knob down and hold down for 10 holding burner control knob seconds until after burner ignited? down and continue holding... -
Page 45: Side Burner Troubleshooting
SIDE BURNER TROUBLESHOOTING WARNING: Before attempting any troubleshooting steps, all gas controls and supply valves should be in the OFF position. Problem Check Cure Side burner does not light. Is gas supply off? Turn supply on. Flame is low in HIGH position. Is fuel hose bent or kinked? Straighten hose. - Page 46 G R I L L I N G...
-
Page 47: Grilling Methods
GRILLING METHODS NOTE: If grill looses heat while cooking refer to the troubleshooting section of this manual. You can adjust the LEFT and RIGHT burners as desired. The control settings High (H), Medium (M), Low (L), or Off (O) are described in your cookbook. The cookbook uses these notations to describe the settings of the LEFT and RIGHT burners. -
Page 48: Grilling Methods
GRILLING METHODS The most important thing to know about grilling is which cooking method to use for a specific food, Direct or Indirect. The difference is simple: place the food directly over the fire, or arrange the fire on either side of it. Using the right method is the shortest route to great results—and the best way to ensure doneness safety. -
Page 49: Grilling Tips & Helpful Hints
GRILLING TIPS & HELPFUL HINTS • Always preheat the grill before cooking. Set all burners on HIGH heat and close lid; heat for 10 minutes, or until thermometer registers 500˚- 550˚F (260˚- 288˚C). • Sear meats and cook with the lid down for perfectly grilled food every time. •... -
Page 50: Cooking For A Crowd
COOKING FOR A CROWD • Select menu items that can be completely or partially prepared in advance — salads, relishes, condiments, casseroles, breads, cookies, cakes, and pies. • Grill all-American favorites such as burgers, chicken pieces or quarters, hot dogs or sausages — great tasting and easy. -
Page 51: Storage
STORAGE • The gas must be turned off at the gas supply when the Vieluxe ® gas grill is not in use. • When the gas supply is not disconnected from the Vieluxe ® gas grill, the appliance must be kept outdoors in a well-ventilated space. -
Page 52: Grilling Guide
GRILLING GUIDE The following cuts, thicknesses, weights, and grilling times are meant to be guidelines rather than hard and fast rules. Cooking times are affected by such factors as altitude, wind, outside temperature, and desired doneness. Two rules of thumb: Grill steaks, fish fillets, boneless chicken pieces, and vegetables using the Direct Method for the time given on the chart or to the desired doneness, turning once halfway through grilling time. -
Page 53: Game
GAME TYPE THICKNESS OR WEIGHT APPROXIMATE GRILLING TIME Ground buffalo patty ⁄ inch thick 7 to 9 minutes (medium) Direct Medium Buffalo strip steak 1 inch thick 6 to 7 minutes (medium rare) Direct High Quail, whole 5 ounces 15 to 20 minutes Indirect Medium Squab, whole or butterflied 1 pound 35 to 45 minutes Indirect Medium... -
Page 54: Fish & Seafood
FISH & SEAFOOD TYPE THICKNESS OR WEIGHT APPROXIMATE GRILLING TIME* Fish, fillet or steak ⁄ ⁄ inch thick 3 to 5 minutes Direct High ⁄ to 1 inch thick 5 to 10 minutes Direct High 1 to 1 ⁄ inches thick 10 to 12 minutes Direct High Fish, whole 1 pound... -
Page 55: Vegetables
VEGETABLES TYPE WEIGHT APPROXIMATE GRILLING TIME Artichoke, whole Steam 20 to 25 minutes; cut in half and grill 8 to 10 minutes Direct Medium Asparagus 6 to 8 minutes Direct Medium Beet 1 to 1 ⁄ hours Indirect Medium Bell pepper, whole 10 to 12 minutes Direct Medium Bell pepper, halved or quartered 6 to 8 minutes Direct Medium... -
Page 56: Patents & Trademarks
PATENTS & TRADEMARKS © 2001 Vieluxe ® , Flavorizer ® , and Crossover ® are registered U.S. trademarks; Gas Catcher ™ , is a trademarks, all of Weber- Stephen Products Co., 200 East Daniels Road, Palatine, IL 60067-6266. U.S.A.