Advertisement
Table of Contents
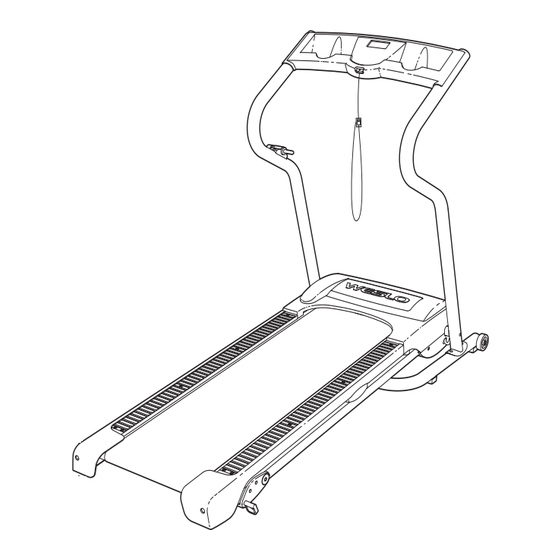
Model No. WLTL19105.2
Serial No.
Serial Number Decal
QUESTIONS?
As a manufacturer, we are com-
mitted to providing complete
customer satisfaction. If you
have questions, or if parts are
damaged or missing, PLEASE
CONTACT OUR CUSTOMER
SERVICE DEPARTMENT
DIRECTLY.
CALL TOLL-FREE:
1-866-699-3756
Mon.–Fri., 6 a.m.–6 p.m. MST
ON THE WEB:
www.wesloservice.com
CAUTION
Read all precautions and instruc-
tions in this manual before using
this equipment. Save this manual
for future reference.
USER'S MANUAL
Visit our website at
www.weslo.com
new products, prizes,
fitness tips, and much more!
Advertisement
Table of Contents

Related Manuals for Weslo Cadence G25 Treadmill


Summary of Contents for Weslo Cadence G25 Treadmill
- Page 1 Mon.–Fri., 6 a.m.–6 p.m. MST ON THE WEB: www.wesloservice.com CAUTION Visit our website at Read all precautions and instruc- tions in this manual before using www.weslo.com this equipment. Save this manual new products, prizes, for future reference. fitness tips, and much more!
-
Page 2: Table Of Contents
8. To purchase a surge suppressor, see 4. Keep the treadmill indoors, away from mois- your local WESLO dealer or call the toll-free ture and dust. Do not put the treadmill in a telephone number on the front cover of this garage or covered patio, or near water. - Page 3 15. Read, understand, and test the emergency 21. Do not change the incline of the treadmill by stop procedure before using the treadmill (see placing objects under the treadmill. TREADMILL OPERATION). 22. Inspect and properly tighten all parts of the 16.
-
Page 4: Before You Begin
BEFORE YOU BEGIN Thank you for selecting the WESLO ® CADENCE G-25 help us assist you, please note the product model treadmill. The CADENCE G-25 treadmill combines ad- number and serial number before calling. The model vanced technology with innovative design to let you number of the treadmill is WLTL19105.2. -
Page 5: Assembly
ASSEMBLY To hire an authorized service technician to assemble the treadmill, call toll-free 1-800-445-2480. Assembly requires two persons. Set the treadmill in a cleared area and remove all packing materials; do not dispose of the packing materials until assembly is completed. Do not remove the long plastic tape is inside the Right Handrail until told to. - Page 6 3. Using two adjustable wrenches, attach the Wheels (15) to the outer sides of the Base (71) with two Wheel Bolts (14) and two Nuts (17) as shown. Do not overtighten the Wheel Nuts; the Wheels should turn freely. It may be helpful to tip the Handrails (6, 7) forward when attaching the Wheels (15).
- Page 7 6. Set the Console (1) on the Right Handrail (6) and the Left Handrail (not shown). Start four Console Screws (70) (only two are shown) into the Console. After you have started all four Console Screws, tighten them. Insert the excess Wire Harness (22) down into the Right Handrail (6).
-
Page 8: Operation And Adjustment
Grounded Outlet Box drawing 1 at the right). To purchase a surge sup- Adapter pressor, see your local WESLO dealer or call the Surge Suppressor toll-free telephone number on the front cover of this manual and order part number 146148, or see your local electronics store. - Page 9 DIAGRAM OF THE CONSOLE Clip Note: If there is a sheet of clear plastic on the console, remove the plastic. Next, stand on the foot rails of the treadmill. Find the CAUTION: clip attached to the key (see the drawing above), and Before operating the slide the clip onto the waistband of your clothes.
- Page 10 To stop the walking belt, press the Stop button. above or below Note: If the time mode is displayed (see step 3 the word TIME, below), the time will begin to flash. DISTANCE, SPEED, CALO- RIES, or FAT. Note: The first time the treadmill is used, observe Make sure that the alignment of the walking belt, and center the there is not a...
-
Page 11: How To Fold And Move The Treadmill
HOW TO FOLD AND MOVE THE TREADMILL HOW TO FOLD THE TREADMILL FOR STORAGE Unplug the power cord. CAUTION: You must be able to safely lift 45 pounds (20 kg) to raise, lower, or move the treadmill. 1. Hold the treadmill with your hands in the locations shown at the right. -
Page 12: Maintenance And Troubleshooting
MAINTENANCE AND TROUBLESHOOTING Most treadmill problems can be solved by following the steps below. Find the symptom that applies, and follow the steps listed. If further assistance is needed, see the front cover of this manual. PROBLEM: The power does not turn on SOLUTION: a. - Page 13 PROBLEM: The walking belt slows when walked on SOLUTION: a. Use only a single-outlet surge suppressor that meets all of the specifications described on page 8. b. If the walking belt is overtightened, treadmill perfor- mance may decrease and the walking belt may be- 2”–3”...
-
Page 14: Conditioning Guidelines
CONDITIONING GUIDELINES Aerobic Exercise WARNING: Before beginning If your goal is to strengthen your cardiovascular sys- this or any exercise program, consult your tem, your exercise must be “aerobic.” Aerobic exercise physician. This is especially important for in- is activity that requires large amounts of oxygen for dividuals over the age of 35 or individuals prolonged periods of time. - Page 15 EXERCISE FREQUENCY tween workouts. After a few months, you may com- plete up to five workouts each week if desired. The key To maintain or improve your condition, complete three to success is to make exercise a regular and enjoyable workouts each week, with at least one day of rest be- part of your everyday life.
- Page 16 PART IDENTIFICATION CHART Remove this chart and use it to identify small parts during assembly. Save this chart and the EXPLODED DRAWING/PART LIST for future reference. Formed Washer (31)–4 Handrail Washer (11)–2 Nut (17)–6 Console Screw/ Latch Screw (70)–7 Star Washer (33)–2 Handrail Bolt (12)–4 Console Back Wheel Bolt (14)–2...
- Page 17 PART LIST—Model No. WLTL19105.2 R1205A Key No. Qty. Description Key No. Qty. Description Console Motor Tension Washer Handrail Endcap Storage Latch Key/Clip Base Pad Screw Console Back Motor Assembly Ground Screw Power Cord Right Handrail Large Warning Decal Left Handrail Reed Switch Rear Foot Wire Tie Clamp...
-
Page 19: Ordering Replacement Parts
• the KEY NUMBER and DESCRIPTION of the desired part(s) (see the PART LIST and the EXPLODED DRAWING in the center of this manual) WESLO is a registered trademark of ICON IP, Inc. LIMITED WARRANTY ICON Health & Fitness, Inc. (ICON), warrants this product to be free from defects in workmanship and material, under normal use and service conditions, for a period of ninety (90) days from the date of pur- chase.
Need help?
Do you have a question about the Cadence G25 Treadmill and is the answer not in the manual?
Questions and answers