Advertisement
48085D
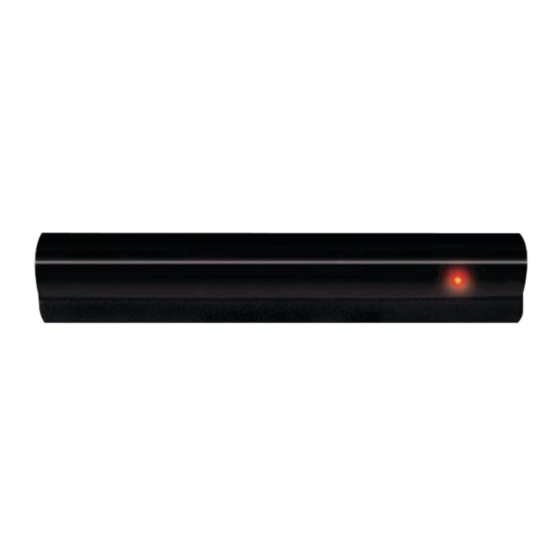
Dinky Link™ Surface Mount
CFL/LCD Proof IR Receiver
INSTALLATION INSTRUCTIONS
DESCRIPTION
These small IR receivers have been designed for mounting in very small
spaces. They may be mounted under shelf edges, cabinet ledges, in wall
speakers, etc. – anywhere an inconspicuous appearance is desired.
FEATURES
•
Very small package, only 2.45"L x 0.45"W x 0.35"H.
•
Wire channel for clean installation.
•
System testing red-talk-back LED.
•
Includes 3-Terminal Block for easy extension to remote room locations.
SPECIFICATIONS
•
Infrared carrier input frequency bandwidth: 30 - 60kHz.
•
Reception range: Up to 50 feet, depending on conditions.
•
Nominal reception angle: 55 degrees off axis.
•
Cable requirements: See "INSTALLATION" below.
•
Max. transmission length: 1 mile using 18 gauge wire.
•
Maximum current output: 100mA
•
Drives IR emitters through Xantech Connecting Blocks, Controllers, etc.
•
Power requirements: +12VDC, 20mA.
3.5mm mini plug
TIP
RING
SLEEVE
MODEL
Signal Name
SIGNAL
GROUND
+12VDC
INSTALLATION
QUICK-START
A typical system will use an IR receiver, several emitters, and a power supply
all connected to a connecting block.
1. Connect the IR receiver to the "IR RCVR" port on the connecting
block. The 'red' connector is installed to the 'red' plug.
Note: In some extended distances, additional 3-conductor may be required and can
be connected to the terminals on the connecting block.
2. Connect the Emitters to the connecting block. The 'yellow' connector
is installed to the 'yellow' plug.
3. Connect the power supply to the connecting block.
4. Installation complete
ADJUSTING IR CARRIER FREQUENCY
The IR receiver is factory set to an IR carrier frequency of 38kHz. This will be
correct for the majority of installations, however, some manufacturer's
components that you wish to control may use difference carrier frequencies
(such as digital cable boxes which use carrier frequencies between 52kHz
and 56kHz). If such carrier frequencies fall within the range of 32kHz to
56kHz, you can adjust the IR receiver to match them for best range
performance. The adjustment can be made through a small opening on the
rear of the unit.
To adjust, proceed as follows:
1. First, try the IR receiver in the system. If the system controls all the
desired components with adequate range, do not make any
adjustments.
2. If the system does not work or has poor range, determine the IR
carrier frequency of the product you wish to control. Contact the
manufacturer of the product, if necessary, to determine this
frequency.
3. Using a small blade type screwdriver, rotate the adjustment shaft
slightly either clockwise to obtain carrier's less than 38kHz or
counter-clockwise to obtain carrier's greater than 38kHz.
4. If you have audio/video equipment in the same system that have
different IR carrier frequencies, you will have to adjust the IR receiver
to the midway position. For example, some products may operate at
38kHz and others at 56kHz. In this case, set the adjustment in
between this range so both products can operate in the system.
Note: Some products are more tolerant of compromised frequency settings than
others. You may have to "fine tune" the adjustment to "favor" the least tolerant
component for the best performance of all units in the system.
Advertisement
Table of Contents

Related Manuals for Xantech 48085D


Summary of Contents for Xantech 48085D
-
Page 1: Installation Instructions
Maximum current output: 100mA frequency. • Drives IR emitters through Xantech Connecting Blocks, Controllers, etc. 3. Using a small blade type screwdriver, rotate the adjustment shaft • Power requirements: +12VDC, 20mA. - Page 2 7-foot cable. The 3.5mm stereo type mini plug is connected to the “IR RCVR” jack on the Xantech Connecting Block. Input connections must be made as illustrated. To extend the emitter wires to a more distant location, you may splice in 2-conductor wire, in the wire gauges mentioned before, as needed.
- Page 3 Limited Warranty Xantech® warrants its products to be free of defects in materials or workmanship. This is a Limited Lifetime warranty from the date of purchase by the original consumer. Any products returned to Xantech and found to be defective by Xantech within the warranty period will be repaired or replaced, at Xantech’s option, at no charge.
- Page 4 [BLANK PAGE] [BLANK PAGE]...
Need help?
Do you have a question about the 48085D and is the answer not in the manual?
Questions and answers