Table of Contents
Advertisement
Advertisement
Table of Contents

Subscribe to Our Youtube Channel
Related Manuals for Aiwa JAX-N3


Summary of Contents for Aiwa JAX-N3
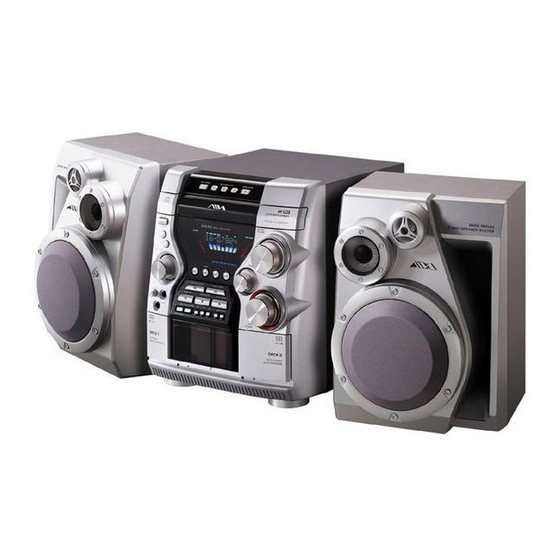
- Page 1 4-246-024-12 030501BMI-DS-SO Mini Hi-Fi Component System JAX-N3/JAX-E3...
-
Page 2: Precautions
PRECAUTIONS WARNING To prevent fire or shock hazard, do not expose On operating voltage the unit to rain or moisture. Before operating the system, check that the operating voltage To avoid electrical shock, do not open the cabinet. of your system is identical with the voltage of your local power Refer servicing to qualified personnel only. -
Page 3: Table Of Contents
Please be aware that among those discs, there are some that do not conform to the CD standard and may not be playable by this product. If you have any questions or problems concerning your stereo system, please consult your nearest Aiwa dealer. -
Page 4: Preparations
PREPARATIONS 2 Connect the supplied antennas. Connection Remote Connect the FM antenna to the FM 75 Ω terminal and Plug in the AC power cord to the AC power outlet after all other Detach the battery compartment lid at the rear of the remote the AM antenna to the AM LOOP terminals. -
Page 5: Parts And Controls
PARTS AND CONTROLS FM 75 Ω terminals (4) 1 AM LOOP, Main unit: rear Plug in the supplied AM and FM antennas here. Refer to the pages indicated in parentheses for details. 2 VIDEO/AUX jacks Accepts analog sound signals from external equipment. Connect using an optional connecting cable with RCA phono plugs (red plug to R jack, white plug to L jack). - Page 6 5 MULTI JOG (8-12, 14, 17-21) # TREBLE (19) Main unit: front When used in combination with ENTER and MULTI JOG, Enhances high frequency sound. Refer to the pages indicated in parentheses for details. CD: selects a track and Repeat/Shuffle/Programmed $ cPLAY/PRESET (8, 10-12, 14, 16) playback.
-
Page 7: Remote Control
Remote control 0 DISC SKIP (10) SPECTRUM (8) Changes the spectrum analyzer display. Select a disc. Refer to the pages indicated in parentheses for details. ! c/d (8, 10-12, 16) TUNER MODE (15) Switches between stereo or monaural FM reception. When the unit is turned off: activates or deactivates DEMO. -
Page 8: Adjustments Before Operations
ADJUSTMENTS BEFORE OPERATIONS DEMO POWER POWER STANDBY / ON You can enjoy DEMO in the display when the unit is turned off. SPECTRUM To activate or deactivate the DEMO MODE VOLUME Press c (c/don the remote) when the unit is turned ENTER off. - Page 9 ECO mode Dimmer Setting the clock Saves the power consumption while the unit is turned off (in Adjusts the brightness of the display. Use the remote. standby mode). 1 Press MODE repeatedly until "DIMMER ?" 1 Press CLOCK/TIMER/SET. 1 Press MODE repeatedly until "ECO MODE?" appears in the display when the unit is turned on Go to step 3 when the time appears and the 'hour' flashes.
-
Page 10: Cd Operations
CD OPERATIONS To replace disc(s) during playback without DISC DIRECT 1–0/10, interruption OPEN/CLOSE PLAY 1-3 While one disc is being played back, press DISC CHANGE so DISC CHANGE that the compartment opens, replace disc(s) with other one(s), DISC SKIP MODE and press DISC CHANGE to close the compartment. -
Page 11: Shuffle Playback
•You cannot program more than 30 tracks. "FULL" is Shuffle playback Programmed playback displayed. Plays the tracks on one desired disc or all discs in random Plays back up to 30 selected tracks in programmed order. order. To clear a track 1 Press MODE repeatedly until "PLAY MODE?"... -
Page 12: Mp3-Cd Operations
MP3-CD OPERATIONS Tip: 1–0/10, •In shuffle playback for MP3-CDs, only one disc is playable. Select a disc before carrying out the procedures. •To cancel it or to use the remote for it, see "Shuffle playback" MODE ALBUM of “CD OPERATIONS”. ENTER Programmed playback 1 Press MODE repeatedly until "PLAY MODE?"... - Page 13 Descriptions of MP3 •The elapsed playing time may not be displayed correctly for •ID3TAG An MP3 file stores audio data compressed using MPEG1/2, MP3 tracks. ID3TAG determines the data format for the text to be added the audio layer-3 file-coding scheme. •The character codes which cannot be represented in ASCII to an MP3 file, mainly used to indicate a track title or an code are displayed as "...
-
Page 14: Tuner Operations
TUNER OPERATIONS Tuning in to preset stations 1–0/10, On the unit BAND POWER 1 Press TUNER/BAND to select a band. TUNER TUNER/ MODE BAND 2 Press cPRESET repeatedly or turn MULTI JOG. ENTER With each press, the station with the succeeding preset MULTI JOG number is tuned in. -
Page 15: Pty Search
RDS features PTY Search Adjustments RDS (Radio Data System) is a broadcasting service which allows The unit can search for a station broadcasting your desired PTY Antennas FM stations to send additional information along with the regular easily. To do so, you need to preset every available station in Keep antennas away from metallic objects, electrical equipment radio signal. -
Page 16: Tape Operations
TAPE OPERATIONS Notes on cassettes 1–0/10, DISC DIRECT PLAY 1-3 •Use of a tape longer than 90 minutes is not recommended EDIT TAPE A/B since they are extremely thin and easily damaged. If you DISC SKIP should use it, do not change the tape operations such as TAPE A/B play and stop frequently. -
Page 17: Ai Edit Recording
To stop recording 5 Press the numbered buttons on the remote to Whole tape dubbing Press s. enter the length of the recordable tape. 1 Press TAPE A/B to select the TAPE function. 10 to 99 minutes can be specified. To pause recording (only for TUNER or VIDEO/AUX - For a 60-minute tape press 6 and 0/10. -
Page 18: Programmed Edit Recording
to side A. Programmed Edit Recording To prevent accidental erasure Remove the plastic tab of the cassette tape with a screwdriver As you program the CD tracks to record, Programmed Edit 9 Press wREC/REC MUTING to start recording on or other pointed tool. To record on the tape again, cover the Recording displays the remaining recording time for each side side A. -
Page 19: Sound Adjustments
SOUND ADJUSTMENTS i-Bass Produces rich and clear low frequency sound besides BASS effect. MODE TREBLE 1 Press i-Bass to select "I-BASS ON". The red indicator on i-Bass button lights up. ENTER 2 Turn BASS to adjust from 1 to MAX(5). MULTI JOG BASS To select the frequency range for i-Bass effect... -
Page 20: Timer Operations
TIMER OPERATIONS 5 Press r or t to set the timer-on minute POWER and then press ENTER. "OFF TIME" appears for a moment. POWER 6 Repeat step 4 and 5 to set the timer-off hour and VOLUME ENTER minute. 7 Press r or t to select the source (CD, MULTI JOG TAPE and TUNER) and then press ENTER. -
Page 21: Timer Recording
•To stop timer setting in step 3 to 4, press CLEAR on the Timer recording Notes remote. Timer standby mode is also canceled. •The Timer playback performs every day at the specified time Turns on the unit and makes recording once at a specified time. •The Timer recording will not begin unless the unit is turned unless you cancel it. -
Page 22: Reference
- "Presetting stations" on page 14 Use a soft and dry cloth. If the unit surfaces are extremely Should any problem persist, consult your nearest Aiwa dealer. If you have set the timer, also redo "Timer playback/ dirty, use a soft cloth lightly moistened with mild detergent recording"... -
Page 23: Tape Deck
The CD will not play. Poor tape sound. •The CD is not lying flat in the disc compartment. •Use TYPE I (normal) tapes. •The CD is dirty. Tuner •The CD is inserted label side down. •Moisture condensation has built up. Remove the CD and Noise is heard or poor reception. -
Page 24: Supplied Accessories
Supplied accessories CD PLAYER Specifications Laser Semiconductor laser (λ = 780 nm) Remote commander (1) MAIN UNIT CX-JN3/CX-JE3 Emission duration: Batteries (2) TUNER continuous FM antenna (1) D/A converter 1 bit dual FM tuning range 87.5 MHz to 108 MHz AM antenna (1) Signal-to-noise ratio 85 dB (1 kHz, 0 dB) - Page 26 Sony Corporation http://www.aiwa.com/ Printed in China...
Need help?
Do you have a question about the JAX-N3 and is the answer not in the manual?
Questions and answers
Как заменить лазерную головку
To replace the laser head in the Aiwa JAX-N3:
1. Remove the case (side-L) to access internal components.
2. Manually open the disc tray:
- Turn the loading gear in the direction of arrow A.
- Pull out the disc tray.
3. Access the CD mechanism deck and locate the main board (CN691).
4. Disconnect and reconnect the wire (flat type, 19 core) between the main board (CN691) and BD board (CN710).
5. Handle the flexible board with care to avoid damage.
6. Be cautious of electrostatic discharge:
- Use anti-static procedures.
- Avoid touching the laser diode directly.
7. Perform the “S curve check” in the CD section adjustment to confirm proper function.
These steps summarize the procedure for replacing and checking the laser head.
This answer is automatically generated