Table of Contents
Advertisement
Advertisement
Table of Contents

Subscribe to Our Youtube Channel
Related Manuals for Aiwa JAX-T7


Summary of Contents for Aiwa JAX-T7
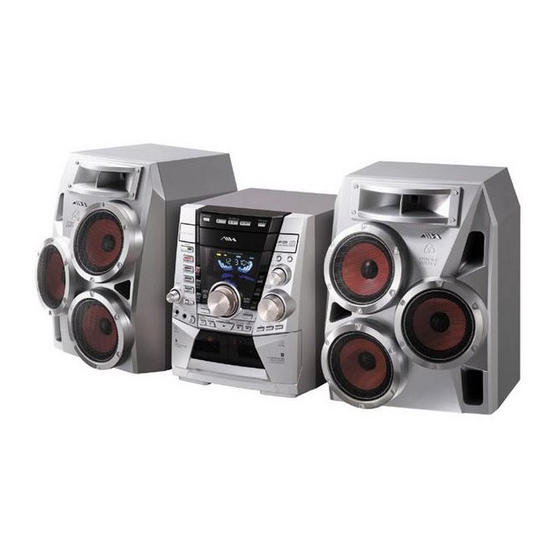
- Page 1 4-246-840-61 030327AMI-NV-FM Mini Hi-Fi Component System JAX-T7...
-
Page 2: Precautions
WARNING To prevent fire or shock hazard, do not expose the unit to rain or moisture. To avoid electrical shock, do not open the cabinet. Refer servicing to qualified personnel only. Do not install the appliance in a confined space, such as a bookcase or built-in cabinet. -
Page 3: Table Of Contents
CD standard and may not be playable by this product. If you have any questions or problems concerning your stereo system, please consult your nearest Aiwa dealer. TABLE OF CONTENTS PRECAUTIONS ... 2 PREPARATIONS ... -
Page 4: Preparations
PREPARATIONS Connection Plug in the AC power cord to the AC power outlet after all other connections are made. 1 Connect the front speakers. Connect the right front speaker (marked with “R”) to the SPEAKERS R terminals and place it on the right side of the unit. -
Page 5: Parts And Controls
PARTS AND CONTROLS Main unit: rear Refer to the pages indicated in parentheses for details. FM 75 Ω terminals (4) 1 AM LOOP, Plug in the supplied AM and FM antennas here. 2 MD (VIDEO) jacks Accepts analogue sound signals from external equipment. - Page 6 Main unit: front Refer to the pages indicated in parentheses for details. 1 DISC CHANGE/DISC SKIP (12) Rotates the CD trays. 2 POWER 6STANDBY/ON (10) Switches the unit on and off (standby). The red indicator flashes when receiving a signal from the remote.
- Page 7 # BASS (20) Adjusts low frequency sound. SURROUND (21) Switches surround on and off. i-Bass (20) Produces rich and clear low frequency sound. $ DISPLAY (11, 12, 15) Displays the time and the remaining time for CD. When the unit is off, press DISPLAY to switch between DEMO, Clock and ECO display modes.
- Page 8 Remote control Refer to the pages indicated in parentheses for details. Buttons with the same or similar names with the main unit basically have the same function. 1 POWER (10) 2 1-0/10, +10 (12, 14, 15) Selects a CD track of the specified number. The numbered buttons take on these functions below when pressed together with SHIFT held down EDIT (19)
- Page 9 9 FUNCTION Switches the active function among CD, TAPE, TUNER and MD (VIDEO). 0 DISC SKIP (12, 14) Select a disc. ! c/d (12–14) CD and Tape: starts playback. CD and Tape: stops playback. f, g (12, 17, 18) CD: searches a track in fast forward or fast reverse playback when held down.
-
Page 10: Spectrum Analyser Display
ADJUSTMENTS BEFORE OPERATIONS POWER STANDBY / ON TAPE A/B, TUNER/BAND, MD (VIDEO), Power Turning the unit on Press POWER 6STANDBY/ON (POWER on the remote). Pressing TAPE A/B, TUNER/BAND, MD (VIDEO) or CD also turns the unit on (Direct Play Function.) Turning the unit off Press POWER 6STANDBY/ON again. - Page 11 Dimmer Adjusts the brightness of the display. 1 Press MODE repeatedly until “DIMMER” appears in the display when the unit is turned on and then press ENTER. 2 Turn MULTI JOG to select one of the four dimmer modes “DIMMER 0” to “DIMMER 3” and then press ENTER.
-
Page 12: Cd Operations
CD OPERATIONS DISC DIRECT PLAY 1-3 DISC CHANGE/ DISC SKIP This unit plays back finalized CD-R/RW discs as well as audio CDs. Playback 1 Press CD and load disc(s). Press zOPEN/CLOSE to open the disc compartment and place one or two disc(s) with the labelled side up. To place three discs, press DISC CHANGE/DISC SKIP so that the trays rotate, then place the third one. -
Page 13: Shuffle Playback
Repeat playback Plays all the tracks or one track on the discs repeatedly. 1 Press MODE repeatedly until “REPEAT” appears in the display and then press ENTER. 2 Turn MULTI JOG to select one of the two repeat modes as below or “REP OFF”, and then press ENTER. -
Page 14: Programmed Playback
DISC DIRECT PLAY 1-3 Programmed playback You can program the unit to playback selected tracks from one or more discs in any order you specify. 1 In the stop mode, press MODE repeatedly until “PLAYMODE” appears in the display and then press ENTER. -
Page 15: Mp3-Cd Operations
MP3-CD OPERATIONS ALBUM ALBUM DISPLAY Playback This unit plays back MP3-CDs: discs recorded with MP3 tracks (files). Basic operations for MP3-CDs are mostly the same as those in “CD OPERATIONS”. This section explains MP3-CD OPERATIONS where there is additional information or exceptions to the information in “CD OPERATIONS”. - Page 16 Notes on display indications during play •Up to 32 characters are displayed for the title of an album or a track. If ID3TAG version 1.X was applied to record additional information for an MP3 track, up to 30 characters showing track title is displayed. However, this unit does not support ID3TAG version 2.X.
-
Page 17: Tuner Operations
TUNER OPERATIONS TUNER BAND Manual tuning 1 Press TUNER BAND (SHIFT+BAND on the remote) repeatedly to select a band (FM or AM.) 2 Press f or g to tune in to a station. “TUNED” appears when a station is tuned in. To search for a station automatically (Auto Search) Hold down f or g. -
Page 18: Tape Operations
TAPE OPERATIONS DISC DIRECT PLAY 1-3 DISC CHANGE/ DISC SKIP TAPE A/B CD SYNC PUSH EJECT/CLOSE Deck A REC PAUSE/ START Playback Use only TYPE I (normal) tapes. 1 Press TAPE A/B and insert the tape in either deck. Press zPUSH EJECT/CLOSE on either side (deck A and deck B) to open the outer cassette holder and insert the tape in the deck. -
Page 19: Basic Recording
Basic recording Use only type I (normal) tapes. Deck B is the recording deck. 1 Insert the recordable tape in deck B. Press zPUSH EJECT/CLOSE to open the outer cassette holder, and insert with the exposed side down and the side to be recorded on facing out from the unit. -
Page 20: Sound Adjustments
SOUND ADJUSTMENTS HEAVY, VOCAL, SALSA, TECHNO, HIP HOP, MANUAL TREBLE/ MIDDLE SURROUND TREBLE and MIDDLE TREBLE enhances high frequency for sound clarity and MIDDLE enhances mid frequency for presence. 1 Press MODE repeatedly until “TRE/MID” displays and press ENTER. 2 Turn MULTI JOG to select “TREBLE” or “MIDDLE”... -
Page 21: Graphic Equalizer
Graphic equalizer Selects a sound equalization curve to match the music type. Press HEAVY, VOCAL, SALSA, TECHNO, HIP HOP or MANUAL. On the remote, press SHIFT+GEQ and then press r or t repeatedly within 2 seconds. The selected equalization curve is displayed. •MANUAL is a customized curve (see “Saving a custom equalization curve”). -
Page 22: Timer Operations
TIMER OPERATIONS POWER STANDBY / ON Sleep timer Turns off the unit automatically after a specified time. Press SLEEP on the remote repeatedly. With each press, the timer duration changes cyclically as follows: “AUTO” * “90” “80” - - - “10”... -
Page 23: Timer Recording
Choosing a Timer function You cannot use both Timer playback and Timer recording at the same time. If both have been set, choose one or the other. 1 Press CLOCK/TIMER/SELECT on the remote. “SELECT” is displayed. 2 Press r or t to select “DAILY” (Timer playback) or “REC”... -
Page 24: Care And Maintenance
Operating Instructions. First, check that the AC power cord and the speakers are connected correctly and firmly. Should any problem persist, consult your nearest Aiwa dealer. General There is no sound. •Are the speakers and AC power cord connected properly? •Turn VOLUME clockwise and hold. -
Page 25: Tape Deck
•Disconnect the AC power cord from the wall outlet and then check the speaker connection. Should the problem persist, consult your nearest Aiwa dealer. Resetting the unit If an unusual condition occurs in the display window or the cassette deck, reset the unit as follows: 1 Press POWER to turn off the power. -
Page 26: Supplied Accessories
Specifications MAIN UNIT CX-JT7 TUNER FM tuning range 65 MHz to 74 MHz (10 kHz step) 87.5 MHz to 108 MHz (50 kHz step) FM usable sensitivity (IHF) 15.3 dBf (65 MHz to 74 MHz) 12.8 dBf (87.5 MHz to 108 MHz) FM antenna terminal 75 ohms (unbalanced) AM tuning range... - Page 28 Sony Corporation http://www.aiwa.com/ Printed in China...
Need help?
Do you have a question about the JAX-T7 and is the answer not in the manual?
Questions and answers