Table of Contents
Advertisement
Available languages
Available languages
Advertisement
Chapters
Table of Contents

Related Manuals for Aiwa JAX-N3


Summary of Contents for Aiwa JAX-N3
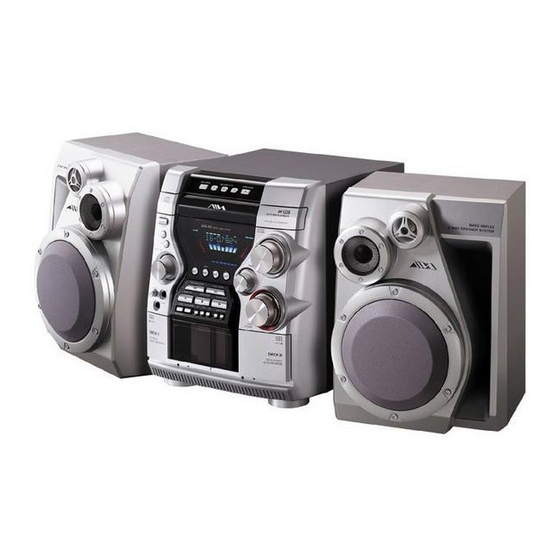
- Page 1 4-246-024-01 030113AMI-DS-SO Mini Hi-Fi Component System JAX-N3...
-
Page 2: Precautions
WARNING To prevent fire or shock hazard, do not expose the unit to rain or moisture. To avoid electrical shock, do not open the cabinet. Refer servicing to qualified personnel only. Do not install the appliance in a confined space, such as a bookcase or built-in cabinet. -
Page 3: Table Of Contents
CD standard and may not be playable by this product. If you have any questions or problems concerning your stereo system, please consult your nearest Aiwa dealer. TABLE OF CONTENTS PRECAUTIONS ... 2 PREPARATIONS ... -
Page 4: Preparations
PREPARATIONS Connection Plug in the AC power cord to the AC power outlet after all other connections are made. 1 Connect the front speakers. Connect the right front speaker (marked with "R") to the SPEAKERS R terminals and place it on the right side of the unit. -
Page 5: Parts And Controls
PARTS AND CONTROLS Main unit: rear Refer to the pages indicated in parentheses for details. FM 75 Ω terminals (4) 1 AM LOOP, Plug in the supplied AM and FM antennas here. 2 VIDEO/AUX jacks Accepts analog sound signals from external equipment. Connect using an optional connecting cable with RCA phono plugs (red plug to R jack, white plug to L jack). - Page 6 Main unit: front Refer to the pages indicated in parentheses for details. 1 DISC CHANGE (10) Rotates the CD trays. 2 POWER 6STANDBY/ON (8) Switches the unit on and off (standby). The red indicator flashes when receiving a signal from the remote.
-
Page 7: Remote Control
Remote control Refer to the pages indicated in parentheses for details. Buttons with the same or similar names with the main unit basically have the same function. 1 POWER (8) 2 1-0/10, +10 (10-12) CD: selects a CD track of the specified number. Tuner: tunes in to the station with the specified preset number. -
Page 8: Adjustments Before Operations
ADJUSTMENTS BEFORE OPERATIONS POWER STANDBY / ON MODE ENTER MULTI JOG Power Turning the unit on Press POWER 6STANDBY/ON (POWER on the remote). Pressing TAPE A/B, TUNER/BAND, VIDEO/AUX or CD also turns the unit on (Direct Play Function.) When a disc or tape is inserted, the playback will start automatically. -
Page 9: Eco Mode
ECO mode Saves the power consumption while the unit is turned off (in standby mode). 1 Press MODE repeatedly until "ECO MODE?" appears in the display and then press ENTER. 2 Turn MULTI JOG to select "ECO ON" and then press ENTER. -
Page 10: Cd Operations
CD OPERATIONS DISC DIRECT PLAY 1-3 DISC CHANGE MODE ENTER MULTI JOG This unit plays back finalized CD-R/RW discs as well as audio CDs. Playback 1 Press CD and load disc(s). Press zOPEN/CLOSE to open the disc compartment and place one or two disc(s) with the labelled side up. To place three discs, press DISC CHANGE so that the trays rotate, then place the third one. -
Page 11: Programed Playback
Shuffle playback Plays the tracks on one desired disc or all discs in random order. 1 Press MODE repeatedly until "PLAY MODE?" appears in the display in stop mode and then press ENTER. 2 Turn MULTI JOG to select "SHUFFLE" and then press ENTER. -
Page 12: Tuner Operations
TUNER OPERATIONS POWER ENTER MULTI JOG PRESET Manual tuning 1 Press TUNER/BAND (SHIFT+BAND on the remote) repeatedly to select a band (FM or AM). 2 Press f or g to tune in to a station. "TUNE" appears when a station is tuned in. "1"... - Page 13 Adjustments Antennas Keep antennas away from metallic objects, electrical equipment and cords. FM antenna: Extend fully and position for the best reception. If receiving condition is poor, connect optional outdoor antenna FM 75 Ω terminal. Use an adapter as required. AM antenna: Rotate to find best reception.
-
Page 14: Tape Operations
TAPE OPERATIONS TAPE A/B MULTI JOG PUSH EJECT Deck A SYNC DUB Playback Use only TYPE I (normal) tapes. 1 Press TAPE A/B (SHIFT+TAPE A/B on the remote) and insert the tape in either deck. Press zPUSH EJECT to open the cassette holder, and insert with the exposed side down and playback side facing out from the unit. -
Page 15: Ai Edit Recording
To stop recording Press s. To pause recording (only for TUNER or VIDEO/AUX source) Press a. Press again to resume. To record a selected set of tracks from a CD Program the desired tracks (see "Programed playback") and then press wREC/REC MUTING. To record a 4-second blank space (only for TUNER or VIDEO/AUX source) 1 Press w REC/REC MUTING during recording or in... - Page 16 Programed Edit Recording As you program the CD tracks to record, Programed Edit Recording displays the remaining recording time for each side of the tape, so you can easily select a set of desired tracks within the length of your tape. 1 Insert the recordable tape in deck B.
-
Page 17: Sound Adjustments
SOUND ADJUSTMENTS MODE ENTER MULTI JOG BASS Emphasizes low frequencies for a powerful sound. Turn BASS to adjust from 0 to 5. On the remote, press SOUND repeatedly until "BASS" appears in the display and then press r or t repeatedly within 6 seconds. -
Page 18: Timer Operations
TIMER OPERATIONS POWER ENTER MULTI JOG Sleep timer Turns off the unit automatically after a specified time. Press SLEEP on the remote repeatedly. With each press, the timer duration changes cyclically as follows: "AUTO "* " 90" "80" - - - "10"... -
Page 19: Timer Recording
Timer recording Turns on the unit and makes recording once at a specified time. Timer recording is available only for TUNER source. Use the remote from step 3. 1 Prepare the TUNER source. Select the band and tune in to the desired station or tune in to a preset station (see "Tuning in to preset stations"). -
Page 20: Care And Maintenance
Operating Instructions. First, check that the AC power cord and the speakers are connected correctly and firmly. Should any problem persist, consult your nearest Aiwa dealer. General There is no sound. •Are the speakers and AC power cord connected properly? •Turn VOLUME clockwise and hold. -
Page 21: Tape Deck
The CD will not play. •The CD is not lying flat in the disc compartment. •The CD is dirty. •The CD is inserted label side down. •Moisture condensation has built up. Remove the CD and leave the system turned on for about an hour until the moisture evaporates. -
Page 22: Supplied Accessories
Specifications MAIN UNIT CX-JN3 TUNER FM tuning range 87.5 MHz to 108 MHz FM usable sensitivity (IHF) 13.2 dBf FM antenna terminal 75 ohms (unbalanced) AM tuning range 530 kHz to 1710 kHz (10 kHz step) 531 kHz to 1710 kHz (9 kHz step) AM usable sensitivity 350 µV/m AM antenna... - Page 23 ADVERTENCIA Para evitar un incendio o peligro de descarga, no exponga la unidad a la lluvia ni a la humedad. Para evitar descargas eléctricas, no abra la cubierta. Dirija las reparaciones únicamente a personal de servicio cualificado. No instale el aparato en un espacio cerrado, como una estantería o armario empotrado.
- Page 24 CD, por lo que no podrán reproducirse mediante este producto. Si tiene cualquier pregunta o problema relacionado con su sistema estéreo, consulte a su distribuidor Aiwa más cercano. ÍNDICE PRECAUCIONES ... 24 PREPARATIVOS ... 26 PARTES Y CONTROLES ...
-
Page 25: Control Remoto
PREPARATIVOS Conexión Enchufe el cable de alimentación de CA a una toma de corriente después de haber efectuado todas las demás conexiones. 1 Conecte los altavoces frontales. Conecte el altavoz frontal derecho (marcado con una "R") a los terminales SPEAKERS R y colóquelo al lado derecho de la unidad. -
Page 26: Partes Y Controles
PARTES Y CONTROLES Unidad principal: panel posterior Consulte las páginas indicadas entre paréntesis para más información. FM 75 Ω (26) 1 Terminales AM LOOP, Conecte aquí las antenas de AM y FM suministradas. 2 Tomas VIDEO/AUX Aceptan la señal de sonido analógica procedente de un equipo exterior. -
Page 27: Cplay/Preset
Unidad principal: Panel frontal Consulte las páginas indicadas entre paréntesis para más información. 1 DISC CHANGE (32) Gira las bandejas del CD. 2 POWER 6STANDBY/ON (30) Enciende y apaga (pone en espera) la unidad. El indicador rojo parpadea al recibirse una señal del mando a distancia. -
Page 28: Consulte Las Páginas Indicadas Entre Paréntesis Para Más Información
Control remoto Consulte las páginas indicadas entre paréntesis para más información. Los botones cuyos nombres son idénticos o similares a los de la unidad principal realizan básicamente las mismas funciones que ellos. 1 POWER (30) 2 1-0/10, +10 (32-34) CD: seleccionan una pista del CD del número especificado. -
Page 29: Ajustes Previos Al Funcionamiento
AJUSTES PREVIOS AL FUNCIONAMIENTO POWER STANDBY / ON MODE ENTER MULTI JOG Alimentación Encendido de la unidad Pulse POWER 6STANDBY/ON (POWER en el control remoto). Al pulsar TAPE A/B, TUNER/BAND, VIDEO/AUX o CD también se enciende la unidad (función de reproducción directa). Cuando se inserte un disco o una cinta, la reproducción empezará... - Page 30 Modo ECO Reduce el consumo de energía mientras la unidad está apagada (en modo de espera). 1 Pulse repetidamente MODE hasta que "ECO MODE?" aparezca en pantalla y, a continuación, pulse ENTER. 2 Gire MULTI JOG para seleccionar "ECO ON" y, a continuación, pulse ENTER.
-
Page 31: Funcionamiento Del Cd
FUNCIONAMIENTO DEL CD DISC DIRECT PLAY 1-3 DISC CHANGE MODE ENTER MULTI JOG Esta unidad reproduce discos CD-R/RW finalizados así como también CDs de audio. Reproducción 1 Pulse CD e introduzca el(los) disco(s). Pulse zOPEN/CLOSE para abrir el compartimiento de discos y ponga un disco o dos discos con el lado de la etiqueta hacia arriba. -
Page 32: Reproducción Aleatoria
Para cancelar la reproducción repetida Realice los pasos 1 y 2, y seleccione "REPEAT OFF" en el paso 2. En el control remoto, pulse repetidamente REPEAT hasta que " " " y " "1 " desaparezcan. Reproducción aleatoria Reproduce las pistas de un disco deseado o todos los discos en orden aleatorio. -
Page 33: Funcionamiento Del Sintonizador
FUNCIONAMIENTO DEL SINTONIZADOR POWER ENTER MULTI JOG PRESET Sintonización manual 1 Pulse repetidamente TUNER/BAND (SHIFT+BAND en el control remoto) para seleccionar una banda (FM o AM). 2 Pulse f o g para sintonizar una emisora. "TUNE" aparece en pantalla cuando se sintoniza una emisora. - Page 34 Ajustes Antenas Mantenga las antenas alejadas de objetos metálicos, equipos y cables eléctricos. Antena de FM: Extiéndala completamente hasta la posición que ofrezca la mejor recepción. Si las condiciones de recepción no son adecuadas, conecte una antena exterior FM 75 Ω. Utilice un adaptador si es opcional al terminal necesario.
-
Page 35: Funcionamiento De La Cinta
FUNCIONAMIENTO DE LA CINTA TAPE A/B MULTI JOG PUSH EJECT Platina A SYNC DUB Reproducción Utilice solamente cintas TYPE I (normales). 1 Pulse TAPE A/B (SHIFT+TAPE A/B en el control remoto) e introduzca la cinta en una de las pletinas. Pulse zPUSH EJECT para abrir el portacasete, e inserte el casete con el lado donde está... -
Page 36: Copiado De Toda La Cinta
Para detener la grabación Pulse s. Para hacer una pausa en la grabación (sólo para una fuente TUNER o VIDEO/AUX) Pulse a. Púlselo de nuevo para reanudar la grabación. Para grabar un grupo seleccionado de pistas de un Programe las pistas deseadas (consulte "Reproducción programada") y, a continuación, pulse wREC/REC MUTING. -
Page 37: Grabación Con Edición Programada
Grabación con edición programada Según programa las pistas del CD que van a ser grabadas, la función de grabación con edición programada muestra el tiempo de grabación restante para cada cara de la cinta, de esta forma usted podrá seleccionar fácilmente un grupo de pistas deseadas que quepa en su cinta. -
Page 38: Ajustes Del Sonido
AJUSTES DEL SONIDO MODE ENTER MULTI JOG BASS Realza las frecuencias bajas para obtener un sonido potente. Gire BASS para ajustar de 0 a 5. En el control remoto, pulse repetidamente SOUND hasta que "BASS" aparezca en pantalla y, a continuación, pulse repetidamente r o t antes de que transcurran 6 segundos. -
Page 39: Funcionamiento Del Temporizador
FUNCIONAMIENTO DEL TEMPORIZADOR POWER ENTER MULTI JOG Temporizador de apagado Apaga temporalmente la unidad después de transcurrir un tiempo especificado. Pulse repetidamente SLEEP en el control remoto. Cada vez que pulse, la duración del temporizador cambiará cíclicamente como sigue: "AUTO "* "... -
Page 40: Grabación Con Temporizador
Para visualizar el ajuste del temporizador Pulse repetidamente CLOCK/TIMER/SELECT en el control remoto hasta que "DAILY PLAY" aparezca. La hora de encendido temporizado, la hora de apagado temporizado y la fuente aparecerán en pantalla. Para cambiar el ajuste del temporizador Reponga de nuevo el temporizador. -
Page 41: Cuidados Y Mantenimiento
En primer lugar, compruebe que el cable de alimentación de CA está conectado firmemente y que los altavoces están conectados correctamente y firmemente. Si el problema persiste, consulte a su distribuidor Aiwa más cercano. General No hay sonido. •¿Están conectados correctamente los cables de los altavoces y el cable de alimentación de CA? - Page 42 Reproductor CD El compartimiento de discos no se cierra. •El CD no está colocado correctamente. El sonido se entrecorta. •La lente está sucia. Límpiela con un aerosol disponible en comercios. El CD no se reproduce. •El CD no está bien colocado en el compartimiento de discos. •El CD está...
-
Page 43: Accesorios Suministrados
Especificaciones UNIDAD PRINCIPAL CX-JN3 SINTONIZADOR Rango de sintonización FM 87,5 MHz a 108 MHz Sensitividad útil para FM (IHF) 13,2 dBf Terminal para antena de FM 75 ohmios(desequilibrados) Rango de sintonización de AM 530 kHz a 1710 kHz (pasos de 10 kHz) 531 kHz a 1710 kHz (pasos de 9 kHz) - Page 44 Sony Corporation http://www.aiwa.com/ Printed in China...
Need help?
Do you have a question about the JAX-N3 and is the answer not in the manual?
Questions and answers