Oki OKIFAX 5650 User Manual
Hide thumbs
Also See for OKIFAX 5650:
- User manual (251 pages) ,
- Options manual (12 pages) ,
- Maintenance manual (468 pages)
Table of Contents
Advertisement
Quick Links
Download this manual
See also:
User Manual
Advertisement
Table of Contents

Subscribe to Our Youtube Channel
Related Manuals for Oki OKIFAX 5650


Summary of Contents for Oki OKIFAX 5650
- Page 1 English User’s Guide...
-
Page 2: Energy Star
English Every effort has been made to ensure that the information in this document is complete, accurate, and up-to-date. The manufacturer assumes no responsibility for the results of errors beyond its control. The manufacturer also cannot guarantee that changes in software and equipment made by other manufacturers and referred to in this guide will not affect the applicability of the information in it. -
Page 3: Table Of Contents
English Table of contents Table of contents......... iii Safety instructions. - Page 4 English Setting answering mode ........27 Answering mode options .
- Page 5 English Chapter 5 - Advanced Operations ..... . 55 Sending faxes to multiple locations and/or groups....55 Delayed sending of faxes .
- Page 6 English Forward number programming ......86 Memory password programming ......87 Creating a memory password .
- Page 7 English Chapter 9 - Problem Checklist ......111 Typical error messages ....... . 114 Appendix A - Specifications .
-
Page 8: Safety Instructions
English Safety instructions This product has been carefully designed to give you years of safe, reliable performance. As with all electrical equipment, however, there are a few basic precautions you should take to avoid hurting yourself or damaging the product: •... - Page 9 English rating. The total ratings of all equipment plugged into the outlet should not exceed 15 amperes. • The power outlet into which you plug your machine must remain accessible at all times. • It is recommended that the machine be switched off prior to removing covers.
-
Page 10: Toner Cartridge & Image Drum Unit Handling
English Toner Cartridge & Image Drum Unit Handling • Leave unused toner cartridges and image drum units in their packages until needed. When replacing a toner cartridge or image unit, reuse the packaging to dispose of the old toner cartridge or image drum unit. -
Page 11: Notes, Cautions And Warnings
English Notes, cautions and warnings Note: A note appears in this manual like this. A note provides additional information to supplement the main text which may help you to use and understand the product. CAUTION: A caution appears in this manual like this. A caution provides additional information which, if ignored, may result in equipment malfunction or damage. - Page 12 English...
-
Page 13: Chapter 1 - Introduction
English Chapter 1 - Introduction Thank you for purchasing this fax machine, which uses advanced Light Emitting Diode technology to transfer received and copied images to plain paper. It has been designed to make sending and receiving faxes a fast and trouble free process. -
Page 14: Product Options
English • Answering modes for manual and automatic fax reception, automatic switching between incoming voice and fax messages. Also allows an answering machine to be used with the fax machine. • Fax forwarding, memory fax reception and, if desired, a 4 digit password for printing messages. -
Page 15: Isdn
English • Receive and store fax messages directly into your computer. • Scan pages from your fax machine into your computer. • Carry out optical character recognition (OCR) on received faxes or scanned pages. • Easily program dial directories on your fax machine. ISDN This option allows your fax machine to send and receive digital communi- cations. -
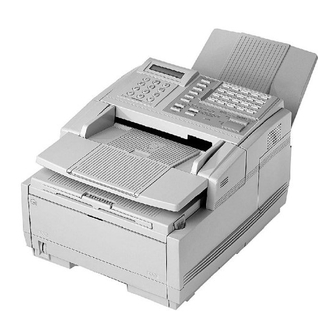
Page 16: Component Identification
English Component identification Your new fax machine package should contain the following items: Document stacker AC Power cable Telephone cable Fax machine Toner cartridge Image drum unit (inside fax machine) -
Page 17: Components
English Components One-Touch keypad: Provides one-touch dialling of your most often used or favourite numbers Document table: Covers the copy stacker and holds original documents to be faxed or copied. Document table extension: Flips out to support longer documents to be faxed or copied. Copy stacker: Holds copies or received faxes. - Page 18 English Power switch: Press to turn the fax machine ON (I) and OFF (O). 10. Document guides: Adjust these guides to the page width of the documents to be faxed or copied. 11. Control panel: Contains most of the operator controls and indicators 12.
- Page 19 English 19. Image drum unit: The image drum unit contains the photosensitive drum, which receives images from the LED print head and transfers these images to the printing paper. You will need to install a new drum unit when prompted to do so by the display. 20.
-
Page 20: Control Panel Keys And Indicators
English Control panel keys and indicators LCD panel: Refer to this liquid crystal display (LCD) panel for instructions and information while your fax machine is operating or while you are programming your fax machine. RESOLUTION/YES key: This key changes the resolution used for transmitting and copying documents. - Page 21 English wait for the dial tone of an outside line before it continues dialling the rest of the telephone number. When programming the identification and call back numbers into your fax machine, this key can also be used to enter a “+” symbol (not available in all Countries).
- Page 22 English 10. S ELECT FUNCTION key: Using this key activates the advanced transmission and reception functions of your fax machine to obtain reports and for programming. To select a function, press the SELECT FUNCTION key, then press the One Touch key labelled with the function you want to use.
- Page 23 English of the first part of the number to indicate to the fax machine that this is a chain dial number. When programming TSI/CSI and call back numbers into your fax machine, this key is used to enter a “+” symbol.
-
Page 24: One Touch Keypad
English 23. */Tone key: If your fax machine is set to pulse dialling, this key allows from pulse to you to switch the dialling operation of your fax machine tone dialling during your current call. You can also use this key while programming to create numbers with mixed pulse-then-tone operation. -
Page 25: Selecting Functions And Programming
English Selecting functions and programming You can also use One Touch keys 1 to 10 for selecting special transmission and reception functions, obtaining reports and programming. To select a function from the One Touch keypad, press the SELECT FUNCTION key, then press the corresponding One Touch key. 1/DELAYED TX key: Use this key to delay sending a fax to a time and date which can be specified up to three days later. -
Page 26: Signal Tones
English 6/REPORT PRINT key: Using this key manually prints reports from your fax machine. 7/COUNTER DISPLAY key: Your fax machine keeps track of the number of pages it has printed and scanned. Using this key checks the print counters of your fax machine and resets the drum counter of your fax machine after replacing the image drum unit. - Page 27 English End of Session Tone: At the end of every successful fax session, your fax machine emits a short beep to inform you that there were no errors or problems in the communication. Off-Hook Alarm Tone: If your fax machine is equipped with a handset and if the handset is left off the hook, your fax machine will emit an intermittent warbling sound.
- Page 28 English...
-
Page 29: Chapter 2 - Installation
English Chapter 2 - Installation Getting started To install your new fax machine, follow the instructions from Unpacking to Setting the Fax Identification. You must complete these steps for your fax machine to operate properly. If you have purchased an option package for your fax machine, refer to the documentation you received with that option. -
Page 30: Setting Up
English Note: A telephone handset, handset cradle and handset cable may also be included. If any items are missing, notify your supplier immediately for a replacement. Keep your packing materials and carton in case you ever need to ship or transport the machine. - Page 31 English Push in the cover release buttons on the side of the copy stacker until you hear a click. Lift the copy stacker. Lift the image drum unit clear, keeping it out of direct sunlight. DO NOT touch the green surface of the drum. Carefully remove the protective sheet from the image drum unit.
- Page 32 English Place the image drum unit back into your fax machine. To ensure that the image drum is positioned correctly, press down firmly on both of the locations marked “PUSH”. Remove the protective foam cylinder from the toner well in the image drum unit.
-
Page 33: Connecting The Telephone Line
English With the ridged side facing up and the coloured lever on your right, insert the toner cartridge into the image drum unit. Slide the left end of the cartridge in first, and then lower the right end into place. Once the toner cartridge is in place, push the coloured lever all the way to the rear of the fax machine to secure it and release the toner. -
Page 34: Installing An External Handset
English Installing an external handset If you purchased an optional external handset with your fax machine, follow these instructions to install it. Note: The external handset cannot be used if the ISDN option is installed, as voice communication is not supported on this fax machine when using ISDN Insert the telephone cable supplied into the socket located on the bottom of the cradle and feed the cable to the back of the cradle. -
Page 35: Connecting Telephone Or Answering Machine
English Connecting telephone or answering machine Insert one end of the telephone cable into the TEL terminal on the back of the fax machine. Insert the other end of the telephone cable into the socket in your telephone or answering machine. Note 1: This facility is available in some countries only. -
Page 36: Paper
English Paper Paper types We recommend the following guidelines when selecting paper for use in your fax machine: • Paper should be stored flat and away from moisture, direct sunlight and heat sources. • It is recommended to use a smooth finished paper such as copier or laser type paper with a Sheffield (smoothness) rating of 250 or less. - Page 37 English Pull the paper cassette out of the fax machine. Adjust the paper guides to the width of your paper. If necessary, lift and adjust the vertical paper guide for the length of your paper. If you are using legal size paper, pull out the extension at the back of the paper cassette.
-
Page 38: Setting The Clock
English Remove the paper from its wrapper (up to 250 sheets). Note the print side notice printed on the label. Fan the paper. Load the paper into the cassette, print side down. Note: Make sure the paper is under the tabs at the left and right edges of the cassette. -
Page 39: Setting Answering Mode
English Setting answering mode Your fax machine has a number of answering modes which determine how it handles incoming calls (both fax and voice). The current answering mode appears on your fax machine’s LCD display. Note: When the ISDN option is fitted, Telephone/Fax Auto Switch Mode (T/F) and Telephone Answering Device Mode (TAD) cannot be used because voice communication is not supported on this fax machine when using ISDN. - Page 40 English Telephone/Fax Auto Switch Mode [T/F]: When incoming calls are a mixture of fax and telephone calls, your best choice is the Telephone/Fax Auto SW mode. In this mode, your fax machine detects whether the incoming call is a fax or voice call. When the call is from another fax machine with CNG tones, your machine will switch to fax mode and receive the message.
-
Page 41: Changing Answering Mode
English Any incoming fax messages would then be sent directly to your computer for storage and not be printed by your fax machine or stored in the memory of your fax machine. Forwarding Mode [FWD]: When set to this mode, your fax machine receives all fax messages into memory, and will then automatically resend them to the forwarding number programmed into your fax machine. -
Page 42: Fax Machine Identification
English Fax machine identification Fax machines use the information you enter here to identify themselves during communications. In most countries programming this information into your fax machine is a legal requirement. The information you enter here includes: TSI/CSI: This is the telephone number of your fax machine. This number appears on displays and reports of other fax machines with whom you communicate. - Page 43 English Note: Use the HYPHEN or 18/+ One Touch key to enter a “+” character before the number, which is the generally recognised method of indicating the international access code before the country dialling code. The 19/SPACE One Touch key is used to enter spaces in a number.
-
Page 44: Setting Language
English Setting language Your fax machine comes with two languages installed, which appear on the display and in reports. Follow the instructions below to switch languages. Note: Your supplier may be able to provide you with additional languages. Press the SELECT FUNCTION key. Press the 9/USER PROG. -
Page 45: Mfp Function
English Press the SELECT FUNCTION key. Press the 9/USER PROG. One Touch key. The display will prompt for a selection. On the numeric keypad, press 2. The display confirms that dial parameter has been requested Press the YES key until the display prompts for selection of PBX line OFF. - Page 46 English...
-
Page 47: Chapter 3 - Dial Directories
English Chapter 3 - Dial Directories Programming One Touch keys Your fax machine has 40 One Touch keys for rapid dialling. You can store up to two fax numbers with 40 digits for each One Touch key, a main number and an alternate number. The alternate number is used if the main number is busy or does not answer. - Page 48 English Enter the main fax number as follows: To Do This Enter numbers Numeric keypad. Enter spaces SPACE One Touch key. Enter hyphens HYPHEN key (i.e. to wait for dial tone). Enter pauses PAUSE key (i.e., to wait for outside lines). */TONE key dialling for part of the call (not Add a switch from pulse to tone available in all countries.)
- Page 49 English 10. Select with the NO key and then press the YES key. Note: If you experience problems communicating with a remote location, try lowering the G3 communication speed. If this does not help, turn on G3 echo protection. 11. The display prompts for selection of G3 echo protection. Select with the NO key, then press the YES key.
-
Page 50: Chain Dialling
English Chain dialling Each fax number that you enter or program into your fax machine can be up to 40 digits long. If you need to dial a number which is longer than 40 digits, then you can use the chain dial feature. To create a chain dial number, program the first 39 digits of the number into a One Touch key or Auto Dial number. - Page 51 English The display will briefly indicate a fax number and location ID, or a previously-programmed fax number and location. Enter the fax number. Refer to the instructions below. To Do This Enter numbers Numeric keypad. Enter spaces SPACE One Touch key. Enter hyphens HYPHEN key (i.e.
-
Page 52: Programming Groups
English 11. The display prompts for G3 echo protection. Press the NO key to change the setting and the YES key to select it. Note 1: If the ISDN option is installed, the display prompts for the ISDN mode after Step 11. Press the YES key to select G4 or press the NO key first and then the YES key to select G4. - Page 53 English Using the numeric keypad, enter the group number 01 to 20 you want to program. The display shows the number of your current group and prompts you to select a location. You can now add a location to your group (or delete a location from it).
- Page 54 English...
-
Page 55: Chapter 4 - Basic Operations
English Chapter 4 - Basic Operations Preparing documents • Try to use good quality documents for your transmissions. Documents that are typed or created in felt-tip black ink on white (or light) paper work best. • Do not send documents which are not rectangular. •... -
Page 56: Loading Documents
English When loading several pages for transmission, paper thickness should be between 0.08 mm and 0.13 mm. For single page transmission, paper thickness can be between 0.06 mm and 0.15 mm. Loading documents To prevent paper jams and problems during scanning, neatly stack your documents, aligning their edges, before loading. -
Page 57: Sending Faxes To A Single Location
English Your fax machine will grip the documents and pull the bottom page into the machine. If necessary, use the RESOLUTION/YES key to set the resolution of your document. Original Document Set RESOLUTION to Normal office documents Standard (STD) Documents with small type or other fine Fine/Ex. -
Page 58: Search Key Dialling
English To dial using Do this Pick up the handset of your external telephone and dial the number of the machine to which you wish to transmit. An external If the receiving fax machine is in automatic reception mode, you telephone will hear a high-pitched tone. -
Page 59: Real-Time Dialling
English Repeatedly press the SEARCH key to look through the entire list of locations in alphabetical order, or locate the letter you want on the numeric keypad, and press that key repeatedly to look through Location IDs beginning with that letter. Press the START key as soon as the desired location appears on the display. -
Page 60: Receiving Faxes Manually
English If documents are stuck part way through the document feeder, the display may prompt you to reload the document. Press the STOP key again and your fax machine will feed the document the rest of the way through the document feeder. Note: If your fax machine cannot feed your document through the document feeder, refer to “Problem Solving”. -
Page 61: Paper Out Message
English When you change the reception mode of your fax machine, any non- confidential fax messages stored in memory are automatically printed. If you want to print any fax messages stored in memory without changing the reception mode, carry out the following: Press the SELECT FUNCTION key. -
Page 62: Cancelling Messages Stored In Memory
English Note: Even if you see a TONER LOW message on your fax machine, you may be able to use the 2/PRINT OPERATION One Touch key to continue printing faxes, but the print quality cannot be guaranteed. Replace your toner cartridge as soon as possible. Cancelling messages stored in memory It is also possible to erase messages received in memory without printing them. -
Page 63: Power Failures And Memory
English Press the YES key. The display will prompt you to enter a function number. Using the numeric keypad, enter 08. The display confirms that closed network is available, and the current setting of this function. Press the NO key until the setting you want appears in the display. Press the YES key to confirm the new setting then press the SELECT FUNCTION key to finish. -
Page 64: Making Copies Using Manual Paper Feeder
English To make multiple copies, enter the number of copies you want to make on the numeric keypad within 3 seconds. Then press the COPY key again. Your fax machine begins making the required number of copies. Note: When the display prompts you to program the number of copies, the degree of print resolution can be changed. -
Page 65: Using Voice Request
English Press the COPY key. Note: It is recommended to make single copies only when using the manual paper feed slot. This will prevent any possible paper feed jams from occurring. Using voice request The voice request feature allows you to have a conversation with a person at a remote fax machine during a fax communication. -
Page 66: Answering Voice Request
English Note 1: If you press your HOOK/V. REQUEST key to initiate a voice request during transmission, but no one is there to answer, your fax machine automatically sends a call back message to the remote site giving a telephone number where you can be reached. -
Page 67: Chapter 5 - Advanced Operations
English Chapter 5 - Advanced Operations Sending faxes to multiple locations and/or groups If you want to send the same fax to more than one location, carry out the following steps: Load your document. Select your first group or location as follows. The next group or individual location must be selected within three seconds. - Page 68 English Note: Up to 10 fax locations can be entered using the numeric keypad. When you have finished selecting groups and/or individual locations, quickly press the START key and the display will prompt you to confirm that the entry is OK. If your entries are OK, press the START key.
-
Page 69: Delayed Sending Of Faxes
English If your entries are OK, press the NO key and the display will prompt you to confirm that the entry is OK. If your entries are OK, press the START key. Your fax machine then scans your document and begins to transmit to your selected locations. -
Page 70: Sending Delayed Faxes To A Single Location
English From From Features and limitations feeder memory Number of locations Multiple Number of delayed faxes in your fax machine at any one time Up to 20 Fax machine can be used for other transmissions while a delayed fax is waiting to be sent. Note: Sending a delayed fax from your fax machine does depend on the settings of the user function memory feeder switch. - Page 71 English Press the YES key. The display will prompt for entry of the delayed time. Using the numeric keypad, enter the time on which you wish the transmission to begin. Note 1: [xx/xx] indicates the time you have entered using the numeric keypad.
-
Page 72: Sending Delayed Faxes To Groups And/Or Multiple Individual
English Sending delayed faxes to groups and/or multiple individual locations Load your document. Press the SELECT FUNCTION key. Press the 1/DELAYED TX One Touch key. The display shows DELAYED, the TX DATE and today’s date. Press the YES key and go to Step 7 if transmission is to occur later today. - Page 73 English Select location using Do this Dial as you would on a normal telephone. If the ISDN G4 option is fitted, the fax machine shows the current transmission A number dialled on mode G3 or G4. To select the current setting, press the YES the numeric keypad key.
-
Page 74: Locations
English If your entries are OK, press the START key. If you do not want to print a report, but want to confirm your entries, press the NO key and the display prompts you to check the location(s). 15. To check your selected locations, press the START key and the display shows the first location you have entered 16. -
Page 75: Confidential Faxes
English Press the YES key. The display shows the Location ID or telephone number of the first delayed transmission currently loaded in your fax machine. Note: If you have programmed standard one-time polling or standard bulletin polling into your fax machine, the display indicates that it is waiting to be polled before the delayed transmissions. -
Page 76: Sending Confidential Faxes
English Sending confidential faxes Load your document. Press the SELECT FUNCTION key. Press the 3/CONFIDENTIAL TX One Touch key. The display will ask you to enter the number of the confidential mail box, or ITU sub-address, on the receiving fax machine. Using the numeric keypad, enter the number of the confidential mail box, or ITU sub-address, to which you are transmitting. -
Page 77: Creating A Confidential Mailbox
English Creating a confidential mailbox Create a confidential or personal mailbox on your fax machine as follows. (This fax machine can have a maximum of sixteen). Press the SELECT FUNCTION key. Press the 9/USER PROG. One touch key. Using the numeric keypad, press 5. The display requests selection of the personal box program. -
Page 78: Changing The Password Or Closing A Personal Box
English Changing the password or closing a personal box If you want to change the password of an existing personal box, or if you want to close an existing personal box, follow the instructions below. Press the SELECT FUNCTION key. Press the 9/USER PROG. -
Page 79: Printing Confidential Faxes
English Printing confidential faxes Each time your fax machine receives a confidential fax, it automatically prints a confidential reception report telling you which mailbox number received the message. To print a confidential fax after your fax machine has received it, follow the instructions below. Press the SELECT FUNCTION key. -
Page 80: Relay Broadcasting
English Relay broadcasting Relay broadcasting is where one fax machine, which is the relay initiating station, sends a document to another fax machine. The receiving fax machine, which is the relay key station, will then resend (broadcast) the document to a number of other locations. Relay initiating station Your fax machine can act as the relay initiating station, which starts the relay broadcast by sending the original documents. -
Page 81: Initiating Relay Broadcast
English Initiating relay broadcast Load your document. Press the SELECT FUNCTION key. Press the 4/RELAY INITIATE TX One touch key. The display will prompt you to enter the relay password. Using the numeric keypad, enter a password of up to 20 digits, which is the same as the relay password programmed into the relay key station. -
Page 82: Polling
English Polling When you normally send faxes, you load your document into your fax machine, select a location and, if required, press the START key to begin sending the document. However, sometimes it is more useful to be able to simply load your document on the document feeder or scan into the memory of your fax machine and set it to wait for the another fax machine to call and collect the document. - Page 83 English For standard bulletin polling, press the YES key and the display will prompt you to enter a personal box number. Note: Standard bulletin polling uses the personal mailbox number of 00 to store the document in the memory of your fax machine. After your fax machine has been polled and the document has been sent, your document remains in mailbox 00 allowing the document to be retrieved more than once.
-
Page 84: Polling Reception
English Polling reception When carrying out polling reception, the fax machine or PC with fax software you are polling should be able to carry out standard polling transmission or ITU polling transmission. With no documents loaded, press the SELECT FUNCTION key. Press the 5/POLLING One Touch Key. -
Page 85: Itu Bulletin Polling
English Press the YES key and the display prompts you to confirm cancellation of the document waiting to be polled. Press the YES key and the polling transmission is cancelled. ITU bulletin polling To cancel an ITU bulletin polling transmission, you have to close the personal mailbox as follows: Press the SELECT FUNCTION key. -
Page 86: Dual Access
English Note 1: Standard one-time and standard bulletin polling messages stored in personal box 00 cannot be printed. Note 2: If no message is stored in that personal box, the display will indicate that there is no data in memory. Note 3: If you want to clear the personal box without printing, immediately press the STOP key in Step 4. -
Page 87: While Making Copies
English • Continue to receive faxes while earlier messages are being printed if your fax machine has been set to memory reception mode. While making copies While you are making copies with your fax machine, you can: • Continue to receive faxes while copies are being printed if your fax machine has been set to memory reception mode. - Page 88 English...
-
Page 89: Chapter 6 - Programming
English Chapter 6 - Programming Customising features and operations Many features and functions of your fax machine have settings which can be changed to customise the operations of your fax machine. Because each country has different regulations, you may not be able to access all of the settings listed below. - Page 90 English 02:MCF. (MULTI-LOC.): This function prints a general Message Confirmation Report and a detailed Broadcast Confirmation Report after each multiple location transmission. Available settings are ON and OFF. 03:ERR. REPORT (MCF.): This function automatically prints a Message Confirmation Report each time an error occurs during a transmission or polling transmission operation.
- Page 91 English ORIGINAL/NO keys, your fax machine is set to use the STANDARD and NORMAL settings. If you repeatedly send faxes or make copies which require some other combination of transmission modes, use this function setting to change the default transmission modes to any other combination of settings.
- Page 92 English stand-alone fax reception as messages will be stored in memory and will not print out until you return to one of the normal paper size settings). 14:USER LANGUAGE: This function allows you to switch between the two languages programmed into your fax machine 15:INCOMING RING: This function controls the telephone ringing sound your fax machine makes when a call comes in.
- Page 93 English indicates that the machine is in power save mode and requests you to press the START key to exit. While in this mode, your fax machine automatically switches back to full operation after you press the START key, when the telephone rings, when the telephone handset, or telephone connected to the fax machine, is lifted, or when a document is loaded.
- Page 94 English 22:NO TONER MEM. RX: With this function turned on, your fax machine automatically receives and stores messages in its memory when toner is low. When turned off, messages print even if toner is low or empty. Available settings are ON and OFF. Note: The off setting allows time for you to replace the toner cartridge, but quality of printing may become poor as the toner...
-
Page 95: Changing The User Function Settings
English 25:INSTANT DIALLING: Set this function to start reading documents upon call origination when transmitting to a single location. Available settings are ON and OFF. 26:RESTRICT ACCESS: Select whether or not you want restricted access. Turning on this function renders your restricted ID registration active. -
Page 96: Setting Distinctive Ring
English Press the NO key to cycle through the settings for the user function, then press the YES key to confirm your selection. The name of the next user function appears in the display. Note: If you are changing your fax machine’s 9:TX MODE DEFAULT settings, the new settings will appear on the LED above RESOLUTION/YES... -
Page 97: Personal Mailboxes
English confirm the result. If this happens, follow the above instructions again. Personal mailboxes Personal mailboxes are used to store messages in memory of your fax machine for bulletin polling or receiving confidential faxes. Note: To use a personal mailbox for confidential messages, refer to Confidential Faxes in Advanced Operations. -
Page 98: Forward Number Programming
English Using the numeric keypad, press number 5. The display confirms that Personal box Programming has been selected. Press the YES key, and the display prompts you to enter the personal box number. Using the numeric keypad, enter the number of the personal mailbox you want to close. -
Page 99: Memory Password Programming
English Make sure your fax machine prints a report warning you if a forward fax message could not be sent. Memory password programming When your fax machine has been set to Memory Reception Mode, you can protect the printing of stored messages by using a password. To print stored messages, refer to “Receiving faxes in memory”... -
Page 100: Deleting A Memory Password
English Press the YES key and the display prompts you to enter the Password number (4 digits). Note: [xxxx] indicates that a four digit password has already been programmed. Using the numeric keypad, enter a new four digit password and the display prompts you to confirm the password number. -
Page 101: Creating Restricted Id Number
English Creating restricted ID number Press the SELECT FUNCTION key. Press the 9/USER PROGRAM One Touch key. The display confirms that Functional Programming has been selected. Using the numeric keypad, press the * key. The display confirms that restrict ID program has been selected. Press the YES key and the display prompts you to enter the Department number (01-24 digits). -
Page 102: Closing Restricted Id Number
English Using the numeric keypad, enter the current four digit ID number and the display prompts you to close ID change. Press the NO key and the display then prompts you to enter an ID number (four digits). Using the numeric keypad, enter a new four digit ID number and then press the YES key. -
Page 103: Dial Parameter Settings
English Dial Parameter Settings These functions allow you to control the way your fax machine dials telephone numbers. Refer to “Dial Parameter Settings List” to determine which settings you may need to change, then refer to “Changing Your Dial Parameter Settings” to make the change. Note: Some settings are not available in some countries. -
Page 104: Changing Dial Parameter Settings
English MF(TONE) DURATION: If your fax machine is set to tone dialling, this function controls the duration of the tones used for dialling (the tone duration varies in different countries). Available settings are 75 ms, 85 ms, and 100 ms. PBX LINE: Turn this function on if your fax machine is connected to a PBX. -
Page 105: Chapter 7 - Reports
English Chapter 7 - Reports Understanding reports Your fax machine provides a variety of useful reports which help you understand the current settings, programming and operations of your fax machine. Refer to the reports listing below to determine which reports you may want to print, then refer to Printing Reports for instructions on printing a report. -
Page 106: Broadcast Confirmation Report
English Broadcast confirmation report Use this report to confirm the results of a multiple-location transmission (or broadcast). Information provided on this report includes: • The date and time at which the broadcast started. • The total amount of time used to complete the broadcast. •... -
Page 107: Telephone Directory
English • TRANSMISSION: prints out information on Delayed Fax and Redialling Wait transmissions. Date and time the document was scanned, remote location ID or telephone number and the transmission mode (single location transmission, group transmission and forwarding) are printed Note: If there are no fax messages or polling reception jobs stored in the memory of your fax machine, this report cannot be printed. -
Page 108: Message Confirmation Report
English Message confirmation report This report provides information about your last single location fax transmission or polling transmission. Information in this report includes: • The date and time the message was sent • The total amount of time your fax machine spent sending •... -
Page 109: Broadcast Entry Report
English Broadcast entry report Each time you program a multiple-location transmission (or broadcast), your fax machine gives you the option of printing this report to confirm your entries. Information in this report includes: • The Location ID or telephone number of the One Touch keys and Auto Dial codes you have selected. -
Page 110: Codes Used In Reports
English Codes used in reports Result codes The following codes indicate the results of communications. Code Explanation BUSY The line of the remote location was busy or there was no answer. A confidential message was erased after being held in memory for 10 CANCL days. -
Page 111: Chapter 8 - Problem Solving
English Chapter 8 - Problem Solving Clearing document jams When a document jam occurs, your fax machine beeps and an error message appears in the display. If the jammed document looks like it is positioned straight in your feeder, press the STOP key to try to feed the document the rest of the way through the feeder. -
Page 112: Clearing Printer Paper Jams
English Clearing printer paper jams If your fax machine display indicates that a paper jam has occurred, or that there is no paper in the cassette, when the paper cassette still contains paper, there may be one or more sheets of paper jammed in the machine. Clearing paper jams is as follows: Note: If you are experiencing many paper jams, it may be due to the... - Page 113 English Push the buttons on the side of the copy stacker until you hear a click. Lift the copy stacker out of the way. CAUTION: Never expose the image drum unit to light for more than 5 minutes. Never ex- pose the image drum unit to direct sunlight.
- Page 114 English Pull out the paper cassette. If any of the paper in the paper cassette is damaged, remove and replace it. Push the paper down until it is under the plastic tabs. Slide the paper cassette all the way back into your fax machine. Place the image drum unit back into your fax machine.
-
Page 115: Replacing The Toner Cartridge
English 10. Close the copy stacker and push down on it until you hear a click. Be sure both slides are latched. 11. Close the document table. Replacing the toner cartridge The number of pages you can print with one toner cartridge varies depending on the type of documents you usually receive or copy. - Page 116 English WARNING BE CAREFUL WHEN HANDLING THE TONER CARTRIDGE. DO NOT LET TONER SPILL ON YOUR CLOTHING OR OTHER POROUS MATERIALS. SEE SAFETY AT THE BEGINNING OF THIS USER'S GUIDE. WARNING IF YOU OPEN THE TOP COVER, YOU WILL SEE A LABEL THAT READS: (CAUTION-HOT).
- Page 117 English Pull the coloured lever on the old toner cartridge all the way toward you. Carefully pull the old toner cartridge out of the image drum unit. Dispose of it in the plastic bag you received with your new toner cartridge. Remove the new toner cartridge from its package and gently shake it from side to side to distribute the toner.
-
Page 118: Replacing The Image Drum Unit
English Once the toner cartridge is in place, push the coloured lever all the way toward the rear of the machine to secure it and release the toner. Using the cleaning wipe provided in the package with your new toner cartridge, gently wipe back and forth across the full length of the LED array. - Page 119 English The life of an image drum depends on a number of factors, including temperature and humidity, the type of paper you use, and the number of pages per job. CAUTION: Never expose the image drum unit to light for more than 5 minutes. Never ex- pose the image drum unit to direct sunlight.
- Page 120 English Remove the old image drum unit (with its toner cartridge), wrap it in the packaging materials from your new image drum unit and return your old cartridge to your supplier for disposal. Carefully remove the protective sheet from your new image drum unit.
-
Page 121: Reading Print Counters
English With the copy stacker and document table closed, wait until the time and answering mode appear on the display. Then press the SELECT FUNCTION key. Press the 7/COUNTER DISPLAY One-Touch key. The display prompts you to clear the drum count. Press the YES key to clear the image drum unit counter. -
Page 122: Shipping The Fax Machine
English Shipping the fax machine When shipping the fax machine once it has been in use, please follow the re-packaging procedure below: Remove the image drum unit with toner cartridge from the fax machine. Place the image drum unit with toner cartridge still attached into a black plastic bag and keeping it away from direct sunlight. -
Page 123: Chapter 9 - Problem Checklist
English Chapter 9 - Problem Checklist Your fax machine is a complex machine with many features and functions which allow it to operate in different ways. Many problems you experience may be due to improper programming. If you are experiencing a problem, read through the list of problems and solutions before calling your supplier. - Page 124 English of dialling pulses and you know that your area uses pulse dialling, refer to the MF(TONE)/DP(PULSE) dial parameter setting in Programming. If your fax machine is connected to a PBX, make sure you have programmed it to work with a PBX (see “Connecting to a PBX” in “Installation”).
- Page 125 English You sent a fax but it was received completely blank. Make sure that you have correctly loaded your document face down. The image received on your fax machine was very poor. Contact the person sending you the fax and ask them to change their Resolution and Type of Original settings.
-
Page 126: Typical Error Messages
English Your fax machine will not poll a remote fax machine. Call the person at the remote fax machine and make sure that they have loaded documents and set their fax machine in polling transmission mode. Check also if their fax machine uses either standard polling transmission or ITU polling transmission. - Page 127 English PAPER JAM: Paper is jammed feeding from the paper tray into the printer, or paper may be jammed inside the printing mechanism under the image drum. Check the paper path and remove any jammed paper- see “Clearing Printing Paper Jam”. ADF ERROR (JAM): A document to be faxed or scanned has jammed in the scanner.
- Page 128 English...
-
Page 129: Appendix A - Specifications
English Appendix A - Specifications Category Specification Type/compatibility Desktop ITU-T G3 transceiver (G4 optional) Applicable network PSTN, PBX (optional ISDN) 33,600/28,800/26,400/24,000/21,600/19,200/16,800/ Transmission Speed 14,400/9,600/7,200/4,800/2,400 bits/sec, automatic fall back (64,000 bits/sec for ISDN option) Communications Half duplex Coding scheme MH/MR/MMR with ITU-T ECM Horizontal resolution 8 pel/mm or 300 dpi 3.85 line/mm (standard) - Page 130 English...
-
Page 131: Appendix B - Isdn G4 Option
English Appendix B - ISDN G4 Option The ISDN G4 Option is an optional package that enables this fax machine to function as a digital fax machine conforming to Group 4 ITU-T recom- mendations. It is equipped with an automatic fallback feature that enables the machine to communicate in G3 mode when its G4 signal is rejected or a G3 signal is received. -
Page 132: Isdn Programming Flow
English ISDN programming flow Press SELECT FUNCTION key then 9/USER PROGRAM One- Touch key. Press the # symbol on the keypad. The display prompts you to pro- gram ISDN. Press YES key and the display shows the country code. Enter the country code and press the START key. Enter the ISDN(G4) NUMBER and press the START key. -
Page 133: Other Settings
English Other settings ISDN dial mode for dialling from the keypad (user setting 30) SET TO G3 - The call originates in the G3 mode when dialling is carried out from the keypad. At the time, speech analogue transmission is requested to the network. -
Page 134: Other Related Functions
English Other related functions The following are a few related functions incorporated to enhance faxing operations. Automatic Fallback: If the G4 signal transmitted from the machine is rejected by the remote location, the machine will automatically retransmit the signal in G3 mode. Similarly, if a G3 signal is received for an in- coming call, the machine will automatically switch to the G3 mode for the call. -
Page 135: Index
English Index Symbols Changing a memory password . 87 Changing password or closing #/Group Key ....11 personal box ....66 Changing restricted ID . - Page 136 English Creating personal mailbox (bulletin polling transmission) ..85 Fax machine identification Creating restricted ID number . . 89 Setting ....30 Customising features and Flash/Earth/Normal .
-
Page 137: Memory Password
English Personal mailboxes ..85 Plus (+) Key ....10 Manual Receive Mode ..27 POLL RX . - Page 138 English Message Confirmation ..96 Toner Save ....83 Power Outage ... . 97 Transmit Resolution .
Need help?
Do you have a question about the OKIFAX 5650 and is the answer not in the manual?
Questions and answers