
Related Manuals for FiveStar 36


Summary of Contents for FiveStar 36
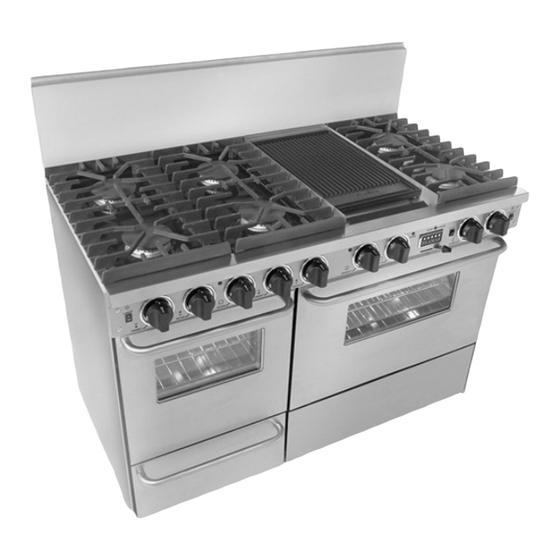
- Page 1 24”, 30”, 36”, 48” and 60” Range Models 36” and 48” Cooktop Models Your exact model may not be pictured.
-
Page 2: Table Of Contents
Self-Cleaning Instructions ..20-21 FiveStar Contact Info ....2 Service ......32 Gas and Electric Connections . -
Page 3: Installation Instructions
FIVESTAR INSTALLATION INSTRUCTIONS Please read these instructions before attempting to install this range. Unpacking Check the range carton for visible damage. If there is damage or even creases in the carton contact the carrier, request and inspection, and file the appropriate freight claim. -
Page 4: Wall Clearances
40” above the unit’s top conform to CAN 1-B149.1 or .2. To the range. All FiveStar ranges use a ½” cooking surface for the full width of the prevent gas leaks, use an approved NPT inlet. - Page 5 method is used, you must carefully align the 5. When all connections have been Connecting the Range to Gas pipe; the range cannot be moved after the made, make sure all range controls Shut off the main gas supply valve connection is made.
- Page 6 Backguard Assembly NOTE: COOKTOPS DO NOT HAVE LEVELING LEGS. CABINET SUPPORT MUST BE LEVEL. The backguard, located in the top pack with the range, must be installed prior to placing the range in position for gas hookup. See FIG. 7. NEVER BLOCK THE FLOW OF AIR FOR COMBUSTION OR...
-
Page 7: Pressure Regulator Conversion
Ultra High-Low™ Sealed Burners All ranges are equipped with a gas pressure regulator for controlling gas FiveStar sealed burner models may not be pressure in the range. The pressure adjusted without factory authorization. regulator must not be removed. To Please call 800-251-7224 to inquire about convert from one gas to another, sealed burner adjustments. -
Page 8: Electrical Requirements
The differing electric systems on all Depending on the particular features of your the burner flame will go out. “-7” FiveStar range require more FiveStar range, there may be one, two, or three power than standard ranges. Refer to shut-off valves. ELECTRICAL POWER IS the range rating plate for the range’s... -
Page 9: Electronic Ignition
Electronic Ignition Ranges and cooktops have top ignitor electrodes. When a top burner knob is turned to the LITE position, electrodes will spark at a rate of approximately 1½ pulses (sparks) per second. On sealed burner models, the sparking will stop once the burner has ignited. On open burner models, rotate the knob slightly clockwise to stop sparking once lit. -
Page 10: Before Using
SAFETY INSTRUCTIONS Never allow children to play with the Read all instructions before using this WARNING!!! All ranges can appliance. range controls. The range and pans on it tip and injury can result. To can be hot. Do not allow anyone to prevent accidental tipping of the Many accidents occur in the home. -
Page 11: Surface Cooking
Disconnect power to toward the appliance is not to be APPROPRIATE FIRE the range, and use a dry cloth to handle installed with a FiveStar. Ventilation EXTINGUISHER FOR USE IN the bulb. hoods that direct air toward a gas range... -
Page 12: General Information
If none is available, contact If the knob is turned to LITE and no FiveStar’s factory Parts & Service clicking sound occurs, turn the knob off Department by calling 1-800-251- and check the electrical connection, 7224. -
Page 13: Cooking Utensils
Most cooking utensils are suitable for more slowly, making the tempera- IF THE OVEN OR GRIDDLE use on the FiveStar, and it is not tures vary and cooking results to be BURNER DOES NOT IGNITE necessary to replace your present unsatisfactory. - Page 14 Frozen pies in shiny aluminum pans Gas Broiler Assembly Baking should be baked on a cookie sheet or Each gas oven has a gas broiler below When baking, follow the recipe removed to a dull or glass pan prior the oven. A broil pan and grill are instructions.
-
Page 15: Oven Cooking
Convection Cooking on Multiple Racks For best results, bake foods on one positions #2 and #4 or #1 and use of cookie sheets. Baking times rack at a time as described in this #3). will be similar. manual. However, very good results ... -
Page 16: Broiling
Always broil with the oven door The griddle/grill plate is pre-seasoned Broiling closed. The oven thermostat will and ready to use. Broiling times vary depending on a maintain the temperature while food Griddle Cooking meat’s thickness, fat content, and broils. personal taste. -
Page 17: Burners
CLEANING THE RANGE OR COOKTOP Make certain all parts of the range are AVOID HARSH CLEANSERS Cooktop Area cool before cleaning. Be sure to AROUND ALUMINUM PARTS Any cooktop spill-overs should be replace all parts correctly. Do not use harsh cleaners or wiped up as quickly as possible. -
Page 18: Cleaning The Oven
Cleaning Cast Iron Grates Lift-Off Doors The cast iron burner grates may be removed and cleaned All models are equipped with lift-off oven doors to aid in with soap and hot water. Do not put grates in a dishwasher. cleaning (See FIG. 19 on page 19). Griddle/Grill Gas Oven Bottom Removal Before cooking on the reversible cast iron griddle/grill, rinse... - Page 19 LIFT-OFF OVEN DOOR To remove oven door(s) Open door fully. Rotate the Hinge Retainers into the locked position, as shown, over the hook located on the bottom side of each hinge quadrant. Lift the door slightly to clear the hinge slots, and pull straight out to clear hinge mechanism from main front opening.
-
Page 20: Indicator Lights
CLEANING THE ELECTRIC OVEN Each FiveStar electric oven contains heavy smoke or fire when subjected Release the LOCK switch. The a self-clean cycle. These self-cleaning to high temperatures. DO NOT allow oven is now cleaning. electric ovens clean with very high... - Page 21 To Unlock the Door After Self-Clean NOTE: The oven door cannot be locked or unlocked unless Keep the oven dial in CLEAN position. the knob is in the CLEAN position. Push and hold the momentary door lock switch on the control panel while moving the door lock handle to the When the oven is COMPLETELY cool, wipe up the fine right until it stops.
- Page 23 WIRING DIAGRAMS...
- Page 29 Wiring Range Connection Cord (For Dual-Fuel Ranges Only) FIG. 24 FIG. 23 WARNING!!! THIS APPLIANCE MUST BE CONNECTED AS SHOWN IN FIG. 23 OR FIG. 24. IF A CORD IS UTILIZED IT MUST BE RATED AT 250 VOLTS, 40 AMPERES, AND CERTIFIED FOR USE ON HOUSEHOLD RANGES.
-
Page 30: Optional Accessories
Never place the griddle cover over a hot griddle. Optional Accessories These accessories pieces may be purchased from a local authorized FiveStar dealer. To find a dealer near you, visit www.fivestarrange.com. Portable FiveStar Griddle... - Page 31 FIVESTAR TRIM KITS For Ranges and Cooktops For 4” Low-Profile Range Backguard Models BKG024, 030, 036, 048, and BKT060; Range Island Trim Models RBT024, 030, 036, 048, and BKT060; Cooktop Island Trim Models TBT036 and 048; and Side Trim Models SST002 and SST007.
-
Page 32: Electronic Ignition
If the name of a service agency is not If service repair requires installation available, have these items ready and If Service is Required of parts, use only FiveStar parts to call the factory Parts & Service ensure protections under the Department at 1-800-251-7224 or Call the dealer or authorized FiveStar warranty. -
Page 34: Trouble Shooting Guide
TROUBLESHOOTING GUIDE Factory Parts & Service Department: 1-800-251-7224 Phone Hours: Mon-Thurs: 8am-5pm, Eastern; Fri: 8am-4pm Problem Cause Correction 1. Surface Burner fails to light. a. Range not connected to power a. Connect range to wall outlet or check circuit supply (Solid State Ignition). breaker or fuse box. - Page 35 NOTES...
Need help?
Do you have a question about the 36 and is the answer not in the manual?
Questions and answers