
Related Manuals for FiveStar 24 Range


Summary of Contents for FiveStar 24 Range
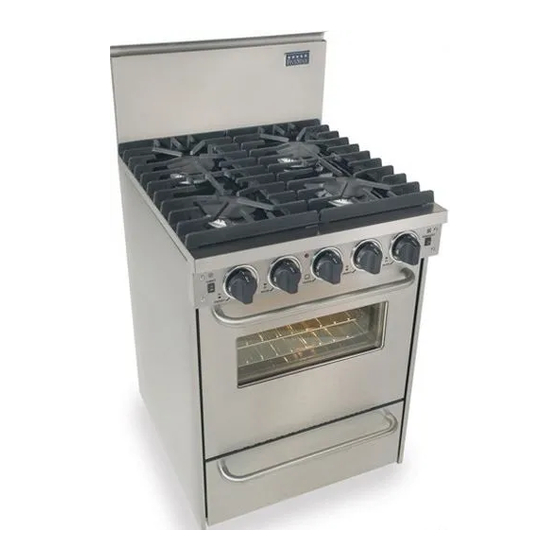
- Page 1 24”, 30” and 36” Range Models 48” and 60” Range Models 36” and 48” Cooktop Models Your exact model may not be pictured.
- Page 2 Moisture ....12, 33 Operation of Range....11 Oven Racks....13 Oven Safety Tips.
-
Page 3: Installation Instructions
INSTALLATION OF ANTI-TIP BRACKET ON 24”, 30” AND 36” MODELS 1) PLACE RANGE IN PROPER LOCATION WITH BACK OF RANGE AGAINST REAR WALL. 2) ADJUST LEG LEVELERS TO MATCH COUNTER HEIGHT. 3) REMOVE RANGE AND INSTALL ANTI-TIP BRACKET TO WALL, SEE NOTE, FIG. 2. -
Page 4: Wall Clearances
Combustible surfaces above the unit must be a minimum of 40” above the unit’s top cooking surface for the full width of the appliance if a range hood is not used. If a hood is used we recommend 30” to the bottom of the hood above the top cooking surface (Top of hood 7’... - Page 5 Because hard piping restricts movement of the range, the use of an A.G.A.-certified flexible metal appliance connector is recommended unless local codes require a hard- piped connection.
- Page 6 OF AIR FOR COMBUSTION OR VENTILATION. SEE INSTRUCTION FIG. 2. Positioning/Leveling To position the range use a lift jack or enough manpower to lift the range completely. Avoid sliding, pushing, or pulling the range because this increases the possibility of bending...
-
Page 7: Flame Height
The burner orifice hoods are black for NAT. gas and brass for LP. gas. If the range is to be converted from NAT. gas to LP. or vice versa call 800-251-7224 for proper orifices and instructions. -
Page 8: Safety Instructions
• Never allow children to play with the range controls. Teach them that the range and pans on it can be hot. Don’t allow anyone to climb about the range or use it or the doors for stepping, leaning, or sitting. -
Page 9: Surface Cooking
YOU BET IT IS. Always turn utensil handles to the side or back of the range. It’s also possible for an adult to hit the handle accidentally. • Always turn surface burner to OFF before removing cookware. -
Page 10: Oven Cooking
Provide properly sized exhaust fans for efficient operation, no sprinklers are required. • If this range is removed for any reason, service or cleaning, etc., it must be replaced as outlined in the installation instructions before placing the range back in operation. -
Page 11: Final Preparation
Some stainless steel parts may have a plastic protective wrapper which must be peeled off. The range should be washed thoroughly with hot, soapy water to remove these film residues and any installation dust or debris before being used for food preparation, then rinsed and wiped dry. -
Page 12: Oven Temperature
The bake cycle is from 250 degrees to 550 degrees. This can be termed as the very low range (250 degrees to 275 degrees) to extremely hot (500 degrees to 525 degrees). The moderate baking range is 350 degrees to 425 degrees. -
Page 13: Oven Racks
See Figure 15. To open the broiler, gently lift up and pull forward on the “drop-down” broiler door. Use a hot pad or “range mitten” to grasp the broiler pan and gradually pull forward. It will reach a temporary “stop.”... -
Page 14: Electronic Ignition
Turning the control dial ON will activate an electronic module and send pulses Make certain all parts of the range are cool before cleaning. Be sure to replace the parts correctly. Knobs Pull forward to remove the knobs. - Page 15 The amount of moisture will depend upon the humidity of the air and water content of the food being cooked. Fogging and even dripping water will usually occur in geographic locations of high humidity.
- Page 16 HINGE RETAINER “LOCKED” QUANDRANT HOOK HINGE RETAINER “OPEN” HINGE MECHANISM Lift-Off Oven Door (on some models) HINGE SLOT FIG. 18 LIFT OFF DOOR To remove oven door/s: • Open door fully. • Rotate the “hinge retainers” into the locked position, as shown over the hook located on the bottom side of each hinge quadrant.
- Page 17 CONVECTION OVEN MODELS Convection oven ranges offer the choice of “regular” radiant baking and roasting or convection baking and roasting. The benefits of convection cooking are: 1. More even baking and roasting. 2. A general reduction in cooking time for most baked foods; up to 30% faster.
-
Page 18: Baking Chart
Product and Type CAKE Yellow-2 layers White-2 layers Chocolate-2 layers Bundt Angel Food Pound Cake Snacking Cake Cupcakes Sheet Cake PIES Two Crust Fruit, fresh Fruit, frozen One Crust Custard, fresh Custard, frozen Pie Shell COOKIES Chocolate Chip Peanut Butter Sugar Brownies BREADS, YEAST... -
Page 19: Broiling Tips
Convection Baking of Frozen Convenience Foods • Follow package recommendations for oven temperature, foil covering and use of cookie sheets. Baking times will be similar. See chart below for some examples. Here are a few examples of times and temperatures: FROZEN CONVENIENCE FOODS... - Page 20 FEATURE which means that the broiling temperature can be varied by selecting a lower temperature setting on the TEMPERATURE knob. Using a lower temperature FOODS BEEF Steak (1") Rare Medium Well Hamburgers ( ") Rare Medium Well PORK TO “BROIL” AND BACK TO 500˚F Bacon Chops ( ")
- Page 21 WARNING - During the self- cleaning cycle, the exterior of the range can become very hot to the touch. DO NOT leave small children unattended near the appliance.
- Page 22 CAUTION: We recommend you not use your range during the self- clean cycle. The range can become very hot to the touch. STARTING THE SELF-CLEAN CYCLE If the cleaning cycle is interrupted for any reason, wait three hours before restarting.
- Page 23 MODEL NO.
- Page 24 LEFT FAN MOTOR SWITCH REFER ONLY TO FEATURES WHICH ARE EQUIPPED ON YOUR RANGE WARNING-ELECTRICAL GROUNDING INSTRUCTIONS: THIS APPLIANCE IS EQUIPPED WITH A THREE- PRONG GROUNDING PLUG FOR YOUR PROTECTION AGAINST SHOCK HAZARD AND SHOULD BE PLUGGED DIRECTLY INTO A PROPERLY GROUNDED THREE-PRONG RECEPTACLE. DO NOT CUT OR REMOVE THE GROUNDING PRONG FROM THE PLUG.
- Page 25 SWITCH WALL PLUG REFER ONLY TO FEATURES WHICH ARE EQUIPPED ON YOUR RANGE WARNING-ELECTRICAL GROUNDING INSTRUCTIONS: THIS APPLIANCE IS EQUIPPED WITH A THREE- PRONG GROUNDING PLUG FOR YOUR PROTECTION AGAINST SHOCK HAZARD AND SHOULD BE PLUGGED DIRECTLY INTO A PROPERLY GROUNDED THREE-PRONG RECEPTACLE. DO NOT CUT OR REMOVE THE GROUNDING PRONG FROM THE PLUG.
- Page 26 TIMER MOTOR WIRING DIAGRAM FOR 30'' & 36'' SELF CLEANER 188-6C022 MODEL NO. 275, 325 TIMER MOTOR WIRING DIAGRAM FOR 60'' SELF CLEANER 188-6C023 MODEL NO. 625...
- Page 27 WIRING DIAGRAM FOR 48'' SELF CLEAN WIRING RANGE CONNECTION CORD FIG. 1 BLACK WHITE GROUND LINK STANDARD 120/240V HOOKUP FRAME GROUNDED TO NEUTRAL THROUGH A LINK THIS APPLIANCE MUST BE CONNECTED AS SHOWN IN FIGURE 1, OR 2. IF THE CORD IS REPLACED IT MOST BE RATED AT 250 VOLTS 50 AMPERES AND CERTIFIED FOR USE ON HOUSEHOLD RANGES.
- Page 28 NEUTRAL GROUND NEUTRAL GROUND WIRING DIAGRAM FOR 48'' SEALED BURNER IGNITION GRIDDLE NEUTRAL LINE GROUND REIG REIG REIG REIG WIRING DIAGRAM FOR 36'' SEALED BURNER REIG LINE REIG REIG REIG REIG REIG REIG REIG OVEN GRIDDLE REIG LINE REIG REIG REIG REIG REIG...
- Page 29 10” x 21” Griddle Clean Up Cooked-off grease will drain from the griddle toward the front of the range and accumulate in the grease well. Direct the flow of grease to the center of the grease well with a spatula.
- Page 30 Smoke and odor are normal and should be expected when using this grill. Use range hood anytime grill is on. • Season grill grate. Preheat grill on HI, 10-15 minutes, for best flavor. • For best results, buy top grade meat.
- Page 31 Models RBT024, 030, 036, 048, TBT036 and 048 and Side Trim Models SST002. • Some models may require removal of top burner grates, burner pans and griddle if equipped. If range is NOTE 1 4” Backguard Models BKG024, 030, 036, 048 and BKT060...
-
Page 32: If Service Is Required
Griddle Cover – Remove stainless steel griddle cover/work surface when using griddle. Do not replace until griddle cools. Service If your range should fail to operate check the following: Is the electrical cord securely inserted into the electrical outlet? Is the circuit breaker open, or is a... -
Page 33: Trouble Shooting Guide
3. Soil not completely removed after cleaning cycle. TROUBLE SHOOTING GUIDE Cause a. Range not connected to power supply (Solid State Ignition). b. Burner incorrectly rated. c. Clogged burner ports. d. Top burner not properly positioned. e. Burner cap not properly seated (Sealed Burner Models). - Page 34 NOTES...
- Page 35 NOTES...
- Page 36 This appliance has been designed for domestic household use. If properly installed, adjusted, and operated under normal conditions in accordance with the printed instructions, it will satisfactorily perform the functions that are generally expected of this type of appliance. ONE YEAR PARTS AND LABOR If your appliance fails to do so because of a defect in material or workmanship within one year from the date of original purchase: We will at our option, repair, exchange, or correct by other means what we consider appropriate,...
Need help?
Do you have a question about the 24 Range and is the answer not in the manual?
Questions and answers