Table of Contents
Advertisement
Chapter 1 - Introduction and Installation
PlateMaker 4
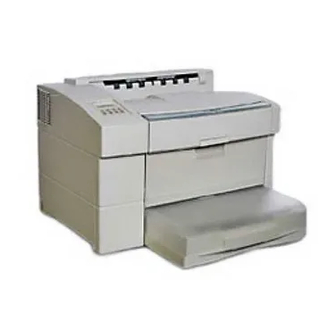
Fig. 1.1 PlateMaker 4 Printer
The PlateMaker 4 (Fig. 1.1) provides a complete prepress solution for graphics
professionals. These include groups such as small commercial printers, print shops,
in-plant operations, and service shops in need of high-quality, fast turnaround
printing at a low cost.
The PlateMaker 4 offers high resolution and true Adobe PostScript 3 output on up to
13" x 35.5" (330 mm x 901 mm) media. Using XANTÉ's CPT (Clean Plate
Technology) and XANTÉ's patented Accurate Calibration Technology (X-ACT), you
can print quality paper and polyester plates which are immediately ready for press
with no intermediate steps required. Plus, this versatile printer prints on paper, cover,
film, transparencies, labels, and envelopes.
About this Manual
This user's guide covers installation, setup, and operation of a PlateMaker 4 printer.
Chapter 1—Introduction and Installation summarizes this manual and PlateMaker 4
features, optional configurations, and the printer's warranty. It also covers printer setup
and required cabling as well as a printer overview.
Chapter 2—Macintosh Setup describes the XANTÉ Utilities for the Macintosh. This
includes connecting to the appropriate interface, installing the Adobe PostScript
printer driver, your printer's PPD, printer utilities, and Adobe Downloader as well as
procedures for using many features.
Introduction and Installation 1-1
Advertisement
Table of Contents

Related Manuals for Xante PlateMaker 4


Summary of Contents for Xante PlateMaker 4
-
Page 1: About This Manual
The PlateMaker 4 offers high resolution and true Adobe PostScript 3 output on up to 13" x 35.5" (330 mm x 901 mm) media. Using XANTÉ’s CPT (Clean Plate Technology) and XANTÉ's patented Accurate Calibration Technology (X-ACT), you... - Page 2 Chapter 3—PC Setup describes the XANTÉ Utilities for the PC. This includes connecting to the appropriate interface, installing the Adobe PostScript printer driver, your printer’s PPD, printer utilities, and procedures for using many features. Chapter 4—Configuration describes using front panel keys and menus and the Print dialog box to configure many printer features.
- Page 3 Manual Conventions The following conventions are used in this manual: ↵ indicates that you need to press the Return key on a Macintosh or the Enter key on a PC. indicates additonal or emphasized information. indicates instructions that must be followed to avoid damage to files or equipment.
-
Page 4: Printer Features
Printer Features The following chart lists PlateMaker 4 printer features. Features PlateMaker 4 IDT 79RC3255 Processor Std. RAM: 64 MB Std. 128 MB Opt. 256 MB (maximum) Opt. Adobe PostScript 3 Std. 136 PostScript Fonts Std. Resolutions: 600 x 600 dpi Std. -
Page 5: Mirror Print
Media Types: Plain and Laser Paper Std. Heavy Paper Std. Cover Std. Transparencies Std. Labels Std. Envelopes Std. Polyester Plate Std. Paper Plate Std. Matte Film Std. Clear Film Std. Mirror Print Std. Negative Print Std. Tray Chaining Std. XANTÉ Utilities (PC and Macintosh) Std. -
Page 6: Installation
Installation Installation covers selecting a printer location as well as unpacking, becoming familiar with, and connecting your printer. Printer Location Set up your printer in a location that can support its weight and can provide sufficient operation and maintenance clearance. To prevent overheating, allow at least 8.0" (200 mm) clearance for the printer’s vent. -
Page 7: Xanté Utilities Cd-Rom
The printer weighs approximately 58.5 lb (26.5 kg) without the toner, cassettes, and media installed. • Always have two people lift the printer. • Only lift the printer using the recessed grip areas on the right and left sides. Remove the shipping stabilizer from the top of the printer; then, lift the printer out of the box (fig. -
Page 8: Printer Overview
Printer Overview Use Figures 1.4, 1.5, and 1.6 to become familiar with your new printer. Duplexer Replacement Cover Output Tray Fuser Cover Front Panel Paper Stop Vent Output Tray Fuser Cover Output Tray Extension Parallel Port Top Cover USB Port Top Cover Latch Ethernet Port Multipurpose Feeder... -
Page 9: Removing And Installing The Toner Cartridge
• Do not expose the cartridge to bright lights or direct sunlight. Keep the cartridge in its protective bag until installation. If you must remove the cartridge temporarily, place it in the original bag or wrap it well to protect it from light. - Page 10 Do not touch any parts inside the printer. Remove the toner cartridge if it is in the printer by grasping its handles and pulling it slowly out of the printer (fig. 1.9). Once you begin pulling the cartridge out of the printer, remove it completely. The cartridge’s shutter may not open properly or be damaged if the cartridge is pulled partially out and then pushed back in the printer.
-
Page 11: Standard Cassette
Insert the pins on both sides of the cartridge into the guide channels in the printer (fig. 1.12). Then, slide the cartridge into the printer until it stops and is seated properly (fig. 1.13). Fig. 1.13 Insert Toner Cartridge Fig. 1.14 Close Top Cover Close the top cover by pressing down on the center section until the latch engages (fig. - Page 12 Remove the cassette if it is in the printer by pulling the cassette straight out until it stops (fig. 1.16). Then, lift it slightly and pull it from the printer (fig. 1.17). Fig. 1.16 Pull Out Cassette Fig. 1.17 Remove Cassette from Printer Place the cassette on a flat surface and remove the cassette cover (fig.
-
Page 13: Multipurpose Feeder
Align the paper stack and load it into the cassette print side up, leading edge to the back. See “Media Sources” in chapter 5 to determine whether to load media short or long edge first (fig. 1.21). Adjust media guides to the size of the paper stack. To prevent paper jams, make sure the paper fits between the paper guides and under the cassette’s retaining clips (fig. - Page 14 To load the multipurpose feeder Open the multipurpose feeder by grasping the cover’s top center handle and pulling down (fig. 1.23). The multipurpose feeder does not open to a 90° angle. To prevent damage, do not exert strong pressure or place heavy objects on the feeder. Fig.
-
Page 15: Multipurpose Feeder Tip
Multipurpose Feeder Tip Occasionally, in a Macintosh environment if media is in the multipurpose feeder, the system’s Print Monitor sends a prompt message to put paper into the manual feed tray and click OK. To disable this prompt This prompt can only be turned off in Print Monitor. You cannot turn the manual feed message off on the Desktop Print Monitor. -
Page 16: Turning The Printer On
Connect the power cable’s female connector to the back of the printer and the male connector to a standard electrical outlet (fig. 1.28). Plug the printer into a dedicated, properly grounded AC outlet. Do not use an extension cord. Use a surge protected outlet to help prevent power source fluctuations from damaging your printer. -
Page 17: Turning The Printer Off
Following initialization, a start-up page prints if that feature is enabled. This page lists the selected resolution, installed RAM, hard disk identities, page count, enabled interfaces, and network information. Review this page to be sure that the printer is configured properly. See “Printing a Start-up Page” later in this chapter and “Start-up Page”... -
Page 18: Printer Ports Overview
Printer Ports Overview Your printer has standard parallel, 10/100BaseT Ethernet (EtherTalk, LPR, TCP/IP, and IPP), and USB ports (fig. 1.30). These simultaneously active interfaces can receive jobs from different operating environments without hardware switching. ETHERNET PARALLEL Fig. 1.30 Printer Ports Selecting the Printer Interface Connect to the printer appropriate interface for your host computer or network environment. -
Page 19: Required Equipment: Ethernet
Chapter 6 contains your printer’s warranty. Be sure to register your printer to receive a $50 discount toward your next purchase of XANTÉ consumables. You can register on-line at www.xante.com or return the warranty sheet included with your printer. ◊◊◊... - Page 20 1-20 Introduction and Installationbb...
Need help?
Do you have a question about the PlateMaker 4 and is the answer not in the manual?
Questions and answers