KitchenAid SUPERBA KEBS278 Use & Care Manual
Built-in electric convection single and double ovens
Hide thumbs
Also See for SUPERBA KEBS278:
- Use & care manual (176 pages) ,
- Use and care manual (44 pages) ,
- Use and care manual (44 pages)
Table of Contents
Advertisement
SUPERBA
BUILT-IN ELECTRIC CONVECTION
®
SINGLE AND DOUBLE OVENS
Use & Care Guide
For questions about features, operation/performance, parts, accessories or service, call: 1-800-422-1230
or visit our website at www.kitchenaid.com
In Canada, call for assistance, installation and service, call: 1-800-807-6777
or visit our website at www.KitchenAid.ca
FOURS ÉLECTRIQUES À CONVECTION
SIMPLES ET DOUBLES, ENCASTRÉS SUPERBA
®
Guide d'utilisation et d'entretien
Au Canada, pour assistance, installation ou service composez le 1-800-807-6777 ou visitez notre site web à...
www.KitchenAid.ca
Table of Contents/Table des matières............................................................................. 2
Models/Modèles
KEBS107 KEBS177 KEBS207 KEBS277 KEBS208 KEBS278
W10162180A
Advertisement
Table of Contents

Related Manuals for KitchenAid SUPERBA KEBS278


Summary of Contents for KitchenAid SUPERBA KEBS278
- Page 1 SIMPLES ET DOUBLES, ENCASTRÉS SUPERBA ® Guide d’utilisation et d’entretien Au Canada, pour assistance, installation ou service composez le 1-800-807-6777 ou visitez notre site web à... www.KitchenAid.ca Table of Contents/Table des matières................2 Models/Modèles KEBS107 KEBS177 KEBS207 KEBS277 KEBS208 KEBS278 W10162180A...
-
Page 2: Table Of Contents
TABLE OF CONTENTS TABLE DES MATIÈRES OVEN SAFETY ................3 SÉCURITÉ DU FOUR ..............23 PARTS AND FEATURES..............4 PIÈCES ET CARACTÉRISTIQUES ..........24 ELECTRONIC OVEN CONTROL ...........5 COMMANDE ÉLECTRONIQUE DU FOUR .........25 Display..................6 Afficheur ..................25 Mise en marche ................26 Start ....................6 Arrêt du four inférieur, arrêt du four supérieur et arrêt....26 Lower Oven Off, Upper Oven Off and Off ........6 Horloge ..................26 Clock ....................6... -
Page 3: Oven Safety
OVEN SAFETY Your safety and the safety of others are very important. We have provided many important safety messages in this manual and on your appliance. Always read and obey all safety messages. This is the safety alert symbol. This symbol alerts you to potential hazards that can kill or hurt you and others. All safety messages will follow the safety alert symbol and either the word “DANGER”... -
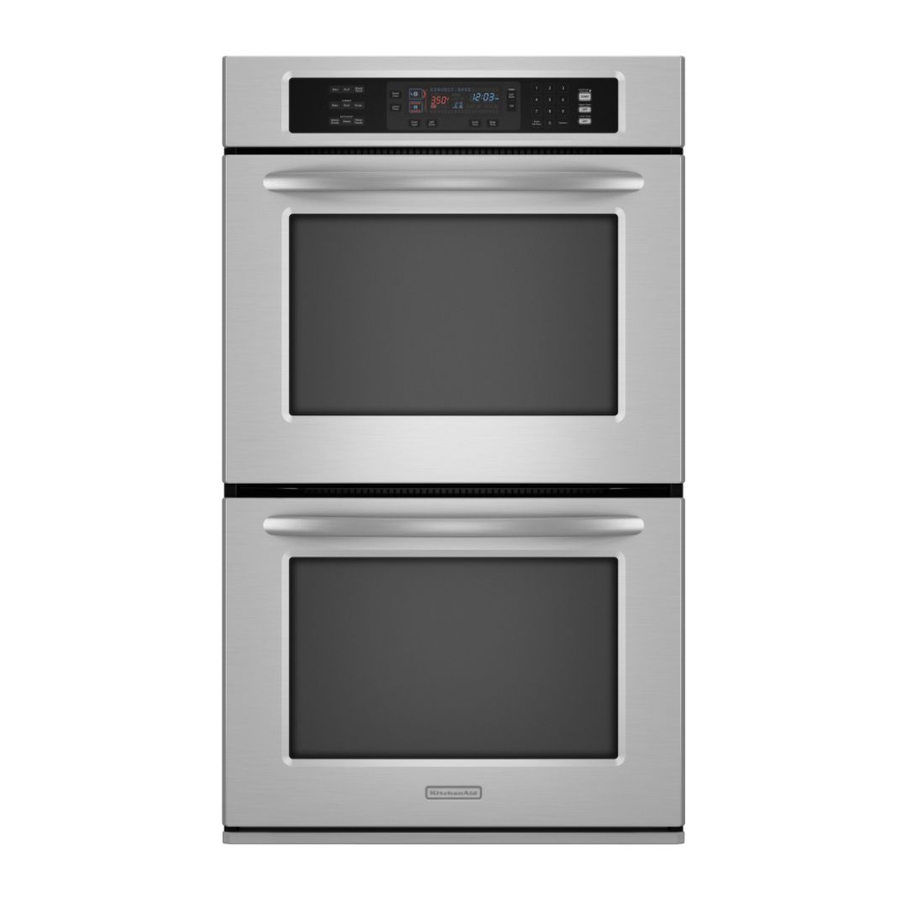
Page 4: Parts And Features
The California Safe Drinking Water and Toxic Enforcement Act requires the Governor of California to publish a list of substances known to the State of California to cause cancer, birth defects, or other reproductive harm, and requires businesses to warn of potential exposure to such substances. -
Page 5: Electronic Oven Control
ELECTRONIC OVEN CONTROL This manual covers different models. The oven you have purchased may have some or all of the items listed. The locations and appearances of the items shown here may not match those of your model. A. Oven settings E. -
Page 6: Display
Three beeps Display Invalid key touch When power is first supplied to the oven, the clock will be End of a cooking cycle flashing the message “clock-enter time.” Time can be entered by touching either CLOCK SET/START or START to allow operation. Three chimes To allow operation without setting a time, touch When timer reaches zero... -
Page 7: Timer
To Adjust Oven Temperature Calibration: Timer 1. Touch OPTIONS and then “6” to set the calibration. 2. On double ovens only, touch UPPER OVEN or LOWER OVEN The Timer can be set in minutes and seconds or hours and to select oven. minutes and counts down the set time. -
Page 8: Oven Use
To Regularly Set, Timed: OVEN USE WARNING Odors and smoke are normal when the oven is used the first few Food Poisoning Hazard times, or when it is heavily soiled. During oven use, the heating elements will not remain on, but will Do not let food sit in oven more than one hour before cycle on and off throughout oven operation. -
Page 9: Roll-Out Rack
Convection Cooking To Remove Roll-Out Rack: 1. Slide the rack in completely so that it is closed and engaged OVEN SETTING NUMBER OF RACK with the sliding shelf. RACKS USED POSITION(S) 2. Using 2 hands, lift up on the front edge of the rack and the Convection Bake 1, 2 or 3 sliding shelf together. -
Page 10: Bakeware
Bakeware Oven Vent(s) The bakeware material affects cooking results. Follow manufacturer’s recommendations and use the bakeware size recommended in the recipe. Use the following chart as a guide. BAKEWARE/ RECOMMENDATIONS RESULTS Light colored Use temperature and time aluminum recommended in recipe. Light golden crusts Even browning Dark aluminum and... -
Page 11: Full And Center Broiling
3. Touch START. 1. On double ovens only, touch UPPER OVEN or LOWER OVEN. “Lo” will appear on the oven display if the actual oven The cavity symbol will indicate which oven was chosen. temperature is under 170°F (77°C). 2. Touch BROIL once for Full broiling, twice for Center broiling. When the actual oven temperature reaches 170°F (77°C), Touch the number keys to enter a temperature other than the oven display will begin displaying the temperature as it... -
Page 12: Convection Cooking
During convection baking preheat, the T.H.E.™ convection Convection Cooking element and broil element and the CleanBake™ element all heat the oven cavity. After preheat, the T.H.E.™ convection element (single, upper and, on some models, lower oven) and the CleanBake™ element will cycle on and off in intervals to maintain oven temperature, while the fan constantly circulates In a convection oven, the fan-circulated hot air continually the hot air. - Page 13 To Convection Roast: FOOD/RACK COOK TIME OVEN TEMP. INTERNAL Before convection roasting, position racks according to the POSITION (min. per FOOD TEMP. “Positioning Racks and Bakeware” section. It is not necessary to 1 lb [454 g]) wait for the oven to preheat before putting food in, unless recommended in the recipe.
-
Page 14: Convection Broil
Convection Broil EasyConvect Conversion ™ (single, upper and, on some models, lower oven) Convection temperatures and times differ from those of standard cooking. The oven can automatically reduce standard recipe temperatures and times for convection cooking. The conversion may not be exact because foods are grouped in general categories. -
Page 15: Proofing Bread
To Use: Proofing Bread Before using, insert the probe into the food item. (For meats, the probe tip should be located in the center of the thickest part of Proofing bread prepares dough for baking by activating the the meat and not into the fat or touching a bone). Place food in yeast. -
Page 16: Timed Cooking
3. Touch COOK TIME. Timed Cooking 4. Touch number keys to enter the length of time to cook. 5. Touch STOP TIME. WARNING 6. Touch the number keys to enter time of day to stop. 7. Touch START. Food Poisoning Hazard The start time is automatically calculated and displayed. -
Page 17: Oven Care
OVEN CARE Self-Cleaning Cycle The oven is preset for a 3 hour 30 minute clean cycle, however WARNING the time can be changed. Suggested clean times are 2 hours 30 minutes for light soil and between 3 hours 30 minutes and 4 hours 30 minutes for average to heavy soil. -
Page 18: General Cleaning
® KitchenAid Stainless Steel Cleaner and Polish Part Number discolor and become harder to slide. If this happens, a light 4396920 (not included) or KitchenAid ® Stainless Steel Wipes coating of vegetable oil applied to the rack guides will help Part Number 8212510 (not included): them slide. -
Page 19: Oven Lights
Oven Door BROILER PAN AND GRID (on some models) IMPORTANT: Do not clean in the Self-Cleaning cycle. To avoid oven door glass breakage: Cleaning Method: Do not close the oven door if the racks are not fully inserted Mildly abrasive cleanser: into the oven cavity or when bakeware extends past the front Scrub with wet scouring pad. -
Page 20: Troubleshooting
TROUBLESHOOTING Try the solutions suggested here first in order to avoid the cost of an unnecessary service call. Nothing will operate Self-Cleaning cycle will not operate Has a household fuse blown, or has a circuit breaker Is the oven door open? tripped? Close the oven door all the way. -
Page 21: Assistance Or Service
KitchenAid brand of Whirlpool Corporation or Whirlpool Canada LP (hereafter “KitchenAid”) will pay for Factory Specified Parts and repair labor to correct defects in materials or workmanship. Service must be provided by a KitchenAid designated service company. This limited warranty is valid only in the United States or Canada and applies only when the major appliance is used in the country in which it was purchased. - Page 22 In the second through fifth years from the date of purchase, when this appliance is operated and maintained according to instructions attached to or furnished with the product, KitchenAid will pay for Factory Specified Parts for the following components if defective in...
Need help?
Do you have a question about the SUPERBA KEBS278 and is the answer not in the manual?
Questions and answers
What is the red bowl with cover for?