Chapters
Table of Contents

Related Manuals for Kenmore 41003


Summary of Contents for Kenmore 41003
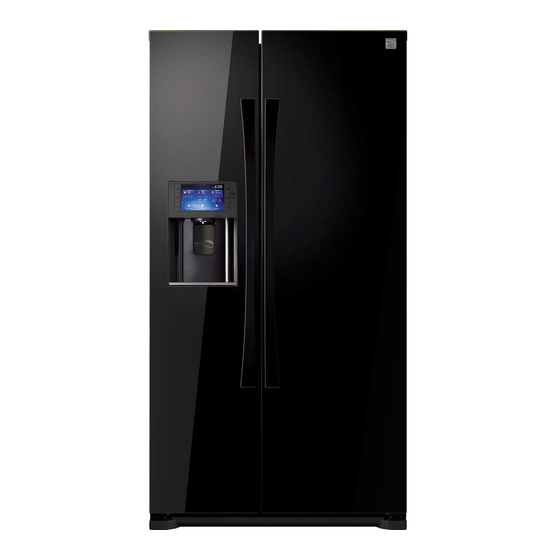
- Page 1 SIDE-BY-SIDE REFRIGERATOR REFRIGERADOR DE DOS PUERTAS lVlode|s/Modelos 41002, 41003, 41009 www, sears,corn Sears, Roebuck and Co,, Hoffman Estates, IL 60179 U,S,A, DA99=01746C REV(0.2) Printed in Korea...
-
Page 2: Table Of Contents
English Version Turning Off the Ice Dispenser Spanish Version Selecting and Dispensing Ice Warranty Selecting and Dispensing Water Protection Agreements Cooling Off (Demo Mode) Important Safety Instructions Door Open Alarm Calendar CFC Refrigerant Disposal How to Enter a Calendar Memo 21, 22 Grounding Requirements Parts and Features... -
Page 3: Warranty
REFRIGERATOR WARRANTY YKenmore Elite Limited Warranty When installed, operated, and maintained according to all instructions supplied with the product, if any non- expendable part of this appliance other than the sealed refrigerant system fails due to a defect in material and workmanship within one year from the date of purchase, call 1-800-4-MY-HOME _ to arrange for free repair. -
Page 4: Protection Agreements
Once you purchase the Agreement, a simple phone call is Master Protection Agreements all that it takes for you to schedule service. You can call Congratulations on making a smart purchase. Your new anytime day or night, or schedule a service appointment Kenmore ®... -
Page 5: Important Safety Instructions
BASIC SAFETY PRECAUTIONS This guide contains many important safety messages. Always read and obey all safety messages. This is the safety alert symbol. It alerts you to safety messages that inform you of hazards that can kill or hurt you or others, or cause damage to the product. All safety messages will be preceded by the safety alert symbol and the hazard signal word DANGER, WARNING, or CAUTION. - Page 6 DO NOT install the refrigerator in a damp place or place NEVER use gas pipes, telephone lines, or other potential lightning attractors as an electrical ground. where it may come in contact with water. Wet and/or Improper use of the grounding plug can result in a risk deteriorated insulation of the internal electrical parts may cause electric shock or fire.
-
Page 7: Cfc Refrigerant Disposal
Ifyouhavea longvacation planned, e mpty the This appliance is not intended for use by small children refrigerator andturnit off.Wipeexcess moisture from or infirm persons without capable, adult supervision. theinsideandleave the doorsopento keepodorand Small children should be supervised when using the moldfromdeveloping. -
Page 8: Parts And Features
I®I Use this section to become more familiar with the parts and features. Page references are included for your convenience. NOTE: The refrigerator you have purchased may have some or all of the items listed below. OAuto Door Closer (p. 41) Deli Drawer (p. -
Page 9: Refrigerator Installation
Allow clearance to the right, left, back, and top when installing. (See drawing in column 1.) This will help Congratulations on your purchase of the Kenmore Elite reduce power consumption and keep your energy bills Side-By-Side Refrigerator. We hope you enjoy the many lower. -
Page 10: Unpacking Your Refrigerator
Excessive Weight Hazard Avoid placing the refrigerator near a heat source, direct sunlight, or moisture. Use two or more people to move and install the refrigerator. Failure to do so can result in back or other injury. SUPPLIED PARTS UNPACKING YOUR REFRIGERATOR The following parts should be supplied with the refrigerator. -
Page 11: Refrigerator And Freezer Door Removal And Installation
To remove the freezer door: REFRIGERATOR AND FREEZER DOOR REMOVAL AND INSTALLATION Disconnect the 3 wire connectors (11) by gently pulling them apart at the connectors. If the refrigerator is too large to pass through your doorway easily, you can remove the refrigerator and freezer doors. -
Page 12: Water Line Requirements
WATER LINE REQUIREMENTS To remove the refrigerator door: A water dispenser is one of the helpful features on your new Kenmore Elite Side-By-Side Refrigerator. To help promote better health, the water filter removes unwanted particles from your water. However, it does not sterilize or Support the door during upper hinge removal to destroy microorganisms. -
Page 13: Installing The Water Filter
CONNECTING THE WATER SUPPLY INSTALLING THE WATER FILTER LiNE TO THE REFRIGERATOR Remove the water filter cover (1). There are several items that you need to purchase to Remove the fixed cap by turning it counterclockwise. Keep the cap in a safe place for later use if you don't complete this connection. - Page 14 Remove any residual matter inside the water Check the amount of water supplied to the icemaker. supply line after installing the water filter. Plug the refrigerator's power cord into a 3-prong Open the freezer door. grounded outlet. Lift the icemaker cover up and out to remove it from the freezer door.
-
Page 15: Positioning And Leveling The Refrigerator
POSITIONING AND LEVELING If it is not level, adjust the front leveling legs until the refrigerator is level. Using a flat-head screwdriver, turn REFRIGERATOR the leg counterclockwise to extend the leg and raise the refrigerator at that point. Turn the leg clockwise to Now that the refrigerator has been assembled and retract the leg and lower the refrigerator at that point. -
Page 16: Making Minor Door Adjustments
MAKING MINOR DOOR ADJUSTMENTS Using the Allen wrench (1), turn the bolt (2) clockwise to raise the door or counterclockwise to lower the Remember, a level refrigerator is necessary for getting door. Close the doors to check the level. Repeat step 3 until the doors are level. -
Page 17: Using Your Refrigerator
DIGITAL PANEL Accent Lighting - Turns the accent lamp ON and OFF. The digital panel on the freezer door is a Graphic User Ice Type/Ice Off - Allows you to select the type of ice Interface (GUI). This panel with LCD screen provides an being dispensed. -
Page 18: Calibrating The Stylus Touch Point
Calibrating the Stylus Touch Point •*aft 30 _,_e_d le rev¢#t _,ack t_ _dgi_el se_t_hgs The stylus touch point can be calibrated to best meet the user's needs. To adjust the stylus touch point on the touch screen: Press the Settings button on the "Home" screen. The 'lime l_r_t _ 28 se4z display will show the adjustable settings on the screen. -
Page 19: Using Slide Show
To reactivate the control Kenmore Elite default slide. buttons, the touch-screen controls, and the dispenser, press and hold the Child Lock button for more than Press the Slide Show button. -
Page 20: Dispenser Controls
Dispenser Controls Turning Off the Ice Dispenser The last three buttons on the control panel control the The Ice Type/Ice Off button controls two functions. The dispenser functions. These buttons include Accent length of time the control is held determines which function it controls. -
Page 21: Selecting And Dispensing Water
Press and hold the Slide Show and the Accent Selecting and Dispensing Water Lighting buttons simultaneously again for 3 or more Press the Water button. The screen will show seconds to reactivate the refrigerator compressor "Dispenser Active Water." functions. The screen will show "Cooling OFF Deactivated." Door Open Alarm Slid Sho,... - Page 22 Choose the desired date to input a calendar memo. A If you want to repeat your memo within the calendar blank memo pad will show on the screen for that day. system, touch the Repeat button on the screen. This enables you to choose the repetition period (daily/weekly/mo nthly/yearly).
-
Page 23: How To Enter A New Special Day
Touch the screen button for the special day you want How to Enter a New Special Day to use. A keyboard will be displayed on the screen. Press the Home button. The display screen will show the "Home" screen. Show Cooling Slide Accent... -
Page 24: How To Change A Calendar Memo Or Special Day
To set an alarm time, touch the set time button on the Choose the desired date to change a calendar memo screen. Using the < and > buttons, set the time in or special day. The memos for that day will appear on the screen. - Page 25 How to Delete a Calendar Memo or If you want to change or select a repeat for your memo or special day, touch the Repeat button on the Special Day screen. This enables you to choose the repetition period (daily/weekly/monthly/yearly). Press the Home button.
-
Page 26: Or Special Day
Calendar Memo Alarm Touch the OK button to complete deleting the memo or special day. The calendar alarm is designed to remind you there is a calendar memo or special day event for that day. At the scheduled time, the calendar alarm will sound and the "Check Calendar Memo"... -
Page 27: Temp Control
Touch the OK button(s) under the new temperature(s) Temp Control to set and save the setting(s). The temperature control allows you to set the freezer and the refrigerator temperatures. Use the following instructions to change and set these temperatures. Press the Home button. The display screen will show the "Home"... -
Page 28: About The Automatic Icemaker
About the Automatic Icemaker Ice is made in the automatic icemaker and sent to the dispenser. The automatic icemaker is designed to make • Never store beverage cans or other foods in the ice cubes 24-hours per day. The quantity will vary ice bucket for the purpose of rapid cooling. -
Page 29: Setting Fast Freeze Or Rapid Cool
Water Filter Setting Fast Freeze or Rapid Cool The Water Filter button on the "Home" touch screen The Fast Freeze and Rapid Cool functions can be used to quickly lower the temperature of the freezer and enables you to check the current status of the water filter. refrigerator compartments. -
Page 30: Water Filter
The filter needs replacement immediately: When the replacement is done, touch the OK button at the bottom of the screen. The display screen will show the "Home" screen. If the status reads "Order" or "Replace," touch the Replace button on the bottom of the screen to access the replacement instructions. -
Page 31: Photo Album
Photo Album Choose the Upload pictures button. The display screen will show the "External Album : Upload Save photos you shot yourself or images you want and Pictures" screen. make your own slide show. When the memory card is • The Upload pictures button will load and store inserted, the photo album is automatically run. - Page 32 The display will go back to the "External Album : • Multiple images can be selected and deleted. Upload Pictures" screen. Repeat steps 4-7. • The Kenmore Elite default slide cannot be deleted. DO NOT remove the memory card from the slot under the display until the screen shows "Please Remove...
- Page 33 To view the slide show, press the Slide Show button Setting Up a Slide Show From the Photo Album on the upper right. Press the Home button. The display screen will show the "Home" screen. Touch the Photo Album button on the touch screen. The images in the photo album will appear on the Home screen.
-
Page 34: Photo Album
Touch the OK button to save the slide show as it is. Setting Up a Slide Show from an External Card Touch the Cancel button and repeat step 3 to add Insert the memory card (SD/SDHC/MMC/HS MMC) more slides. with the saved images in the card slot at the bottom of the screen. -
Page 35: Message
Select the messaging tools as needed by touching Message the buttons under the message screen. Enter the The message feature allows you to leave handwritten or message contents with the selected tools. typed messages on the screen for yourself or someone else. - Page 36 Touch the Save button to save and enter the changed Changing a message message. Press the Home button. The display screen will show the "Home" screen. Slide Show Coollng Accent Lighting Water Touch the Message button in the center bottom of the Deleting a message touch screen.
-
Page 37: Settings
Settings Deleting a message (cont.) Touch the Delete button under the message screen. You can customize the following areas under the Settings The "Delete Message?" screen will appear. button: Energy Saver, Brightness, Screen Saver, Volume Control, Touch Screen Correction, and Current Date/Time. How to toggle the energy saver function. - Page 38 After "Energy Saver Deactivated" is displayed on the Touch the Brightness button in the upper-right corner screen, the settings screen will display the Energy of the touch screen. The brightness control will Saver Off button, indicating the energy saver function appear on the screen.
- Page 39 Use the < and > buttons to choose one of the six How to set the screen saver. preset settings (0/3/5/10/30/60 minutes). The selected If the screen saver is left on for extended periods, it is a running time will appear on the screen. good idea to set the slide show at the photo album as the NOTES: screen saver.
-
Page 40: Settings
How to set the volume control. How to change the current date and time. You can control the volume of the alert sounds, Press the Home button. The display screen will show the "Home" screen. Press the Home button. The display screen will show the "Home"... -
Page 41: Storing Food In The Refrigerator
STORING FOOD IN THE REFRIGERATOR STORING FOOD IN THE FREEZER ICE BUCKET The Kenmore Elite Side-By-Side Refrigerator has been designed with features and functions that maximize space Designed to store large amounts saving. The following customized compartments help of ice. -
Page 42: Removing The Refrigerator/Freezer Accessories
THE REFRIGERATOR/ Door Bins (Refrigerator and Freezer) FREEZER ACCESSORIES The Kenmore Elite Side-By-Side Refrigerator accessories can be easily removed and/or rearranged to maximize the use of interior space and provide ease of cleaning. Injury may occur if the door bins are not firmly installed. - Page 43 Drawers/Crispers (cont.) Ice Bucket (Freezer) To remove and replace a drawer cover: To remove and replace: Do not force the ice bucket during removal. Do not use excessive force when removing a drawer cover. Forced drawer covers can break and/or cause Unnecessary force could cause damage to the icemaker.
-
Page 44: Care And Cleaning
CLEANING THE REFRIGERATOR Cleaning the Exterior Caring for your Kenmore Elite Side-By-Side Wipe the digital panel and LCD display panel with a Refrigerator prolongs the life of your appliance and helps clean, soft cloth. Spray water onto the cleaning cloth keep it odor- and germ-free. -
Page 45: Replacing The Interior Lights
CHANGING THE WATER FILTER Cleaning Behind the Refrigerator To check the condition of the water filter, press the Home button and then touch the Water Filter button on the top right of the touch screen. The current water filter status Electric Shock Hazard will be displayed on the screen followed by step-by-step servicing instructions. -
Page 46: Power Interruptions
POWER INTERRUPTIONS WHEN YOU MOVE If the power will be out for 24 hours or less, keep all When you are moving your refrigerator to a new home, refrigerator doors closed to help foods stay cold and follow these steps to prepare it for the move. frozen. -
Page 47: Troubleshooting Guide
REFRIGERATOR DOES NOT OPERATE Check if... Then... The power supply cord is unplugged. Firmly plug the cord into a live outlet with proper voltage. A household fuse has blown or circuit Replace the fuse or reset the circuit breaker. breaker tripped. Refrigerator is in defrost cycle. - Page 48 FRONT CORNERS AND VERTICAL HINGED SURFACES ARE HOT OR HAVE CONDENSATION Check if... Then... Vertical hinged surfaces feel hot. Some heat is normal due to installed anti-condensators. These prevent condensation buildup. Refrigerator door is ajar. Condensation can occur when you leave a door open for a long time.
- Page 49 THE DISPLAY FUNCTIONS DO NOT WORK Check if... Then... The display lock function is set to Locked. Reset the display lock function to Unlocked. The display lock function is set to Unlocked. Push the display reset button with a sharp tool. This initializes the display.
- Page 50 NOTES DA9 c} 01746C(t_N+ES).inclcl 2012.6.8 2:13:23...
-
Page 51: Spanish Version
Garantia Como seleccionar y expender agua Acuerdos de proteccion Enfriamiento (modo de prueba) Instrucciones importantes de seguridad Alarma al abrir la puerta Calendario Eliminacion del refrigerante CFC Requisitos de conexion a tierra Como ingresar una nota en el calendario 70, 71 Partes y caracteristicas Como ingresar una fecha especial nueva Como cambiar una nota... -
Page 52: Garantia
GARANTiA D ELREFRIGERADOR fGarantia Limitada de Kenmore Elite Sial realizar la instalacion, uso y mantenimiento de acuerdo con todas las instrucciones provistas con este producto una parte imprescindible de este electrodomestico que no sea el sistema de refrigeracion sellado falla debido a un defecto de material o fabricacion dentro del a_o desde su fecha de adquisicion, Ilame al 1-800-4-MY-HOME _ para programar una reparacion gratuita. -
Page 53: Acuerdos De Proteccion
Acuerdos Maestros de Proteccion Proteccion anual de $250 por p4rdida de comida que se haya producido como resultado una falla Felicitaciones por realizar una compra inteligente. Su mec&nica de cualquier refrigerador o congelador cubierto. nuevo producto Kenmore ® fue disefiado y fabricado para argos de funcionamiento confiable. -
Page 54: Instrucciones Importantes De Seguridad
PRECAUCIONES B.&.SICAS DE SEGURIDAD Esta guia cuenta con muchos mensajes importantes de seguridad. Siempre lea y cumpla con todos los mensajes de seguridad. €:ste es el simbolo de alerta de seguridad. Lo alerta sobre los mensajes de seguridad que le informan sobre riesgos que le pueden producir la muerte o lesiones a usted y otras personas, o que pueden producir dados sobre el producto. - Page 55 , NO instale el refdgerador en un lugar hQmedo ni en un • NUNCA use tubos de gas, lineas telef6nicas u otros elementos que atraigan la luz como conexi6n a tierra. El uso inadecuado lugar donde pueda entrar en contacto con agua. Si los del enchufe de conexi6n a tierra puede provocar riesgos de aislantes de las partes electdcas interiores se mojan y/o descargas el6ctricas.
-
Page 56: Eliminacion Del Refrigerante Cfc
• Si planifico sus vacaciones por un tiempo prolongado, vacie • Este electromestico no fue construido para ser usado por el refrigerador y apague el mismo. Retire el exceso de nifios pequefios o personas enfermas que no cuenten con humedad del interior y deje las puertas abiertas para evitar la supervision de un adulto capaz. -
Page 57: Partes Y Caracteristicas
I®l Use esta seccion para conocer m&s sobre las partes y caracteristicas. Se incluyen las referencias de las p&ginas para su conveniencia. NOTA." El refrigerador que adquirio podr& contar con algunos o todos los items que figuran a continuacion. OCierre autom&tico de puerta (p. -
Page 58: Instalacion Del Refrigerador
(Observe la Felicitaciones por su adquisici6n del Refrigerador de columna 1 del dibujo). Esto le ayudar& a reducir el Dos Puertas Kenmore Elite Esperamos que disfrute consumo de corriente y el costo de sus facturas de luz. -
Page 59: Desembalaje De Su Refrigerador
Riesgo de Peso Excesivo Evite ubicar el refrigerador cerca de una fuente de calor, luz solar directa o humedad. Cuente con la ayuda de dos o m&s personas para mover e instalar el refrigerador. Si esto no se cumple se podr&n producir lesiones en la espalda u otras heridas. -
Page 60: Retiro De La Puerta Del Refrigerador O Congelador E Instalacion
RETIRO E INSTALACION DE LA PUERTA Para retirar la puerta del congelador: DEL REFRIGERADOR Y EL CONGELADOR Desconecte los 3 conectores (11) tirando de los mismos de forma suave sobre las conexiones. Si el refrigerador es demasiado grande y no pasa por la puerta de entrada facilmente, puede retirar las puertas del refrigerador y del congelador. -
Page 61: Requisitos Del Suministro De Agua
Para retirar la puerta del refrigerador: Inserte 2 ganchos y controle que cada uno sostenga el suministro de manera firme. Instale la tapa de la pata del frente (2) y asegure con 3 tornillos. REQUISITOS DEL SUMINISTRO Sostenga la puerta al retirar la bisagra superior para DE AGUA evitar posibles lesiones personales y/o da_os sobre el producto debido a la caida de una puerta que no... -
Page 62: Instalacion Del Filtro De Agua
C()MO REALIZAR LA CONEXION COlViO (NSTALAR EL F(LTRO DE AGUA DEL SUMiNISTRO DE AGUA AL Retire la tapa de( filtro de agua (1). Retire la tapa fija girando la misma en direcci6n REFRIGERADOR contraria a las agujas del reloj. Conserve la tapa en un lugar seguro para su uso posterior, en caso de no Hay varios articulos que deber&... - Page 63 Retire cualquier materia residual dentro del Controle la cantidad de agua suministrada suministro de agua luego de instalar el filtro la maquina de hacer hielo. de agua. Abra la puerta de congelador. Enchufe el cable de corriente del refrigerador en un Mueva la tapa de la ma.quina de hacer hielo hacia tomacorriente con conexion a tierra de 3 patas.
-
Page 64: Posicionamiento Y Nivelacion Del Refrigerador
COMO POSIClONAR Y NIVELAR Si no estan a nivel, ajuste las patas frontales hasta que el refrigerador este nivelado. Utilizando un EL REFRIGERADOR destornillador de cabeza aplanada, gire la pata en direccion contraria a las agujas del reloj para Ahora que el refrigerador fue ensamblado y conectado extender la pata y elevar el refrigerador hasta ese a la fuente de suministro de agua, posicione y nivele punto. -
Page 65: Realizacion De Ajustes Menores En La Puerta
COMO REALIZAR AJUSTES MENORES Usando la Ilave Allen (1), gire el tornillo (2) en direccion de las agujas del reloj para elevar la puerta DE LA PUERTA o en direccion contraria alas agujas del reloj para bajar la puerta. Cierre las puertas para controlar el Recuerde que es necesario que el refrigerador est6 nivel. -
Page 66: Como Usar Su Refrigerador
PANEL DIGITAL Accent Lighting (iluminacion acentuada) - Enciende y apaga la luz acentuada. El panel digital de la puerta del congelador es una Ice Type/Ice Off (tipo de hielo/hielo apagado) - Interface Gr&fica de Usuario (Graphic User Interface, Le permite seleccionar el tipo de hielo producido. GUI). -
Page 67: Como Calibrar El Puntero Tfictil De La Aguja
Como calibrar el puntero tactil de la aguja El puntero t&ctil de la aguja se puede calibrar para cubrir de mejor manera las necesidades del usuario. Para ajustar el puntero t&ctil de la aguja en la pantalla: T;me li_i_ Presione el boton Settings (configuraciones) la pantalla Home (inicio). -
Page 68: Como Usar Las Diapositivas
Para reactivar los botones del Kenmore Elite control, los controles de la pantalla tactil, y el Presione el boton Slide Show (diapositivas). -
Page 69: Controles Del Dispensador
Controles del dispensador Como apagar el dispensador de hielo Los tres Qltimos botones del panel de control controlan El boton Ice Type/Ice Off (tipo de hielo/hielo apagado) las funciones del dispensador. Estos botones incluyen controla dos funciones. La cantidad de tiempo que se Accent Lighting (iluminaci6n acentuada) alrededor del sostiene el control determina que funci6n controla. -
Page 70: Como Seleccionar Y Expender Agua
Mantenga presionados los botones Slide Show Como seleccionar y expender agua (diapositivas) y Accent Lighting (iluminacion Presione el boton Water (agua). En la pantalla acentuada) en forma simulta.nea por 3 segundos o aparecera. Dispenser Active Water (agua del mas para reactivar las funciones del compresor del dispensador activa). - Page 71 Elija la fecha deseada para ingresar una nota en el Si desea repetir su nota dentro del sistema del calendario. Aparecera un espacio de notas en blanco calendario, presione el boton Repeat (repetir) en en la pantalla para ese dia. la pantalla.
-
Page 72: Como Ingresar Una Fecha Especial Nueva
Presione el boton en pantalla para la fecha especial Como ingresar una nueva fecha que desea usar. Aparecera un teclado en la pantalla. especial Presione el boton Home (inicio). En la pantalla a0arecera Home (inicio). Slide Show Cooling Accent Lighting Wmer Usando el teclado en pantalla, escriba los contenidos de su nota en la fecha especial. -
Page 73: Como Cambiar Una Nota En El Calendario O Una Fecha Especial
Para configurar la alarma en un horario, presione el Elija la fecha deseada para cambiar una nota o fecha especial en el calendario. Las notas para ese dia bot6n de configuraci6n de horario en la pantalla. Usando los botones < y >, configure la hora y minutos aparecer&n en la pantalla. -
Page 74: Como Borrar Una Nota Del Calendario O Una Fecha Especial
Como borrar una nota o fecha Si desea cambiar o seleccionar una repeticion de su nota o fecha especial, presione el boton Repeat especial del calendario (repetir) en la pantalla. Esto le permite elegir el periodo de repeticion (diario/semanal/mensual/anual). Presione el boton Home (inicio). En la pantalla aparecera Home (inicio). -
Page 75: Alarma De La Nota Del Calendario
Alarma de la memoria del calendario Presione el boton OK para completar la eliminacion de la nota o fecha especial. La alarma del calendario fue diser_ada para recordarle que ese dia hay una nota o evento especial en el calendario. En el horario programado, la alarma del calendario sonarb, y verb. -
Page 76: Control Del Temporizador
Presione el boton(es) OK debajo de la nueva Control de temperatura temperatura(s) para configurar y guardar la El control de temperatura le permite configurar las configuracion(es). temperaturas del congelador y del refrigerador. Use las siguientes instrucciones para cambiar y configurar estas temperaturas. -
Page 77: Acerca De La Mfiquina De Hacer Hielo Automfitica
Acerca de maquina de hacer hielo automatica El hielo se hace en la m&quina de hacer hielo autom&tica • Elimine la primera cantidad de hielo y purgue el y se envia al dispensador. La m&quina de hacer hielo dispensador por 2 minutos luego de la instalacion de un refrigerador o si el mismo no se uso durante autom&tica fue dise_ada para hacer cubos de hielo las un periodo prolongado. -
Page 78: Configuracion De Congelamiento
• El consumo de corriente se incrementa al usar Configuracion de congelamiento la funcion Fast Freeze (congelamiento rapido) y/o rapido o enfriamiento inmediato Rapid Cool (enfriamiento inmediato). Las funciones Fast Freeze (congelamiento ra.pido) y Filtro de agua Rapid Cool (enfriamiento inmediato) se pueden usar para bajar ra.pidamente la temperatura de los compartimientos El boton Water Filter (filtro de agua) en la pantalla tactil del congelador y del refrigerador. - Page 79 Una vez realizado el reemplazo, presione el boton OK Es necesario reemplazar el filtro de inmediato: en la parte inferior de la pantalla. En la pantalla aparecera Home (inicio). Si en el estado se lee Order (orden) o Replace (reemplazar), presione el boton Replace (reemplazar) sobre el boton de la pantalla para acceder alas instrucciones de reemplazo.
-
Page 80: Album De Fotos
Album de fotos Presione el boton Upload Pictures (carga de ira&genes). En la pantalla aparecer& la pantalla Guarde las fotos que toma o las imb.genes que desee y External Album: Upload Pictures (&bum externo: cree su secuencia de diapositivas. AI insertar la tarjeta carga de ira&genes). - Page 81 • Presione el boton Cancel (cancelar) para cargar • Se pueden seleccionar y borrar im&genes m_ltiples. mas im&genes. La pantalla volvera a External • La imagen por omision de Kenmore Elite no se Album: Upload Pictures (album externo: carga puede borrar.
- Page 82 Para visualizar la secuencia de diapositivas, presione Como configurar una secuencia el boton Slide Show (secuencia de diapositivas) en la diapositivas del album de fotos parte superior derecha. Presione el boton Home (inicio). En la pantalla aparecera Home (inicio). Presione el boton Photo Album (a.lbum de fotos) en la pantalla tactil.
- Page 83 Presione el boton OK para guardar la secuencia Como configurar una secuencia de diapositivas. diapositivas de una tarjeta externa Presione el boton Cancel (cancelar) y repita el Inserte la tarjeta de memoria (SD/SDHC/MMC/HS Paso 3 para agregar m&s diapositivas. MMC) con las im&genes guardadas en la ranura de la tarjeta en la parte inferior de la pantalla.
-
Page 84: Mensaje
Mensaje Seleccione las herramientas de mensaje segQn sea necesario, presionando los botones debajo de la La funci6n mensaje le permite dejar mensajes pantalla de mensaje. Ingrese los contenidos del manuscritos o tipiados en la pantalla para usted u otra mensaje con las herramientas seleccionadas. persona. - Page 85 Presione el boton Save (guardar) para guardar e Como modificar un mensaje ingresar el mensaje modificado. Presione el boton Home (inicio). En la pantalla aoarecerf Home (inicio). Slide Show Coollng ..Lighting Water Presione el boton Message (mensaje) en la parte Como borrar un mensaje inferior central de la pantalla t&ctil.
-
Page 86: Configuraciones
Configuraciones Como borrar un mensaje (cont.) Presione el boton Delete (borrar) debajo de la Puede personalizar las siguientes areas con el boton pantalla del mensaje. Aparecera la pantalla Delete Settings (configuraciones): Energy Saver (ahorro de Message? (_,borrar mensaje?). energia), Brightness (brillo), Screen Saver (protector de pantalla), Volume Control (control de volumen), Touch Screen Correction (correccion de la pantalla tactil), y Current Date/Time (fecha/hora actual). - Page 87 Luego de aparecer Energy Saver Deactivated (ahorro Presione el boton Brightness (brillo) en la esquina de energia desactivado) en la pantalla, la pantalla de superior derecha de la pantalla t&ctil. El control de configuraciones mostrar& el boton Energy Saver Off brillo aparecer&...
- Page 88 Use os botones < y > para elegir una de las seis Como configurar el protector de pantalla. configuraciones preconfiguradas (0/3/5/10/30/60 Si se dejar#, el protector de pantalla activado por periodos minutos). El tiempo de funcionamiento seleccionado prolongados, una buena idea es configurar la secuencia aparecera en la pantalla.
- Page 89 Como configurar el control de volumen. Como cambiar la fecha y hora actual. Puede controlar el volumen de las alertas sonoras. Presione el bot6n Home (inicio). En la pantalla aparecer& Home (inicio). Presione el bot6n Home (inicio). En la pantalla aparecer&...
-
Page 90: Como Guardar Comida En El Refrigerador
COMO GUARDAR LA COMIDA EN EL REFRIGERADOR EL CONGELADOR CUBO PARA HIELO El Refrigerador de Dos Puertas Kenmore Elite diser_ado con caracteristicas y funciones que maximizan Diser_ado para guardar grandes el ahorro de espacio. Los siguientes compartimientos cantidades de hielo. -
Page 91: Del Refrigerador/Congelador
COMO RETIRAR LOS ACCESORIOS Recipientes de la puerta (refrigerador y congelador) DEL REFRIGERADOR/CONGELADOR Los accesorios del Refrigerador de Dos Puertas Kenmore Elite se pueden retirar f&cilmente y/o volver a organizar para maximizar el uso del espacio interior y facilitar la limpieza. - Page 92 Cajones (cont.) Cubo para hielo (congelador) Para quitar y reemplazar: Para retirar y reemplazar la tapa de un cajon: No fuerce el cubo para hielo al retirar el mismo. No haga fuerza excesiva al retirar la tapa de un cajon. Si se fuerzan las tapas de los cajones se El uso de fuerza innecesaria podria dahar la m&quina de hacer hielo.
-
Page 93: Cuidado Y Limpieza
COMO LIMPIAR EL REFRIGERADOR Como limpiar el exterior El cuidado de su Refrigerador de Dos Puertas Kenmore Limpie el panel digital y el panel de visor de LCD con una Elite prolonga la vida Qtil de su electrodomestico y Io tela suave que este limpia. -
Page 94: Reemplazo De Las Luces Interiores
COMO CAMBIAR EL FILTRO DE AGUA Como limpiar la parte trasera del refrigerador Para controlar las condiciones del filtro de agua, presione el boton Home (inicio) y luego presione el boton Water Filter (filtro de agua) en la parte superior derecha de la pantalla t&ctil. -
Page 95: Cortes De Corriente
INTERRUPCIONES SOBRE CUANDO SE MUDE LA CORRIENTE Cuando sea necesario trasladar el refrigerador a su nuevo hogar, siga estos pasos de modo que el mismo Si no habr& corriente durante 24 horas o menos, este preparado para la mudanza. mantenga todas puertas del refrigerador cerradas Retire todas las comidas del refrigerador y embale para mantener las comidas frias y congeladas. -
Page 96: Guia De Solucion De Problemas
EL REFRIGERADOR NO FUNCIONA Controle si... Luego... El cable de suministro de corriente est& Firmemente enchufe el cable en un tomacorriente activo desenchufado. con el voltaje adecuado. Un fusible del hogar se quem6 o se activ6 el circuito. Reemplace el fusible o reinicie el disyuntor. El refrigerador se encuentra en el ciclo Espere unos 30 minutos hasta que el ciclo de de descongelamiento. - Page 97 LAS ESQUINAS DEL FRENTE Y LAS SUPERFICIES VERTICALES CON BISAGRA ESTAN CALIENTES O POSEEN CONDENSACION Controle si... Luego... Las superficies verticales con bisagra est&n calientes. Un poco de calor es normal debido a los anticondensadores instalados. Esto evita la acumulaci6n de condensaci6n. La puerta del refrigerador est&...
- Page 98 EL DISPENSADOR DE AGUA NO FUNCIONA Controle si... Luego... El suministro de agua est& conectado y/o la v&lvula Conecte el suministro de agua y abra la v&lvula de de seguridad est& abierta, seguridad. La linea de suministro de agua se pleg6 o aplast6. Reemplace la linea de suministro de agua.
- Page 99 CUANDO APARECEN IMAGENES O LiNEAS DE BORDES EN LA PANTALLA Controle si... Luego... Los tamados de las im&genes son los mismos que Si todas las im&genes mostradas son del mismo tama_o en los modos Slide Show (diapositivas) y Screen con bordes oscurecidos en la parte superior, inferior, Saver (protector de pantalla).
- Page 100 Your Home For expert troubleshooting and home solutions advice: www.managemyhome.com For repair - in your home - of all major brand appliances, lawn and garden equipment, or heating and cooling systems, no matter who made it, no matter who sold it! For the replacement parts, accessories owner's...
Need help?
Do you have a question about the 41003 and is the answer not in the manual?
Questions and answers
Hello i got my fridge but the problem is the touch screen or anything is not working
If the touch screen on your Kenmore fridge model 41003 is not working correctly, check if the input point is correctly set. If needed, perform a touch screen correction from the "Settings" screen.
This answer is automatically generated