Table of Contents
Advertisement
Quick Links
Download this manual
See also:
Owner's Manual
FW:FiLm
DIGITAL
CAMERA
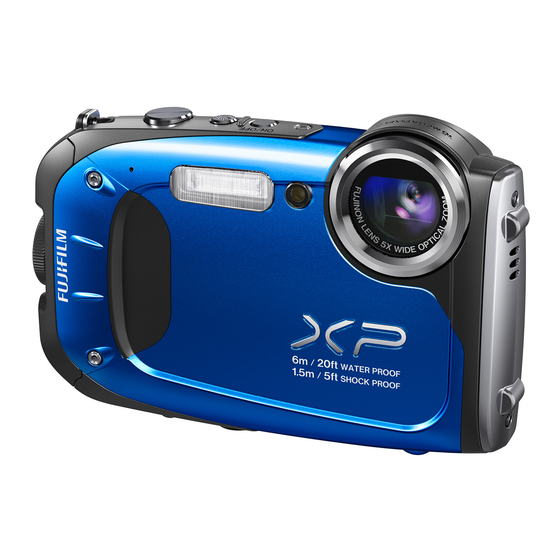
FINEPIX XP60 Series
Owner's
Manual
Thank you for your purchase
of this product.
This manual
describes how to
use your
FUJIFILM digital camera and the
supplied software. Be sure that
you have read and understood
its contents and the warnings in
"ForYour Safety"(_ ii) before us-
ing the camera.
For information
on related products,
visit our website
at
http://www.fujifilm.com/products/digito/
comeros/index.html
BL03301-100r_l
Before YouBegin
First S teps
Basic Photography
andPlayback
More onPhotography
More onPlayback
Movies
Connections
Menus
Technical Notes
Troubleshooting
Appendix
..... =_
_{
H
rlrlll°
ExifPrint
.._"
PictB,idg0 ...................................
Advertisement
Table of Contents

Related Manuals for FujiFilm FINEPIX XP60 Series


Summary of Contents for FujiFilm FINEPIX XP60 Series
- Page 1 FW:FiLm BL03301-100r_l Before YouBegin DIGITAL CAMERA FINEPIX XP60 Series First S teps Basic Photography andPlayback Owner's Manual More onPhotography Thank you for your purchase of this product. This manual More onPlayback describes how to use your FUJIFILM digital camera and the Movies supplied software.
-
Page 2: Important Safety Instructions
For Your Safety IMPORTANT SAFETY INSTRUCTIONS • Readlnstru_tions: All the safety and operat Alternate Warnings; This video product Power-Cord Protection: Power supply cords ing instructions should be read before equipped with a three wire grounding type should be routed so that they are not likely appliance is operated. - Page 3 If the video product does not operate nor ma/y follow the operating instructions, Ad Cleaning: Unplug this video product from the Outdoor Antenna Grounding: If an outside iust only those controls that are covered by wall outlet before cleaning Do not use liq antenna or cable system...
- Page 4 ..i i !i!i!i!i!i!i!i!i!i!i!i!i!i!i!i!i!i!i!i!i!i!i!i!i!i!i!i!i ¸IIII ¸IIII ¸IIII ¸IIII ¸IIII ¸IIII ¸IIII ¸IIII ¸IIII ¸IIII ¸IIII ¸IIII ¸IIII ¸IIII ¸IIII ¸IIII ¸IIII ¸IIII ¸IIII ¸IIII ¸IIII ¸IIII ¸IIII ¸IIII ¸IIII ¸IIII ¸IIII ¸IIII ¸IIII ¸IIII ¸IIII ¸IIII ¸IIII ¸IIII ¸iiiiiiii Safety Notes Do not usethe camerain the bathroom orshower (exduding water- •...
- Page 5 :o" Do not usethe charqer to charqe botteriesother then these spod- Do not cover or wrap the carnera or the ACpower adepter in a doth fiedhere. The supplied battery charger is for use only with the _ _) or hlankot. This carl cause heat to build up and distort the cas type ofbattery supplied with the camera Using the charger to...
- Page 6 • Charging the Battery • Cautions: Handling the Battery The Battery and Power Supply Charge the battery in the supplied battery • Donottransport or storewith metal objects Note: Check type of battery used charger. Charging times will increase at am such as necklaces or hairpins your...
- Page 7 5<>-y) • NiMN Batteries • Do not mix old and new batteries, batteries with different charge levels, or batteries capacity Ni MH batteries This section applies to all camera models different types temporarily reduced when new, after long Use only FUJIFILM AC power adapters desig •...
- Page 8 Using the Camera In the event that LCD monitor is dam This camera may interfere with hospital Do not aim the camera at extremely bright aged, care should be taken to avoid contact aviation equipment Consult with hospital light sources, such as the sun in a cloudless sky.
-
Page 9: About Thismanual
_About This Manual Before using the camera, read this manual and the warnings in"For Your Safety" ii). For information on specific topics, consult the sources below. MemoryCards Picturescarl be stored in the camera's internal memory or on optional SD,SDHC,and SDXCmemory cards (_ 12),referred to in this manual as"memory cards:'... - Page 10 _quently-Used Buttons -I_ To delete a picture, display it full frame -I_ To return instantly to shooting mode, and press the selector up (_). press the shutter button halfway. View Shoot the Camera on in • Silent Mode -I_ Press and hold the DISP/ PlaybackMode BACK button to disable...
-
Page 11: Productfeatures And Precautions For Use
Product Features and Precautions for Use • Water, Dust, and ShockResistance ']) The camera complies with JIS Class 8 water resistance and JIS Class 6 (IP68) dust resistance standards, and has passed FUJlFILM drop tests (drop height: 1.5 m/4.9 ft.; impact surface: ply- wood, thickness 5 cm/2.0 in.) compliant with MIbSTD 81 OF Method... - Page 12 <>d_d _esa_d Pecado ':!) The front surface of the camera lens is protected by a sheet of glass. Foreign matter on the glass will appear in photographs; keep the glass clean at all times. ':!) Be sure that the battery-chamber is fully latched.
- Page 13 _r a{i t <111 _e_1_. _!_yl(i _:_i'ec_M._tioiqs _oi" • After Use Perform the following steps after using the camera underwater or in locations where foreign matter might adhere to the camera body. 1 Securely close the battery-chamber cover and rinse the camera un- der the tap or leave it in a basin of fresh water for about ten minutes.
- Page 14 i:>_OCIb_C:_ _ e_bJ_e_ _c:i _I_:_lio_ _:oi_(_e • Storage and Maintenance ':_) Do not store at temperatures below 0 °C (32 °F) or above 40 °C (104 °F). ':!) To ensure continued water resistance, it is recommended that you have the water-resistant seal replaced about once a year (a fee is charged...
-
Page 15: Table Of Contents
_Table of Contents ForYourSafety ..............Basic Photography and Playback IMPORTANT SAFETY INSTRUCTIONS ........ii TakingPicturesin ,_ (SceneRecognition) Mode,,,,,,19 SafetyN otes..............Viewing Pictures ............. About ThisManual ............More on Photography Frequently-Used Buttons..........x ProductFeatures and Precautions for Use ...... xi Shooting Mode..............Choosing a ShootingMode .......... - Page 16 Connections More on Playback PlaybackOptions............. Viewing Pictureson High-Definition TVs ....... 54 * Favorites: R atingPictures......... 43 Printing Picturesvia USB..........55 Playback Zoom............... Printing the DPOF Print Order ......... 57 Multi-FramePlayback ............ Viewing Pictureson a Computer........59 Deleting Pictures............Windows:InstallingMyFinePix Studio......59 Image Search............
- Page 17 i, beofC< _et_s The Setup Menu............Usingthe Menus: Playback Mode ........72 Using t heSetup Menu ............ Usingthe Playback Menu..........72 Setup M enu Options ............Playback MenuOptions..........[] DATE/TIME ............PHOTOBOOK ASSIST ..........72 [] TiME D IFFERENCE ...........
- Page 18 _ 3 _ _, ! _ :_ Technical Notes Troubleshooting OptionalAccessories ............Problems andSolutions ..........Accessories f rom FUJIFILM ..........91 Warning Messages and Displays ........100 Caringfor the Camera ............. Storageand Use............. Appendix Condensation ..............Memory CardCapacity..........Cleaning ................. Specifications ..............
-
Page 19: Symbolsand Conventions
_ymbols and Conventions The following symbols are used in this manual: (D :This information should be read before use to ensure correct operation. _, :Additional information that may be helpful when using the camera. Other pages in this manual on which related information may be found. -
Page 20: Parts Of The Camera
Parts of the Camera For more information, refer to the page listed to the right of each item. Selectorbutton Move cursorup (exposure c ompensation) button (37) (delete)button MENU/OKbutton Move cursorleft (macro)button (38) Move cursordown 1 O (se fltimer) button (41) _The illustrations in this manual have been simplified... - Page 21 i:_/i_/_ ¸i_13_!_ _r'_q_!!!!'_ IIIIIIIIII1_ Strapeyelet..............Latch................ 7,10 IIIIIIIII1_ Microphone..............Safetylock............... 7,10 IIIIIIIII1_ Shutter button............. 21 _) (movierecording)button........51 IIIIIIIE_ Burstmode button............42 DISP(display)/BACl(button........6,18 IIIIIH ON/OFFbutton............. 16 (silent mode)button*,..........x IIIIIIIIIIF_ Flash................(playback)button..........23 Self-timerlamp............41 Tripodmount AF-assist i lluminator ............ 88 Water-resistant s eal..........
-
Page 22: Cameradisplays
CameraDisplays The following types of indicator may be displayed during shooting and play- back. Indicators vary with camera settings. • Shooting IIIIIIIIII11_ Movie mode..............IIIIIIIIIIi_ Numberof availableframes........104 lUc_'_ _ 1 / ,_,/ 91_- _ IIIIE:E) Sensitivity..............|'_° 8oo¢_1_ _)"i" $ DATE J lllli:_) Imagesizeand quality ........... -
Page 23: Playback
_>art5 o_ ti_e _mei_a • Playback Playback modeindicator........23, 43 Intelligent Face Detectionindicator ......34, 77 Red-eyeremovalindicator........... 77 Prolow-light mode,HDR........27, 28 image ..............Advanced filter ............. 29 Edit ................® Gift image..............Framenumber............. 84 Silentmode indicator..........3, 82 Mark for uploadto ............75 Photobookassist . - Page 24 _ Hd ngandVew ng ndcators PressDISP/BACK to cycle through shooting and playback indicators as follows: • Shooting: I ndicators displayed/indicators hidden/best framing/HD framing Playbad(: Indicators displayed/indicators hidden/-k favorites }Mr: _'_, % _' Begin...
-
Page 25: Inserting The Battery And A Memory Card
_lnsertinq the Battery and a Memory Card Insert the battery and memory card as described below. (l> Before proceeding, confirm that tile water-resistant seal is free of foreign matter as described on page xi. 1 Open the battery-chamber cover. Keeping the safety lock pressed ((]])), rotate the latch ((_) and open the battery-cham- ber cover ((]_)). - Page 26 2 Insert t hebattery. Align theorange s tripe onthebattery w ith Orongestripe theorange battery latch andslide thebat- teryintothe camera, keeping t he battery Bottery Iotch latch pressed tooneside. C onfirm thatthe battery i ssecurely latched. (!_ Insert thebattery inthecorrect orientation. Do NOT USeforce or attempt to insert the bat- tery upside down or backwards.
- Page 27 3 Insert the memory card. Holding the memory card in the orientation shown at right, slide it in until it clicks into place at the back of the slot. (l> Be sure card is in the correct orientation; do not insert at an angle or use force. Ifthe mem- ory card is not correctly inserted or no mem- ory card is inserted, _ will appear in the LCD...
- Page 28 4 Close and latch the battery-chamber cover, Holding the battery-chamber cover closed against the camera body ((_), rotate the latch until it clicks into place ((_), indicating that the cover is secure. (l) Before closing the cover, confirm that there is no dust, sand, or other foreign matter on tile water-resistant sealor adjacent surfaces.
- Page 29 ®®Removing t heBattery andMemory C ard Before removing the battery or memory card, turn the camera off and open tile battery-chamber cover. To remove the battery, presstile battery latch to the side, and Botterylotch slide the battery out of the camera as shown. To remove tile memory card, press it in and release it slowly.
-
Page 30: Compatible M Emory Cards
• Compatible M emory(ards FUJIFILM and SanDisk SD, SDHC, and SDXC memory cards have been ap- proved for use in the camera. A complete list of approved memory cards is available at http://www.fujifilm.com/support/digitol_comeros/compotibility/. Operation is not guaranteed with other cards. The camera can not be used with xD-Picture Cards or MultiMediaCard (MMC) devices. - Page 31 !_se_t # itleBx_t :_i_Se_o_yCad • Tile data in internal memory may be erased or corrupted when the camera is re- paired. Please note that tile repairer will be able to view pictures in internal memory. • Formatting a memory card or internal memory in tile camera creates a folder in which pictures are stored.
-
Page 32: Charging The Battery
_ging the Battery The battery is not charged at shipment. Charge the battery before use. The camera charges the battery internally. Turn the camera off and connect the camera to the supplied AC power adapter using the supplied USB cable. Then plug the AC power adapter into an indoor power outlet. - Page 33 _ Charging v iaacomputer Tile battery carl be charged by corlrlecting tile camera to a computer. Turn tile camera off and connect tile supplied USBcable as shown, making sure the connec- tors are fully inserted. Connect the camera di- rectly to the computer; do not use a USBhub or keyboard.
-
Page 34: Turning The Cameraon And Off
the Camera on and Off ShootingMode Playback Mode Press the ON/OFF b utton to turn the To turn the camera on and begin camera on. playback, press the [] button about a second. PressON/OFF a gain to turn the camera off. - Page 35 T_!!_!_gtieCa! ea<t _ d(}_ (!:>Fingerprints and other marks on the protective glass covering the lens carl affect pictures. Keep tile glass clean. (!:>The ON/OFF button does not completely end the supply of power to tile camera. AutoPower O ff The camera will turn offautomatically if no operations are performed for the length of time selected for _ AUTO POWEROFF (_ 8d).
-
Page 36: Basicsetup
Basic Setup A language-selection dialog is displayed the first time the camera is turned on. Set up the camera as described below (you can reset the clock or change languages at any time using the [] DATE/TIME or [] _j_/LANG. options in the setup menu;... - Page 37 Pictures in _r% (Scene Recoqnition) Mode This section describes how to take pictures in _ (scene recognition) mode. The camera automatically analyzes the composition and adjusts settings ap- propriately. 1 Turn the camera on, Press the ON/OFFbutton to turn the camera on. 8R shooting indicators will be displayed.
- Page 38 2 Frame the picture. Use the zoom buttons to frame the picture in the display. Zoom out Zoom in _* Holding theCamera Hold the camera steady with both hands and brace your elbows against your sides. Shaking or unsteady hands carl blur your shots.
- Page 39 3 Focus. Press the shutter button halfway to focus. _, Tile lens may make a noise when the camera focuses;this is normal. If the subject is poorly lit, the AF-assistillumina- tor may lig ht; see"l_ AFILLUMI NATOR"(_ 88)for informa- tion or] disabling the illuminator. If the camera isable to focus, it will beep twice.
- Page 40 d;!;i_ 4 Shoot. Smoothly press the shutter button the rest of the way down to take the picture. If the subject is poorly lit, the flash may fire when the pic- ture is taken. For information on using tile flash when lighting is poor, see "_.
-
Page 41: Viewing Pictures
_Viewing Pictures Pictures can be viewed in the LCD monitor. When taking important photo- graphs, take a test shot and check the results. 1 Press the [] button, The most recent picture will be displayed. View additional pictures, Press the selector right to view pictures in the order recorded, left to view pictures in reverse order. -
Page 42: Shooting Mode
_Shooting. Mode Choose a shooting mode according to the scene or type of subject. Choosin.g o Shooting Mode 1 Press MENU/OK to display the shooting menu. 2 Highlight SHOOTING MODE and press the selector right to display shooting mode options. 3 Highlight the desired mode and press MENU/0K 4 Press DISP/BACK t o exit to shooting mode. -
Page 43: Shootingmodeoptions
S_oo _gf¢_d_ ShootingModeOptions Mode Description The camera automatically analyzes the composition and selects a scene SCENE RECOGNITION according to shooting conditions and the type of subject. Choose for crisp, clear snapshots. This mode is recommended in most I_1 AUTO situations. P PROGRAMAE The camera sets exposure automatically. - Page 44 Mode Description NIGHT Choose this mode for poorly lit twilight or night scenes. ,_-* NIGHT(TRIPOD) Choose this mode for slow shutter speeds when shooting at night. Choose this mode to record the vivid colors in sunrises and sunsets. -_. SUNSET Choose for crisp, clear shots that capture the brightness of scenes domi- _l_ SNOW nated by shining white snow.
-
Page 45: R_ Pro Low-Light
L_:it • FF_ PRO LOW-LIGHT Each time the shutter button is pressed, the camera makes four exposures and combines them into a single photo- graph. Use to reduce noise and blur when photographing poorly lit subjects or static subjects at high zoom ratios. A single combined photograph may not be created with some scenesor if the subject or camera moves during shooting. -
Page 46: Rm Hdr
• rFm HDR Each timetheshutter b utton ispressed, thecamera takes a series o fshots, each withdifferent exposure. These a recombined intoasingle image, pre- serving d etail i n highlights andshadows. Choose f orhigh-contrast scenes. Press theselector leftorright t ochoose t heexposure range before s hooting. Asingle c ombined photograph may notbecreated withsome s cenes orifthe subject orcamera moves during s hooting. -
Page 47: A_ Advanced Filter
S_oo _gL;_d_ • A_._ ADVANCED FILTER Take photos with filter effects. Select A_._ ADVANCED FILTER for shooting mode (_ 24). 2 Select a filter effect and press MENU/0K Filter Description TOYCAMERA Choose for a retro toy camera effect. MINIATURE The tops and bottoms of pictures are blurred for a diorama effect. -
Page 48: Motion Panorama 360
• _ MOTION PANORAMA 360 Follow an on-screen guide to take photos that will auto- matically bejoined to form a panorama.The camera zooms all the way out and remains fixed at the widest angle until shooting is complete. 1 To select the angle through which you will pan the camera while shooting, press the selector down. - Page 49 (J>Panoramasarecreated from multiple flames.The camera may in some casesrecord an greater or lesserangle than selected or be unable to stitch tile frames together perfectly. Tile last part of tile panorama may not be recorded if shooting ends be- fore the panorama is complete. (J:>...
-
Page 50: D Individ. Shutter 3D
• _D INDIVlD, SHUTTER 3D Take two shots from different angles to create a 3D image. 1 Select _o INDIVID. SHUTTER 3D for shooting mode (_ 24). 2 To choose the order in which the pictures are taken, press the selector right to display the current order and then press the selector left or right to choose from the options below. - Page 51 _i_o_ati_qg Mode • Thecamera displays images in 2D. Press tile selector down to toggle between tile first and second shots. • Devices equippedfor 3D display,such as the FINEPIX REAL 3D V3 digital photo frame or FINEPIX REAL 3D W3 digital camera, will display tile images in 3D. Note that tile FINEPIX REAL 3D W3 only displays images of size O or smaller.
-
Page 52: [] Intelligent Facedetection
Intelligent Face Detection Intelligent Face Detection sets focus and exposure for human faces anywhere in the frame, preventing the camera from focusing on the background group portraits. Choose for shots that emphasize portrait subjects. To use Intelligent Face Detection, press MENU/OK to display the shooting menu and select ON for FACE DETECTION (_... -
Page 53: _Focus Lock
_Focus Lock To compose photographs with off-center subjects: 1 Focus: Position the subject in the focus frame (E[+]_) and press the shutter button halfway to lock focus and exposure. Focus and exposure will remain locked while the shutter button is pressed halfway (AF/AE loci<). - Page 54 Although tile camera boasts a high-precision autofocus system, it may be unable to focus on tile subjects listed below. If the camera is unable to focus, focus on another subject at the same distance and use focus lock to recompose the photograph.
-
Page 55: Exposure Compensation
Exposure Compensation To adjust exposure compensation when photo- graphing very bright, very dark, or high-contrast subjects, press the selector up (r_l). Press the selec- tor up or down to choose an exposure compensa- tion value and then press MENWOK Choose positive (+) volues to increose exposure Choose negotive () vo/ues to reduce exposure... -
Page 56: Macromode (Close-Ups)
Macro Mode (Close-ups) For close-ups, press the selector left (_) and select When macro mode is in effect, the camera fo- cuses on subjects near the center of the frame. Use the zoom buttons to compose pictures (_ 20). To exit macro mode, press the selector left (_) and select '_ OFF' Useof atripod is recommended to prevent blur caused... -
Page 57: Using The Flash(Intelligent Flash)
_ Using. the Flash (Intelligent Flash) When the flash is used, the camera's Intelligent Flash system instantly analyzes the scene based on such factors as the brightness of the subject, its position in the frame, and its distance from the camera. Flash output and sensitivity are adjusted to ensure that the main subject is correctly exposed while pre- serving the effects of ambient... - Page 58 _, If tile flash will fire, [] will be displayed when the shutter button is pressed halfway (if tile icon blinks yellow, the flash charging; wait for charging to complete before shooting). At slow shutter speeds, t"" will appear in the display to warn that pic- tures may be blurred;...
-
Page 59: Usingthe Self-Timer
Q Using the Self-Timer To use the self-timer, press the selector down (_) and choose from the following options: Option Description (OFF) Self-timer off. [he shutter is released ten seconds after the shutter button is pressed. Use for 6_ (10SE() self-portraits. -
Page 60: The Burst Mode Button
_The Burst Mode Button Press the burst mode button to toggle between single-frame shooting and the burst mode selected using the Continuous option in the shooting menu (_ 69). When a burst mode is selected, the camera displays the icon _-- for the selected mode. -
Page 61: Playbackoptions
_yback Options To view the most recent picture in the LCDmonitor, pressthe [] button. Press the selector right to view pictures in the order recorded, left to view pictures in reverse order. Keep the selector pressed to scroll rapidly to the desired frame. -
Page 62: Playback Zoom
Playback Zoom Press T to zoom in on pictures displayed in single-frame playback; press W to zoom out. When the picture is zoomed in, the selector can be used to view areas of the image not currently visible in the display. Zoom indicotor Novigotion window shows... -
Page 63: Multi-Frameplayback
Multi-FramePlayback Pressing Wwhen a picture is shown full-frame in the LCD monitor displays the current image with previous and following images in the background. Press W to increase the number of images displayed to two, nine, or one hundred, T to view fewer images. When two or more images are displayed, use the selector to highlight images and press MENU/OK to view the highlighted image full frame. -
Page 64: [] Deleting Pictures
Deletinq Pictures To delete individual pictures, multiple selected pictures, or all pictures, press the selector up (_), and choose from the options below. Note thatde- leted pictures can not be recovered. Copy impor- tant pictures to a computer or other storage device before proceeding. Option Description Press tile selector left or right to scroll through... -
Page 65: [] Image Search
[] Image Search Searchfor pictures. I Select [] IMAGE SEARCH in the playback menu (_ 72), highlight one of the following search criteria, and press MENU/OK: • BYDATE: S earch by date. • BYFACE: Search for faces from the face recognition database. -
Page 66: [] Photobook Assist
PhotoBook Assist Create books from your favorite photos. Creating aPhotoBook 1 Select NEW BOOK for [] PHOTOBOOK ASSIST in the playback menu 72) and choose from the following options: • SELECT F ROMALL: Choose from all available pictures. • SELECT B YIMAGE SEARCH: Choose from pictures matching selected search conditions 47). -
Page 67: Viewing Photobooks
Viewing, Photobooks Highlight a book in the photobook assist menu and press MENU/OK to display the book, then press the selector left or right to scroll through the pictures. EditingandDeletinq.Photobooks Display the photobook and press MENU/OKThe following options will be dis- played;... -
Page 68: Viewing Panoramas
_Viewing Panoramas If you press the selector down when a panorama is displayed full frame, the camera will play back the picture from left to right or from bottom to top. To pause playback, press the selector down; press the selector down again to resume. -
Page 69: Recordingmovies
Recordinq Movies Press _.; to shoot a movie. During recording, _ and the time remaining will be displayed in the LCD monitor and sound will be recorded via the built-in microphone (be careful not to cover the microphone during recording). To end recording, press the _o)button again. - Page 70 _J_Taking Photographs D uringRecording Pressthe shutter button to take a photograph during recording. _, The photo is saved separately from the movie and does not appear as part of the movie. <_ Photos can not be taken while a high-speed movie is being recorded.
-
Page 71: Viewing Movies
_Viewing. Movies During playback, movies are displayed in the LCD monitor as shown at right. The following operations can be per- formed while a movie is displayed: Option Description Start/pause Press the selector down to start playback. Press again playback )ause. -
Page 72: Viewing Pictureson High-Definition Tvs
_Viewing Pictures on Hiqh-Definition The camera can be connected to High-Definition (HD) devices using an HDMI cable (available separately from third-party sources). 1 Turn the camera off and connect the HDMI cable as shown below. Micro HDM/ connector insert into HDM/ insert into HDM/ connector connector... -
Page 73: Printing Picturesvia Usb
_Printing Pictures via USB If the printer supports PictBridge, the camera can be connected directly to the printer as shown below and pictures can be printed without first being copied to a computer. Note that depending on PiclBridge the printer, not all the functions described below may be supported. 1 Connect the supplied USB cable as shown and turn the printer on. - Page 74 !ki_gPct uesv_ 6 Press MENU/OKto start printing. Printing can be interrupted by pressing DISP/BACK, b ut note that some printers may not respond immediately. the printer stops before printing is complete, turn the camera off and then on again. 7 After confirming that PRINTING has cleared from the camera display, turn the camera offand disconnect the USB csable.
-
Page 75: Printing.thedpofprintorder
Printing.theDPOFPrintOrder The [] PRINT ORDER (DPOF) option in the playback menu can be used to create a digital "print order"for PictBridge-compatible printers (_ 90) or de- vices that support DPOR .._ DPOF {iii DPOF(Digital Print Order Format) is a standard that allows pictures to be _j printed from "print orders"... - Page 76 F'c_esv_ sSF: S Press the selector up or down to choose the number of copies (up to 99). print To remove a picture from the order, press the selector down until the number of copies is zero. 6 Repeat Steps 4-5 to complete the print order and press MENU/OI( w hen settings are complete.
-
Page 77: Viewing Pictureson A Computer
_Viewing Pictures on a Computer The supplied software can be used to copy pictures to a computer, where they can be stored, viewed, organized, and printed. Before proceeding, install the software as described below. Do NOT connect the camera to the computer until instaflation is complete. - Page 78 2 Start the computer. Log in to an account with administrator privileges before proceeding. 3 Exit any applications that may be running and insert the installer CD in a CD-ROMdrive. o_Windows 8_indows 7_indows Vista If an AutoPlay dialog is displayed, click SETUP.EXE. A "User Account Control"dia- log will then be displayed;...
- Page 79 4 If prompted to install Windows Media Player or DirectX, follow the on- screen instructions to complete installation. 5 Remove the installer CD from the CD-ROM drive when installation is com- plete. Store the installer CD in a dry location out of direct sunlight in case you need to re-install the software.
-
Page 80: Connecting The Camera
Vew_gP_t_t_,s t_p_te Connectin.g. the Camera 1 If the pictures you wish to copy are stored on a memory card, insert the card into the camera. _, Windows users may require tile Windows CD when starting tile software the first time. (!} Lossof power during transfer could result in lossof data or damage to internal memory or tile memory card. - Page 81 V_wtg P :tt_'_ s For more information on using the supplied software, start the application and select the appropriate option from the Help menu. (t_ If a memory card corltairling a large number of images is inserted, there may be a delay before the software starts and you may be unable to import or save images.
- Page 82 soitware ..Only uninstall the supplied software when it is no longer required or before be- ginning reinstallation. After quitting tile software and disconnecting tile camera, open tile control panel and use "Programs and Features"(Windows 8/Windows 7/ Windows Vista) or "Add or Remove Programs"(Windows XP)to uninstall MyFinePix Studio.
-
Page 83: Usingthe Menus: Shooting Mode
..,, the Menus: Shooting. Mode Usingthe Shooting.Menu To display the shooting menu, press MENU/OKin shooting mode. Highlight items and press the se- lector right to view options, then highlight an option and press MENU/OK Press DISP/BA(:K t o exit when set- tings are complete. -
Page 84: [] Image Size
iJsin_ ti_e _ ent_s: Si*_c<xting _x:ie Choose the image size (large, medium, orsmall) and a spect ratio ( 4 :3, 0 4:3 3:2,16:9, orl:1) a twhich pictures are r ecorded. Large pictures can b e ,_'-r' printed atlarge sizes with no drop i nquality, while small pictures require Size----Aspect... -
Page 85: [] Image Qualify
U_ing the Men_i_: Si_ooting Mode Choose how much image files are compressed. Option Description FINE Low compression. Select for higher image quality. NORMAL High compression. Select this option to store more pictures. Enhance contrast and color saturation or take pictures in black and white. Option Description STANDARD... -
Page 86: [] Whffebalance
For natural colors, choose asetting that matches the light source. Option Description AUTO White balance adjusted automatically. -;÷:- For subjects in direct sunlight. _'.',_ For subjects in the shade. Use under"dayJight'fluorescent lights. Use under"warm white"fluorescent lights. Use under"cool white"fluorescent lights. Use under incandescent lighting. -
Page 87: Continuous
U_i_g ti_e M em_: _i_ooting Mod_ Capture motion inaseries ofpictures. Option Description s_ CONTINUOUS H_ CONTINUOUS The camera takes pictures while the shutter button is pressed. _i_ CONTINUOUS CONTINUOUS _¢,H FINAL The camera shoots while the shutter button is pressed and records the last sev- _.M FINAL eral pictures. -
Page 88: [] Afmode
This option controls how the camera selects the focus area. Regardless ofthe option selected, the camera will f ocus onthe subject inthe center ofthe LCD monitor when m acro mode is on. Option Description CENTER Tile camera focuses on tile subject in tile center of tile frame. MULTI IWhen the shutter button is pressed halfway, the camera detects... -
Page 89: [] Movie Afmode
UsMg the Me_us: Shooting Mod_ This option controls how the camera selects the focus area for m ovies. Option I Description IThe CENTER camera focuses on the subject in tile center of the frame. CONTINUOUSThe camera continuously_ adjusts focus to reflect changes, in the distance subjects near the center of the frame. -
Page 90: Usingthe Menus: Playback Mode
the Menus: Playback Mode Usingthe Play.buck M enu To display the playback menu, press MENU/OK in play- back mode. Highlight items and press the selector right to view options, then highlight an option and press MENU/OK Press DISP/BACK t o exit when settings are complete. -
Page 91: [] Edit
is_( I tse J_ie _s: P ayba(k i\_< d_ Create a retouched copy of the current picture. 1 Display the desired picture. 2 Select I_ EDIT in the playback menu and choose from the following options: Option Description BRIGHTNESS IAdjustbrightness. CONTRASTIAdjustcontrast. -
Page 92: [] Movie Edit
Edit movies. ':_; Do not turn the camera off while editing movies. • MOVIETRIMMING Remove opening or ending footage to create an edited copy of the current movie. 1 Display the desired movie. 2 Select [] MOVIE EDIT > MOVIE TRIMMING in the playback menu. -
Page 93: [] Mark For Upload To
_s _}<_ tle J'Se!_ _s: Y ayback f'_od Select pictures for upload to YouTube, Facebook or MyFinePix.com using MyFinePix Studio (Windows only). • Selecting Picturesfor Upload 1 Select YouTube to choose movies for upload to YouTube, FACEBOOK to choose photos and mov- ies for upload to Facebook, or MyFinePix.com to choose photos for upload to MyFinePix.com. -
Page 94: Slide Show
t_e i_Se_ _s: P _yba< k i_sod View pictures in an automated slide show. Choose the type of show and press MENU/OKto start. Press DISP/BACR at any time during the show to view on-screen help. The show can be ended at any time by pressing MENU/OR. -
Page 95: E_ Red Eye Removal
;s gt eJ";e _s::>aybackf'; Ifthe current picture is marked with a_]icon t oindicate that itwas taken with intelligent Face Detection, this o ption can b e used toremove red-eye. The c amera will a nalyze the image; ifred- eye i s detected, the image will b e processed tocreate acopy with reduced red-eye. -
Page 96: [] Crop
Me _s:P yb_i:_cMod Create a cropped copy of the current picture. 1 Display the desired picture. 2 Select [] CROP in the playback menu. 3 Use the zoom buttons to zoom in and out and use the selector to scroll the picture until the desired portion is displayed. -
Page 97: [] Image Rotate
t_e J'Se _<_s:>ayback i}<de Rotate pictures taken in tall orientation so that they are displayed in tall orientation in the LCD monitor. Display the desired picture. 2 Select [] IMAGE ROTATE in the playback menu. 3 Press the selector down to rotate the picture 90 °... -
Page 98: [] Print O Rder ( Dpof)
£s!_<3 tie J,_oSe Select pictures for printing on DPOF- and PictBridge-compatible devices (57). Choose how High Definition (H D) devices display pictures with an aspect ratio of 4:3 (this option is available only when an HDMI cable is connected). Select 16:9 to display the image so that it fills the screen with its top and bottom cropped... -
Page 99: The Setup Menu
_The Setup Menu Usingthe Setup. Menu 1 Display the setup menu. 1.1 Press MENU/OK to display the menu for the cur- rent mode. 1.2 Press the selector left to highlight the tab for the current menu. 1.3 Press the selector down to highlight "_ SET. -
Page 100: Setup Menu Options
Setup Menu Options Setthe camera clock (18). Switch the camera clock instantly from your home time zone to the local time at your destina- tion when traveling. To specify the difference between local time and your home time zone: 1 Highlight -t _ LOCAL and press the selector right. -
Page 101: Format
Th_ Setup Mem_ Reset all settings except [] DATE/TIME, TIME DIFFERENCE, and 1_ BACKGROUND COLOR to default values. Highlight RESET and press the selector right to display a confirmation dialog. 2 Highlight OK and press MENU/OK If a memory card is inserted in the camera, this option will format the memory card. -
Page 102: Reset
New pictures are stored in image files named using a four-digit file Fromenumber number assigned by adding one to the last file number used. The file %o.loool number is displayed during playbackas shown at right. FRAME NO. _r"T'_ controls whether file numbering is reset to 0001 when a new memory Directory... -
Page 103: Off
TieS_tt_pM Adjust tilevolume oftilesounds produced when camera controls are o perated. Choose 1|OFF (mute) todisable control sounds. Adjust tilevolume oftilesounds produced when tileshutter isreleased. Choose 1|OFF (mute) todisable tile shutter sound. Choose tilesounds used for t ileshutter, atstartup, and f or c amera controls. - Page 104 The Set_p Menu Choose whether the display automatically dims to save power in shooting mode. This option does not take effect during playback. Option Description The display dims to save power if no operations are performed for a few POWER SAVEON seconds.
-
Page 105: Intelligent Digital
Choose ON toremove red-eye effects caused by the flash when shooting with Intelligent Face Detection. _,Red-eye reduction isperformed only w hen aface i s detected. IfON isselected, selecting Tatthe maximum optical zoom position triggers intelligent digital zoom, further magnifying the image while p rocessing itfor s harp, high-resolution results. - Page 106 Choose the type of zoom available during movie recording: !]_ DIGITAL or _ OPTICAL. _, Movies recorded using digital zoom may be slightly"grainy". If ON is selected, the AF-assist illuminator will light to assist autofocus. ':!) The camera may be unable to focus using the AF-assist illuminator in some cases.
-
Page 107: Date Stamp
T_e S{t_, Stamp the time and/or date of recording on photographs as they are taken. Option Description []+® Stamp new photographs with the date and time of recording. Stamp new photographs with the date of recording. Do not stamp the time and date on new photographs. ':!) Time and date stamps can not be deleted.Turn DATE STAMP offto prevent time and date... -
Page 108: Optionalaccessories
_ptional Accessories The camera supports a wide range of accessories from FUJlFILM and other manufacturers. • Printing D_G_TALCAMERA • Audio/Visual\ FINEPIX XP60 Series HDMI cable (soldseparately) USB cable (supp)ied) HDTV_ PictBridge-compotible N Computer Related USBcable (supplied) SDcard slotor card reader [ C°mputer_ Available separately. -
Page 109: Accessories From Fujifilm
Accessories from FUJIFILM The following optional accessories are available from FUJIFILM. For the lat- est information on the accessories available in your region, check with your local FUJIFILM representative or visit http://www.fujifilm.com/producs/digitol_ comeros/index.html. Rechargeab!e NP-45A: Additional large-capacity NP-45A rechargeable Li-ion batteries batteries can be purchased as required. -
Page 110: Caringfor The Camera
for the Camera To ensure continued enjoyment of the product, observe the following pre- cautions. Storageand Use If the camera will not be used for an • Condensation extended period, remove the battery Sudden increases temperature, and memory card. Do not store or such as occur when entering a heated use the camera in locations that are: building on a cold day, can cause con-... -
Page 111: Cleaning
Cleaning_ Use a blower to remove dust from the protective glass covering the lens and LCD monitor, then gently wipe with a soft, dry cloth. Any remaining stains can be removed by wiping gently with a piece of FUJlFILM lens-cleaning paper to which a small amount of lens-cleaning fluid has been applied. -
Page 112: Problems Andsolutions
_Problems and Solutions Water in the Camera Problem Solution IThe battery-chamber coverwas not fully closedbefore the camera was immersed, or Waterinthe camera, was opened underwater: Take the camerato a FUJIFILM-authorized servicetechnicianfor re- pairs,Donot turn the cameraon, Power and Battery Problem Solution Thecameradoesnot Thebatteryis exhausted: Charge the batteryor insertafully-chargedsparebattery(... - Page 113 Problem Solution Reinsertthe battery inthe correct orientation and makesurethat the power connectionis made The battery doesnot 7, 14), • I. Thereisdirtonthebatteryterminals:Cleantheterminalswith asoft drycloth. charge,/The self-tlmer • The battery has been charged many tlmes: Thebattery hasreachedthe end of its charg- lampflashes ..mg llfe, Purchase a new battery, If the battery still failsto charge,contactyourFUJIFILM dealer, I"...
-
Page 114: Silent Mode
Problem Solution Macromode is not available. Choose a different shootingmode(24). Intelligent Face Detection is not available. Choose a different shootingmode(24). The subject'sface is obscuredby sunglasses, a hat, long hair, or other objects:Remove the obstructions. The subject'sface occupies only a small area of the frame: Change the compositionsothat Nofaceis detected. - Page 115 i:_ ¸Qi:_i_ _ _c_i l!_c:_i_ti_:_ Problem Solution Someflashmodesare Thedesired flash mode isnot available in the currentshooting mode:Choose a different not available, shootingmode (24), The camera is in silent mode: Turnsilent modeoff ( 82), Theflashdoesnot fully The subject is not in range ofthe flash: Position the subjectin range ofthe flash(I07), light the subject, The flash window is obstructed: Holdthe cameracorrectly(20), The protectiveglass covering the lens is dirty: Clean the glass(...
- Page 116 Playback Problem Solution Pictures aregrainy, Thepicturesweretakenwith a different makeor model of camera, Playback zoomis unavail- Thecurrentpictureis a resized copywith a sizeof I_], able, Nosoundin movie Playback volume is too low: Adjust playback volume ( 85), playback, The microphone was obstructed: Holdthe cameracorrectlyduring recording( 20, 51), The speakeris obstructed: Holdthe cameracorrectlyduring playback( 53),...
- Page 117 Connections/Miscellaneous Problem Solution Thecamera isnot properly connected:Connect t he cameraproperly(54), Nopictureor sound, Input on the television issetto"TV": Setinputto"HDMI", Thevolume on the TVistoo low: Adjustthe volume, Thecomputer d oesnot Be surethe camera and computer are correctly c onnected (62), recognize the camera, Pictures c annot be Thecamera isnot properly connected:Connect t he cameracorrectly (55), printed,...
-
Page 118: Warning Messages And Displays
_Warninq Messages and Displays The following warnings are displayed in the LCDmonitor: Warning Description (red) Low battery, Chargethe battery (14) or inserta fully-charged sparebattery (7), (blinks red) Battery exhausted,Charge the battery (14) or inserta fully-chargedsparebattery (7), .,,,,,,o Slowshutter speed, Pictumsmay beblurred; usethe flashor a tripod, Thecameracannot focus. - Page 119 Warning Description Turnthe cameraoff and wait for it to cool.If no action is taken, the camerawill turn off auto- matically. Thememorycardis not formatted for usein the camera.Formatthe card(83). Thememorycardcontactsrequirecleaningor the memorycardis damaged.Cleanthe contacts CARD ERROR with a soft,drycloth. Ifthe message isrepeated,formatthecard (83). Ifthe message persists, replacethe card.
- Page 120 Warning Description The camerahas run out of frame numbers(current frame number is 999-9999), Formatthe FRAME NO,FULL memory cardand selectRENEW for [] FRAME NO. in the setup menu, Takea picture to resetframe numberingto 100-0001,then selectCONTINUOUS for [] FRAME NO (84). PRESS ANDHOLD THEDISPBUTTON TO An attempt was made to choosea flashmode or adjust the volume with the camerain silent mode, Exitsilent modebeforechoosinga flash modeor adjustingthe volume(82),...
- Page 121 Warning Description Nomemorycardinsertedwhen Q COPY is selectedin the playbackmenu. Inserta memory NOCARD card. NOIMAGE Thesourceselected for Q COPY containsno images.Selecta differentsource. NOIMAGE The DPOF print order on the current memory cardcontainsmore than 999 images. Copythe DPOF FILEERROR _ictures to internal memoryandcreatea new printorder. CANNOT SETDPOF Thepicturecan not be printed usingDPOF.
-
Page 122: Memory Cardcapacity
_Memory Card Capacity The following table shows tile recording time or number of pictures available at difi ferent image sizes.All figures are approximate; file sizevarieswith the scene recorded, producing wide variations in tile number of files that carl be stored. The number of exposures or length remaining may not diminish at an even rate. -
Page 123: Specifications
_pecifications Model DigitalCamera FinePixXP60Series Effective pixels 16,4million _J_.3-in, squarepixel CMOS with primary colorfilter Storage media • Internal memory(approx. 95MB) • SD/SDHC/SDXC memorycards File system Compliantwith Design Rulefor Camera File System(DCF), E xif2,3, and Digital Print Order Format (DPOF) File format •... - Page 124 Sensitivity Standardoutput sensitivity equivalentto ISO100,200,400, 800,1600,3200, 6400 (image size 1231 o r IQI); AUTO, AUTO (400),AUTO (800),AUTO (1600) Metering 256-segmentthrough-the-lens (TTL); M ULTI Exposure control ProgrammedAE Exposure compensation -2 EV- +2 EVin increments of_/3 EV Image stabilization Opticalstabilization(image-sensor shift) Shutter speed •...
- Page 125 White balance Auto, directsunlight, shade,daylight fluorescent,warm white fluorescent,coolwhite fluores- cent,incandescent, u nderwater Self-timer Off,2 sec.,10sec.,_._ (COUPLE TIMER), _.'._(GROUPT%ER) Flash Auto flash; effective range when sensitivity is set to AUTOis approx. 70cm-3.1 m/2.3 ft.- I0.2 ft. (wide angle),70cm-2.7 m/2.3ft.-8.9 ft. (telephoto); e ffective range in macromode is approx.30cm-80 cm/1.0 ft.-2.6 ft.
- Page 126 Powersupply NP-45Arechargeable battery Battery life (approximate number offrames that can betakenwitha fully charged battery) CIPA standard,measuredin _ mode usingbattery suppliedwith cameraand SDmem- (auto) ory card. Note: Numberof shotsthat canbetakenwith battery varieswith battery chargelevel andwill declineat low temperatures. Charging time Approx.130minutes(+20 %/+68 °F) Camera dimensions 104,1mm x 66,5mm x 26,3mm/4,0 in, x 2,6 in, x 1,0 in,, excludingprojections (WxH×D)
- Page 127 Nominal voltage DC3,7V Nominal capacity 720mAh Operating temperature 0 °C- +40 °C/+32°F- +104 °F Dimensions(Wx Hx D) 31.0mm × 39.6mm × 6.0 mm/12 in. × 1.6in.× 0.2 in. Weight Approx.15.5g/05 oz. Rated input 100V-240 V AC,50/60 Hz Input capacity • 100 V: 10VA •...
- Page 128 Specifications • Notices • Specifications subject to change without notice. FUJIFILMshall not be held liable for damages resulting from errors in this manual. • Although tile LCDmonitor is manufactured using advanced high-precision technol- ogy, small bright points and anomalous colors may appear, particularly in tile vicMty of text.
- Page 129 Memo...
- Page 130 FUJ:FILm FUJIFILM Corporation 7-3, AKASAKA 9-CHOME, MtNATO-KU, TOKYO 107-0052, JAPAN http://www.fujifiLm.com/products/digitat cameras/index.htmI...
- Page 131 Restrictions on Camera Settincjs The options available in each shooting mode are listed below. Mode Option...
- Page 132 1 Automatically optimized for selected shooting mode 2 OFF only...
Need help?
Do you have a question about the FINEPIX XP60 Series and is the answer not in the manual?
Questions and answers
I found this camera and I was giving it 20 years ago I have no idea what's on it so my charged it and I just want to view the pictures and photos but I don't remember how to use it please help